HMS Jalouse - Caldercraft by Ted

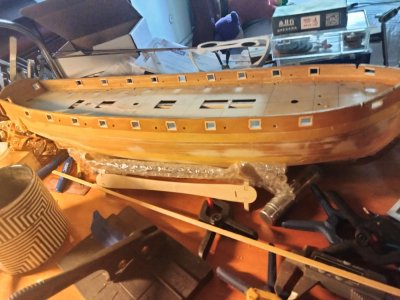
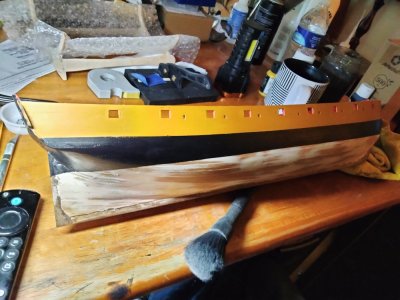
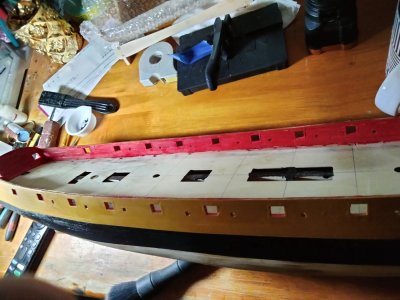
Ah, this is a very bright yellow coloured ‘ochre’. If I had realised this would be your shade I’d have strongly advised priming with a white or pink primer. A thin one that wouldn’t obscure your wood grain but which would cover the variations in the wood’s colours.

Yellow is notoriously poor in opacity. I think of ochre as a yellowish brown and brown paint is good in this respect. My apologies.
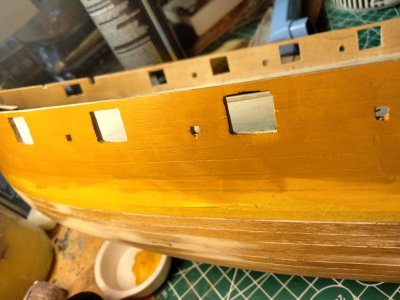
I'll second that. I put on a second coat using leftover Model Expo Yellow ochre hull paint. It's more opaque and I like the results.
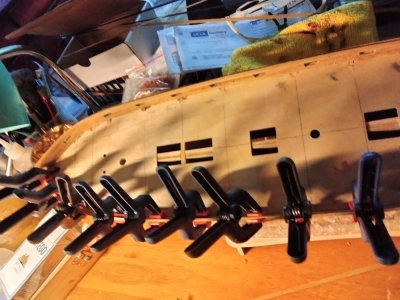
IMG20250405082447.jpg
 
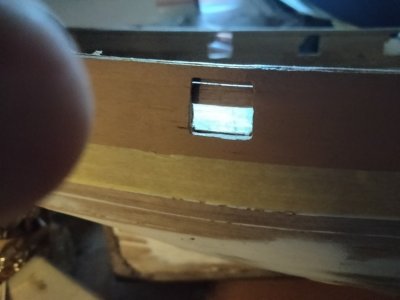
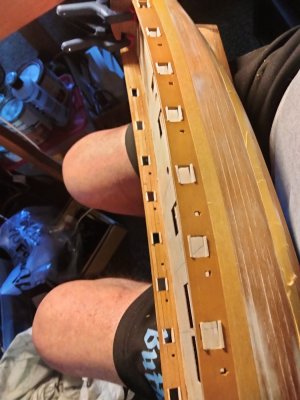
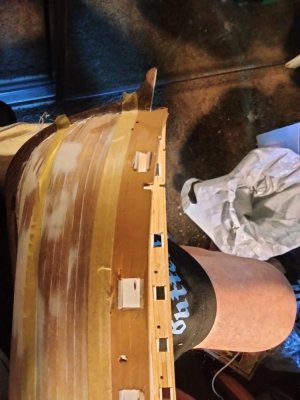
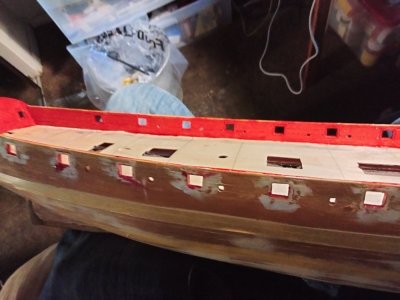
on most builds I've seen the gun ports are lined with timber. My plans and instructions don't mention them. Do you think this is something I'm supposed to know and do on my own. Something like the lack of rabbets on the plans I missed that are now haunting me.
Note the tear out on the bulwark. Similar to the Swift model I built. I'm blaming the 25 plus year old wood as I have been using backing while filing.


IMG20250407123830.jpg
 
Last edited:
on most builds I've seen the gun ports are lined with timber. My plans and instructions don't mention them.
Hi Ted
It is a good idea to check information based on contemporary sources to find if something is amiss such as this mistake in the instructions. If only one book can be picked, Goodwin's The Consruction and Fitting of the English of Men of War is a good choice as it covers a wide range of years. The gun port linings have been discussed in some detail here at SoS, but just in case a search does not turn up everything you need, the following may help. These cover both plank on frame and plank on bulkhead builds.

Allan

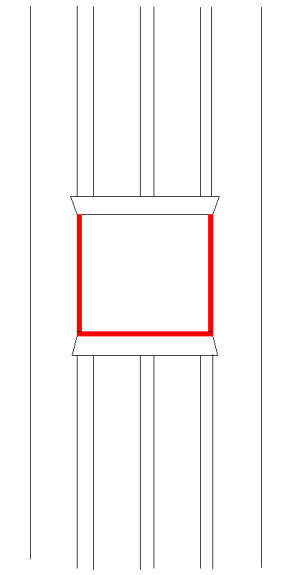
There are both sills as well as the stops (linings) as shown below. The stops are shown in red. There were stops on the sides and top of the lower sill but no stops on the bottom of the upper sills. The stops are recessed so the port lids close flush with the surrounding planking
1744070940406.png

For plank on bulkhead there are still sills and stops, but the construction is different to account for the large gap between the bulkheads.
1744071105125.jpeg
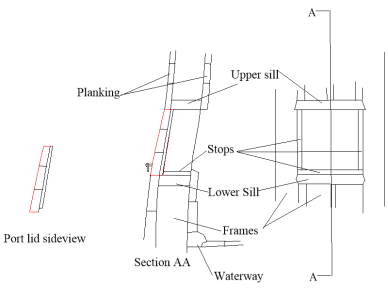
The below shows the ports in two layers as was actually done for obvious reasons, but on a small scale model this is often made up with just the outboard layer of planks which ran in line with the adjacent planking on the hull.

1744072035019.png
 
Hi Ted
It is a good idea to check information based on contemporary sources to find if something is amiss such as this mistake in the instructions. If only one book can be picked, Goodwin's The Consruction and Fitting of the English of Men of War is a good choice as it covers a wide range of years. The gun port linings have been discussed in some detail here at SoS, but just in case a search does not turn up everything you need, the following may help. These cover both plank on frame and plank on bulkhead builds.

Allan

There are both sills as well as the stops (linings) as shown below. The stops are shown in red. There were stops on the sides and top of the lower sill but no stops on the bottom of the upper sills. The stops are recessed so the port lids close flush with the surrounding planking
View attachment 512168

For plank on bulkhead there are still sills and stops, but the construction is different to account for the large gap between the bulkheads.
View attachment 512169
The below shows the ports in two layers as was actually done for obvious reasons, but on a small scale model this is often made up with just the outboard layer of planks which ran in line with the adjacent planking on the hull.

View attachment 512170
Thanks. I'm assuming I should install them. It won't be to this level of detail though.
 
Hi Ted
It is a good idea to check information based on contemporary sources to find if something is amiss such as this mistake in the instructions. If only one book can be picked, Goodwin's The Consruction and Fitting of the English of Men of War is a good choice as it covers a wide range of years. The gun port linings have been discussed in some detail here at SoS, but just in case a search does not turn up everything you need, the following may help. These cover both plank on frame and plank on bulkhead builds.

Allan

There are both sills as well as the stops (linings) as shown below. The stops are shown in red. There were stops on the sides and top of the lower sill but no stops on the bottom of the upper sills. The stops are recessed so the port lids close flush with the surrounding planking
View attachment 512168

For plank on bulkhead there are still sills and stops, but the construction is different to account for the large gap between the bulkheads.
View attachment 512169
The below shows the ports in two layers as was actually done for obvious reasons, but on a small scale model this is often made up with just the outboard layer of planks which ran in line with the adjacent planking on the hull.

View attachment 512170
Hi AllanKP69 , HMSJalouse is not French?Frank
 
For the future, some find it is best to install the sills before planking as the planking always covers the upper and lower sills. The stops are recessed and their edges not covered by the planking outboard but are covered by the inboard planking as the stops are not recessed on the inboard side. Just be sure the dimensions of the port openings are OK to accommodate the guns. (29" fore and aft by 26" up and down as mentioned above)
Allan
Toi late for that. I have already finished planking and the subsequent installation of the gun port sills. Don't know if the room left meets your specifications.
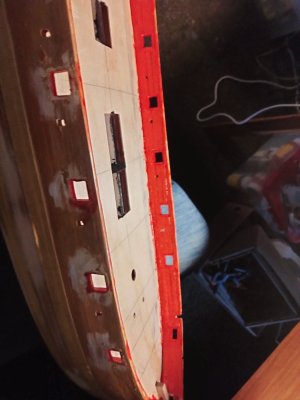
Inmy.case.should the exterior of the sillsqnd stops be painted red IMG20250412102015.jpg
 
Don't know if the room left meets your specifications.
These are scantlings are not my spec, but can be found in Steel's 1805 work and in the Shipbuilder's Repository 1788.

The sills were not painted as they were covered by the planking as discussed but the sides and outboard edges of the sides of the stops and inboard side of the gun port lids were often painted red based on contemporary models and paintings. You can also get the measurements of the port openings from the drawings of Cormorant class ships built between 1793 and 1814 of which Jalouse was a part. I looked at the original contract but only found the scantlings for the sills, not the opening size. The contract is a big help for most scantlings for the class which included the following:
Cormorant (1794); Lynx (1794) Hornet (1794) Favourite (1794) Hazard (1794) Stork (1796) Hyacinth (1806) Egeria (1807) Hesper (1809) Anacreon (1813) Acorn (1807) Cherub (1806) Fawn (1807) Dauntless (1808) Herald (1806) Jalouse (1809) Blossom (1806) Serpent (cancelled 1810) Minstrel (1807) Sabrina (1806) Ranger (1807) Sapphire (1806) Myrtle (1807) Rosamond (1807) Partridge (1809) Racoon (1808) Favourite (1806) North Star (1810) Tweed (1807) Wanderer (1806)

All the drawings and the 17 page contract are on the RMG Collections website for free download. https://www.rmg.co.uk/collections/objects/search/Cormorant 1794 for the drawings and for the contract itself https://www.rmg.co.uk/collections/objects/rmgc-object-459418

Allan
 
Last edited:
These are scantlings are not my spec, but can be found in Steel's 1805 work and in the Shipbuilder's Repository 1788.

The sills were not painted as they were covered by the planking as discussed but the sides and outboard edges of the sides of the stops and inboard side of the gun port lids were often painted red based on contemporary models and paintings. You can also get the measurements of the port openings from the drawings of Cormorant class ships built between 1793 and 1814 of which Jalouse was a part. I looked at the original contract but only found the scantlings for the sills, not the opening size. The contract is a big help for most scantlings for the class which included the following:
Cormorant (1794); Lynx (1794) Hornet (1794) Favourite (1794) Hazard (1794) Stork (1796) Hyacinth (1806) Egeria (1807) Hesper (1809) Anacreon (1813) Acorn (1807) Cherub (1806) Fawn (1807) Dauntless (1808) Herald (1806) Jalouse (1809) Blossom (1806) Serpent (cancelled 1810) Minstrel (1807) Sabrina (1806) Ranger (1807) Sapphire (1806) Myrtle (1807) Rosamond (1807) Partridge (1809) Racoon (1808) Favourite (1806) North Star (1810) Tweed (1807) Wanderer (1806)

All the drawings and the 17 page contract are on the RMG Collections website for free download. https://www.rmg.co.uk/collections/objects/search/Cormorant 1794 for the drawings and for the contract itself https://www.rmg.co.uk/collections/objects/rmgc-object-459418

Allan
I appreciate your effort.supporting my build. But this is all so far over my head and capabilities. What I really need to know is what manufacturer and color to paint the yellow ochre on the bulwarks.
Finishing is my weak area.
Thank you
Ted
 
manufacturer and color to paint the yellow ochre on the bulwarks.
Your choice really Ted as no one knows what shade of yellow was used in 1809. There is a whole history of yellow ochre and yellow oxide which came into use in the 18th century to replace yellow ochre at that time for various reasons that will likely bore most folks (that included me after reading about it), Liquitex makes great quality tubed artist acrylics including yellow oxide but there are many others. You can of course adjust the shade of any brand though be adding some white or other shade to suit your own tastes. Look at some old paintings of ships at RMG or other sites and these might give some ideas on the shade you want to match if the shades out of the bottle or tube are not what you would like to use.
Allan

1744625754977.png
 
I ordered someone Amazon, looks like it's a perfect color. I have to be careful since most of the light I have available is from LED lamps. To make matters worse it has different frequencies the make the paint more harsh or warmer depending on the one selected
 
I find that I don't have enough .5x3 mm strips for decking. About half of what's needed. I have about the same amount of 1 x3 mm strips that are not called for in the plans. Even if I had a thickness sander it would be a real pain.
What I do have is more than sufficient quantities of .5 x4 mm strips in walnuIMG20250416135130.jpgt and lime wood. I don't know which would be best for the decking strips. I'm leaning towards the lime wood as the walnut seems too dark. I would appreciate your opinions on this.
Thanks
Ted
 
Back
Top