HMS Pegasus - by Amati [COMPLETED BUILD]

Joined
Dec 8, 2019
Messages
776
Points
403

Location
Virginia Beach, VA.
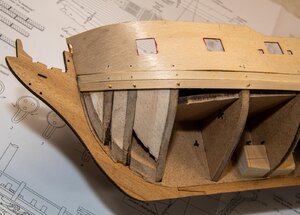
Well I think I'm ready to tackle something a little more complicated. I haven't seen a Pegasus build log posted for a while so I will start one. Bought the kit as well as Bob Hunts practicum so ready to start. First thing I noticed when the kit arrived was the weight, maybe 5 pounds or more. I was really impressed with the contents especially the drawing sheets of which there are twelve. The instructions have been translated by someone with a better working knowledge of English than other Italian kits I've built so I don't need the English - Italian dictionary for this build. The bulkheads, keel, and deck parts are made of some kind of pressboard. Not crazy with the stuff but no warping like can get with plywood. It's very thick and heavy. I was amazed when all the parts fitted together perfectly with no adjustments necessary. When I glued in the lower deck it locked in all the bulkheads and it wasn't really necessary to add any more glue to the them but I did as a precaution. Pegasus 001.jpg
 
I like to plank a deck before I install it when possible. The kit has the deck in two pieces and they fit with no problems. For the treenails I punched a small hole with a needle at each location then twisted a .5mm mechanical pencil in the hole. A coat of sealer was then applied and sanded. After bulkhead tabs 5, 6, and 7, are removed in a later step, the planking will be completed and a coat of poly applied.Pegasus 005.jpgPegasus 007.jpg
 
Many Thanks for starting this building log Thumbsup
- The Pegasus was also on my wishlist - so I will follow your log with big interest
 
I'm kind of working back and forth between Bob's practicum and the kit directions. Also following another Pegasus build and doing a few modifications of my own. The plans call for planking the bow and stern section of the gun deck and leaving the midships section unplanked for the time being. Like Bob I planked the entire deck. He also installed the riding bits and the main mast bits at this point. They looked a little fragile to me and I'd probably break them off while planking the hull with the ship upside down so I left them off for now. I also filled the space between bulkheads 1, 2, 3, and 11, 12, 13 with some scrap balsa for more gluing surface and it made the bulkhead faring easier to "visualize". Some cleaning up to do then the major step of glueing on part 32, the gun port pattern. The instructions say to soak them for at least an hour before bending the into position. Seems kind of excessive to me. Hope the ply doesn't delaminate while installing.
Pegasus 008.jpgPegasus 009.jpgPegasus 010.jpgPegasus 011.jpgPegasus 012.jpg
 
Finished the first planking and applied the wood filler. Really looks messy so lots of sanding ahead. At this point I almost missed installing the stern counter pattern (part #146). Bob's practicum doesn't do it until later in the build but I went with the kit directions and did it now. Also not much attention is paid to the rabbit except for the keel. I think it needs to be cut in the keel, stern post, and the stem before the second planking. Will tackle that after all the sanding is complete and before I start the second planking.Pegasus 018.jpgPegasus 019.jpgPegasus 019a.jpg
 
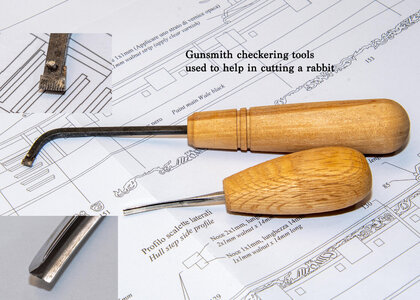
After a few hours of sanding, the hull is about ready to start the second planking. I test fitted the bowsprit while I had access to the inside mount. It needed a little trimming and now fits well. Started working on the rabbit. Not a job I'm crazy about but used my gunsmith checkering tools aided in the process. I have lots of hobbies that have tools that cross over and will show them in use as I progress in the build.Pegasus 021.jpgPegasus 022.jpgPegasus 023.jpg
 
Back
Top