-

Win a Free Custom Engraved Brass Coin!!!
As a way to introduce our brass coins to the community, we will raffle off a free coin during the month of August. Follow link ABOVE for instructions for entering.
-

PRE-ORDER SHIPS IN SCALE TODAY!
The beloved Ships in Scale Magazine is back and charting a new course for 2026!
Discover new skills, new techniques, and new inspirations in every issue.
NOTE THAT OUR FIRST ISSUE WILL BE JAN/FEB 2026
You are using an out of date browser. It may not display this or other websites correctly.
You should upgrade or use an alternative browser.
You should upgrade or use an alternative browser.
HMS Revenge 1577 by Amati , Victory Models [COMPLETED BUILD]
- Thread starter mallacoota
- Start date
- Watchers 17
Lovely work
Thanks Neil, appreciate the encouragement there are days when it is needed more than others...LOLLovely work
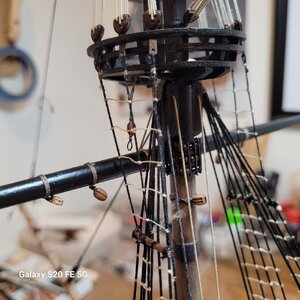
Started on the lanyards and setting up the shrouds. I know the lanyards were almost certainly black with preserving pitch but I have ignored that as light contrast looks better and who would know or care. Finally took the trouble to make myself a deadeye frame from decent wire after using a dodgy one which was too soft. This is 1mm brass and works well.
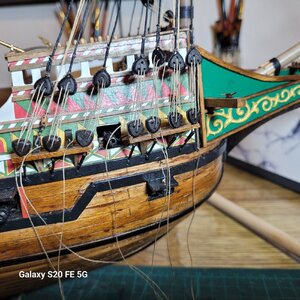
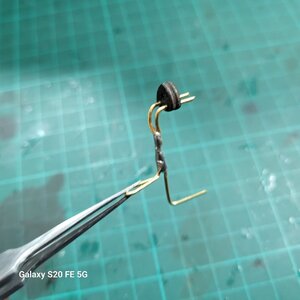


Nice one. Looks the biz.
Hi Winter,our gun belt is not properly installed, the trousers should be attached to the wing of the gun, and not to the ring at the back of the carriage.
I just re-read this thread and realized the example photo may be incorrectly rigged in post #96. The running out tackle had hooks on each block. I have not been able to find any contemporary based information where the block might have been seized to a ring on the carriage as shown in the modern reproduction in the photo. In the end, the use of the hook makes rigging the cannon much easier for us
Allan
- Joined
- Jul 11, 2023
- Messages
- 394
- Points
- 238

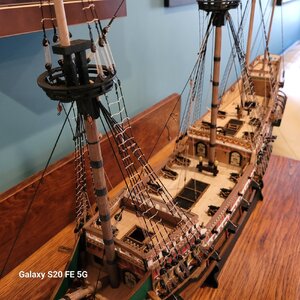
fantastic... looking nice. I'm working myself on the front ratlines. How long does it take you to do the cross section of the ratlines? roughly 1200 knots, I think.
one question: on the main masts, you have two group of 4 lines. Do you create cross sections between the two group of 4? I see that you did not. the plan seen to indicate so. I'm just curious. Regardless, everything looks so neat!
one question: on the main masts, you have two group of 4 lines. Do you create cross sections between the two group of 4? I see that you did not. the plan seen to indicate so. I'm just curious. Regardless, everything looks so neat!
Last edited:
Apologies the slow reply...I did not run the ratlines right across the two sets of shrouds on each big mast. I decided the centre gap was too big to be sensible and made them idependently for each channel. As for the knots...well I am now finding that the running clove hitch is so quick with a pair of tweezers and a bit of practice that I dont really find the whole ratline thing too bad .fantastic... looking nice. I'm working myself on the front ratlines. How long does it take you to do the cross section of the ratlines? roughly 1200 knots, I think.
one question: on the main masts, you have two group of 4 lines. Do you create cross sections between the two group of 4? I see that you did not. the plan seen to indicate so. I'm just curious. Regardless, everything looks so neat!
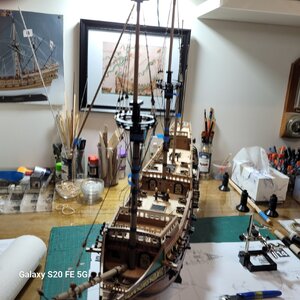
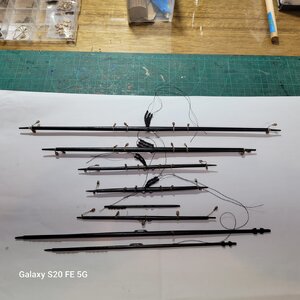
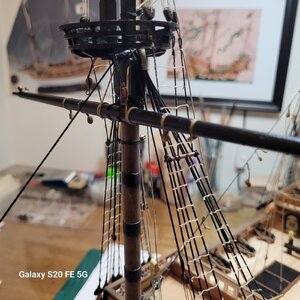
Good morning. Looking wonderful. Cheers GrantFinished the hull and masts I think...now to start on the spars. Had to move it off the bench to make some room.
View attachment 456150
View attachment 456151
View attachment 456152
Personally, I would have left the ratlines even in that wide gap. Thanks for pointing that gap out in your posts, though. There may be a way to close the gap a small bit when fitting the channels. A cannon does not typically require as much space between the shrouds as the Amati model instructs. The gap required for the guns is quite small on my previous model below, with just enough space left for the guns to fire without an obstacle directly in front of the muzzle. The shrouds in this model were adjust to a moderate degree to make space for the guns. Perhaps Chris Watton thought the guns needed a lot more room when he designed the Amati Revenge.
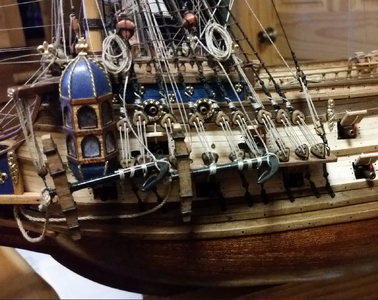

I know that feelingYes...shouting..!
 . Your HMS Revenge is fabulously done. Cheers Grant
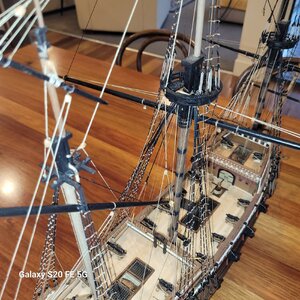
Rigging is progressing satisfactorily. Loving the Syren ropes which I have had to use sparingly because I dont have that much. In my opinion it is head and shoulders the best rope on the market. Fortunately the Amati kit rope is quite good...and does the job well, just not as good as the Syren.
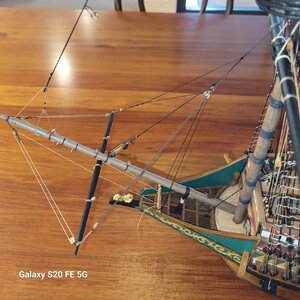
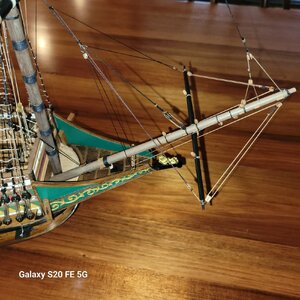
The plans are all over the place on the sprit spar. A couple of places show it above the sprit and more show it below. It obviously goes below but a couple of well photographed models on the web show it installed above the bowsprit which I think is silly.
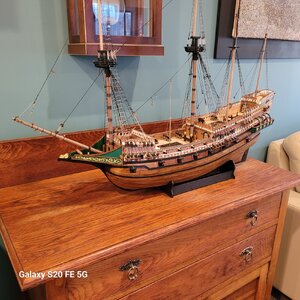
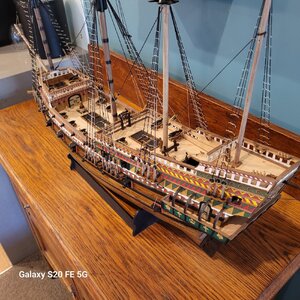
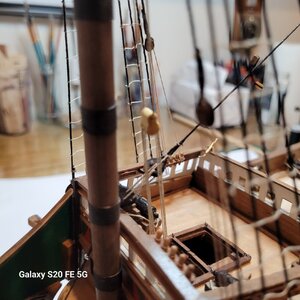
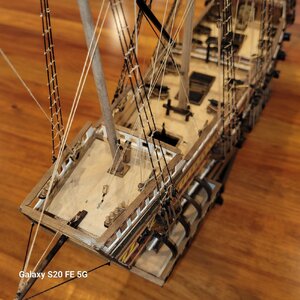
I am not doing sails, so that eliminates a lot of rigging. I reckon that without sails I am probably about half done. Anyway here are some update photos.
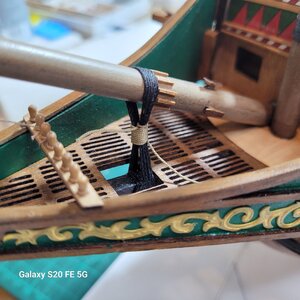
One kit bash I must own up to, I had no end of difficulty getting the euphroe plates to work satisfactorily on the crowsfoot spar rigging. I gave in out of respect to my age and arthritis and used small brass rings in their place which work just fine and nobody who sees it will know about euphroes and crowsfeet anyway.
My aim with each kit is to improve a bit each time and I managed a couple of things quite well this time for the first time like parrel construction, but other things still give me grief. I am awful at gunports, and gun installations properly roped. Next time..?
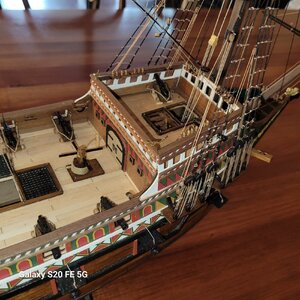
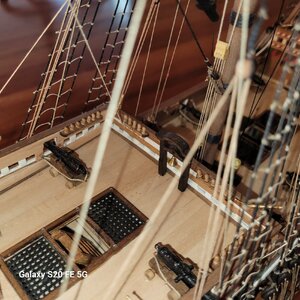


Last edited:
Great work! Beautiful ship.
Thanks very much Kurt for your constant encouragement very much appreciatedGreat work! Beautiful ship.
John
well...it's winter down here and I have plenty of time to spend on it. When the weather improves it will come to a screaming stop. Thanks the encouragement. JohnWhat the... you are fast! nice work.
- Joined
- Aug 30, 2020
- Messages
- 676
- Points
- 353

Beautiful build, great work.Rigging is progressing satisfactorily. Loving the Syren ropes which I have had to use sparingly because I dont have that much. In my opinion it is head and shoulders the best rope on the market. Fortunately the Amati kit rope is quite good...and does the job well, just not as good as the Syren.
The plans are all over the place on the sprit spar. A couple of places show it above the sprit and more show it below. It obviously goes below but a couple of well photographed models on the web show it installed above the bowsprit which I think is silly.
I am not doing sails, so that eliminates a lot of rigging. I reckon that without sails I am probably about half done. Anyway here are some update photos.
One kit bash I must own up to, I had no end of difficulty getting the euphroe plates to work satisfactorily on the crowsfoot spar rigging. I gave in out of respect to my age and arthritis and used small brass rings in their place which work just fine and nobody who sees it will know about euphroes and crowsfeet anyway.
My aim with each kit is to improve a bit each time and I managed a couple of things quite well this time for the first time like parrel construction, but other things still give me grief. I am awful at gunports, and gun installations properly roped. Next time..?
View attachment 458896View attachment 458897View attachment 458900View attachment 458901View attachment 458902View attachment 458903View attachment 458904

