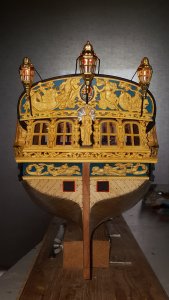
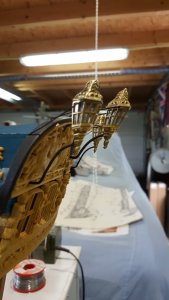
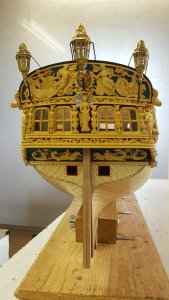
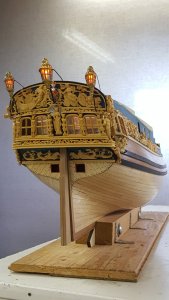
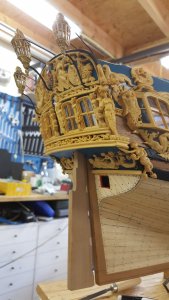
HMS Royal Caroline kit ZHL 1/30

Hi Patrick thx, however the workshop is John's.
Your paint disaster is a hard lesson. That will only happen once (I hope). Wasn't it varnished yet? If so you can maybe safe it by sanding.
 
Sanding didnt help. Wood is of lesser quality then it was from the Victory kit. Tryed tot make everything darker but didnt work out well. Almost done with the decks. Used my own wood.
 
And my victory fell from the table when i was 2 months bussy with it . Was also hard lesson......
 
Hi Patrick,

I am always anxious that something like that happens but fortunately I never experienced it.
Succes with the repairs.
 
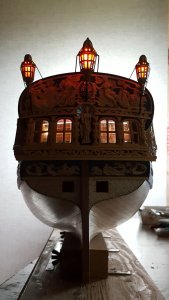
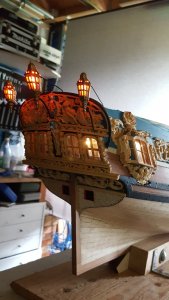
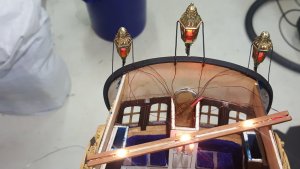
Last week I have been working on the other 2 lanterns and sorted out the wiring for the cabin lighting. But first let me tell that the new platform of the site is a hudge improvement. I can now upload photos directly from my phone without scaling etc, thumbs up for the new site.

Ok back to model building.
20180608_143031.jpg20180608_165421.jpg20180608_143015.jpg20180608_143132.jpg

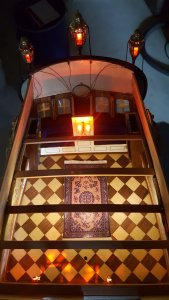
The inside cabin lighting is created with one chandelier, two lanterns and 3 led incorporated in the middle deckbeam.
20180608_141653.jpg
20180608_142325.jpg
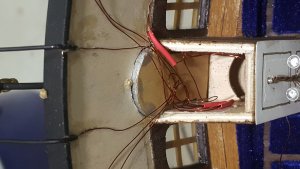
All the wiring will be part of the sandwich construction of the hull. The majority of the connections are covered in the rudder space. No wires will be visible when finished.
20180608_141611.jpg
 
The next step in the RC build are the platforms for the female statue placed at the ps and sb side of the stern. The platform is in two layers of which according to the kit the top one is open creating a kind of bucket. To my opinion this can't be right and I created a closed platform on which the statue stands.

Both layers are created from a piece of profiled strip. The first layer I gave a rounded shape which nicely follows the profile of the stern.
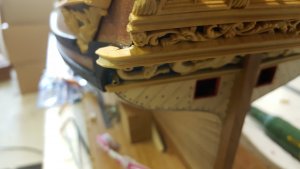
20180608_165708.jpg

On top of that the second layer in a square shape and closed with a piece of Linden which I also will use for the decks.
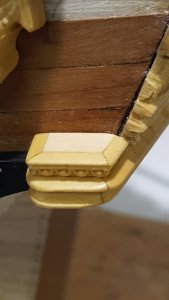
20180608_174053.jpg

After the platform a nice curled shape of wood is fitted on the hull to make the connection between the stern and the side of the hull. This curled shaped piece is placed at an angle with the stern and the hull side. Before this finally the statue is mounted. To fit the statue I have drilled a hole in the platform and the curl to fit in wooden dowels to fit the statue. This as I decided to make the statue free standing.
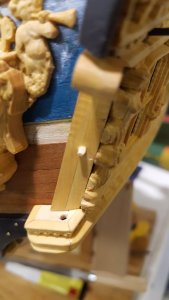
20180611_204324.jpg

As the statue will be free standing and the carvings are 2D cnc I have carved the rear of the statue by hand. Below is the front.
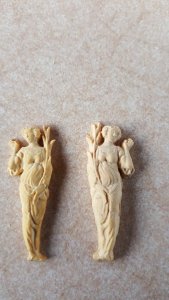
20180519_203527.jpg

Right is the original and left the finished carving by hand.
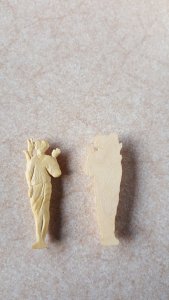
20180519_203348.jpg

For fitting the carving I fixed a wooden dowel.
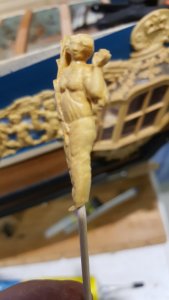
20180611_202942.jpg
20180611_203847.jpg

Below the fitted statue.
20180611_204815.jpg20180611_204724.jpg

The last finishing is to add the small piece of decorative whale just between the gallery and the stern.
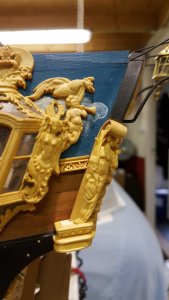
20180611_211854.jpg
20180611_211920.jpg

One side finished and one side to go, after that the black top roll can be painted black for the second time to finish it.
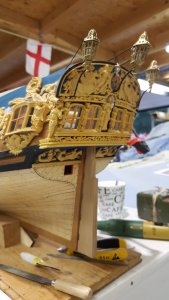
20180611_211952.jpg
 
The next step in the RC build are the platforms for the female statue placed at the ps and sb side of the stern. The platform is in two layers of which according to the kit the top one is open creating a kind of bucket. To my opinion this can't be right and I created a closed platform on which the statue stands.
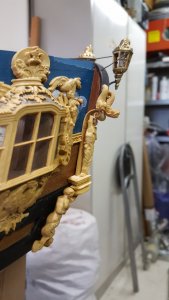
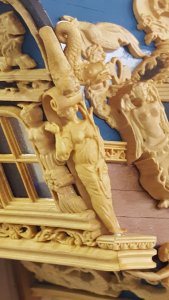
..........
After the platform a nice curled shape of wood is fitted on the hull to make the connection between the stern and the side of the hull. This curled shaped piece is placed at an angle with the stern and the hull side. Before this finally the statue is mounted. To fit the statue I have drilled a hole in the platform and the curl to fit in wooden dowels to fit the statue. This as I decided to make the statue free standing.

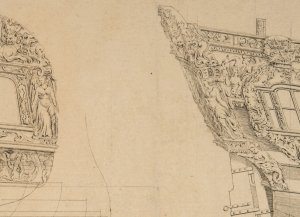
Due to the fact, that we have detailed old drawings from af Chapman available we can check and make our own opinion.......
If we look at these drawings
screenCapture_294884046_4274432719_0.jpg

I fully agree with your decisions. The Lady can be seen completely either from the side and also in the direction twoards the stern. Also her left leg is visible from both directions, so she has to be a 3-dimensional sculpture, standing on a platform. The torso is visible from both sides, so therefore we can interpret this, that her body is somehow in 45° degree angle installed, her head is completely in the direction looking backwards.

Congratulation @Maarten .... you did a very good job based on the original parts.....a very good improvement :cool:
 
Hi Uwe,

Many thx for your detailed comparison, I also thought about recarving this statue to better fit the original but decided for this solution. Second issue is to incorporate the two dolphins as the kit dolphins are on the big side to my opinion. The mermaid at the bottom is also finished which I will fit on Thursday.
 
G'day Maarten
I agree with Uwe, you have done a incredible job. This kit and it's carvings are superb, but going on the Chapman's drawings the carvings around the corners of the sides and transom are not accurate. What you have done is the best that could be done by using what you have to 'play' with.
Well done my good friend.
Happymodeling
Greg
 
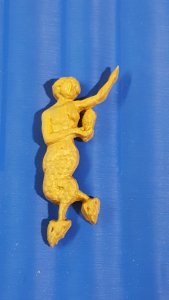
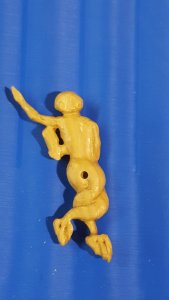
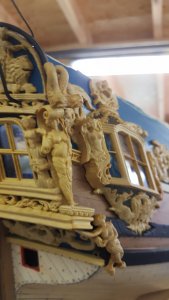
The stern has now been finished. First on the PS side I added the mermaid on the lower stern. To fix her properly I also put this on wooden dowels, this as I carved also the rear of these statues to give them a 3d look and feel.
The front side.
20180614_201331.jpg
And the carved rear, sorry for the hole it looks a little awkward like this.
20180614_201338.jpg
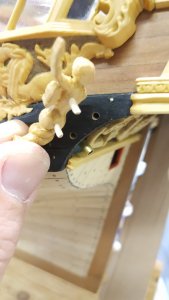
Fitting the statue
20180614_202202.jpg
And fitted in place.
20180614_202414.jpg
And from the stern you can see the effect of also carving the rear side.
20180614_202608.jpg
20180614_202242_001.jpg
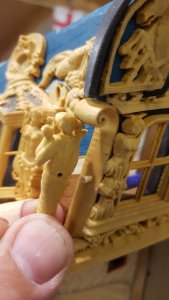
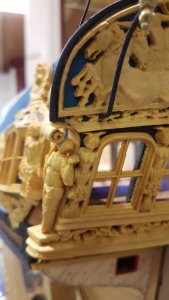
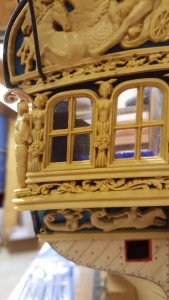
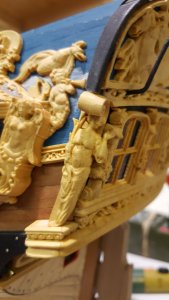
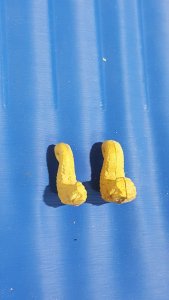
The last carvings to be added to the stern are two dolfins which are mounted on top of the top rol. 2 on both sides so 4 in total. The dolfins in the kit are a little bit to big to my opinion so I put the on a diet on my belt sander, as these statues are made from 2 mirror parts it is easy to sand down from the middle. The kit version and the diet dolfin next to each other.
20180614_210313.jpg
After finishing polishing and waxing they can be fitted. In the kit they are just fitted on the outside of the top rol, on the Chapmen drawing they are fully integrated in the carvings of the stern. I decided to find a solution in the middle and filed the rear of the carvings down to fit them partly over the top rol.
20180615_142241.jpg 20180615_153027.jpg
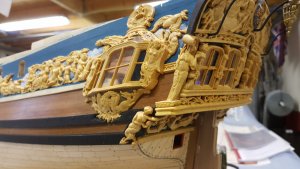
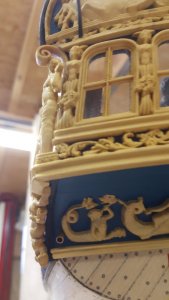
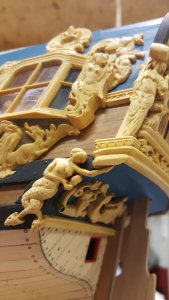
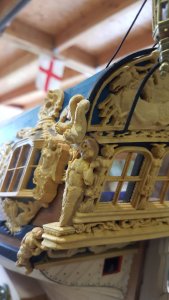
After copying the same to the SB side this is the final result.

20180615_173038.jpg
20180615_172926.jpg
20180615_173412.jpg
20180615_172543.jpg
Next time I will continue on the alley ways between the two main cabins.
 

Attachments

  • 20180615_172617.jpg
    20180615_172617.jpg
    140.5 KB · Views: 19
G'day Maarten
I can see you are up to your high standards again. You are definitely making it hard for me when I'm at your stage.
Thanks for your posts, they are all great help for me as I know what to do, and to try to imitate your build.
Happymodeling
Greg
 
Hi Maarten,
Been in Europe on holiday for the past 6 weeks.
I am writing this at the airport lounge, on my way back to Australia and then moving house to a bigger workshop and semi retirement from work for me.
Hopefully you will hear a lot more about my model ship build logs later in the year.
 
Back
Top