-

Win a Free Custom Engraved Brass Coin!!!
As a way to introduce our brass coins to the community, we will raffle off a free coin during the month of August. Follow link ABOVE for instructions for entering.
-

PRE-ORDER SHIPS IN SCALE TODAY!
The beloved Ships in Scale Magazine is back and charting a new course for 2026!
Discover new skills, new techniques, and new inspirations in every issue.
NOTE THAT OUR FIRST ISSUE WILL BE JAN/FEB 2026
You are using an out of date browser. It may not display this or other websites correctly.
You should upgrade or use an alternative browser.
You should upgrade or use an alternative browser.
HMS Vanguard 1787 1:72 a Victory Models kit
- Thread starter Chestcutter
- Start date
- Watchers 62
-
- Tags
- amati vanguard victory models
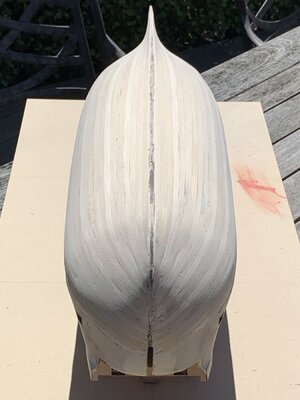
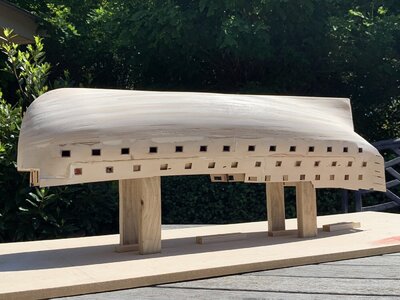
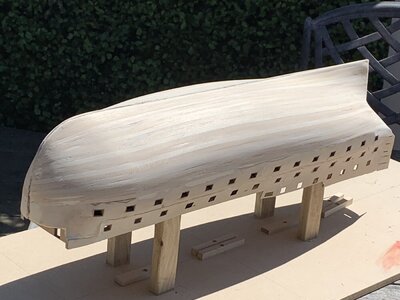
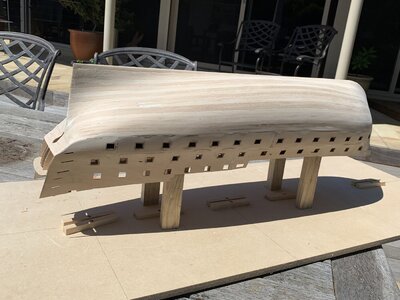
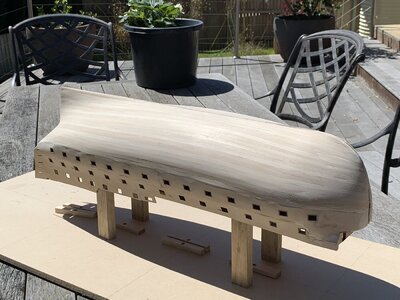
Hi Chestcutter,Finished fine sanding outdoors as it’s finally stopped raining.
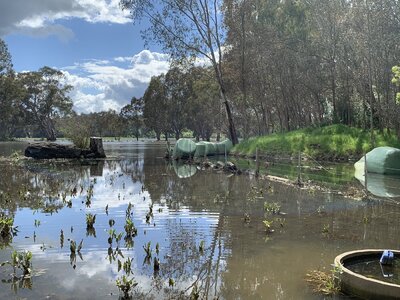
My riverside paddocks. Suitable only for watercraft.
View attachment 339110
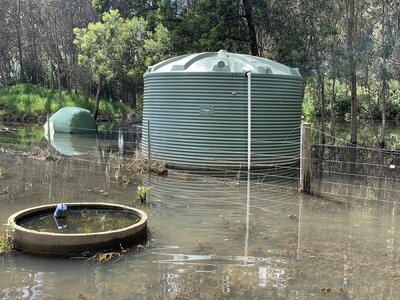
View attachment 339111
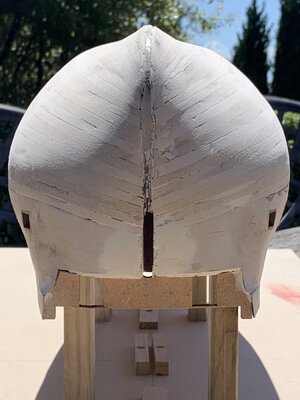
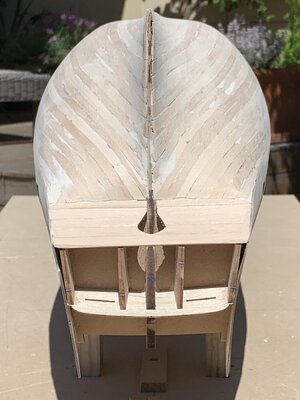
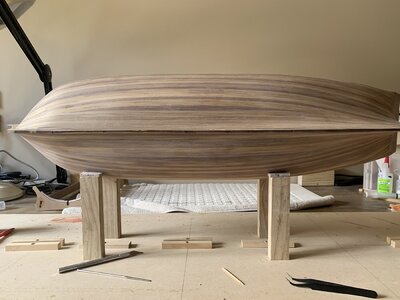
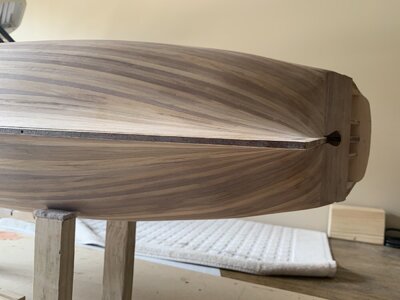
The hull feels very smooth now and I am happy with the beautiful wide hips of the 74 gun Artois class and smooth tail
View attachment 339112View attachment 339113View attachment 339114View attachment 339115View attachment 339116View attachment 339117View attachment 339118
Your hull looks great! Looking forward to seeing your second layer planking. Oh, by the way, your riverside paddocks look like a very interesting scene. What are the green tank and green floats for?
Andre
Hi Andre,Hi Chestcutter,
Your hull looks great! Looking forward to seeing your second layer planking. Oh, by the way, your riverside paddocks look like a very interesting scene. What are the green tank and green floats for?
Andre
The big green tank is my water storage which is normally about half a mile from the river. The green floats are silage, or wrapped hay that weigh about 300kg and floated over the fences from my neighbors property. The round concrete tank is a drinking trough for cattle, so they don’t have to go to the river to drink. We have had major floods throughout inland eastern Australia and my grazing paddocks have been badly inundated. Fortunately the house and olive grove, where I grow olives for oil, are ok.
There are many folk who have lost much, including their homes and businesses.
I find my modeling is a welcome distraction from life’s many challenges.
Thanks for the explanation. I hope your paddocks recover. We have extreme weather events in the US as well, with severe droughts and wild fires in the west and flooding in the central states. The northeast where I'm located is ok so farHi Andre,
The big green tank is my water storage which is normally about half a mile from the river. The green floats are silage, or wrapped hay that weigh about 300kg and floated over the fences from my neighbors property. The round concrete tank is a drinking trough for cattle, so they don’t have to go to the river to drink. We have had major floods throughout inland eastern Australia and my grazing paddocks have been badly inundated. Fortunately the house and olive grove, where I grow olives for oil, are ok.
There are many folk who have lost much, including their homes and businesses.
I find my modeling is a welcome distraction from life’s many challenges.
Currently planning to start the second planking. I admit to having some hesitation and anxiety about starting the layer that will be visible. Performance anxiety.
I have finished lining the gunports with lids, although I realize I missed one without lid. Also varnished the gun deck with a second coat of poly as the first one had a white residue, and I made the mistake of not testing on sample strips before applying to the model. All good now.
Next I marked out the quarter galleries forward edges to terminate the planks there.
Finally I spent some time marking out the main and minor wales on both sides, and plan to place my first second layer plank at the top edge of the main wale and work upwards.
The wales are identified from the 1:1 full scale drawing however there are discrepancies. On the plan the main wale is 18mm wide but the instructions say to use two 5mm and two 4mm planks and then a 3mm strake on top, = 21mm. So like others I will work on the basis that the 18mm lines are before the top strake. Also the minor wale is to be made of one 5mm and two 4mm planks but its width on the plan is 12mm. I don’t like the number 13, so I will use three 4mm planks.
Finally in trying to plan ahead, I have 6mm brass sheaves to go into the sheave block slots, but they needed to be widened to accommodate the sheave. Perhaps smaller ones would have been better but they are hard to find and even harder to handle.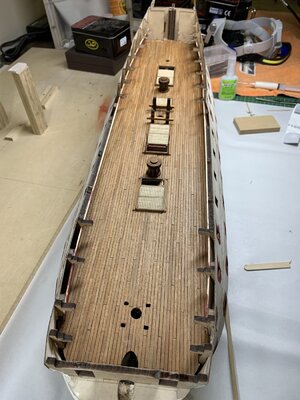


Hi Chestcutter.Currently planning to start the second planking. I admit to having some hesitation and anxiety about starting the layer that will be visible. Performance anxiety.
I have finished lining the gunports with lids, although I realize I missed one without lid. Also varnished the gun deck with a second coat of poly as the first one had a white residue, and I made the mistake of not testing on sample strips before applying to the model. All good now.
Next I marked out the quarter galleries forward edges to terminate the planks there.
Finally I spent some time marking out the main and minor wales on both sides, and plan to place my first second layer plank at the top edge of the main wale and work upwards.
The wales are identified from the 1:1 full scale drawing however there are discrepancies. On the plan the main wale is 18mm wide but the instructions say to use two 5mm and two 4mm planks and then a 3mm strake on top, = 21mm. So like others I will work on the basis that the 18mm lines are before the top strake. Also the minor wale is to be made of one 5mm and two 4mm planks but its width on the plan is 12mm. I don’t like the number 13, so I will use three 4mm planks.
Finally in trying to plan ahead, I have 6mm brass sheaves to go into the sheave block slots, but they needed to be widened to accommodate the sheave. Perhaps smaller ones would have been better but they are hard to find and even harder to handle.View attachment 340272View attachment 340273View attachment 340274View attachment 340275
You have done a great job so far.
There is no easy way with the second layer of planking.
The only way I know is to concentrate on one plank at a time and and keep in your mined that this plank will be on show, and don't settle for a 'Oh that will do'plank.
Slow and steady is the only way.
I have my fingers crossed for you.
Hi Chestcutter,
Your hull looks great, and I have no doubt that the second layer will look just as good! If I can offer some notes about how I planked the second layer...I divided the hull into 5-plank widths at the center by taping together 5 short pieces of planking to use as a spacer to mark a pencil line along the bottom edge. Repeat by moving the 5-planks down and drawing a pencil line. Then holding a single plank aligned with the top edge of the first mark and bending the plank around the hull in a natural manner while drawing a pencil line along the edge. This will create bands of lines around the hull and will serve as an aid to show if you are bending planks in a natural manner and show where you will need joggle planks/drop-planks at the bow and stealers at the stern. I give Bob Hunt's practicum credit for these instructions. I used cyanoacrylate glue for the second layer.
Your hull looks great, and I have no doubt that the second layer will look just as good! If I can offer some notes about how I planked the second layer...I divided the hull into 5-plank widths at the center by taping together 5 short pieces of planking to use as a spacer to mark a pencil line along the bottom edge. Repeat by moving the 5-planks down and drawing a pencil line. Then holding a single plank aligned with the top edge of the first mark and bending the plank around the hull in a natural manner while drawing a pencil line along the edge. This will create bands of lines around the hull and will serve as an aid to show if you are bending planks in a natural manner and show where you will need joggle planks/drop-planks at the bow and stealers at the stern. I give Bob Hunt's practicum credit for these instructions. I used cyanoacrylate glue for the second layer.
Asking as a complete novice: but is there advice on whether you should install the cross deck beams(either permanently or temporary) before 2nd planking so as to give some rigidity to the upper sides? Or does the plywood patterns and 1st planking provide enough?
Hi F1GHTS-ON, thanks for your query about cross beams. I’m not sure about advice and the instruction diagrams do show cross beams fitted. My impression is that the second planking layer doesn’t have short axis or lateral forces and would not be affected by the beams presence or otherwise. I have left them off until after all the guns are in place and rigged, as it would be obstructing access to an already small space.Asking as a complete novice: but is there advice on whether you should install the cross deck beams(either permanently or temporary) before 2nd planking so as to give some rigidity to the upper sides? Or does the plywood patterns and 1st planking provide enough?
Good morning. Excellent work. She is prepared for your second layer and I think your anxiety will be replaced with satisfaction. Man you guys have been hammered with some flooding. All the best. Cheers GrantCurrently planning to start the second planking. I admit to having some hesitation and anxiety about starting the layer that will be visible. Performance anxiety.
I have finished lining the gunports with lids, although I realize I missed one without lid. Also varnished the gun deck with a second coat of poly as the first one had a white residue, and I made the mistake of not testing on sample strips before applying to the model. All good now.
Next I marked out the quarter galleries forward edges to terminate the planks there.
Finally I spent some time marking out the main and minor wales on both sides, and plan to place my first second layer plank at the top edge of the main wale and work upwards.
The wales are identified from the 1:1 full scale drawing however there are discrepancies. On the plan the main wale is 18mm wide but the instructions say to use two 5mm and two 4mm planks and then a 3mm strake on top, = 21mm. So like others I will work on the basis that the 18mm lines are before the top strake. Also the minor wale is to be made of one 5mm and two 4mm planks but its width on the plan is 12mm. I don’t like the number 13, so I will use three 4mm planks.
Finally in trying to plan ahead, I have 6mm brass sheaves to go into the sheave block slots, but they needed to be widened to accommodate the sheave. Perhaps smaller ones would have been better but they are hard to find and even harder to handle.View attachment 340272View attachment 340273View attachment 340274View attachment 340275
- Joined
- Dec 4, 2022
- Messages
- 4
- Points
- 3
Getting back into it after a decade or two. My bucket list contains building a 74 gun ship. Starting off slow but I will be watching your build for inspiration.
OUTSTANDING so far! This model is currently on my wish list so I will follow along.Starting my build of HMS Vanguard.
I am impressed by the quality of other modelers on SOS, and hope I can come close to a similar outcome.
Posting my build images is a bit anxiety provoking, as I hate imperfection, but rarely make things perfect.
I welcome all comments and suggestions.
Thanks for your interestView attachment 330132View attachment 330131View attachment 330131View attachment 330131View attachment 330132View attachment 330133View attachment 330134View attachment 330135View attachment 330136View attachment 330137View attachment 330138View attachment 330139View attachment 330140View attachment 330141View attachment 330142View attachment 330143View attachment 330144View attachment 330145View attachment 330146View attachment 330147View attachment 330148View attachment 330149
Bill
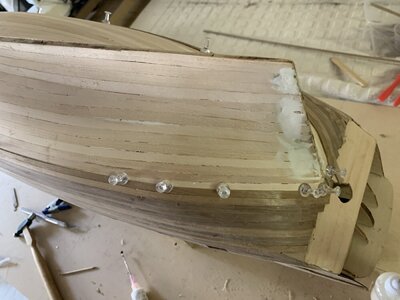
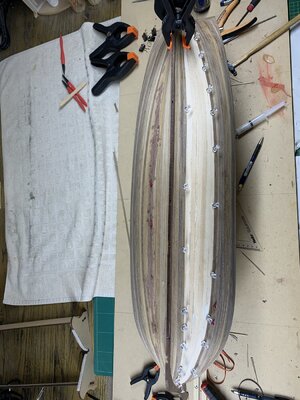
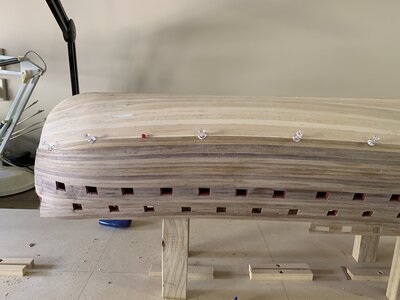
Well I have been working slowly on second layer of planking.
Most other logs and the instructions recommend using CA glue. I tried this but was not satisfied with the result the planks set too quickly, it was messy and hard to use with long planks.
I went back to wood glue and have been satisfied.
I used a wide array of clamps, pins, clips, and elastic bands to hold planks in close apposition.
I consider that too much filler putty is a failure of technique, and I try really hard to keep the planks tight.
I was happy with my bearding line depth, however I didn’t cut a rabbet in the stem or the keel. Might try that on my next build.
Also laid the keel and the rudder post and the stem post.
Finished the port side and closing in on the last few planks on the starboard one.
Here are some pics
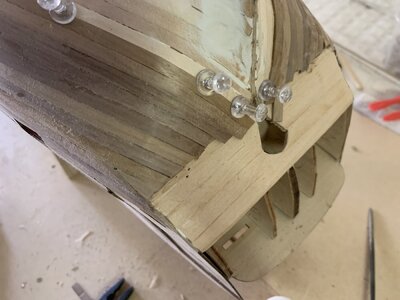
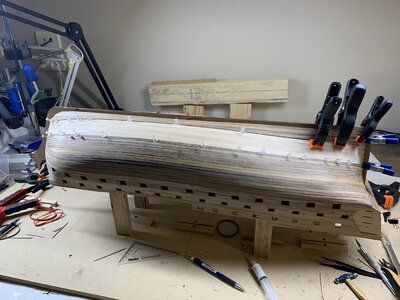
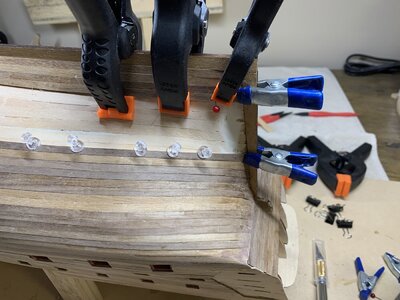
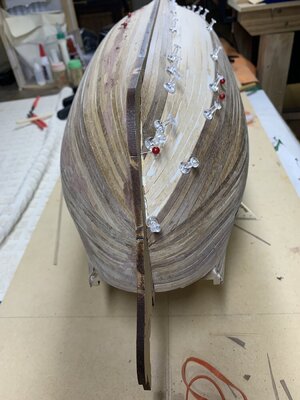


Hi Chestcutter,Well I have been working slowly on second layer of planking.
Most other logs and the instructions recommend using CA glue. I tried this but was not satisfied with the result the planks set too quickly, it was messy and hard to use with long planks.
I went back to wood glue and have been satisfied.
I used a wide array of clamps, pins, clips, and elastic bands to hold planks in close apposition.
I consider that too much filler putty is a failure of technique, and I try really hard to keep the planks tight.
I was happy with my bearding line depth, however I didn’t cut a rabbet in the stem or the keel. Might try that on my next build.
Also laid the keel and the rudder post and the stem post.
Finished the port side and closing in on the last few planks on the starboard one.
Here are some pics
View attachment 353924
View attachment 353925
View attachment 353926
View attachment 353927
View attachment 353928
View attachment 353929
View attachment 353930
As you very well know planking a hull is not an easy task, But I think that you have done a great job.
Well done.
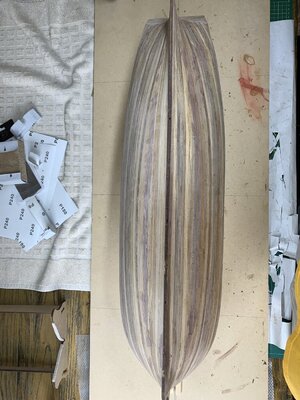
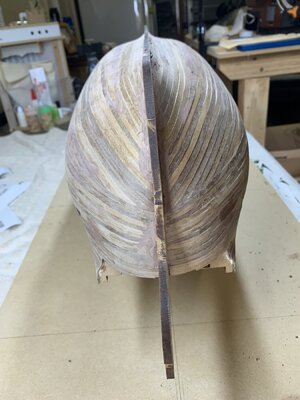
Finished second layer of planking in the rough. Now it needs sanding. A lot of sanding.
I prefer to sand outdoors, so will wait for finer weather.
I did a major clean and reorganize of my work space in recognition of the milestone of second planking completed. I find it very cathartic to reorganize everything after a long work period many of the tools get out of place and there is dust and shavings everywhere.
Next on the schedule is
Quarter galleries
Lower deck cannons
Wales and strakes
Paint the hull
I am also planning to build a display cabinet for the Vanguard, from scratch.
I have not found any reasonably priced or commercially available ones.
Has anyone got any plans or links to display cases, it needs to be big?
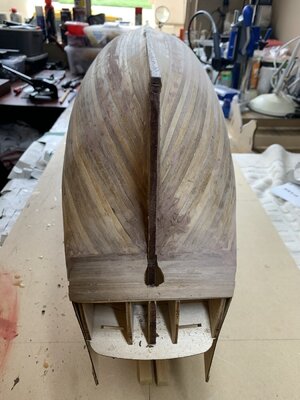
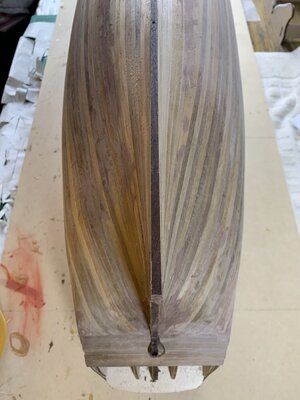
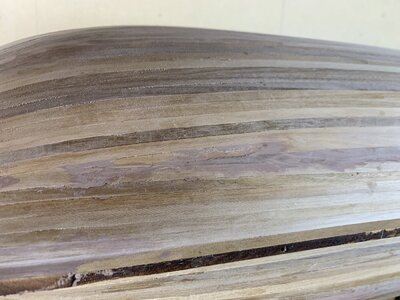
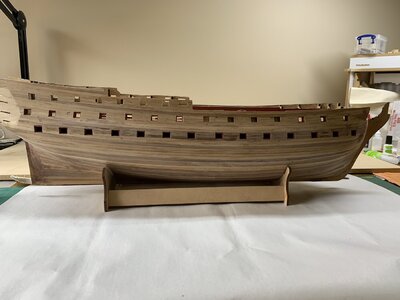
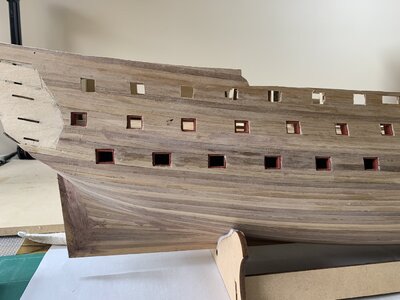
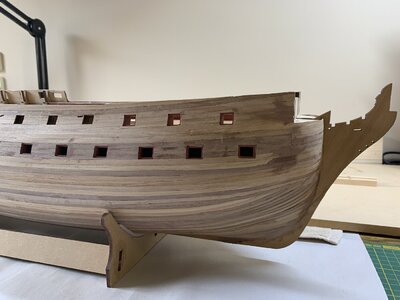


Hi Chestcutter, congratulations to buying a grate kit, I'm sure it'll give you great moments in the coming years.
I'm just starting to erect the rig with shrouds and stays on my Vanguard.
Just saw your building log. The hull looks grate with the very nicely sunken gunports. I'll definitely be following you advancement.
Greetings from a cold Sweden
I'm just starting to erect the rig with shrouds and stays on my Vanguard.
Just saw your building log. The hull looks grate with the very nicely sunken gunports. I'll definitely be following you advancement.
Greetings from a cold Sweden

Absolutely beautiful!
Good evening. Looking marvellous. Cheers GrantSmall update
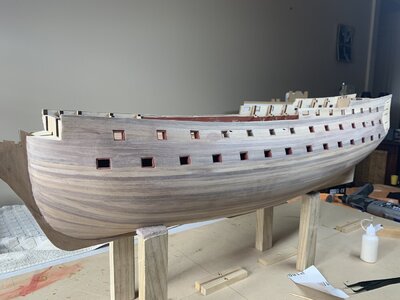
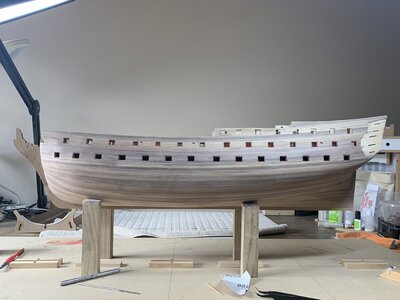
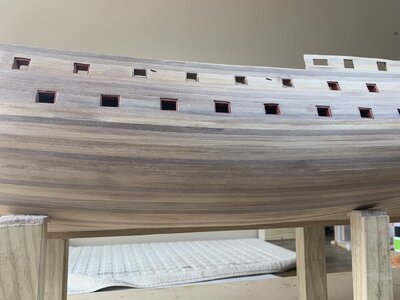
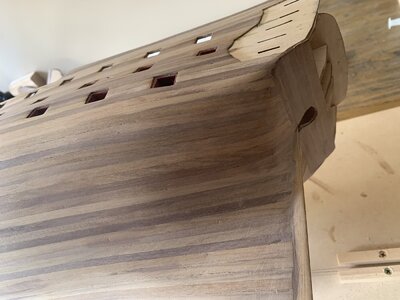
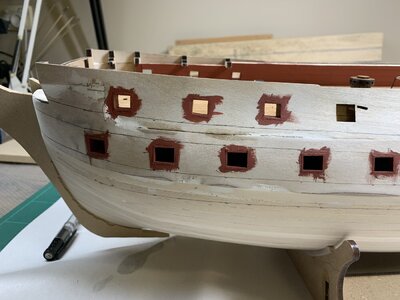
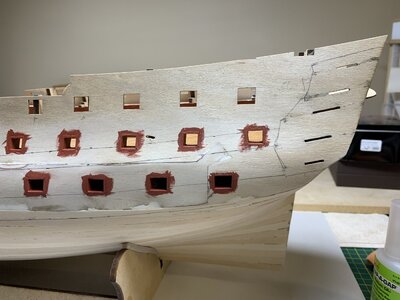
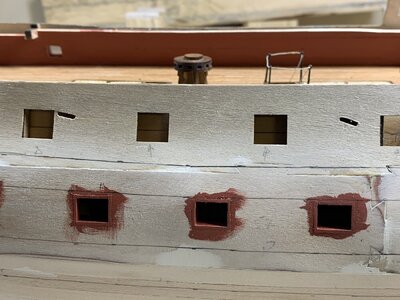
Second planking sanding mostly complete. Lined the gunports without lids.
I used sandpaper first 80 grit followed by 120 then 180 and 240
Every time I look at the hull, especially in photos I see unfilled hairline gaps, more filling and sanding for me.
View attachment 355445
View attachment 355446
View attachment 355447
View attachment 355448
View attachment 355449
View attachment 355450
Thanks for compliments. I still see many flaws, but am happy with the shape.Absolutely beautiful!


