Brilliant modelling Andre! The windows and plating are first class work!
-

Win a Free Custom Engraved Brass Coin!!!
As a way to introduce our brass coins to the community, we will raffle off a free coin during the month of August. Follow link ABOVE for instructions for entering.
-

PRE-ORDER SHIPS IN SCALE TODAY!
The beloved Ships in Scale Magazine is back and charting a new course for 2026!
Discover new skills, new techniques, and new inspirations in every issue.
NOTE THAT OUR FIRST ISSUE WILL BE JAN/FEB 2026
You are using an out of date browser. It may not display this or other websites correctly.
You should upgrade or use an alternative browser.
You should upgrade or use an alternative browser.
HMS Vanguard 1787 1:72 scale by ADoyon - First Build
- Thread starter ADoyon
- Start date
- Watchers 52
-
- Tags
- amati vanguard victory models
That takes such steady hands and enormous patience to like up all those copper tiles so precisely. The resulting effect is fantastic.
There are some other models half off at Model Expo you guys... You might want to check them out.
Last edited:
Hi Mr. Doyen, after making an eye check on the link provided, I remarked that you proceed from bottom to top. On the museum pics they seem's to do the reverse process, top to bottom, which leadership to louer plate overlapping the upper one. I am novice and never did plating becore but this is a question for me of which method should we used in modeling.
You have a really Nice built.
Michel
Thank you Michel and Paul.Brilliant modelling Andre! The windows and plating are first class work!
Michel, good catch on the direction of plating shown in the illustration for copper plating the USS Constitution. A little further down in the article below a photograph, it mentions that copper is installed simultaneously from the waterline down and keel up. I believe this was done during the recent re-coppering of the ship in 2016. Also mentioned, “when coppered in the summer of 1797, it is probable that workers began at the stern, down at the keel, and worked their way both forward and upward. Each sheet would have overlapped one inch on all sides, with vertical joints between the sheets facing aft. This created a smooth “fish scale” affect to the hull, thereby preventing the sheets from being lifted by the action of the water.”
An article from Mark Staniforth, “The introduction and use of copper sheathing – a history” states that both methods of having the horizontal joints between sheets facing down and horizontal joints between sheets facing upwards were used.
In the book “The Arming and Fitting of English Ships of War 1600 – 1815” by Brian Lavery, he states that the coppering roughly followed the run of the planking, so that it curved downwards towards midships. The lowest strake was put on first, and each plank was to overlap its neighbor by about 3/4 in.
I chose to start coppering at the stern, down at the keel so that I could achieve the curved belts of copper meeting the waterline at an angle. The top of the sheathing, where it reached the waterline, was covered by a batten of 3in-square elm.
Wow, thank you for these great stuffs of information. I will keep this post for further reference.
Very good coppering work - it is taking some time like you do, but you get best results - worth every minute
Hi Chestcutter,
I want to congratulate you on your beautiful build of the Vanguard in your previous post! You have accomplished so much in such a short time.
You are correct about the slope of the rear edge of top MDF part, that it will leave a gap with the stern fascia. I was aware of this at the time I glued this piece in position. I could not compensate by moving the part back because the curved edge would move away from the surface of the side gallery patterns. My goal was to match the curved surfaces with side gallery patterns to be flush and worry about the gap later. Likewise with the bottom MDF part. I was also aware of the quarter gallery lower finishing casting not fitting properly. The two surfaces of the casting do form an acute angle of about 80 degrees. I figured it would be easier to add a piece of wood or filler material for the gap after the stern fascia is in place and to trim what is necessary for the lower finishing casting when I am ready to install the casting.
Andre
She’s really looking good Andre! You’re doing a fantastic job, especially for your first ship.
Hallo @ADoyonFirst Build: Amati HMS Vanguard 1787, 1:72 scale. I appreciate the opportunity to share my first build with the SOS community. I have very limited experience with wood ship modeling and hope to receive valuable advice from members. So, all tips and comments are welcome. A little background about myself: I am a retired engineer, age 74, and now find that I have some time to to spend on a build. I started building the Billing Boats Cutty Sark model 50 years ago, but never finished and gave that kit away. Also, about the same time I purchased the Mantua Sergal HMS Victory, which I still have and have not started. The HMS Victory looks a bit daunting with plans in Italian and limited instructions in English. I became interested in building a model of the BlueJacket version of the USS Constitution since I live 30 miles south of Boston and I can visit the ship often. While researching wood ship modeling on the internet I found Robert Hunt’s Practicums on building various wood model kits. I contacted Bob to ask his opinion about this kit. He mentioned that the BlueJacket version is the 1812 configuration and the actual ship as configured today may not be helpful. The BlueJacket kit is also at a smaller scale than the Vanguard which makes the build a little more difficult. Bob suggested that if I really wanted to build a large complex kit to build the Amati HMS Vanguard and to purchase his practicum on building the kit. I did purchase his practicum and realize that it will be of considerable value to my effort. He explains all steps in great detail with techniques and tools to use. I believe his website, www.lauckstreetshipyard.com, is a valuable resource for novice ship modelers. I will be following the kit’s instructions as well as Bob Hunt’s practicum. So, now on with the build…
we wish you all the BEST and a HAPPY BIRTHDAY

Hey Andre, best wishes for a great birthday surrounded by family and friends!
Happy Birthday, Andre! 

A very happy Birthday to you Andre
Happy birthday Andre.
I for one am really looking forward to your next posts about your Vanguard.
Your present to us on your special day.

I for one am really looking forward to your next posts about your Vanguard.
Your present to us on your special day.
Happy birthday Andre!
From a fellow Vanguard builder.
Björn
From a fellow Vanguard builder.
Björn
It’s been slow progress applying copper plates to the hull and I’m almost done. Not for any lack of interest, however, it seems I can only manage a few hours a day to the build. It occurred to me early that I might run out of plates because I am overlapping each plate. By the time I came to that realization I was committed to keep going. The photo below shows where I ran out of plates. The kit came with 1295 plates for each side. I was able to purchase an additional sheet of plates, 7x37 or 259 plates for each side.
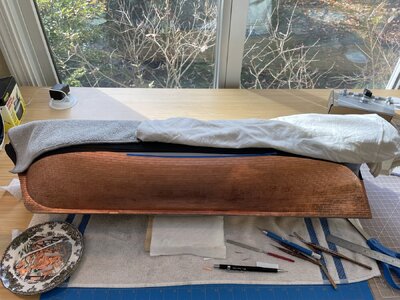
The following photos show the hull plating completed and polished. I used both Flitz and Brasso metal polish.
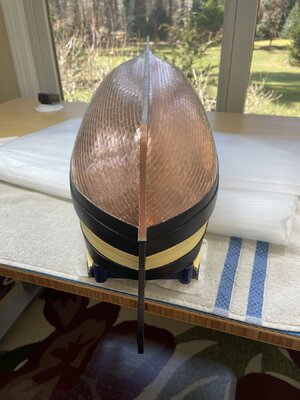
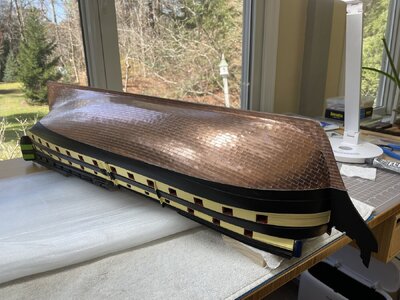
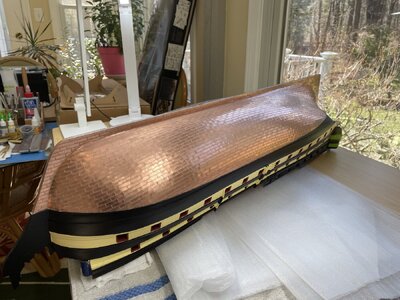
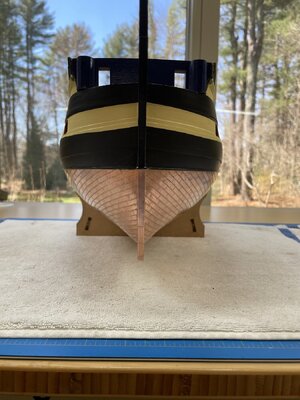
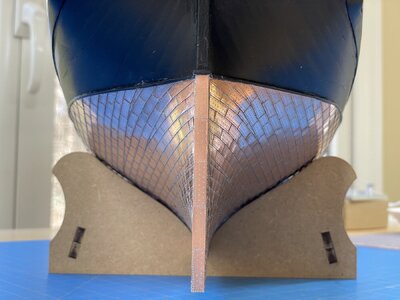
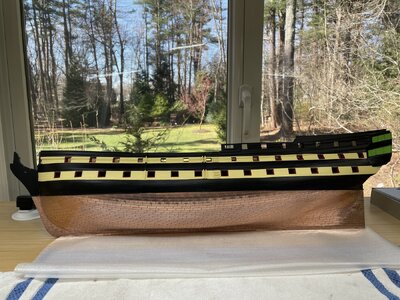
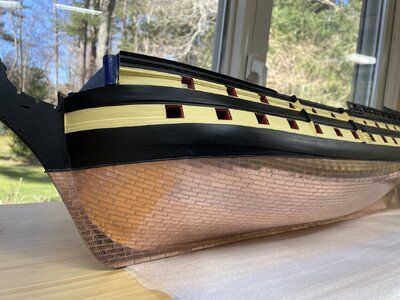
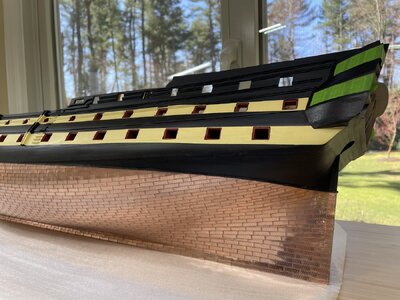

The following photos show the hull plating completed and polished. I used both Flitz and Brasso metal polish.


Beautiful result. Can I ask how will you protect the hull from oxidation ?
Thanks,
Michel
Thanks,
Michel
Hi Michel,Beautiful result. Can I ask how will you protect the hull from oxidation ?
Thanks,
Michel
Thank you for the compliment. After giving it much thought, I am leaning towards using Renaissance Wax. The recommendation in Bob Hunt's practicum was to apply several coats of Minwax Wipe-on Poly. Oil based polyurethane will turn yellow and darken over time. I'm not sure how well the water base poly works. I'm really not sure what I should be using. This is where I would very much appreciate advice from SOS members. Renaissance Wax is a brand of microcrystalline wax polish used for the protection of various materials and was developed in the early 1950s by the British Museum in collaboration with the National Gallery in London. It's used by conservators, museum professionals, antique collectors and artisans, It imparts a soft sheen after polishing. I am tempted to try out this product and see how well it holds up to prevent tarnishing. If it does not hold up, it can be removed with white spirits.
Again, any thoughts from fellow SOS members would be much appreciated.
nice coppering
Thank you mr. Doyon to taking Time to answer me. I will check as you from others for further suggestions.


