HMS Vanguard 1787 1:72 scale by ADoyon - First Build

Hi Fights-On,
Thanks so much for your comments!

If you decide to add the wood batten at the waterline, I thought I should add a little more about how I attached it to the hull. The strip of wood is so thin and flexible that I think it would be difficult to apply it in a straight line along a pencil line, especially when dealing with glue.

View attachment 364538

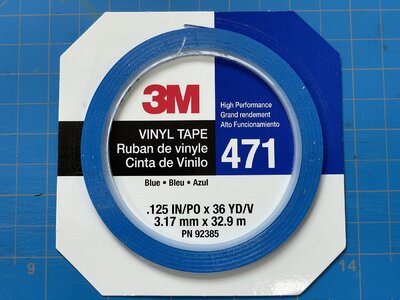
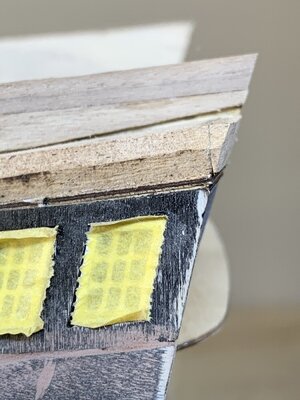
I first used vinyl masking tape along the pencil line. It’s much easier to lay the tape down than the strip of wood, and if the tape is not straight, you can just move it. The tape has just the right thickness that you can push the strip of wood against it as you are gluing it. I applied a small blob of CA glue on a polystyrene sheet and used a hypodermic needle to pick up and apply a few inches at time to the strip. The vinyl tape will give a nice straight line for the wood batten.

View attachment 364539
Thanks Andre for this detailed explanation of your technique. Your work looks so incredibly good, I like the others are very keen to know how to achieve such clean precision.
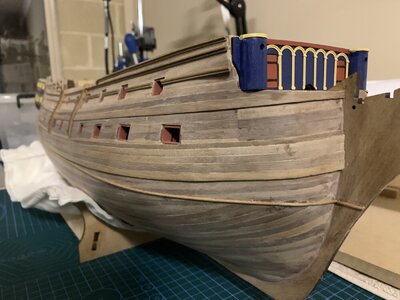
I too have laid a batten on my Vanguard. I used some of the 1x1 stock but will probably find I am missing some for later use in the build.
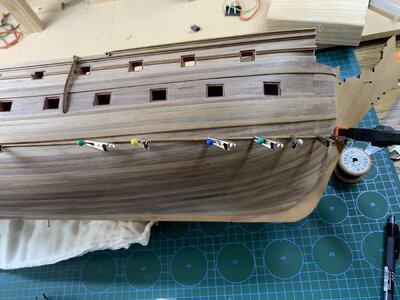
When I laid the batten, I pinned a series of pins along the line and used PVA glue to glue down the strip and held them in place with a light alligator clip onto the shaft of the pin. Your method looks to get a better result.
5C02BF8C-FB3E-454D-86C3-8CB454F03477.jpegC26BE12D-61FD-4E38-993C-FABA169CB1B0.jpeg
 
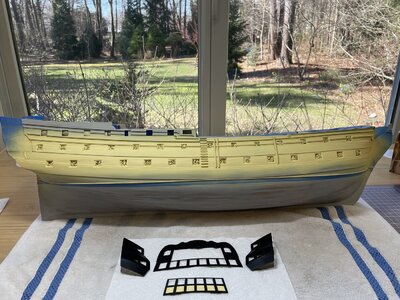
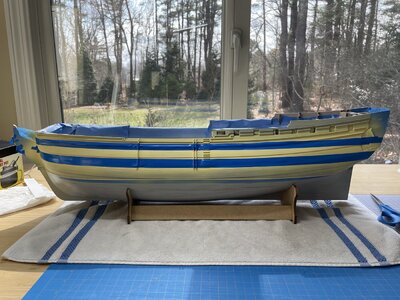
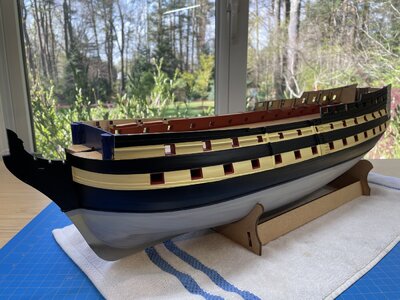
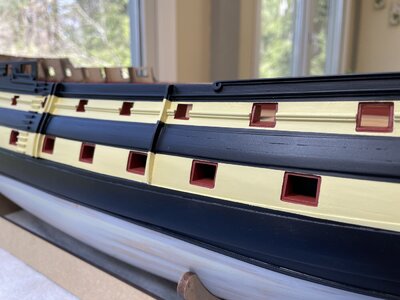
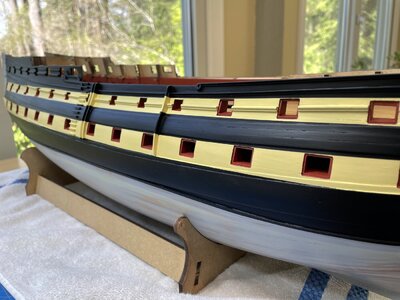
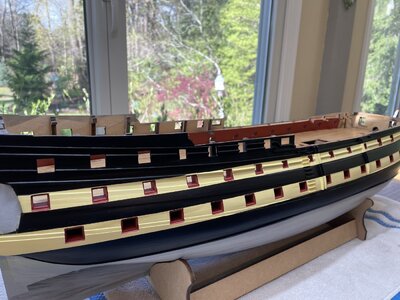
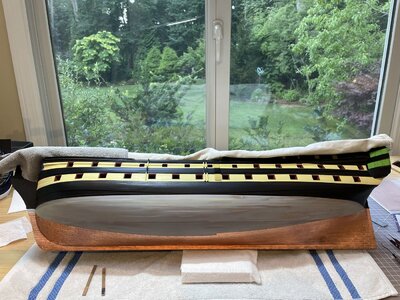
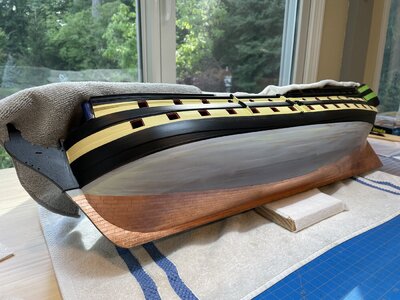
It took me a while to decide which yellow paint I should use on the hull of my ship. The yellow ochre that came with the Admiralty Paint Set seemed to be too dark. A little bit of research revealed that there were variations in the paint schemes used on British navy ships in the 18th century. I think it's likely that the yellow used was a shade known as “Bright Yellow”, which was commonly used on British naval ships during the late 18th century. With a little research, I learned that Bright Yellow was a light, vibrant yellow color that was created by mixing lead tin yellow with white lead or other white pigments.

I also learned that the HMS Victory was re-painted in 2017-2020 with its original colors during active service at the Battle of Trafalgar in 1805. The new yellow color on the Victory is much lighter than the previous orange-brown ochre that was on the ship for many years. I’m using Vallejo Ice Yellow on my Vanguard. To me it looks like it has about the same color value as the new color on the Victory.

1682772789203.jpeg

1682772885723.jpeg

IMG_1947.jpg

IMG_1949.jpg

IMG_1950.jpg

IMG_1953.jpg

IMG_1951.jpg
 
It took me a while to decide which yellow paint I should use on the hull of my ship. The yellow ochre that came with the Admiralty Paint Set seemed to be too dark. A little bit of research revealed that there were variations in the paint schemes used on British navy ships in the 18th century. I think it's likely that the yellow used was a shade known as “Bright Yellow”, which was commonly used on British naval ships during the late 18th century. With a little research, I learned that Bright Yellow was a light, vibrant yellow color that was created by mixing lead tin yellow with white lead or other white pigments.

I also learned that the HMS Victory was re-painted in 2017-2020 with its original colors during active service at the Battle of Trafalgar in 1805. The new yellow color on the Victory is much lighter than the previous orange-brown ochre that was on the ship for many years. I’m using Vallejo Ice Yellow on my Vanguard. To me it looks like it has about the same color value as the new color on the Victory.

View attachment 371810

View attachment 371811

View attachment 371812

View attachment 371813

View attachment 371814

View attachment 371816

View attachment 371815
HI, if you are happy with that colour. no more to discuss, as you are the Captain
 
Andre you never disappoint. Your painting is superlative. I like the lighter yellow too.
Can you tell us please did you paint the yellow onto areas that were then painted black? Yellow as a primer?
What colour black did you use?
Did you airbrush both colors?
How did you get such clean lines and protection of the gunports sills?
What masking tape did you use and is there a technique for taping you used?
Have you sealed with a polyurethane varnish?
Sorry to ask so many questions but you clearly have talents that I for one wish to acquire.
Cant wait to see more of your build.
 
Thank you Chestcutter and to all my SOS friends who posted positive comments.

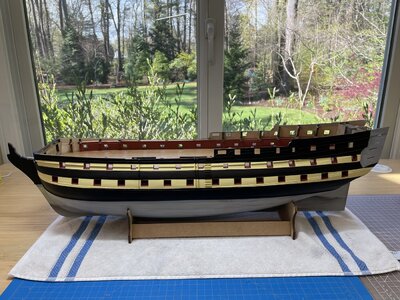
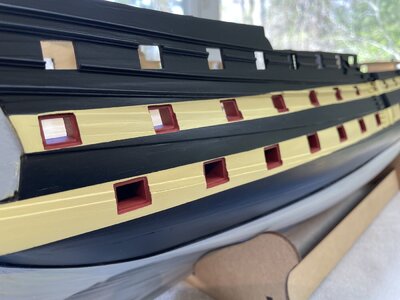
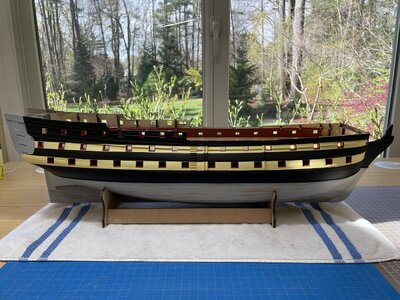
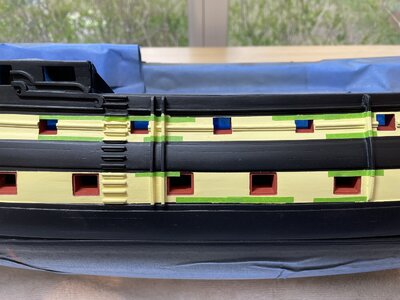
I used an airbrush to paint my hull and did use it for both colors. I first painted the yellow because it’s easier to cover yellow with black than vice versa. My first photo shows the yellow that was applied just before masking off for painting the black. I did overspray the area quite a bit because I wanted to make sure I had proper coverage for the yellow stripes. I applied at least six coats of yellow and at least four coats of black. This is my first experience using an airbrush. I found out that I needed to thin the paint and put on light coats. I found a YouTube video showing the technique. I used Vallejo airbrush thinner and Vallejo airbrush flow improver. Also, I found out that it is better to thin the paint outside of the airbrush paint cup. I purchased a stack of 1 oz medicine cups to thin my paint before pouring into the airbrush cup.

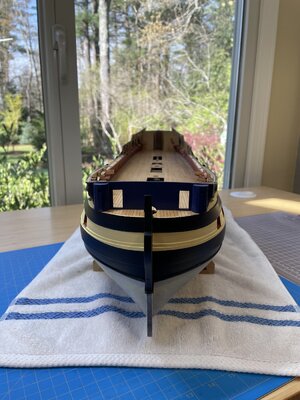
The only primer I used was the Tamiya Fine Surface Primer shown in a previous post. The black paint is called dull black from the Admiralty Paint Set. This black paint has a soft sheen, which I think looks good on the hull. The yellow has a matte finish and I think the combo looks great.

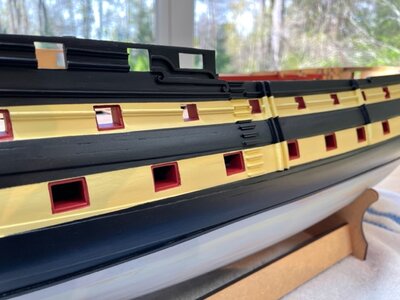
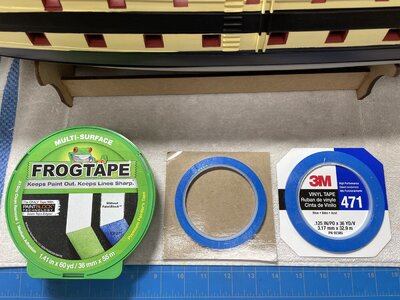
I used 3M Vinyl Tape 471, 1/8” and 1/4” wide for masking. This tape has a slight stretch to it that helps it to conform around irregular surfaces. A few areas that were difficult to mask around were the side chest trees and skid beams. I used a small chisel to tuck the tape into the corners. Masking wasn’t perfect and I needed to do some touch up work with a brush. Once the vinyl tape was off, I used small strips of Frog tape to touch up with a paint brush. Now that I think about this, it might have been better to use the Frog tape on the difficult areas and then apply the vinyl tape over. The Frog tape would not be suitable for the long runs since it is too thin and doesn’t stretch.

The gunports were first stuffed with tissue to prevent paint from getting into the interior of the lower gunports, which I had painted black and to prevent paint from getting on the deck for the upper gun deck. I then used Humbrol Maskol around the gunports being careful not to get any on the hull surface that was to be painted. The Maskol worked well and came off easily even after applying it several weeks prior. However, since paint covered the Maskol I needed to break the paint surface with a small chisel to be able to grab the Maskol with tweezers. It was a combination of pulling the Maskol off with tweezers and scraping off with the chisel. The Maskol cleaned up relatively easy. What the Maskol did was to prevent paint buildup in the gunports. I did have to do a light sanding and repaint the gunports, but I thought that was easy. I thinned some red paint with a little air brush thinner and a drop or two of air flow improver and applied a thin coat to the gunports. The air flow improver retards the drying time and seems to reduce brush strokes. The tricky part is to not get red paint on the yellow surface. If that happens, a quick wipe of saliva on your fingertip cleans it off.

I have not sealed my paint yet with a clear varnish. I’m not sure if I should. If the paint surface gets damaged and needs to be touched up would that complicate things? Also, I would lose having the combination of matte yellow and the soft sheen of the black paint. I would love to know what the experienced modelers have to say about protecting the acrylic paint with a varnish. Is there some reason to varnish for, say, UV protection? I do plan on sealing the copper plates to prevent oxidation.

IMG_1961.jpg

IMG_1945.jpg
 
Hello ADoyon, I just stumbled onto your ship build log, and I must say your ship is coming along magnificently! The paint work is very clean. I usually make a mess of paint work, not being that skilled in that department, so it takes me forever.
 
A very very good result - thanks for the tipp with the different tapes
 
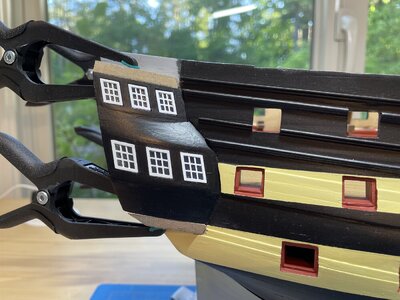
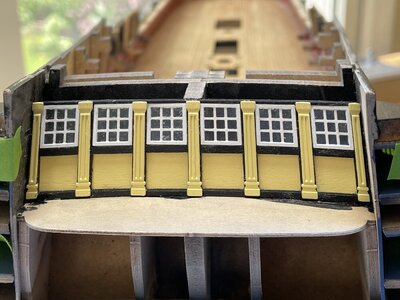
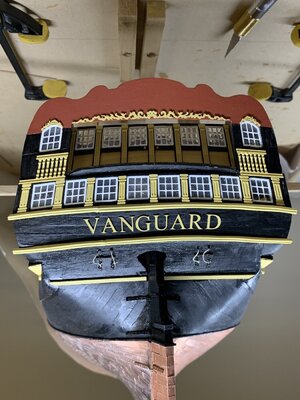
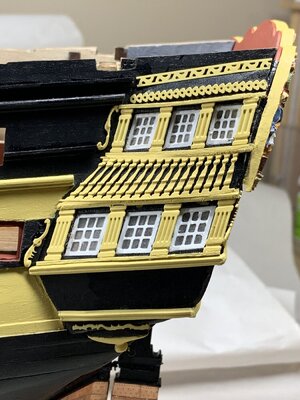
I recently installed the quarter gallery assemblies. Prior to gluing the galleries to the hull, I glued the window frames to their openings and applied glazing to the windows. Something I’d like to mention about the windows that I didn't catch initially, is that they are slightly different in size and shape. I’m glad I double checked the plans before I got carried away with filing an opening to fit the wrong window. Need to pay attention to what I’m doing.
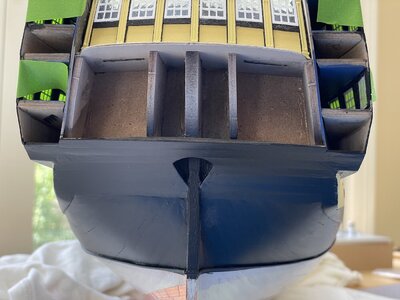
The two triangular parts shown in the photo on top and bottom of the galleries are not numbered or mentioned in the kit’s instruction other than to show something there on the drawing. I found them on billet 2418 on sheet 16.

IMG_1988.jpg

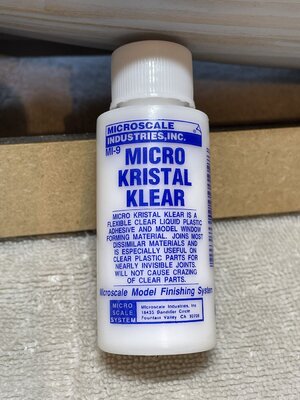
I’m using Micro Kristal Klear for the window glazing. I found it best to apply the Micro Kristal Klear from the inside of the window since there is a tendency to get it all over the window frame when forming the glazing. I used PVA glue to glue the gallery assemblies to the hull because I didn’t want to risk fogging the windows with vapors from CA glue.

IMG_2002.jpg

IMG_1998.jpg

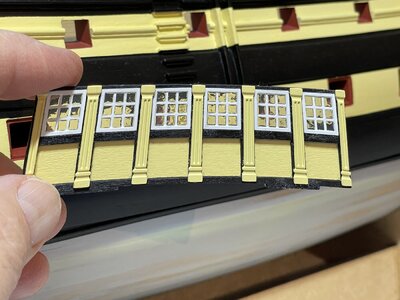
I used CA glue to glue the window frames in their openings, then applied the window glazing from the inside. Since the Micro Kristal Klear is an adhesive, I used it to glue the decorative columns and the yellow back panel to the stern screen bulkhead; again, to avoid fogging the window glazing.

IMG_2055.jpg

IMG_2056.jpg
 
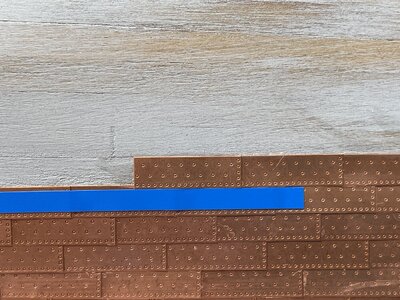
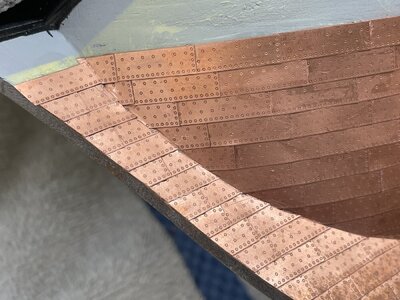
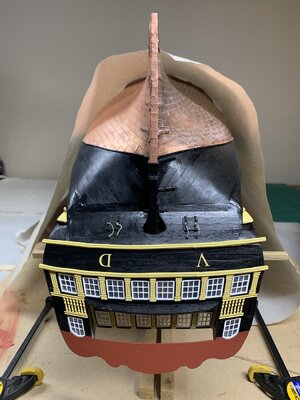
I’m now in the process of applying the copper plating. After looking at various builds and YouTube videos, I decided to overlap the plates for a few reasons. First, it’s the way it was done on real ships. Second, if I were to butt the plates against each other there could be noticeable gaps between plates as they begin to curve upwards at bow and stern without some trimming for a good fit. And finally, the individual plates have a row of closely spaced nail impressions along two edges but not along the opposite edges. A keen observer might wonder why two edges of the plates do not have closely spaced nail impressions, and In my mind it would not look right. The following link from the USS Constitution Museum shows an illustration for copper plating.

https://ussconstitutionmuseum.org/2016/11/18/new-copper-sheathing-2/

IMG_2010.jpg


IMG_2020.jpg

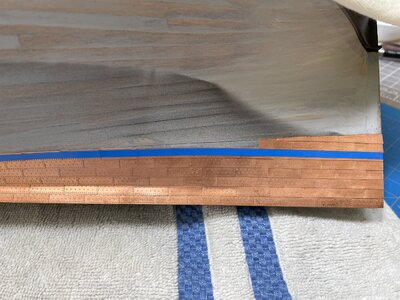
I’m using 3M vinyl tape as a guide to lay the next row of plates, overlapping a little less than 1 mm over the top of the previous row and about 1 mm or a little more overlap on the ends. The vinyl tape has a bit of an edge to set the plates against and helps to minimize glue getting on the adjacent plates. I’m using CA glue on the plates.

IMG_2054.jpg

IMG_2049.jpg

IMG_2047.jpg

IMG_2051.jpg

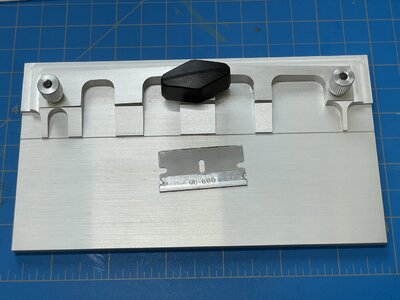
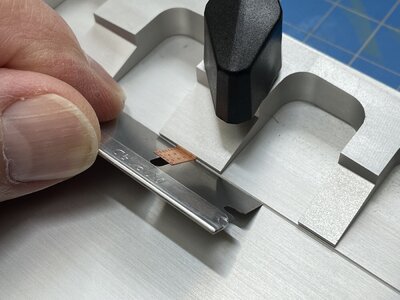
To make the bends in the plates where the hull meets the stem and keel, I used the Etch Buddy Photo-Etch bending fixture from Micro-Mark. This tool works much better than I expected. There is a groove in the base at the bend line that makes the razor blade work as the perfect hinge to produce a sharp bend in the plate precisely where you want.

IMG_2052.jpg

IMG_2053.jpg
 
I’m now in the process of applying the copper plating. After looking at various builds and YouTube videos, I decided to overlap the plates for a few reasons. First, it’s the way it was done on real ships. Second, if I were to butt the plates against each other there could be noticeable gaps between plates as they begin to curve upwards at bow and stern without some trimming for a good fit. And finally, the individual plates have a row of closely spaced nail impressions along two edges but not along the opposite edges. A keen observer might wonder why two edges of the plates do not have closely spaced nail impressions, and In my mind it would not look right. The following link from the USS Constitution Museum shows an illustration for copper plating.

https://ussconstitutionmuseum.org/2016/11/18/new-copper-sheathing-2/

View attachment 389442


View attachment 389443

I’m using 3M vinyl tape as a guide to lay the next row of plates, overlapping a little less than 1 mm over the top of the previous row and about 1 mm or a little more overlap on the ends. The vinyl tape has a bit of an edge to set the plates against and helps to minimize glue getting on the adjacent plates. I’m using CA glue on the plates.

View attachment 389475

View attachment 389444

View attachment 389445

View attachment 389446

To make the bends in the plates where the hull meets the stem and keel, I used the Etch Buddy Photo-Etch bending fixture from Micro-Mark. This tool works much better than I expected. There is a groove in the base at the bend line that makes the razor blade work as the perfect hinge to produce a sharp bend in the plate precisely where you want.

View attachment 389473

View attachment 389474
Good morning Andre. This is a quality build. Cheers Grant
 
I recently installed the quarter gallery assemblies. Prior to gluing the galleries to the hull, I glued the window frames to their openings and applied glazing to the windows. Something I’d like to mention about the windows that I didn't catch initially, is that they are slightly different in size and shape. I’m glad I double checked the plans before I got carried away with filing an opening to fit the wrong window. Need to pay attention to what I’m doing.
The two triangular parts shown in the photo on top and bottom of the galleries are not numbered or mentioned in the kit’s instruction other than to show something there on the drawing. I found them on billet 2418 on sheet 16.

View attachment 389403

I’m using Micro Kristal Klear for the window glazing. I found it best to apply the Micro Kristal Klear from the inside of the window since there is a tendency to get it all over the window frame when forming the glazing. I used PVA glue to glue the gallery assemblies to the hull because I didn’t want to risk fogging the windows with vapors from CA glue.

View attachment 389404

View attachment 389427

I used CA glue to glue the window frames in their openings, then applied the window glazing from the inside. Since the Micro Kristal Klear is an adhesive, I used it to glue the decorative columns and the yellow back panel to the stern screen bulkhead; again, to avoid fogging the window glazing.

View attachment 389432

View attachment 389433
HI Andre
It’s great to see your progress. I wish you were ahead of me as I learn much from seeing your build log and photos.
My experience with those two triangular mdf triangles is you need to shape the rear of the top one with a sloped face to avoid a gap with the stern fascia. Also the bottom triangle in your photos and indeed I did the same and made the lowest level a horizontal surface but when you apply the white metal cap with its bulged tip the angle to get the inner face aligned with no space requires a inward facing slope, as the contacting surfaces are not orthogonal, but less than 90 degrees, I attach some of my photos to show what I mean.

IMG_3245.jpegIMG_3246.jpegIMG_2798.jpegIMG_3261.jpeg
 
Last edited:
I’m now in the process of applying the copper plating. After looking at various builds and YouTube videos, I decided to overlap the plates for a few reasons. First, it’s the way it was done on real ships. Second, if I were to butt the plates against each other there could be noticeable gaps between plates as they begin to curve upwards at bow and stern without some trimming for a good fit. And finally, the individual plates have a row of closely spaced nail impressions along two edges but not along the opposite edges. A keen observer might wonder why two edges of the plates do not have closely spaced nail impressions, and In my mind it would not look right. The following link from the USS Constitution Museum shows an illustration for copper plating.

https://ussconstitutionmuseum.org/2016/11/18/new-copper-sheathing-2/

View attachment 389442


View attachment 389443

I’m using 3M vinyl tape as a guide to lay the next row of plates, overlapping a little less than 1 mm over the top of the previous row and about 1 mm or a little more overlap on the ends. The vinyl tape has a bit of an edge to set the plates against and helps to minimize glue getting on the adjacent plates. I’m using CA glue on the plates.

View attachment 389475

View attachment 389444

View attachment 389445

View attachment 389446

To make the bends in the plates where the hull meets the stem and keel, I used the Etch Buddy Photo-Etch bending fixture from Micro-Mark. This tool works much better than I expected. There is a groove in the base at the bend line that makes the razor blade work as the perfect hinge to produce a sharp bend in the plate precisely where you want.

View attachment 389473

View attachment 389474
Hi Mr. Doyen, after making an eye check on the link provided, I remarked that you proceed from bottom to top. On the museum pics they seem's to do the reverse process, top to bottom, which leadership to louer plate overlapping the upper one. I am novice and never did plating becore but this is a question for me of which method should we used in modeling.

You have a really Nice built.

Michel
 
Back
Top