-

Win a Free Custom Engraved Brass Coin!!!
As a way to introduce our brass coins to the community, we will raffle off a free coin during the month of August. Follow link ABOVE for instructions for entering.
-

PRE-ORDER SHIPS IN SCALE TODAY!
The beloved Ships in Scale Magazine is back and charting a new course for 2026!
Discover new skills, new techniques, and new inspirations in every issue.
NOTE THAT OUR FIRST ISSUE WILL BE JAN/FEB 2026
You are using an out of date browser. It may not display this or other websites correctly.
You should upgrade or use an alternative browser.
You should upgrade or use an alternative browser.
HMS Vanguard 1787 1:72 scale by ADoyon - First Build
- Thread starter ADoyon
- Start date
- Watchers 51
-
- Tags
- amati vanguard victory models
Nice to see you back at it Andre. Looking forward to seeing your progress - she is a real beauty as she sits today with a bright future.
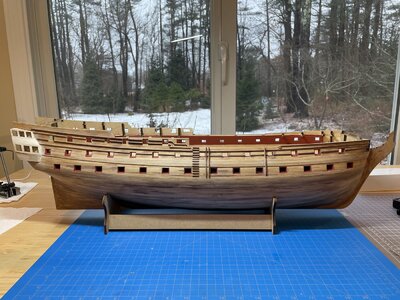
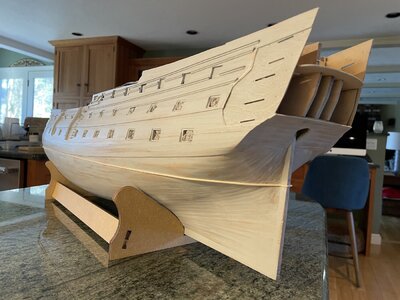
Applied Tamiya Fine Surface Primer to reveal glue residue and imperfections that may need sanding and/or additional wood filler.
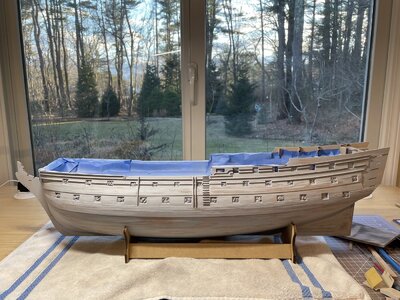
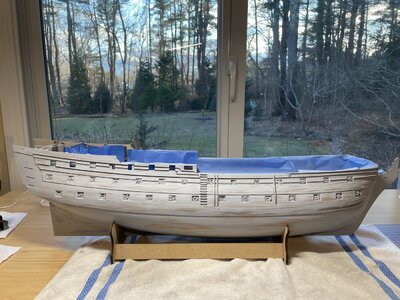
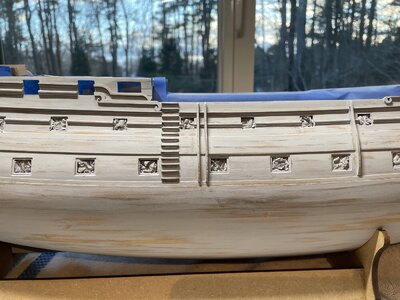
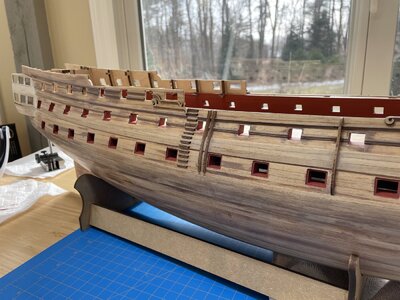
I applied Humbrol Maskol around the gunport openings. We'll see how that works out. I assume I'll still need to do some touch-up painting on the gunports.
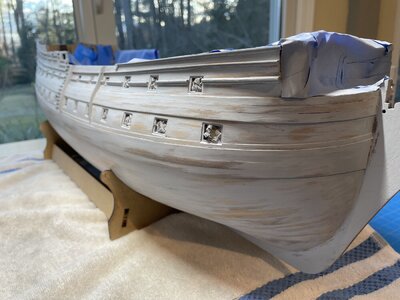
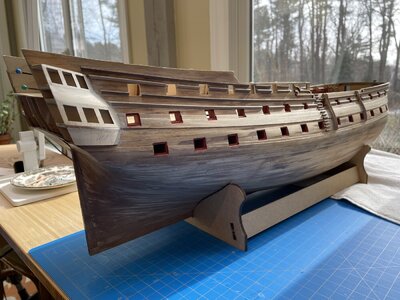
The Tamiya Surface Primer is a lacquer-based paint and I was a little worried about using acrylic paints for the top coat. From what I have read, I can still use acrylic paints if I sand the surface a bit. I'll test it out first.


I applied Humbrol Maskol around the gunport openings. We'll see how that works out. I assume I'll still need to do some touch-up painting on the gunports.

The Tamiya Surface Primer is a lacquer-based paint and I was a little worried about using acrylic paints for the top coat. From what I have read, I can still use acrylic paints if I sand the surface a bit. I'll test it out first.
Thanks PaulNice to see you back at it Andre. Looking forward to seeing your progress - she is a real beauty as she sits today with a bright future.
Kurt Konrath
Kurt Konrath
Are you painting the hull after sanding out any issues it shows you?
They hull looked great in nature wood with a clear coat it would be a gem.
They hull looked great in nature wood with a clear coat it would be a gem.
Hi Kurt,Are you painting the hull after sanding out any issues it shows you?
They hull looked great in nature wood with a clear coat it would be a gem.
Thanks for the compliment. Yes, I do plan on painting the ship black with the yellow stripes.
- Joined
- Oct 9, 2020
- Messages
- 2,229
- Points
- 488

Bien réussi, Monsieur Doyon.
She’s looking beautiful! Great work! 
Andre' Your Wales look great. I just finished one side of the Essex and yours put mine to shame! Look forward to following your build. Magic Mike
A fantastic build, and for ones -as I did -a ship with all Gunports open. I can only say" Bravo". One of the best builds in a long time.Applied Tamiya Fine Surface Primer to reveal glue residue and imperfections that may need sanding and/or additional wood filler.
View attachment 361379
View attachment 361380
View attachment 361381
I applied Humbrol Maskol around the gunport openings. We'll see how that works out. I assume I'll still need to do some touch-up painting on the gunports.
View attachment 361383
The Tamiya Surface Primer is a lacquer-based paint and I was a little worried about using acrylic paints for the top coat. From what I have read, I can still use acrylic paints if I sand the surface a bit. I'll test it out first.
Thank you Peaelcapi.A fantastic build, and for ones -as I did -a ship with all Gunports open. I can only say" Bravo". One of the best builds in a long time.
Nice work Andre. Great to see you are back working on the Vanguard.Applied Tamiya Fine Surface Primer to reveal glue residue and imperfections that may need sanding and/or additional wood filler.
View attachment 361379
View attachment 361380
View attachment 361381
I applied Humbrol Maskol around the gunport openings. We'll see how that works out. I assume I'll still need to do some touch-up painting on the gunports.
View attachment 361383
The Tamiya Surface Primer is a lacquer-based paint and I was a little worried about using acrylic paints for the top coat. From what I have read, I can still use acrylic paints if I sand the surface a bit. I'll test it out first.
I follow your progress closely to assist with my build.
I also find all the painting types and processes somewhat confusing , challenging and a bit of trial and error.
I hate the error.
How long do you leave the Maskol in place?
I recommend you mark out your waterline before painting as this is not an easy step and is necessary to know where the paint stops and the copper starts.
Please keep posting pictures of your progres.
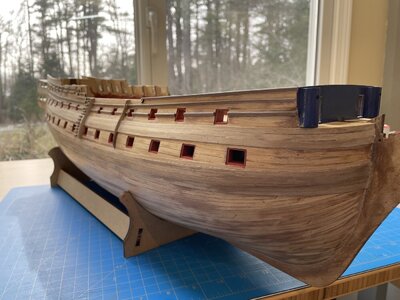
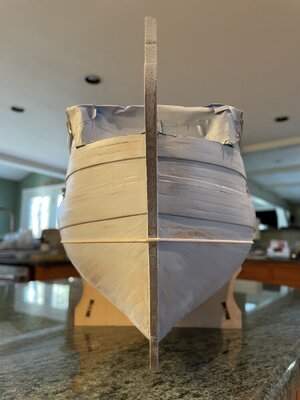
The Fine Surface primer did help to reveal some imperfections. I applied a little more wood filler and sanded those areas. I also applied a second coat of primer and then sanded the primer with 600 grit pads. I’m now ready to mark the waterline.
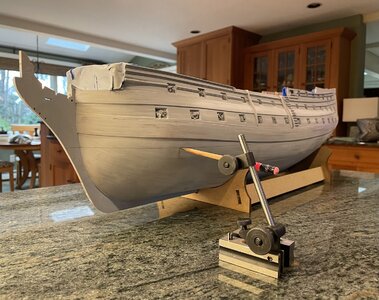
I decided to add the wood batten at the waterline. This is not in the kit’s instructions nor in Bob Hunt’s practicum. I have seen it on some models including in a photograph of a model of the HMS Bellona. This model was built during the ship’s major repair 1778-1780 and was used to demonstrate the practice of copper sheathing to King George III in 1778. The photo appears in Anatomy of the Ship series The 74-Gun Ship Bellona.
The top of the sheathing on a real ship, where it reached the waterline, was covered by a batten of 3 in2 elm. Three inches at 1/72 scale is approximately equal to 1 mm.
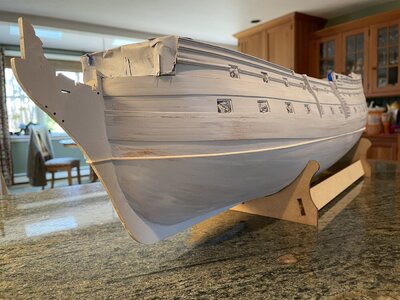
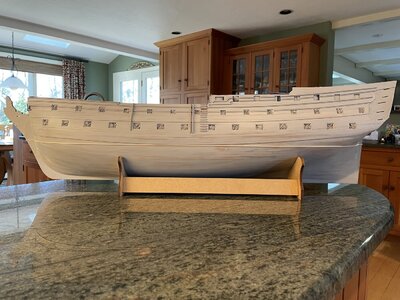
I didn’t want to use any stock material from my kit for fear of running out when it’s called for. So, I made it from 3/16” thick basswood. I set the fence on my small table saw to approximately 1.5 mm away from the blade and raised the blade a little more than 1.5 mm. Two passes on my table saw produced a 1.5 mm2 strip, which I sanded down to a little more than 1 mm2.
First pass.
Second pass.

I decided to add the wood batten at the waterline. This is not in the kit’s instructions nor in Bob Hunt’s practicum. I have seen it on some models including in a photograph of a model of the HMS Bellona. This model was built during the ship’s major repair 1778-1780 and was used to demonstrate the practice of copper sheathing to King George III in 1778. The photo appears in Anatomy of the Ship series The 74-Gun Ship Bellona.
The top of the sheathing on a real ship, where it reached the waterline, was covered by a batten of 3 in2 elm. Three inches at 1/72 scale is approximately equal to 1 mm.


I didn’t want to use any stock material from my kit for fear of running out when it’s called for. So, I made it from 3/16” thick basswood. I set the fence on my small table saw to approximately 1.5 mm away from the blade and raised the blade a little more than 1.5 mm. Two passes on my table saw produced a 1.5 mm2 strip, which I sanded down to a little more than 1 mm2.

First pass.

Second pass.


Hi Chestcutter,Nice work Andre. Great to see you are back working on the Vanguard.
I follow your progress closely to assist with my build.
I also find all the painting types and processes somewhat confusing , challenging and a bit of trial and error.
I hate the error.
How long do you leave the Maskol in place?
I recommend you mark out your waterline before painting as this is not an easy step and is necessary to know where the paint stops and the copper starts.
Please keep posting pictures of your progres.
Sorry about the delay responding to your question regarding Maskol. I know the instructions say to remove the Maskol in three days, but I don't know if it means I must remove it in three days. I don't have any experience with it so not sure what to expect. I don't want to remove it until I apply the yellow paint for the stripes. I have been temporarily frozen with indecision about which paint to use for the stripes but have now settled on the color of paint and will talk about this in my next post.
Looking very good! I wish my first ship looked this good! 
Excellent work!The Fine Surface primer did help to reveal some imperfections. I applied a little more wood filler and sanded those areas. I also applied a second coat of primer and then sanded the primer with 600 grit pads. I’m now ready to mark the waterline.
View attachment 364225
I decided to add the wood batten at the waterline. This is not in the kit’s instructions nor in Bob Hunt’s practicum. I have seen it on some models including in a photograph of a model of the HMS Bellona. This model was built during the ship’s major repair 1778-1780 and was used to demonstrate the practice of copper sheathing to King George III in 1778. The photo appears in Anatomy of the Ship series The 74-Gun Ship Bellona.
The top of the sheathing on a real ship, where it reached the waterline, was covered by a batten of 3 in2 elm. Three inches at 1/72 scale is approximately equal to 1 mm.
View attachment 364226
View attachment 364227
View attachment 364231
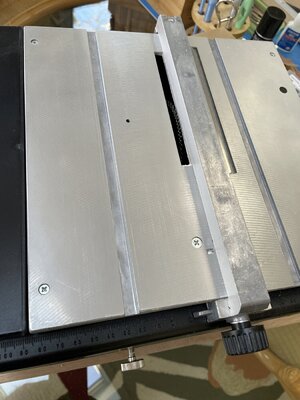
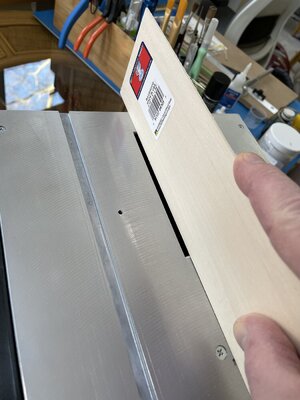
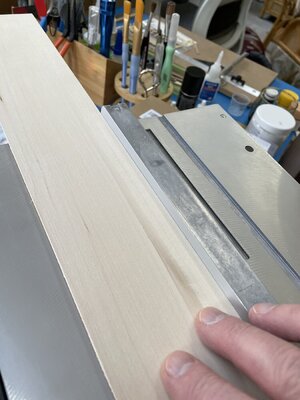
I didn’t want to use any stock material from my kit for fear of running out when it’s called for. So, I made it from 3/16” thick basswood. I set the fence on my small table saw to approximately 1.5 mm away from the blade and raised the blade a little more than 1.5 mm. Two passes on my table saw produced a 1.5 mm2 strip, which I sanded down to a little more than 1 mm2.
View attachment 364233
First pass.
View attachment 364234
Second pass.
View attachment 364235
View attachment 364229
Bravo - good way and execution !
I've left maskol on plastic aircraft canopies for months with no negative effects. I will speculate that the warning to remove after a few days is based on it's shrinkage rather than any damage to surface underneath.
I am halfway thru 1st planking on same ship, and I cannot express enough how helpful I have found your build log and tips.
I am halfway thru 1st planking on same ship, and I cannot express enough how helpful I have found your build log and tips.
This MicroMark table saw work really good. I have one too and use Proxxon disk with adapter.
Hi Fights-On,I've left maskol on plastic aircraft canopies for months with no negative effects. I will speculate that the warning to remove after a few days is based on it's shrinkage rather than any damage to surface underneath.
I am halfway thru 1st planking on same ship, and I cannot express enough how helpful I have found your build log and tips.
Thanks so much for your comments!
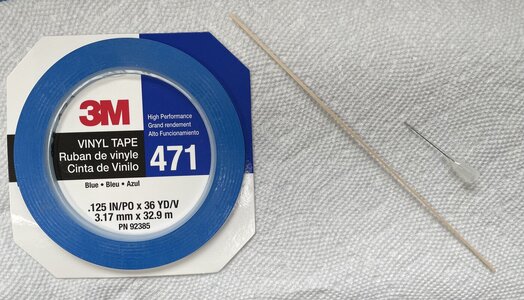
If you decide to add the wood batten at the waterline, I thought I should add a little more about how I attached it to the hull. The strip of wood is so thin and flexible that I think it would be difficult to apply it in a straight line along a pencil line, especially when dealing with glue.
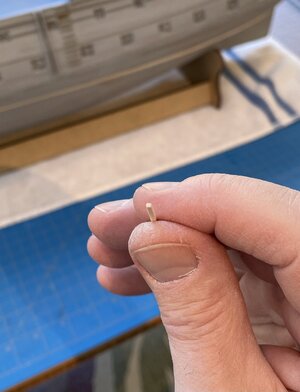
I first used vinyl masking tape along the pencil line. It’s much easier to lay the tape down than the strip of wood, and if the tape is not straight, you can just move it. The tape has just the right thickness that you can push the strip of wood against it as you are gluing it. I applied a small blob of CA glue on a polystyrene sheet and used a hypodermic needle to pick up and apply a few inches at time to the strip. The vinyl tape will give a nice straight line for the wood batten.
