Simply brilliant ! 
-

Win a Free Custom Engraved Brass Coin!!!
As a way to introduce our brass coins to the community, we will raffle off a free coin during the month of August. Follow link ABOVE for instructions for entering.
-

PRE-ORDER SHIPS IN SCALE TODAY!
The beloved Ships in Scale Magazine is back and charting a new course for 2026!
Discover new skills, new techniques, and new inspirations in every issue.
NOTE THAT OUR FIRST ISSUE WILL BE JAN/FEB 2026
You are using an out of date browser. It may not display this or other websites correctly.
You should upgrade or use an alternative browser.
You should upgrade or use an alternative browser.
HMS Vanguard 1787 1:72 scale by ADoyon - First Build
- Thread starter ADoyon
- Start date
- Watchers 52
-
- Tags
- amati vanguard victory models
Good morning.Beautiful. You pullled off a difficult task exceptionally well. Cheers GrantThis latest effort on my build was framing fifty-six gun ports, which I found to be one of the more difficult tasks. Each gun port frame is made from eight 1x6 mm strips. Strips were glued in pairs to form 12 mm wide sills. I framed the upper gunports in sections, horizontal sills first, then the vertical sills. The lower gun port frames needed to be constructed as a complete unit because I was gluing to a narrow edge in the opening.
View attachment 302507
View attachment 302508
View attachment 302509
View attachment 302510
View attachment 302511
View attachment 302512
View attachment 302513
View attachment 302514View attachment 302515
Looks fantastic! Great job! 
Very good and accurate work - Bravo
Hi Andre,
I have been following your build log as I am building Vanguard too. I noticed that this is your first build and like others am very imp by your efforts so far.
Havent seen a post for nearly 6 months. I hope you are ok, and would love to see more progress pictures and building insights.
I have been following your build log as I am building Vanguard too. I noticed that this is your first build and like others am very imp by your efforts so far.
Havent seen a post for nearly 6 months. I hope you are ok, and would love to see more progress pictures and building insights.
Hi Chestcutter,Hi Andre,
I have been following your build log as I am building Vanguard too. I noticed that this is your first build and like others am very imp by your efforts so far.
Havent seen a post for nearly 6 months. I hope you are ok, and would love to see more progress pictures and building insights.
Everything is fine here with me. Thank you for asking. Spring and summer occupy much of my time with outdoor activities, landscape maintenance, some exterior home renovations, and summer activities with family and grandchildren. I am now very anxious to get back to ship modeling. Since my last post in April, I completed the installation of the main wale and chain wale on the starboard side. I hope to post some photos soon.
Andre
Looking forward to seeing how she's developed.Hi Chestcutter,
Everything is fine here with me. Thank you for asking. Spring and summer occupy much of my time with outdoor activities, landscape maintenance, some exterior home renovations, and summer activities with family and grandchildren. I am now very anxious to get back to ship modeling. Since my last post in April, I completed the installation of the main wale and chain wale on the starboard side. I hope to post some photos soon.
Andre
Björn
Hello Andre, first of all congratulations, I wish you all the best and a Happy Birthday  . Hope you are having a wonderful day.
I have just caught up with you build log and have enjoyed it. Beautiful planking.
BTW great view from you house. I can imagine there is a lot to do in summertime.
Hope to see some photo's soon again.
 . Hope you are having a wonderful day.
I have just caught up with you build log and have enjoyed it. Beautiful planking.
BTW great view from you house. I can imagine there is a lot to do in summertime.
Hope to see some photo's soon again.
Hallo @ADoyonFirst Build: Amati HMS Vanguard 1787, 1:72 scale. I appreciate the opportunity to share my first build with the SOS community. I have very limited experience with wood ship modeling and hope to receive valuable advice from members. So, all tips and comments are welcome. A little background about myself: I am a retired engineer, age 74, and now find that I have some time to to spend on a build. I started building the Billing Boats Cutty Sark model 50 years ago, but never finished and gave that kit away. Also, about the same time I purchased the Mantua Sergal HMS Victory, which I still have and have not started. The HMS Victory looks a bit daunting with plans in Italian and limited instructions in English. I became interested in building a model of the BlueJacket version of the USS Constitution since I live 30 miles south of Boston and I can visit the ship often. While researching wood ship modeling on the internet I found Robert Hunt’s Practicums on building various wood model kits. I contacted Bob to ask his opinion about this kit. He mentioned that the BlueJacket version is the 1812 configuration and the actual ship as configured today may not be helpful. The BlueJacket kit is also at a smaller scale than the Vanguard which makes the build a little more difficult. Bob suggested that if I really wanted to build a large complex kit to build the Amati HMS Vanguard and to purchase his practicum on building the kit. I did purchase his practicum and realize that it will be of considerable value to my effort. He explains all steps in great detail with techniques and tools to use. I believe his website, www.lauckstreetshipyard.com, is a valuable resource for novice ship modelers. I will be following the kit’s instructions as well as Bob Hunt’s practicum. So, now on with the build…
we wish you all the BEST and a HAPPY BIRTHDAY

Happy birthday my friend!
Hello Herman,Hello Andre, first of all congratulations, I wish you all the best and a Happy Birthday. Hope you are having a wonderful day.
I have just caught up with you build log and have enjoyed it. Beautiful planking.
BTW great view from you house. I can imagine there is a lot to do in summertime.
Hope to see some photo's soon again.
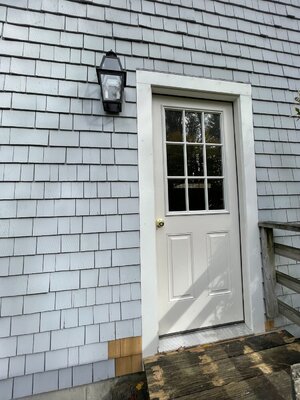
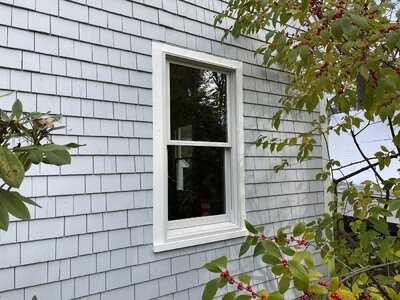
Thank you very much for the nice birthday wish. Yes, there is much to do around the home when the weather is good. Now that I am retired, I am the full-time gardener and handyman. Just finished replacing/installing two new windows and a door in my garage. I am very anxious to get back to ship building. I'll post some new photos this week where I left off last spring. Thanks for watching.
Happy Birthday, Andre!  Have a wonderful day!
 Have a wonderful day!
Happy birthday Andre'
Happy belated birthday Andre. Perhaps if you have not ship building photos you can post images of your new window and door. Lol.
Actually I really want to see your ship. When you are ready.
Actually I really want to see your ship. When you are ready.
Thank you Chestcutter for the birthday wish!Happy belated birthday Andre. Perhaps if you have not ship building photos you can post images of your new window and door. Lol.
Actually I really want to see your ship. When you are ready.
A little painting and installing widow grilles and I can get back to ship modeling.
Now let me post some photos of where I left off with my Vanguard last spring.
The following photos are where I left off last Spring. I added the wales on the starboard side, assembled the galleries and temporarily pinned them in position to help with knowing where to trim the wales.
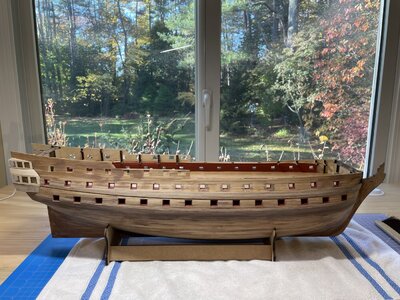
I used a pair of dividers to transfer the measurements from the ship's plan to the hull by measuring from the gunport openings. As you can see, the lower main wale passes through the gun port openings and needed to be trimmed away.
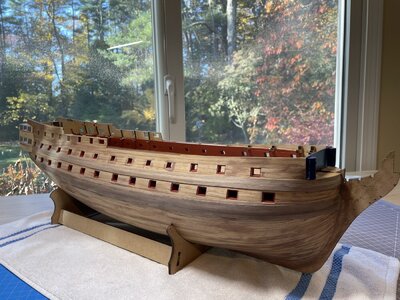
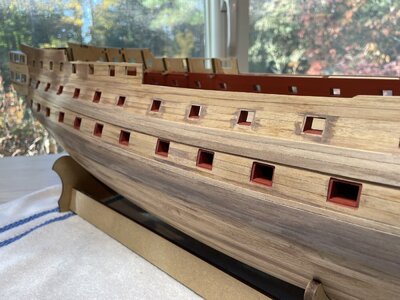
A small detail that I thought might be worth mentioning because I almost missed it. There are five gunports on the upper gun deck where the frames are flush with the outer hull. The reason being is that there are no gunport lids at these locations.
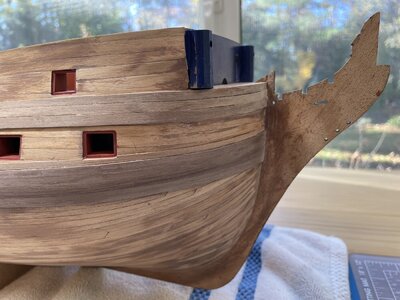
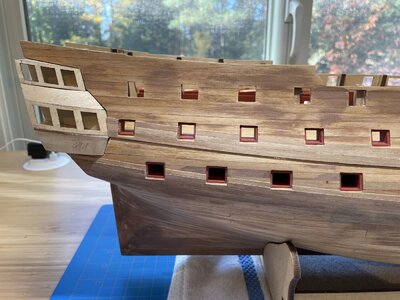
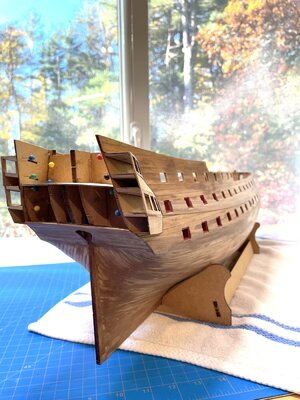
The lowest strake for the main wale bends up sharply at the counter and is tapered to blend into the counter surface.

I used a pair of dividers to transfer the measurements from the ship's plan to the hull by measuring from the gunport openings. As you can see, the lower main wale passes through the gun port openings and needed to be trimmed away.


A small detail that I thought might be worth mentioning because I almost missed it. There are five gunports on the upper gun deck where the frames are flush with the outer hull. The reason being is that there are no gunport lids at these locations.


The lowest strake for the main wale bends up sharply at the counter and is tapered to blend into the counter surface.
Wow, Andre you haven’t disappointed. It looks great.
I am preparing to start the second planking and will follow your example of marking the outline of the side galleries and planking to the line.
What glueing technique did you use for second planking and wales?
I noticed some of your walnut planks have butt joints. Why did you do that and how did you decide when to do a joint?
I am a fan of your work.
Thank you Chestcutter for the compliment!Wow, Andre you haven’t disappointed. It looks great.
I am preparing to start the second planking and will follow your example of marking the outline of the side galleries and planking to the line.
What glueing technique did you use for second planking and wales?
I noticed some of your walnut planks have butt joints. Why did you do that and how did you decide when to do a joint?
I am a fan of your work.
For the second planking I used a cyanoacrylate glue, Loctite 403. Paul Kattner (dockattner), who is building the stunningly beautiful VASA ship, recommended using this glue after I developed an allergic reaction to ZAP-A-GAP medium CA+. Both glues work great and set in 5-8 seconds for ZAP-A-GAP and a few seconds longer for the Loctite. My technique was to taper the plank as needed to fit especially at the bow, then dry fitting the plank against the hull while drawing a pencil line along the edge so that I knew where to apply the glue. I also beveled one edge of the plank along the entire length with a small file to try and have a tight fit with the previous plank. Starting at one end I would apply glue to the hull surface for about one-fourth of the length at a time, then pressing and holding the plank in place for a few seconds as I worked along the length. The thing that is great about using CA glue is that it sets quickly, and you do not have to pin the planks. I have seen modelers describe that they used dots of CA glue and PVA glue for strength. I can say that the CA glue bonds well. Trying to remove a plank that was not set properly is difficult.
The reason I used butt joints is because the walnut planks are not very flexible laterally. I tried to keep the planks bending naturally. At a location I might see that it is difficult to keep the plank tight against the previous plank. This is where a butt joint helped me to have a little more wiggle to keep the planks tight together. There were no special locations for the butt joints. The other reason I used butt joints is because I glued the stern post and stem piece to the frame, and it would be difficult to fit a single plank between the two ends. The reason I glued the stern post, walnut keel and stem was to cut a rabbet for the planks to fit into. I do not think it is necessary to do but I thought it might help give a cleaner looking edge. I also shaved the MDF frame at the stern post so that the total thickness of finished planking was the same thickness of the stern post. The second layer planking butts up against the stern post and is flush with the stern post.
Please take out of your list-el capiThank you Chestcutter for the compliment!
For the second planking I used a cyanoacrylate glue, Loctite 403. Paul Kattner (dockattner), who is building the stunningly beautiful VASA ship, recommended using this glue after I developed an allergic reaction to ZAP-A-GAP medium CA+. Both glues work great and set in 5-8 seconds for ZAP-A-GAP and a few seconds longer for the Loctite. My technique was to taper the plank as needed to fit especially at the bow, then dry fitting the plank against the hull while drawing a pencil line along the edge so that I knew where to apply the glue. I also beveled one edge of the plank along the entire length with a small file to try and have a tight fit with the previous plank. Starting at one end I would apply glue to the hull surface for about one-fourth of the length at a time, then pressing and holding the plank in place for a few seconds as I worked along the length. The thing that is great about using CA glue is that it sets quickly, and you do not have to pin the planks. I have seen modelers describe that they used dots of CA glue and PVA glue for strength. I can say that the CA glue bonds well. Trying to remove a plank that was not set properly is difficult.
The reason I used butt joints is because the walnut planks are not very flexible laterally. I tried to keep the planks bending naturally. At a location I might see that it is difficult to keep the plank tight against the previous plank. This is where a butt joint helped me to have a little more wiggle to keep the planks tight together. There were no special locations for the butt joints. The other reason I used butt joints is because I glued the stern post and stem piece to the frame, and it would be difficult to fit a single plank between the two ends. The reason I glued the stern post, walnut keel and stem was to cut a rabbet for the planks to fit into. I do not think it is necessary to do but I thought it might help give a cleaner looking edge. I also shaved the MDF frame at the stern post so that the total thickness of finished planking was the same thickness of the stern post. The second layer planking butts up against the stern post and is flush with the stern post.


