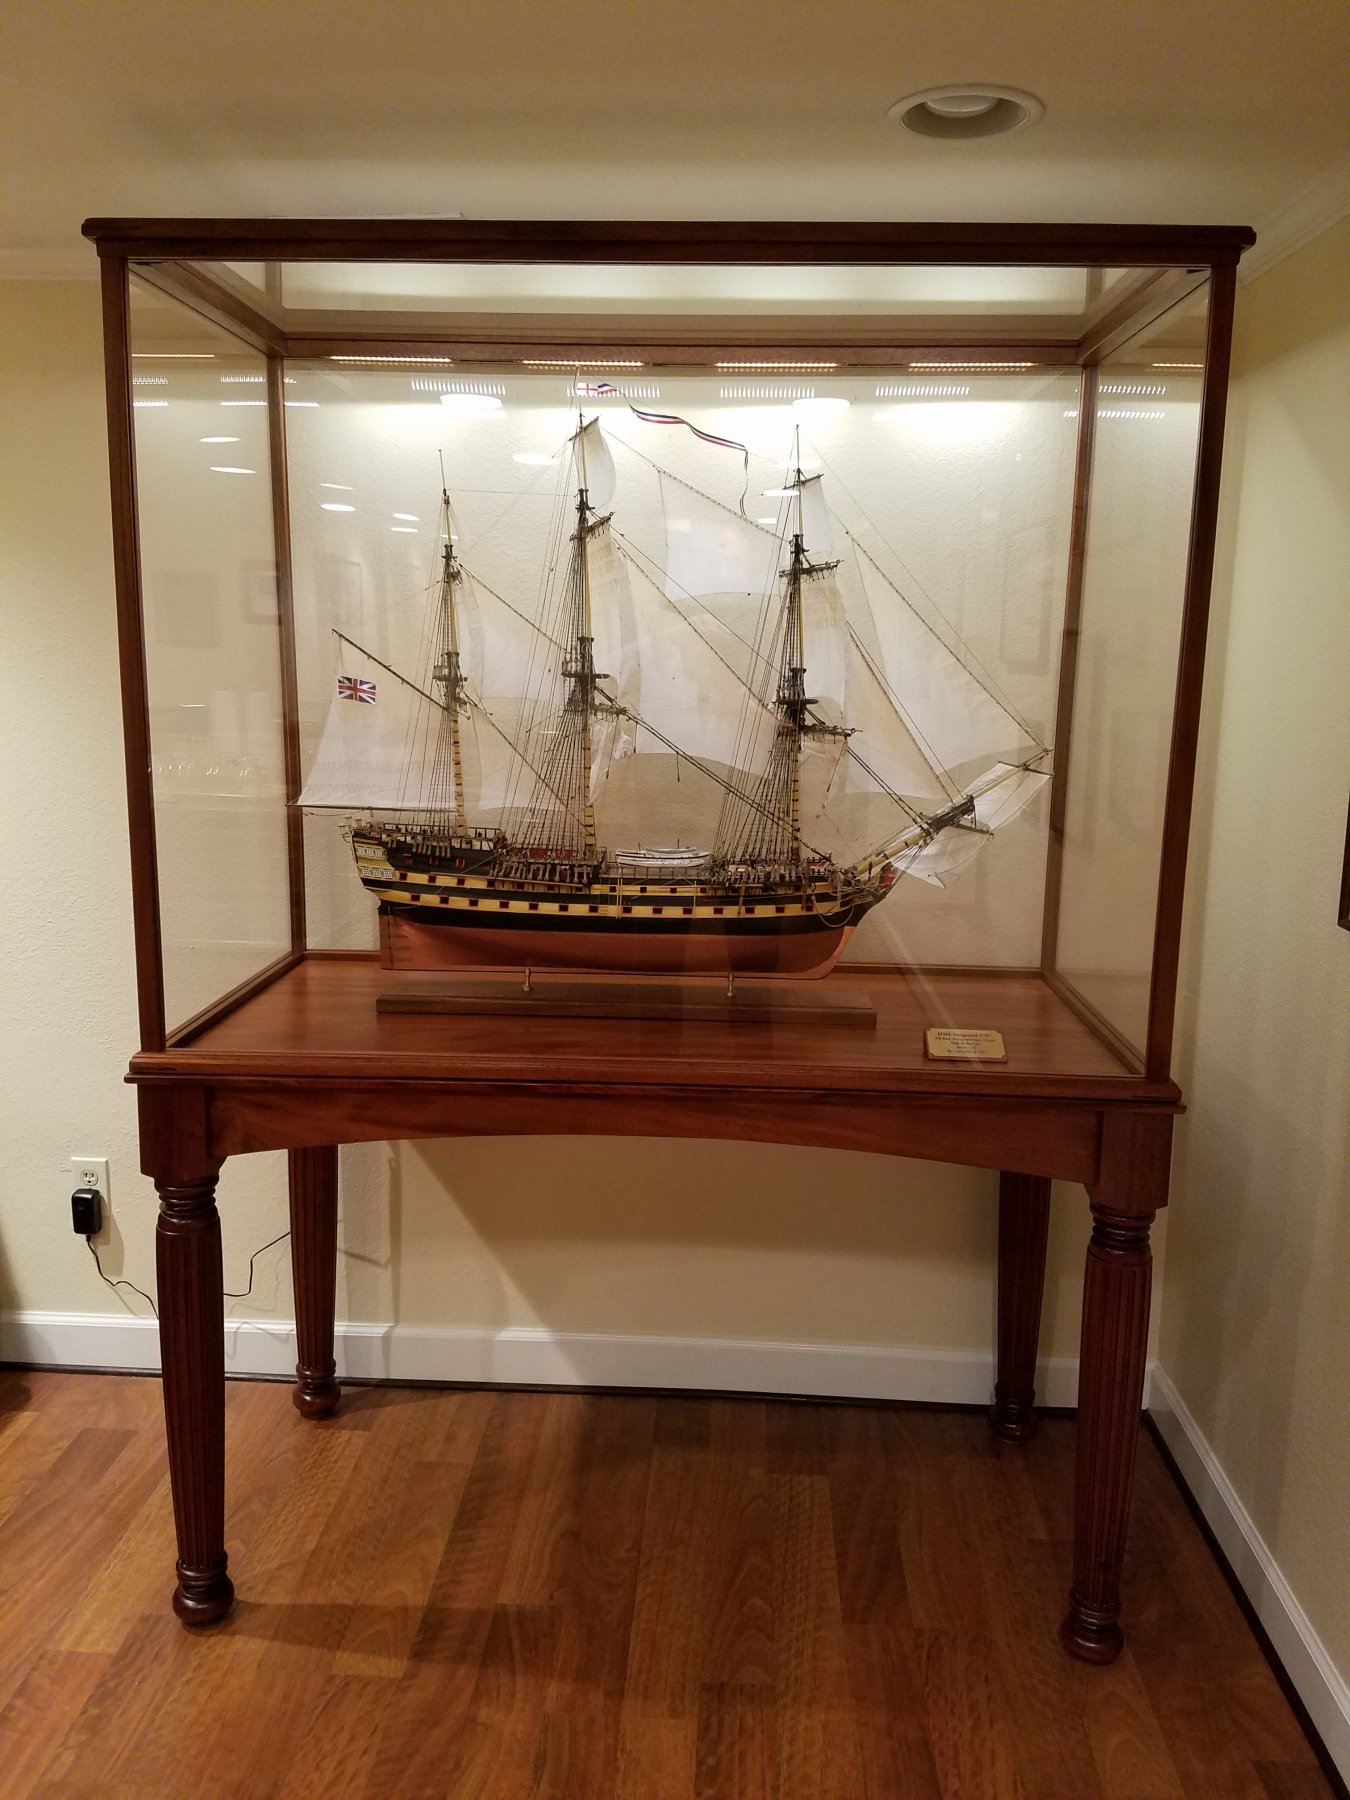
HMS Vanguard 1787 1:72 scale by ADoyon - First Build

Awesome! Have a blessed birthday Andre!
Any progress since completing your hull?
Hi Paul,
Thanks for the birthday greeting! Progress on my Vanguard has been a little slow during the summer months due to other home projects and also because I developed an allergy to the CA glue I was using for the second layer planking. The glue caused nasal congestion making it difficult to sleep at night. I didn't make the connection to the glue at first because I was able to complete the planking on one side without noticing any reaction. However, part way through working on the second side I realized it was the glue. So, I'm thinking the effects of the glue are cumulative. Hopefully those effects wear off after some time and I can work with the glue again for short periods of time. I did finish the second side second layer planking and just trimming away the gunport openings now. I will be posting photos soon. Looking forward to getting back to model ship building full time. Winter months should be more productive.
Good to hear from you Andre. Turns out I have your solution. Search for this: Loctite 40340 Prism Instant Adhesive, Low Odor/Low Bloom, 20 g btl. Its quite expensive (about $25 on Amazon) but it should solve your allergy problem (one I share).
 
Paul, thanks for the tip. I'll give it a try. I'll be working on the ship's quarter galleries next with PVA glue so that will give me break from using CA glue. Again, hoping to post some photos soon with comments.
 
Excellent build. Will go back to the beginning to have a deeper view and read some of the comments. Only one question? As I have seen on Pegasus and now, there are no sail added. Do they not come with the Kit -at least drawings 1:1..I know that without sails you save about 50% or more un Riggen, but gain a lot. sorry for the comment
 
View attachment 247394

View attachment 247395

View attachment 247396

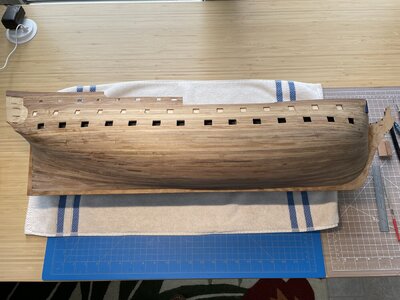
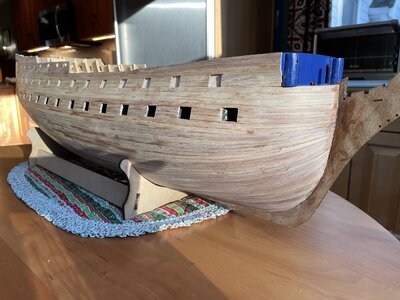
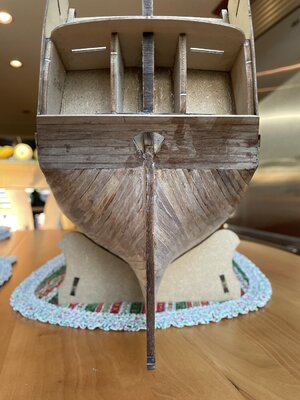
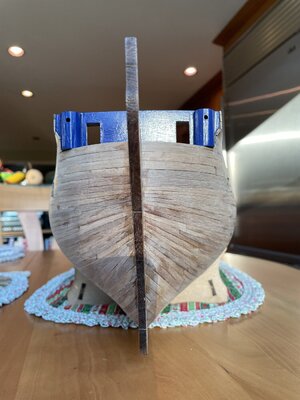
Hello everyone. I completed the second layer planking on one side. This is my first build, so I didn’t know what to expect. I thought the walnut planks would be more difficult to install than the lime wood first layer planking. The walnut planks are thinner and narrower than the lime wood planks and do bend easier around the curve of the hull, however, they are stiffer when trying to bend laterally. I think there will always be at least a little lateral bending when installing the planks if you want a tight fit against the previous plank. With that said, I believe the correct approach is to try to install the planking as they bend naturally around the hull. The planking bands I drew earlier in a previous post really helped me see how much taper to apply and where I needed to use drop planks at the bow and stealers at the stern.
Awesome planking- setting up for a good ship. Nice one Andre
 
Excelente Work done, special the Planking. the conly thing I do not lige are the Dummi cun ports-sorry.
Hi El Capi
Thanks for the compliment. As for the dummy gunport, the kit does come with dummy guns. I think if the interior is painted black and dummy guns are inserted it would look OK. Gunports have not been framed out yet so this might also improve the appearance when completed. Also, to answer your previous question about whether or not the kit comes with sails, it does include the material to make the sails along with full scale plans. There is a good review of the kit in the links below.
 
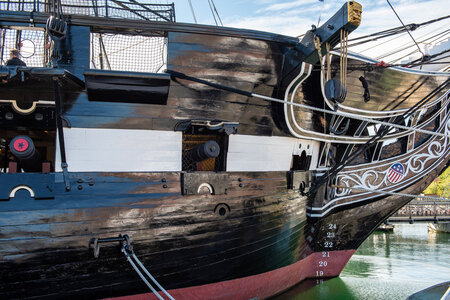
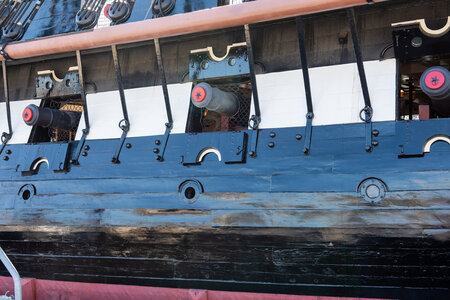
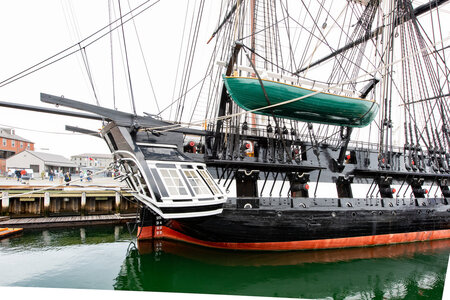
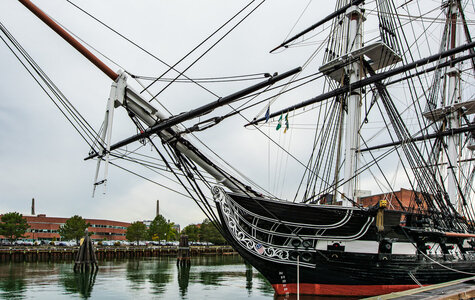
Now I’m thinking about the next step in Bob Hunt’s practicum. He calls for an application of walnut wood filler over the entire surface of the hull and sanded, then followed by a coat of primer paint and sanded and more wood filler where some planks are showing through the paint and sanded again. This appears to leave a very smooth hull. I have seen some models where it looks like the planking shows through the paint. I visited the USS Constitution again to see what the hull of an 18th century ship looks like. The Constitution, 1797, is from the same period as the Vanguard so I imagine ship’s hulls would look similar. Below are some photos of the USS Constitution.

Constitution 1.jpg

Constitution 2.jpg

Constitution 3.jpg

Constitution 4.jpg

Constitution 5.jpg

Since this is my first build, I depend on experienced modelers to guide me. If I were to try and allow some of the planking to show through the paint I would want it to be subtle and use wood filler to correct major surface irregularities. Any opinions from the SOS community? Thanks, Andre.
 
I'm a landlubber so I'm not so sure my opinion matters. Fidelity to scale is tricky here isn't it? One passing thought: the ship you are looking at is several hundred years old. Would the strakes have been more level / smooth when she was fresh off the factory floor? How does that inform your modelling practices?
 
I'm a landlubber so I'm not so sure my opinion matters. Fidelity to scale is tricky here isn't it? One passing thought: the ship you are looking at is several hundred years old. Would the strakes have been more level / smooth when she was fresh off the factory floor? How does that inform your modelling practices?
Paul,

I know what you mean about scale, and I thought about it also. I have the book Anatomy of the Ship HMS Victory with scale drawings. If the scale in the book is accurate, taking a measurement of a plank width at 1/48 scale converts to 9 3/4" wide. My 5mm Vanguard planks at 1/72 scale convert to a little over 14" wide. Assuming HMS Victory and HMS Vanguard had similar plank widths my Vanguard planks are wider than the actual ship's planks. However, I thought that seeing something that resembles the ship's planking might look more realistic...and also shows some of the work that is involved in building this model. Maybe the best thing for me is to follow Bob Hunt's practicum and not regret doing something that I should have done. I was just wondering what other modelers do when I asked the question.

As for the USS Constitution the ship has gone through many restorations in it's more than 200 years since launching. The planking that you see is most likely not the original planking. I would like to think though that any construction/renovation that was done to the ship was done in accordance with the construction techniques at the time that it was built.

Thanks for your thoughts.
Andre
 
I will say this, if you apply scale, your sanding tools or blocks would be close to the size of one plank width! So the real ship would have been sanded and leved similar to you using a postage stamp sized sanding block. ;)
That said, when people use large sanding blocks and pieces of paper to achieve a perfect hull on a model, this would never be possible on a full size ship.
In conclusion it’s is a matter of what you are trying to achieve. Realism at scale, or a cosmetically perfect representation of the ship? Or possibly a compromise in between? I personally never add filler to the final planking. I always want to see the planks, regardless of whether they are stained or painted. And if I paint the hull, I use thinned out water base paints that will not fill in the wood grain too much. I would never spray paint a thick layer of paint to produce a smooth hull with no visible planks. Because I prefer to go for a compromise between scaled realism and cosmetic perfection! ;) Just like the pictures of the Constitution, you clearly see all of the planks.
That’s my opinion and approach. I’m sure you would hate to cover up all of your hard work! ;)
 
Paul,

I know what you mean about scale, and I thought about it also. I have the book Anatomy of the Ship HMS Victory with scale drawings. If the scale in the book is accurate, taking a measurement of a plank width at 1/48 scale converts to 9 3/4" wide. My 5mm Vanguard planks at 1/72 scale convert to a little over 14" wide. Assuming HMS Victory and HMS Vanguard had similar plank widths my Vanguard planks are wider than the actual ship's planks. However, I thought that seeing something that resembles the ship's planking might look more realistic...and also shows some of the work that is involved in building this model. Maybe the best thing for me is to follow Bob Hunt's practicum and not regret doing something that I should have done. I was just wondering what other modelers do when I asked the question.

As for the USS Constitution the ship has gone through many restorations in it's more than 200 years since launching. The planking that you see is most likely not the original planking. I would like to think though that any construction/renovation that was done to the ship was done in accordance with the construction techniques at the time that it was built.

Thanks for your thoughts.
Andre
I did the same scale calculations on my ship (my ship is 1:65) and ended up making the same decision you did (5 mm strakes). I did cut those strips into 10-14 foot boards (at scale) but I have to concede it's not quite perfect. When I can I am trying to be a stickler for scale as I add details but its not easy. I have never contemplated a painted hull and whether it is better to add filler, etc.

You made a sample board for caulking - perhaps some trials for the hull finish?
 
I will say this, if you apply scale, your sanding tools or blocks would be close to the size of one plank width! So the real ship would have been sanded and leved similar to you using a postage stamp sized sanding block. ;)
That said, when people use large sanding blocks and pieces of paper to achieve a perfect hull on a model, this would never be possible on a full size ship.
In conclusion it’s is a matter of what you are trying to achieve. Realism at scale, or a cosmetically perfect representation of the ship? Or possibly a compromise in between? I personally never add filler to the final planking. I always want to see the planks, regardless of whether they are stained or painted. And if I paint the hull, I use thinned out water base paints that will not fill in the wood grain too much. I would never spray paint a thick layer of paint to produce a smooth hull with no visible planks. Because I prefer to go for a compromise between scaled realism and cosmetic perfection! ;) Just like the pictures of the Constitution, you clearly see all of the planks.
That’s my opinion and approach. I’m sure you would hate to cover up all of your hard work! ;)
Dean,

Thanks so much for your advice! Your tips on sanding and painting is exactly what I was hoping for from an experienced modeler. I'm glad you mentioned the wood filler and how you paint your hull by thinning the paint. I will also go for the compromise approach. If needed, I can always add more paint.
Thanks again,
Andre
 
I did the same scale calculations on my ship (my ship is 1:65) and ended up making the same decision you did (5 mm strakes). I did cut those strips into 10-14 foot boards (at scale) but I have to concede it's not quite perfect. When I can I am trying to be a stickler for scale as I add details but its not easy. I have never contemplated a painted hull and whether it is better to add filler, etc.

You made a sample board for caulking - perhaps some trials for the hull finish?
Paul,
Thanks for the tip. If I don't make a sample I can experiment a little below the waterline since it will be ,covered by copper plating.
 
Andre,
I just found your build log and I have to say. First time build, very nicely done on a very ambitious project. Well done sir!

Ron
 
Back
Top