-

Win a Free Custom Engraved Brass Coin!!!
As a way to introduce our brass coins to the community, we will raffle off a free coin during the month of August. Follow link ABOVE for instructions for entering.
-

PRE-ORDER SHIPS IN SCALE TODAY!
The beloved Ships in Scale Magazine is back and charting a new course for 2026!
Discover new skills, new techniques, and new inspirations in every issue.
NOTE THAT OUR FIRST ISSUE WILL BE JAN/FEB 2026
You are using an out of date browser. It may not display this or other websites correctly.
You should upgrade or use an alternative browser.
You should upgrade or use an alternative browser.
HMS Victory 1:96 based on Shipyard
This build-log is a GEM! Wonderfully inventive techniques and superb results. All extremely impressive!
I particularly like your method of making gratings. This is a great way to go, if one is mot equipped with, or simply doesn’t have shop space for a Preac saw. If my kit-bash experiment with stock, plastic kit gratings doesn’t work, I will give your method a go.
I loved all of the great cabin furniture. Just great, great stuff. I will be following with great interest!
- Joined
- Sep 13, 2018
- Messages
- 23
- Points
- 78

Hello.
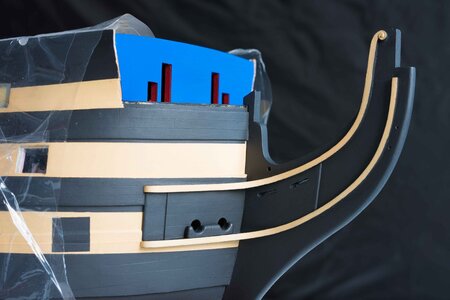
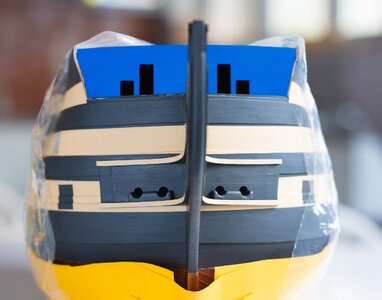
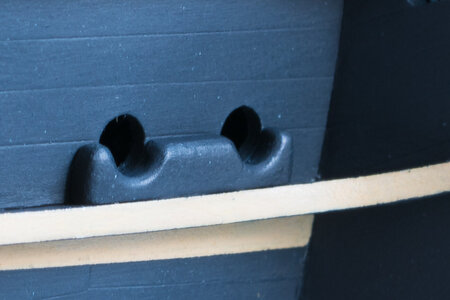
I haven't been here for almost two years, but I'm still alive and so is my Victory. As you can see in the photos, I decided to change the concept of the model and make it with the lids closed. I saw a model made in such a way and I liked this „checkerboard pattern” on the the sides so much, that I decided to do it also in my ship. So there will be no visible guns on the two lower decks.
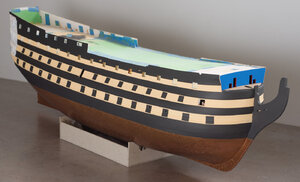
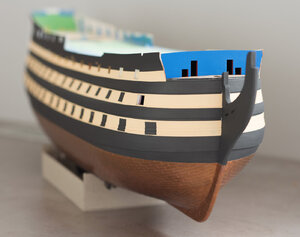
Before painting the model I've made the main, middle and upper wales on the sides.
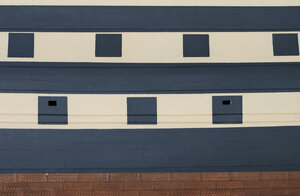
In Victory the main wale was put on in „anchor stock” planking. Each plank was fashioned with a double taper from the center of one edge, so that the planks laid side by side looked something like the stock of the anchor (see pict. below)

The middle wale was put on in similar, but not the same pattern. One edge of the plank was tapered, but insted of the tapers being equal in length one was quite twice length of the other (see pict. below)

Some people may notice, that the shape of the planks I've made on the main wale is slightly different than on the other models. In many models, the main and the middle wale are arranged in the same way, as in the second picture. Various sources give different information about the arrangement of these planks. I made them according to the description given in Longridge's book. Interestingly, on the current ship you will not notice the wales arranged in the so-called anchor stock.
To be continued...
I haven't been here for almost two years, but I'm still alive and so is my Victory. As you can see in the photos, I decided to change the concept of the model and make it with the lids closed. I saw a model made in such a way and I liked this „checkerboard pattern” on the the sides so much, that I decided to do it also in my ship. So there will be no visible guns on the two lower decks.


Before painting the model I've made the main, middle and upper wales on the sides.

In Victory the main wale was put on in „anchor stock” planking. Each plank was fashioned with a double taper from the center of one edge, so that the planks laid side by side looked something like the stock of the anchor (see pict. below)

The middle wale was put on in similar, but not the same pattern. One edge of the plank was tapered, but insted of the tapers being equal in length one was quite twice length of the other (see pict. below)
Some people may notice, that the shape of the planks I've made on the main wale is slightly different than on the other models. In many models, the main and the middle wale are arranged in the same way, as in the second picture. Various sources give different information about the arrangement of these planks. I made them according to the description given in Longridge's book. Interestingly, on the current ship you will not notice the wales arranged in the so-called anchor stock.
To be continued...
Last edited:
The wales are looking very good - but especially also the copper sheeting - great appearance especially in this scale.
For everybody interested, take a look at post #14 of this log, where the construction method is shown....

For everybody interested, take a look at post #14 of this log, where the construction method is shown....


Fabulous, clean work! It is hard to believe this is card!
Hi Paragraf,
will these be any use to you on the painting front ?
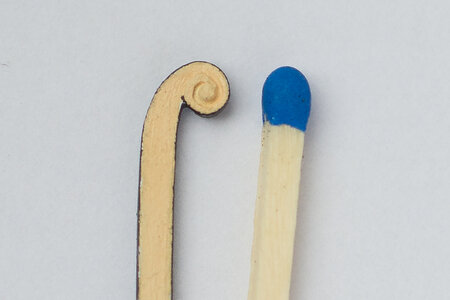
Very impressive workmanship on something that small , I only realised what size it was when I saw the matchstick in the Admirals cabin! Well done that man !
Very impressive workmanship on something that small , I only realised what size it was when I saw the matchstick in the Admirals cabin! Well done that man !
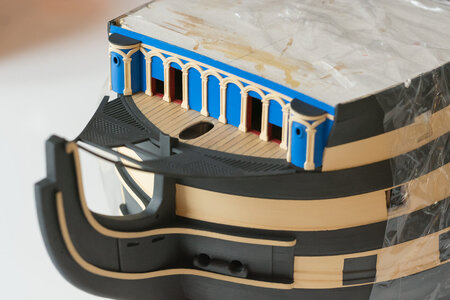
Hallo @ParagrafHello. I’d like to introduce You the building process of my cardstock (pressboard) HMS Victory.
The first thing was to make a ship’s frames. The frames I made from 1 mm cardstock, except the bottom of hull (beneath the waterline), where the frames are 3 mm thick. To increase the thickness I glued additional strips of paper on each frame’s side. I made this because I wanted to have a wider surface to glue the first layer of “plank”.
View attachment 53250
View attachment 53251
All sticking out parts of frames I soaked using CA glue. It helps strengthen them to avoid accidentally damage.
View attachment 53252
I glued two pine slats, one on each side, following almost from bow to stern, to keep the straight line of the paper “keel”.
View attachment 53255
View attachment 53256
Each frame was initially “sanded”, but without using sandpaper. I made this by using the colourless water glue, putting it on each frame’s edge, to soften this element. Then, with a wooden spatula I smoothed the frame edges.
View attachment 53260
Between the frames I glued cardstock pieces (2 mm thick). It helps to avoid “falling” the paper planks between the frames, because they are not as stiff and hard as wooden. It’s hard to believe, but there are about 500 pieces.
View attachment 53263
View attachment 53264
Finally, the view of the first "planking"
View attachment 53265
View attachment 53266
View attachment 53267
we wish you all the BEST and a HAPPY BIRTHDAY

I will be looking for opportunities to use card stock in the future!
Hallo @ParagrafHello. I’d like to introduce You the building process of my cardstock (pressboard) HMS Victory.
The first thing was to make a ship’s frames. The frames I made from 1 mm cardstock, except the bottom of hull (beneath the waterline), where the frames are 3 mm thick. To increase the thickness I glued additional strips of paper on each frame’s side. I made this because I wanted to have a wider surface to glue the first layer of “plank”.
All sticking out parts of frames I soaked using CA glue. It helps strengthen them to avoid accidentally damage.
I glued two pine slats, one on each side, following almost from bow to stern, to keep the straight line of the paper “keel”.
Each frame was initially “sanded”, but without using sandpaper. I made this by using the colourless water glue, putting it on each frame’s edge, to soften this element. Then, with a wooden spatula I smoothed the frame edges.
Between the frames I glued cardstock pieces (2 mm thick). It helps to avoid “falling” the paper planks between the frames, because they are not as stiff and hard as wooden. It’s hard to believe, but there are about 500 pieces.
Finally, the view of the first "planking
we wish you all the BEST and a HAPPY BIRTHDAY

- Joined
- Aug 26, 2020
- Messages
- 72
- Points
- 113

Cholernie dobre. (Damn good). 
Hallo @ParagrafHello. I’d like to introduce You the building process of my cardstock (pressboard) HMS Victory.
The first thing was to make a ship’s frames. The frames I made from 1 mm cardstock, except the bottom of hull (beneath the waterline), where the frames are 3 mm thick. To increase the thickness I glued additional strips of paper on each frame’s side. I made this because I wanted to have a wider surface to glue the first layer of “plank”.
View attachment 53250
View attachment 53251
All sticking out parts of frames I soaked using CA glue. It helps strengthen them to avoid accidentally damage.
View attachment 53252
I glued two pine slats, one on each side, following almost from bow to stern, to keep the straight line of the paper “keel”.
View attachment 53255
View attachment 53256
Each frame was initially “sanded”, but without using sandpaper. I made this by using the colourless water glue, putting it on each frame’s edge, to soften this element. Then, with a wooden spatula I smoothed the frame edges.
View attachment 53260
Between the frames I glued cardstock pieces (2 mm thick). It helps to avoid “falling” the paper planks between the frames, because they are not as stiff and hard as wooden. It’s hard to believe, but there are about 500 pieces.
View attachment 53263
View attachment 53264
Finally, the view of the first "planking"
View attachment 53265
View attachment 53266
View attachment 53267
we wish you all the BEST and a HAPPY BIRTHDAY

Happy Birthday, Paragraf! It is nice to be reminded what a lovey model this is!
Out standing. I wish I had your knowledge.
Hallo @ParagrafHello. I’d like to introduce You the building process of my cardstock (pressboard) HMS Victory.
The first thing was to make a ship’s frames. The frames I made from 1 mm cardstock, except the bottom of hull (beneath the waterline), where the frames are 3 mm thick. To increase the thickness I glued additional strips of paper on each frame’s side. I made this because I wanted to have a wider surface to glue the first layer of “plank”.
we wish you all the BEST and a HAPPY BIRTHDAY


