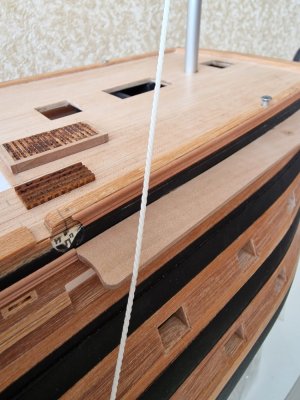
Painting Rigging Threads.
1. I'll demonstrate the painting process using the threads I currently work with:
Gutermann scala 360 color 111, Amann Serafil 120 color 1000.
This can also be done with similar types of thread: Gutermann Tera180 color 111.
I do not use colored threads from these manufacturers either, as all polyester threads have a shine, which I do not like.
2. All the threads I use are in a milky color. Therefore, the results I show apply specifically to this color only.
3. I follow Dmitry Shevelev’s method for coloring, using oil-based artist paints, but with special preparation beforehand.
4. There are two color combination options. I’ll start with the one I initially used, but I’ll be painting the rigging on my ship using the second option. I like both, so I’ll show both.
5. The painting process involves dipping the thread into a reservoir of paint with a brush and pulling the thread under the brush while it is submerged in the paint. After a couple of minutes, we let the paint soak in and then dab off the excess with a paper towel. We don't wipe; we dab.
6. The threads take a couple of days to dry, after which they can be used. For those interested, the smell completely dissipates within a month.
7. It's best to dry the threads stretched out. I tie loops at the ends of the threads and stretch them tightly between two nails fixed on a board. You could hang a weight, but the first method is more convenient.
8. After drying, the threads become slightly stiffer, but not too much. I actually like this, as it makes them easier to work with. If anyone finds this inconvenient, simply kneading them a bit will soften them up.
9. Attention! The paint does not adhere to areas glued with super glue. Therefore, gluing should only be done after painting!
Method one.
The color scheme is similar to this appearance.

To achieve the colors shown in the photo above (dark brown and reddish-brick),
we need two oil paints.

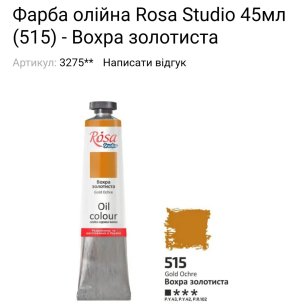
To achieve the
dark brown color (for the standing rigging), I made a test sample with the following proportions:
5 ml of linseed oil + 5 ml of solvent +
5 cm of squeezed (natural) raw umber paint.
Explanation! The solvent I use is odorless, sold in art stores, specifically for thinning oil paints. The 5 cm refers to a strip of paint squeezed through the opening, which is equal to 5 cm. To make a larger batch, simply increase all ingredients proportionally.
To achieve the reddish-brick color (for the running rigging), you need:
5 ml of linseed oil + 5 ml of solvent +
5 cm of golden ochre +
2.5 mm of (natural) raw umber (
no more!).
Explanation! If you add more umber, it will result in a completely different color, and it will be very difficult to achieve the desired shade from that. Therefore, it's better to add very small amounts.
And here is the result. By the way, in the photo, there is a color where I added more than 2.5 mm of umber (the second thread from the right in the photo). Some might prefer that specific color.

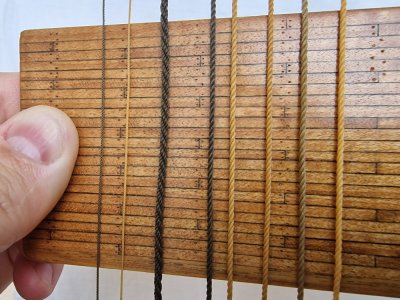
Method two.
I liked the color combination more, and it closely resembles the rigging colors on Dmitry Shevelev's 75-gun ship. I will paint my threads in these colors.
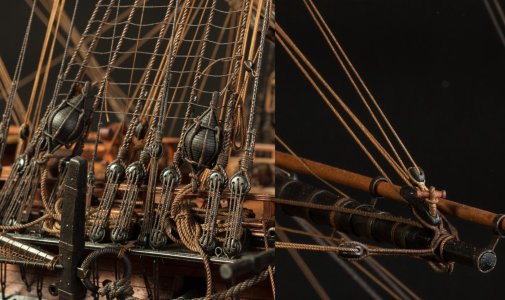
To achieve the colors shown in the photo above (dark brown and reddish-brick),
we need two oil paints.

To achieve the
dark brown color (for the standing rigging), I made a test sample with the following proportions:
5 ml of linseed oil + 5 ml of solvent +
5 cm of squeezed (natural) raw umber paint.
Explanation! The solvent I use is odorless, sold in art stores, specifically for thinning oil paints. The 5 cm refers to a strip of paint squeezed through the opening, which is equal to 5 cm. To make a larger batch, simply increase all ingredients proportionally.
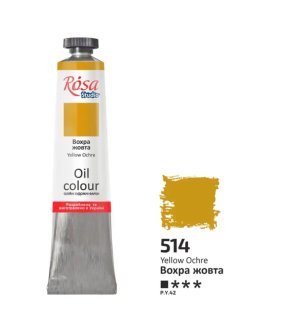
For the
running rigging, a
different ochre is needed, yellow! Here are the proportions:
5 ml of linseed oil + 5 ml of solvent +
3.5 cm of yellow ochre +
3-6 mm of raw umber (no more).
Explanation! If you add more than 7 mm of umber, the color will change. However, in this case, unlike with the golden ochre, it can be corrected by adding oil, solvent, and ochre while reducing the amount of umber. Below, I will show the difference in color between using 3 mm or 6 mm of umber.
And here is the result. I will focus on this.

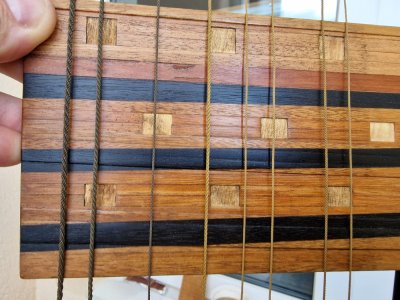
In the two photos above, in order from left to right: the first is the standing rigging (umbra); in the center, the third is yellow ochre + 3 mm of umbra; the right two are 6 mm (hence the color is slightly darker). You can actually play with the shades here. For areas with various weavings in the running rigging, you could use some with 3 mm and others with 6 mm as an option.
In the photo below, the leftmost rope features a lanyard. I made it following Shchevelev's method. First, the rope is dyed with umbra, then impregnated with cyanoacrylate for rigidity during lanyarding. After that, the lanyarding is done, followed by the painting of the finished rope. The lanyarding was done with Amann Serafil 60, so the color is slightly different after dyeing since the thread is not milk-colored but simply white. I will experiment further with this. Additionally, the lanyarding was a trial run, and it needs to incorporate thinner threads; I will discuss this more later.

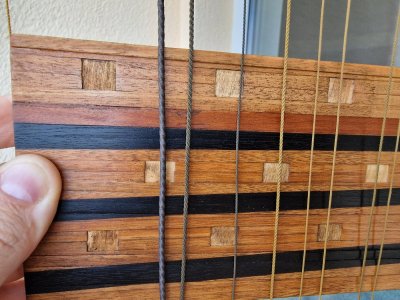
Overall, I liked the samples, and while there's still much I will try and experiment with, the result I've achieved is clear and very satisfactory to me.
If there are any questions, I'll be happy to help.


