HMS Victory [1805] 1:79 by serikoff. Started with Mantua -> Upgraded with John McKay's Anatomy.

Oh, wow. You've also switched from aviation to the navy! Previously, the site was called Serikoff Ship Models. Now the new domain is http://serikoff.ucoz.ru/. Unfortunately, apart from my review, all the information, particularly from the forum, has disappeared due to the war. I mentioned this earlier.
And speaking of my years related to aviation, here’s a photo with my teacher in the F2B class. This is control line modeling.

View attachment 480239


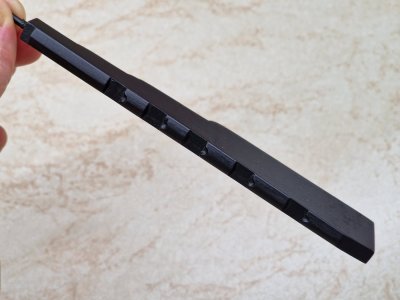
Yes, saws of such sizes are weak. I felt it myself. It cuts only up to 6-7 mm, with difficulty, and if it is thicker, it jams. But this improvement can help a lot. I think the idea will work for yours too. But if you have already taken a new one, then this is not so relevant.
Oh ok control line. I built planes for a few years now because it was something I always had an interest in but never did it, how I’ve done it ! Planes like ships take time and there’s only so much time in a life so progress gets slow it stops frequently.
Yes that’s your page I visited in the past. Keep up your modeling no matter the subject.
 
04.2024

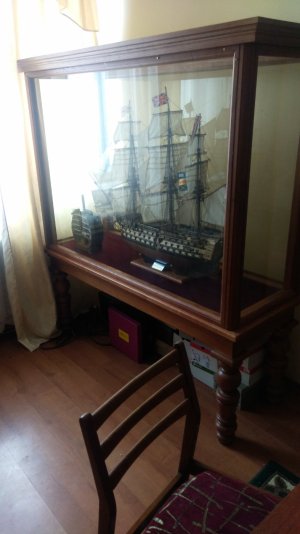
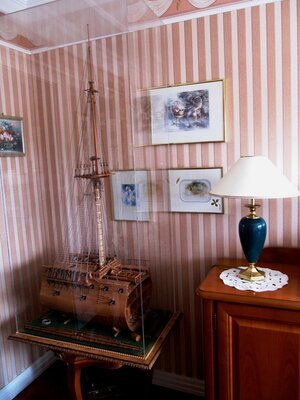
As I mentioned earlier, I decided to make a glass case to protect my model from dust and sunlight. I ordered it from an aquarium shop based on my measurements, 1000x350x250 mm. Essentially, it's an aquarium, just turned upside down. Here’s how I transported it)))

View attachment 480310

I also ordered a stand for it and attached aluminum corner brackets to it with silicone, so the glass could be placed inside. These brackets acted as stops to prevent the glass from shifting. The glass is 4 mm tempered glass glued with silicone adhesive for aquariums.

View attachment 480313 View attachment 480314
View attachment 480315 View attachment 480316

But more importantly, I applied a special film with an ultraviolet filter to the glass. While the model remains without an oil finish, it can naturally fade over time. This museum-grade film will prevent that from happening.

View attachment 480317

I also made a stand with handles to make it easier to transport the model. However, this stand will serve as a connecting link to the new stand, which I'll write about later.

View attachment 480318

And finally, while it's waiting, the ship sits like this. Neither dust nor sunlight is a threat, patiently awaiting its owner to continue building it.

View attachment 480319

How do you like the little house? ROTF
Hi Sergey
Very nice set-up
But may be overdoing it for a temporary house.
 
Oh ok control line. I built planes for a few years now because it was something I always had an interest in but never did it, how I’ve done it ! Planes like ships take time and there’s only so much time in a life so progress gets slow it stops frequently.
Yes that’s your page I visited in the past. Keep up your modeling no matter the subject.
Yes, unfortunately there is little time as a rule and not enough for all hobbies. I left only ships and even then I can't pay much attention to them, but I try.

Hi Sergey
Very nice set-up
But may be overdoing it for a temporary house.
I started building the ship in 2009. Yes, there was a 10-year break, but sometimes these breaks were half a year. And so all this time I can observe the ship through the display case. I regret that I did not make it earlier. But even now I am sure that it will serve for a long time. Thank you for your assessment.
 
С моим темпом сборки (когда я могу пропадать на полгода и ранее ставил проект на паузу до 10 лет) эта коробка будет оставаться довольно маленькой еще долго))) А если серьезно, то это просто промежуточный случай. Пока я закончу корпус, мачты и все остальное, кораблю еще долго будет тесно в этой коробке. А размеры чехла для всего корабля впечатляют... страшно подумать, куда его деть)))

IMG-452c8225fb32205d1a1380441f786e54-V.jpg
 
Вау, краса! Розмір вражає Redface І ще, що мені дуже подобається, що поруч секція, щоб бачити як все всередині. Круто! Прям вражає.

В мене теж є мрія замовити набір (дуже високої якості) Alert 1777 від Trident. Він адміралтійкою. І збудувати корпус скелет по ньому, а ще один зі своїх матеріалів (в спрощеному варіанті, болван) і обшитий повністю рейками і корпус і палуби. І потім з адміралтійки туди накинути всі деталі що на палубі і з анатомії підтягнути рангоут і такелаж, може і навіть з парусами. І все це під одну вітрину. Тобто один корпус буде тільки скелет, шпангоути та бімси з бархоутами, а другий корпус абсолютно повністю в зборі. І ще, в цьому кораблі є два варіанти заднього парусного озброєння. То зробити по черзі обидва для фото. А потім залишити один, а інший варіант поруч з моделями підвісити у вільне місце. І оце сетап був би... ех... Але поки що це тільки мрії.. потрібно хоч початий проекту закінчити )))

Wow, beauty! The size is amazing. And what I really like is that there is a section next to it to see how everything is inside. Steeply! Really impressive. I also have a dream to order a set (of very high quality) Alert 1777 from Trident. He is an admiralty. And build a skeleton hull based on it, and another one of your own materials (in a simplified version, a block) and sheathed completely with rails and the hull and decks. And then from the admiralty, throw all the details that are on the deck there and pull up the mast and rigging from the anatomy, maybe even with the sails. And all this under one window. That is, one body will be only a skeleton, frames and beams with whales, and the second body will be completely assembled. And also, in this ship there are two options for rear sail weapons. Then do both in turn for the photo. And then leave one, and hang the other option next to the models in a free place. And this would be the setup... eh... But for now, it's just a dream... you need to finish the project you started)))
 
04.2024

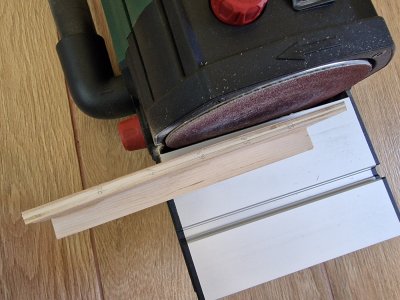
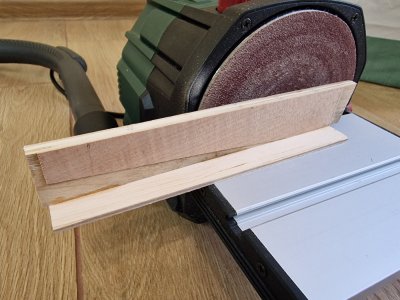
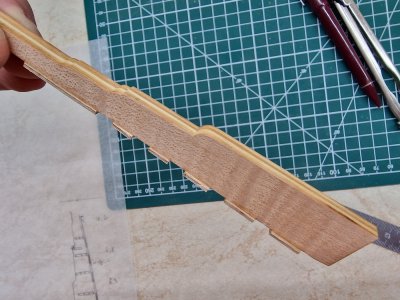
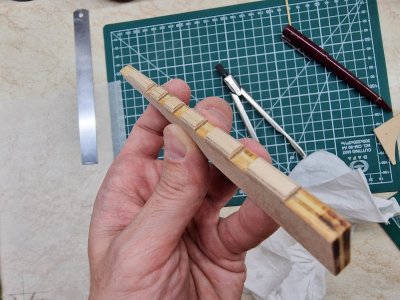
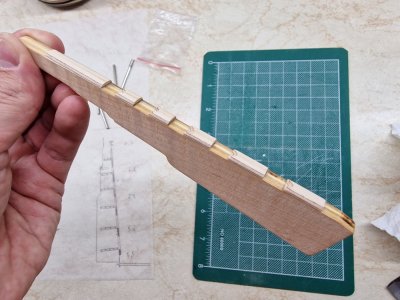
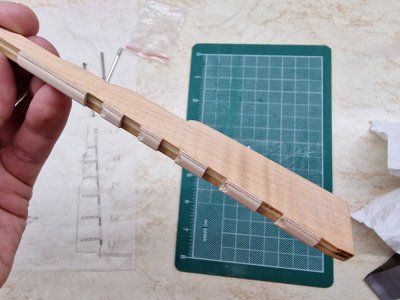
Let’s continue. I made the rudder from a piece of plywood, veneered on both sides with pear wood. First on one side, and after profiling – on the other. I used a sanding machine to taper the rudder towards the bottom. I think the series of photos below will make it clear how and what I did. The only thing I used a rotary tool for was to make indentations for the hinges. To sand the surface parallel to each other, I glued a perpendicular base, which allowed the rudder to slide along the sanding machine's table.

HMS Victory 365.jpg
HMS Victory 366.jpg

This could have been made from a single piece of pear wood, but I didn’t have such a blank. And I didn’t want the plywood structure to be visible under the paint. I sealed the edges of the rudder with super glue. This "sandwich" will be perfect for painting, especially since two-thirds of the rudder will be covered in copper.

HMS Victory 367.jpg
HMS Victory 368.jpg
HMS Victory 369.jpg
HMS Victory 370.jpg
HMS Victory 371.jpg
HMS Victory 372.jpg

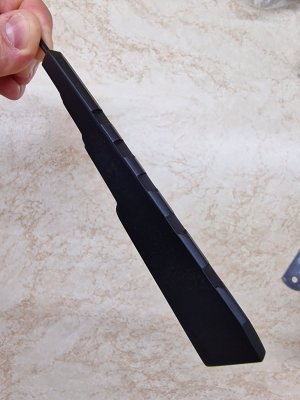
And after painting, the rudder looked like this.

HMS Victory 374а.jpg
HMS Victory 374в.jpg
HMS Victory 374б.jpg
...
 
Last edited:
VERY neat work on the rudder. Regarding the taper of the rudder, while it is a different ship you may find the following post from yesterday to be interesting for the future. https://shipsofscale.com/sosforums/threads/hms-diana-by-caldercraft.14775/page-9#post-406567 posts 176 and 178
From The Elements and Practice of Naval Architecture and The Ship Builder's Repository it would be about 26" thick at the head and then would taper to about 16" to match the breadth of the keel aft on a 100 gun vessel.
Allan
Yes, thank you very useful posts. I took all the dimensions from the printed anatomy 1:1 to my dimensions. There may be an error, but I think plus minus the narrowing is true. Thank you for your interest in my construction and your high assessment.
 
08.2023-10.2024

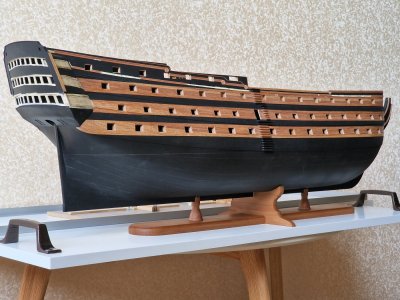
Ship stand. I love it!


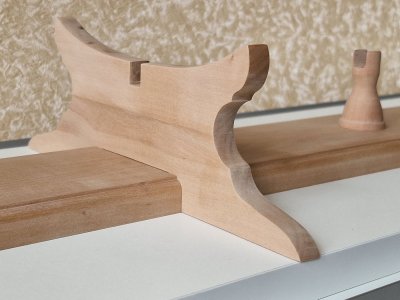
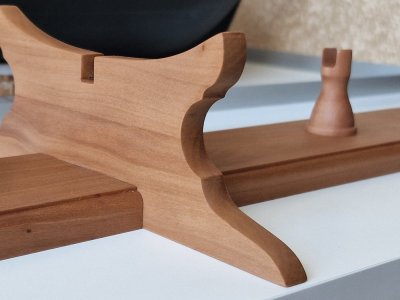
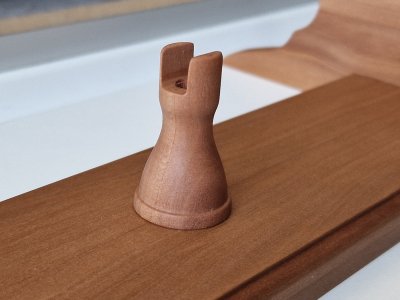
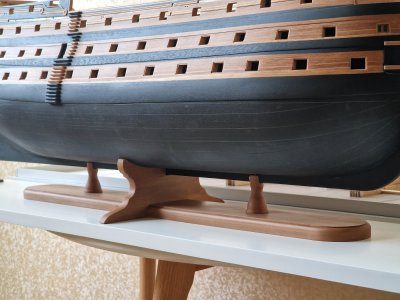
Since I had stocked up on plenty of pear wood, I decided to make the ship stand from it as well. And I was absolutely right—the color of oiled pear wood is divine.
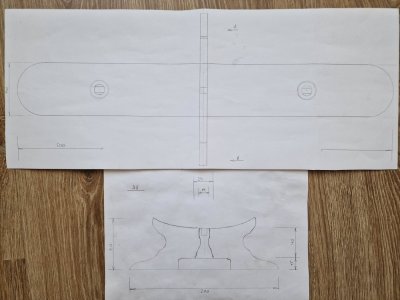
So, I based my design on Shevelev’s stand. I sketched out a drawing and cut out the necessary parts.

HMS Victory 265.jpg HMS Victory 266.jpg HMS Victory 268.jpg
HMS Victory 269.jpg

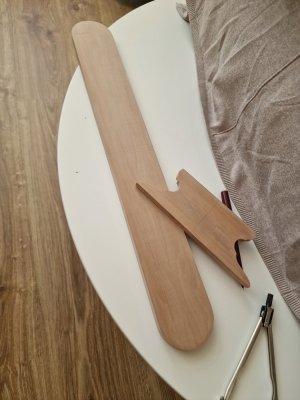
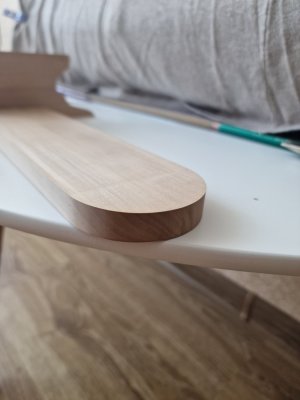
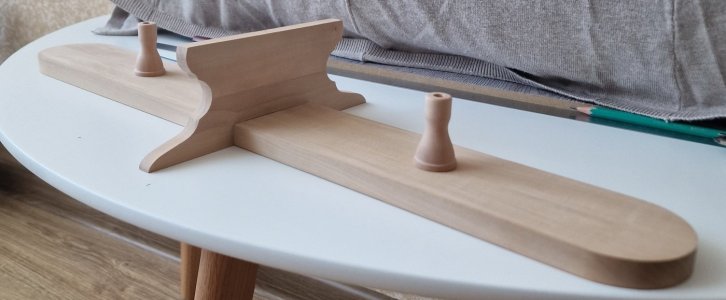
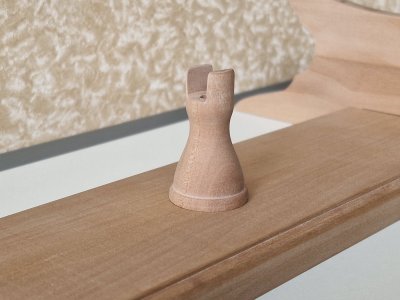
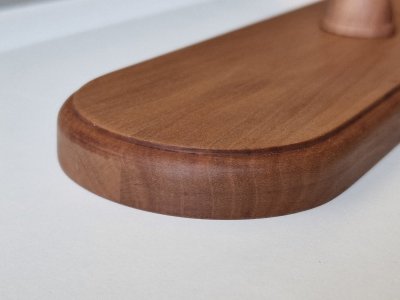
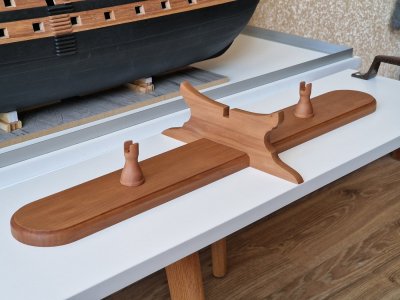
In both parts, I made slots so they could interlock perpendicularly. I ordered two small turned pieces for the side supports from a friend who is a lathe operator. However, I was missing a beveled edge, a profiled finish on the main piece, and, of course, the hull cutout so the ship could rest securely on the stand. To address this, I came up with the following solution...

20241003_134647.jpg 20241003_135652.jpg

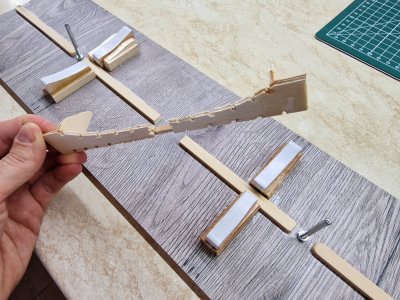
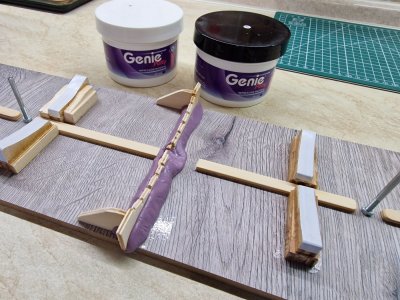
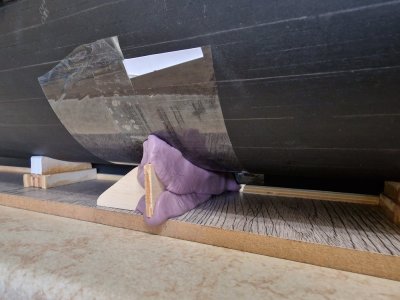
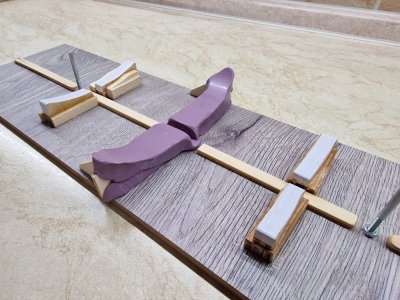
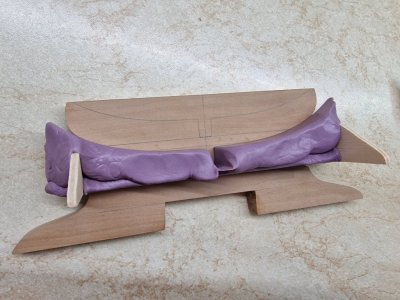
Since I’m a dentist, I have impression material for dental molds. I first created a small plywood template, slightly smaller than the ship’s profile. Using the impression material, I secured this template to the current stand, which holds the ship upright in a strictly vertical position. This is the exact position I need to transfer to the new stand, complete with the precise contour of the ship's hull.

20241003_142312.jpg 20241003_142519.jpg

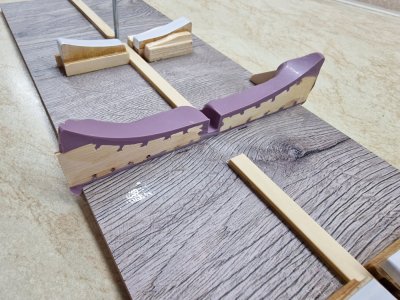
After the material set and the template was securely fixed in place, I applied a second layer of silicone material over the template and immediately placed the ship on the stand. The hull left a perfect impression of its shape. Once the silicone cured, I removed the ship, and I had a precise mold of the hull's contour.

20241003_143240.jpg 20241003_150318.jpg

Then, all that was left was to cut away the excess material perpendicularly, giving me a precise template of the hull’s base. Using this as a stencil, I traced the cutting line onto the base of the stand.

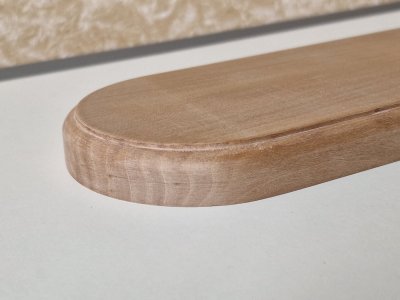
After that, I cut out this piece, made notches for the keel in the side supports, and added a bevel to the main longitudinal part.

20241004_140031.jpg 20241004_140015.jpg 20241004_140006.jpg

And then, I coated the finished stand with four layers of linseed oil, allowing a week between each coat. Oh, how I love this color! I’m absolutely thrilled with the rich tone of pear wood under oil—wow…

20241026_135426.jpg
20241026_135341.jpg
20241026_135520.jpg
20241026_135327.jpg

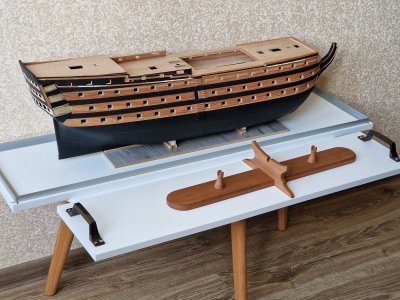
I’ve already mentioned the white board with handles. My plan is to secure the ship, the stand, and the board together by using bolts that will go through the board and the new stand, fastening directly into the hull. This will keep the model firmly in place on the board and prevent it from tipping over.

20241026_135543.jpg

How do you like this setup?

20241026_140348.jpg
20241026_140409.jpg
 
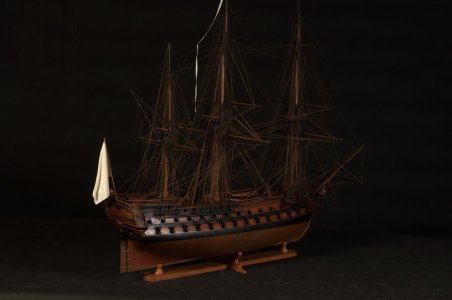
I took the design of this stand from Dmitry Shevelev. In this thread, I posted a photo of his 74-gun ship, which has a similar stand.
You can check out the photo here; you won't regret it!

DSC_0109.jpg

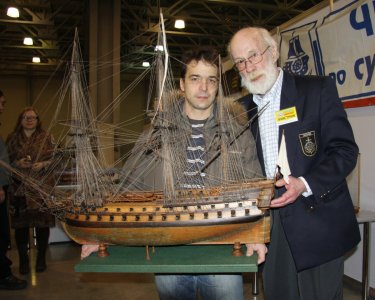
In this photo, next to Dmitry Shevelev, as I mentioned, is the idol of all our idols (now deceased) — Ilya Aleshinin. He was a great man.

That's where it all began. One time, I saw his model on the cover of a magazine, and it struck me as a work of art. I decided to study this topic, and it led me to where I am now. Eternal memory to talented individuals. He has been gone for a long time, but the memory of such people never fades. And thanks to people like him, we strive to achieve more.

IMG_8020а.JPG
 
Last edited:
Nice putty and wash technique ROTF. You spent more on impression material that the pear wood though ROTF.
Well, first of all, I have a lot of this mass. And the consumption was like for one jaw, it's really little. But creating an ideal profile is more important to me than spending a lot of time on redoing or lengthy adjustment. With my method, I did everything the first time. So that's how it is)))
 
08.2023-10.2024

Ship stand. I love it!


Since I had stocked up on plenty of pear wood, I decided to make the ship stand from it as well. And I was absolutely right—the color of oiled pear wood is divine.
So, I based my design on Shevelev’s stand. I sketched out a drawing and cut out the necessary parts.

View attachment 480776 View attachment 480778 View attachment 480779
View attachment 480780

In both parts, I made slots so they could interlock perpendicularly. I ordered two small turned pieces for the side supports from a friend who is a lathe operator. However, I was missing a beveled edge, a profiled finish on the main piece, and, of course, the hull cutout so the ship could rest securely on the stand. To address this, I came up with the following solution...

View attachment 480781 View attachment 480782

Since I’m a dentist, I have impression material for dental molds. I first created a small plywood template, slightly smaller than the ship’s profile. Using the impression material, I secured this template to the current stand, which holds the ship upright in a strictly vertical position. This is the exact position I need to transfer to the new stand, complete with the precise contour of the ship's hull.

View attachment 480783 View attachment 480786

After the material set and the template was securely fixed in place, I applied a second layer of silicone material over the template and immediately placed the ship on the stand. The hull left a perfect impression of its shape. Once the silicone cured, I removed the ship, and I had a precise mold of the hull's contour.

View attachment 480787 View attachment 480788

Then, all that was left was to cut away the excess material perpendicularly, giving me a precise template of the hull’s base. Using this as a stencil, I traced the cutting line onto the base of the stand.

After that, I cut out this piece, made notches for the keel in the side supports, and added a bevel to the main longitudinal part.

View attachment 480790 View attachment 480791 View attachment 480792

And then, I coated the finished stand with four layers of linseed oil, allowing a week between each coat. Oh, how I love this color! I’m absolutely thrilled with the rich tone of pear wood under oil—wow…

View attachment 480793
View attachment 480794
View attachment 480795
View attachment 480796

I’ve already mentioned the white board with handles. My plan is to secure the ship, the stand, and the board together by using bolts that will go through the board and the new stand, fastening directly into the hull. This will keep the model firmly in place on the board and prevent it from tipping over.

View attachment 480797

How do you like this setup?

View attachment 480798
View attachment 480799
very nice stand
Congrats
 
Well, first of all, I have a lot of this mass. And the consumption was like for one jaw, it's really little. But creating an ideal profile is more important to me than spending a lot of time on redoing or lengthy adjustment. With my method, I did everything the first time. So that's how it is)))
Found this you and Paul (Dockattner) might like to build next Serikoff Screenshot_20241025-141423.png
Cheers Mark
 
08.2023-10.2024

Ship stand. I love it!


Since I had stocked up on plenty of pear wood, I decided to make the ship stand from it as well. And I was absolutely right—the color of oiled pear wood is divine.
So, I based my design on Shevelev’s stand. I sketched out a drawing and cut out the necessary parts.

View attachment 480776 View attachment 480778 View attachment 480779
View attachment 480780

In both parts, I made slots so they could interlock perpendicularly. I ordered two small turned pieces for the side supports from a friend who is a lathe operator. However, I was missing a beveled edge, a profiled finish on the main piece, and, of course, the hull cutout so the ship could rest securely on the stand. To address this, I came up with the following solution...

View attachment 480781 View attachment 480782

Since I’m a dentist, I have impression material for dental molds. I first created a small plywood template, slightly smaller than the ship’s profile. Using the impression material, I secured this template to the current stand, which holds the ship upright in a strictly vertical position. This is the exact position I need to transfer to the new stand, complete with the precise contour of the ship's hull.

View attachment 480783 View attachment 480786

After the material set and the template was securely fixed in place, I applied a second layer of silicone material over the template and immediately placed the ship on the stand. The hull left a perfect impression of its shape. Once the silicone cured, I removed the ship, and I had a precise mold of the hull's contour.

View attachment 480787 View attachment 480788

Then, all that was left was to cut away the excess material perpendicularly, giving me a precise template of the hull’s base. Using this as a stencil, I traced the cutting line onto the base of the stand.

After that, I cut out this piece, made notches for the keel in the side supports, and added a bevel to the main longitudinal part.

View attachment 480790 View attachment 480791 View attachment 480792

And then, I coated the finished stand with four layers of linseed oil, allowing a week between each coat. Oh, how I love this color! I’m absolutely thrilled with the rich tone of pear wood under oil—wow…

View attachment 480793
View attachment 480794
View attachment 480795
View attachment 480796

I’ve already mentioned the white board with handles. My plan is to secure the ship, the stand, and the board together by using bolts that will go through the board and the new stand, fastening directly into the hull. This will keep the model firmly in place on the board and prevent it from tipping over.

View attachment 480797

How do you like this setup?

View attachment 480798
View attachment 480799
Wow Sergey. Beautifully crafted and designed stand. Cheers Grant
 
Dental mold material...... great idea. I had always eyeballed with card templates then adjusted as needed, but your method looks easier and obviously very accurate. I golf with my dentist so maybe if I let him win he will give me some of the putty to try. (In reality he beats me all the time but he is a nice guy so I will give it a go) Thanks for the idea Serikoff

Allan
 
Witaj
Piękna podstawka sam coś muszę zrobić do mojej la bella pouela , chyba odpatrzę od Ciebie . Pozdrawiam Mirek
 
very nice stand
Congrats
Thanks a lot!
Found this you and Paul (Dockattner) might like to build next Serikoff View attachment 480858
Cheers Mark
Ahahaha, funny. I once encountered something similar))

Wow Sergey. Beautifully crafted and designed stand. Cheers Grant
Thanks for the praise!

Dental mold material...... great idea. I had always eyeballed with card templates then adjusted as needed, but your method looks easier and obviously very accurate. I golf with my dentist so maybe if I let him win he will give me some of the putty to try. (In reality he beats me all the time but he is a nice guy so I will give it a go) Thanks for the idea Serikoff

Allan
Thank you. Yes, and in fact it is very simple and very accurate. I did not make any corrections at all. Maybe after the copper lining it will be necessary to do a little more, but most likely it will be good))

Witaj
Piękna podstawka sam coś muszę zrobić do mojej la bella pouela , chyba odpatrzę od Ciebie . Pozdrawiam Mirek
Gdy tylko zobaczyłam to stoisko, od razu wiedziałam, że właśnie takie zrobię. Coś w tym jest)))
 
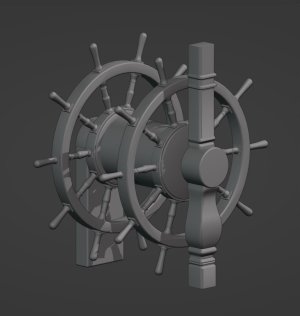
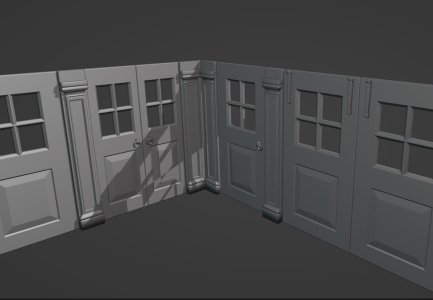
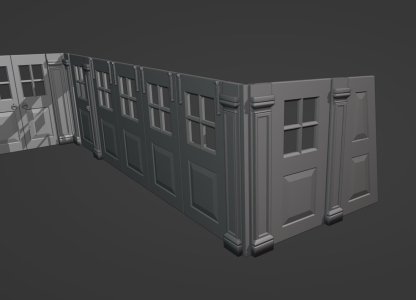
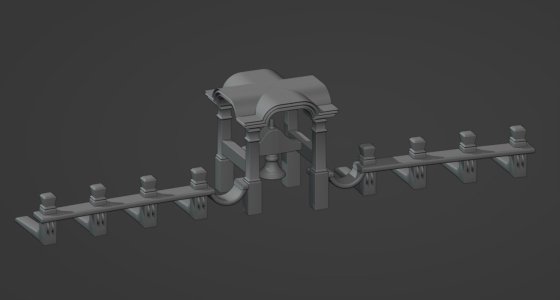
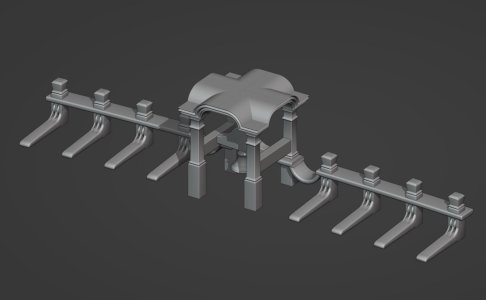
The next, Рart 15 is planned to cover the topic of 3D modeling and everything related to it...

However, this is a vast subject that I want to describe in detail after covering a few other topics. For now, I’ll just tease a bit about the progress I’ve made in 3D modeling.
This subject is very interesting to me and often underrated by other modelers. I was initially skeptical about plastic, but after delving into all the intricacies of the process—from creating the 3D model to the final finish—I came to my own conclusions. This is going to be quite a long discussion, which I’ll be writing up in detail, naturally with pictures. I’m thinking of creating a dedicated thread on 3D modeling in the corresponding forum section, where I’ll address all aspects of this topic.

For now, here are a few screenshots of my progress. (*If anyone has urgent questions about this topic, feel free to message me directly, or hold tight—everything will be shared soon!)))

Штурвалл.JPG
20.JPG
21.JPG
Колокол 1.JPG
Колокол 2.JPG

One additional note: all parts I’ll be making from plastic will be painted in matte black and some in matte dark brown. I’ll ensure proper preparation, and I’ll emphasize, they will have a strictly matte finish. This way, it won’t be apparent under the paint what material is underneath. The entire goal is to create the illusion that all parts are made of wood, with only some painted in color. I can proudly say I’ve achieved this effect. The painted parts don’t look like toys or plastic at all, which was a key requirement for me, and I’ve managed to meet it. There were plenty of trials and errors along the way, and I’ll share more on that soon—stay tuned!
 
Back
Top