HMS Victory Build #776 1:98 scale

Step 13:
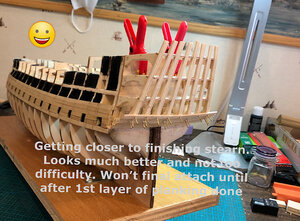
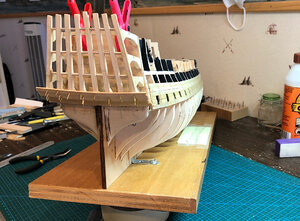
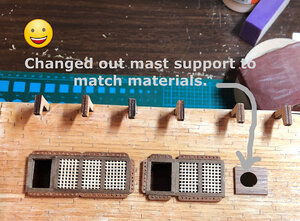
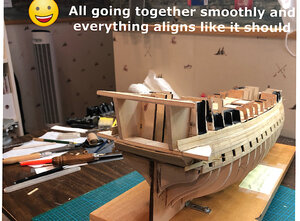
Been a while. In middle of remodeling master bathroom. It’s taking a lot of my time lately but still manage to be going forward. I’ve removed gloss finish on lower deck. Didn’t really like it to be so shiny. Also added gratings and will add stairs down from this level soon. Also added cannon ball racks to this level. Mantua model instructions or drawings say and show nothing about these items. Started cutting out stearn pieces. I like jigsaw puzzles. Hahahahahaha. I’ll build this but won’t attach until after all 1st layer planking is done.View attachment 151212View attachment 151213View attachment 151214View attachment 151215
The look of the deck if very good as shown, not to glossy and nice wear patterns of used deck.
 
step 15:
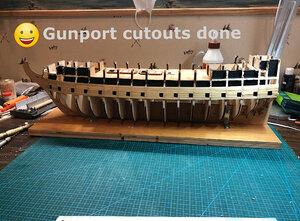
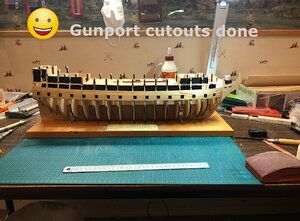
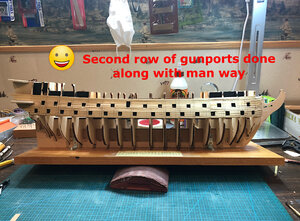
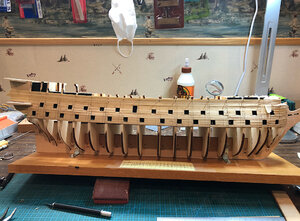
Cutouts all done on 1st layer of planking both sides of lower deck. A bit of work but manageable with a DreMel tool with diamond tipped tapered grinding shaft. Went fairly quickly as I bored small holes around inside outline area then used exacto knife to trim out to line and then use file to make gunport pieces fit. Took about 2 hours for 32 portsAA32136C-4CDF-4F87-8FB8-3D2DD6F0693B.jpeg8FDC95CC-41A0-469A-A89C-E0565B6F2B98.jpeg
 
Step 16:
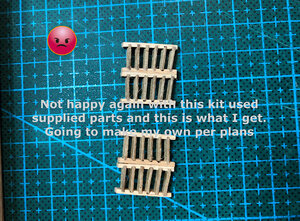
Well couple of days off from shower remodel so I did more to the model. As usual not happy with Mantua parts. These are steps going down from the lower deck and I used their parts and this is what I got. Needless to say I will be making my own. Also added some first layer planking to the Stern area. Next part will be the curve pieces going on both sides of the stearn. I’ll need to make a framing system per the plans this also will be easy. Also changed out the mast support on the lower deck I didn’t like the original material so I put it in a nice piece of walnut.
3486CB83-3140-423F-ACC7-DDC59C0952C8.jpeg9EAD1F4A-D92B-44A8-B0CE-5435D4234931.jpeg4AD344C3-DC5C-4182-9CBB-86DFA9E2AF1F.jpegA665068C-4010-415E-BED5-47FF06910116.jpegFC3C19C4-5B90-481E-A4FA-64FBFF7984B1.jpeg
 
Step 17:
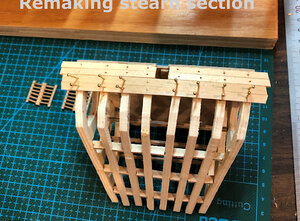
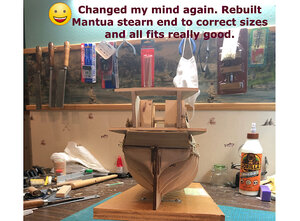
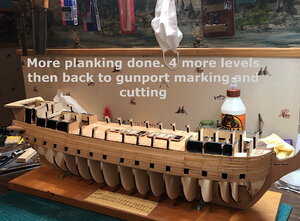
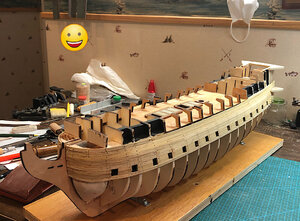
Well changed my Mind again about stearn section so I took my time and reconstructed the kit pieces but this time correctly. Ahhhhh Mantua is my nightmare they were off by 1/2” in some places. Anyway, finished stearn end with my mantua modified to fit design and all is good. Took a little time but it’s amazing what you can do and how fast with a scrollsaw. Also added several more rows of planking. 4 more levels then back to marking and cutting out gun ports.
A89ACC79-D17F-42C1-9906-D9D58C91096B.jpeg83538C42-A972-4E80-8B5F-1C2244E71FAC.jpegBE27B7EE-7093-439E-9469-FBC22E1A9B3C.jpegF608E8A1-EFF4-44DD-9F4E-B0409108F4DA.jpeg
 
You are getting really close to a scratch build! When you are rebuilding 60% of the kit...one of those days you will ask yourself: Why would I need the kit? :)
 
Your correct. The only reason I got the kit before was it would cost a lot more to buy all other parts i.e. cannons, and all other parts not of wood. I was going to finish original model with only parts from kit but when I built from scratch before my model wasn’t right . It was really twisted as that was my 1st without any help or instructions so after watching several YouTube videos I decided to do it better with no twist and correct gunport locations
 
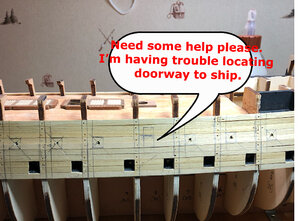
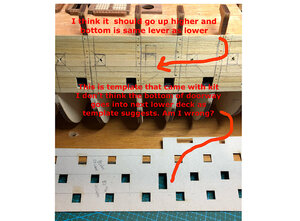
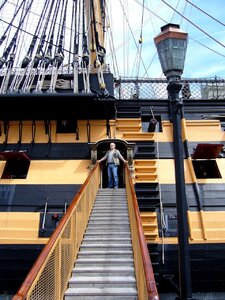
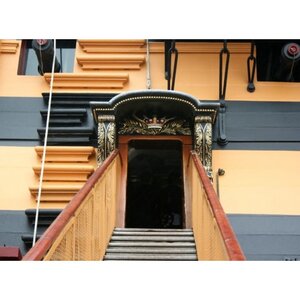
Need some help everyone. Trying to locate doorway into ship. My kit is 1:98 scale and between 2 decks is 41 mm so I am assuming the bottom should line up with a deck level. Any suggestions would help. All drawings and template show top of doorway at top of second level of gunports
I think that is incorrect. See my pics

9F4E17AE-6B8F-4BCA-98C8-71B658CB933A.jpeg7C25B88F-2390-4F9E-ACE2-08F1BB6D8BB4.jpeg
 
Do the gun ports split levels equally, then top of opening for door looks about right if the gun ports tops are near bottom of deck above it.
 
Do the gun ports split levels equally, then top of opening for door looks about right if the gun ports tops are near bottom of deck above it.
Thakks
but they shouldn’t be that high I measured cannon carriage with cannon on it and barrel centerline is 10 mm from bottom of wheels. So if I take 10 from 20.5 then 10.5 from centerline of cannon barrel to next deck level
So I think bottom of doorway should be 10 mm from centerline of cannon barrel on second level.
I have the lower deck installed so I’ll drill thru and find lower deck level that way
 
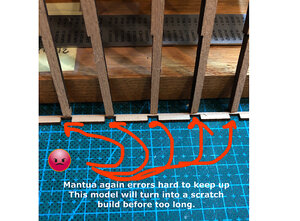
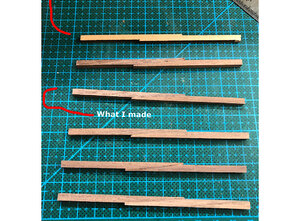
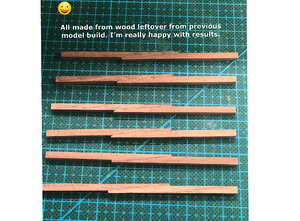
More planks added but wanted to get parts for lower deck ready and after I cut out parts this is what I found. The beams are supposed to be a snug fit near the ends as the part connects to upper deck in opening. They snug fit in the middle. Thanks again to mantua for having incorrect parts again. I’ve started to rebuild these parts. Got wood cut to sizes and will make parts in a few days. I’ll probably very soon wind up with a scratch build. Also wood they use for their kits is subpar in all respects. Luckily I had plenty left over from my previous scratch build.
Well not made in America what can one expect. Quality of this kit is terrible. I’ll never buy Mantua again for another model.
View attachment 161574
E60E1F21-B6C7-4B99-8B39-7560869985CF.jpeg5198DF9A-26AF-4CAC-82B5-31F8E11BA5A4.jpeg
 
Last edited by a moderator:
Some errors are usual in such older kits like this one from Mantua.
But you will find such things also in kits from America, or? Especially if they are older.....
and you can find also good quality kits from Europe and Asia.
A kit without an error is like a soup without salt - ;)
 
Yeah your right. I’ll quit complaining and get on with finishing my model.
I like your reference comment. So correct.
 
Anyone have advice on changing cannons right now they’re shiny and gold brass color and I want to make black
Thanks
DickT
 
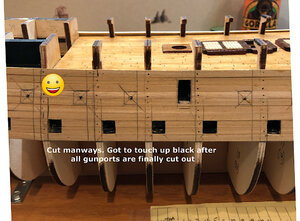
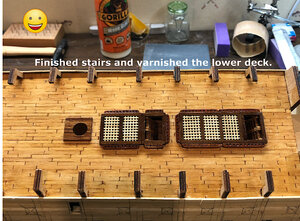
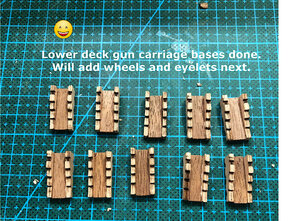
Well cutout manways, made new stairs, and varnished lower deck. Only thing left to do is the cannon carriages for this deck no cannons yet. Will do just before laying down new level decking. Better then than after.
View attachment 158309View attachment 158310
Thanks for sharing your lower varnished deck. I build HMS Victory and made way too much sandpaper and planning to apply varnish to make it look yellowish and woodenish.
Your example is really good and now I am more confident to do this :).
 
Back
Top