HMS Victory - by Mantua Sergal - 1:78 scale

20200410_163854.thumb.jpg.09b496178c1c3fc8edbf8b241da2eb02.jpg
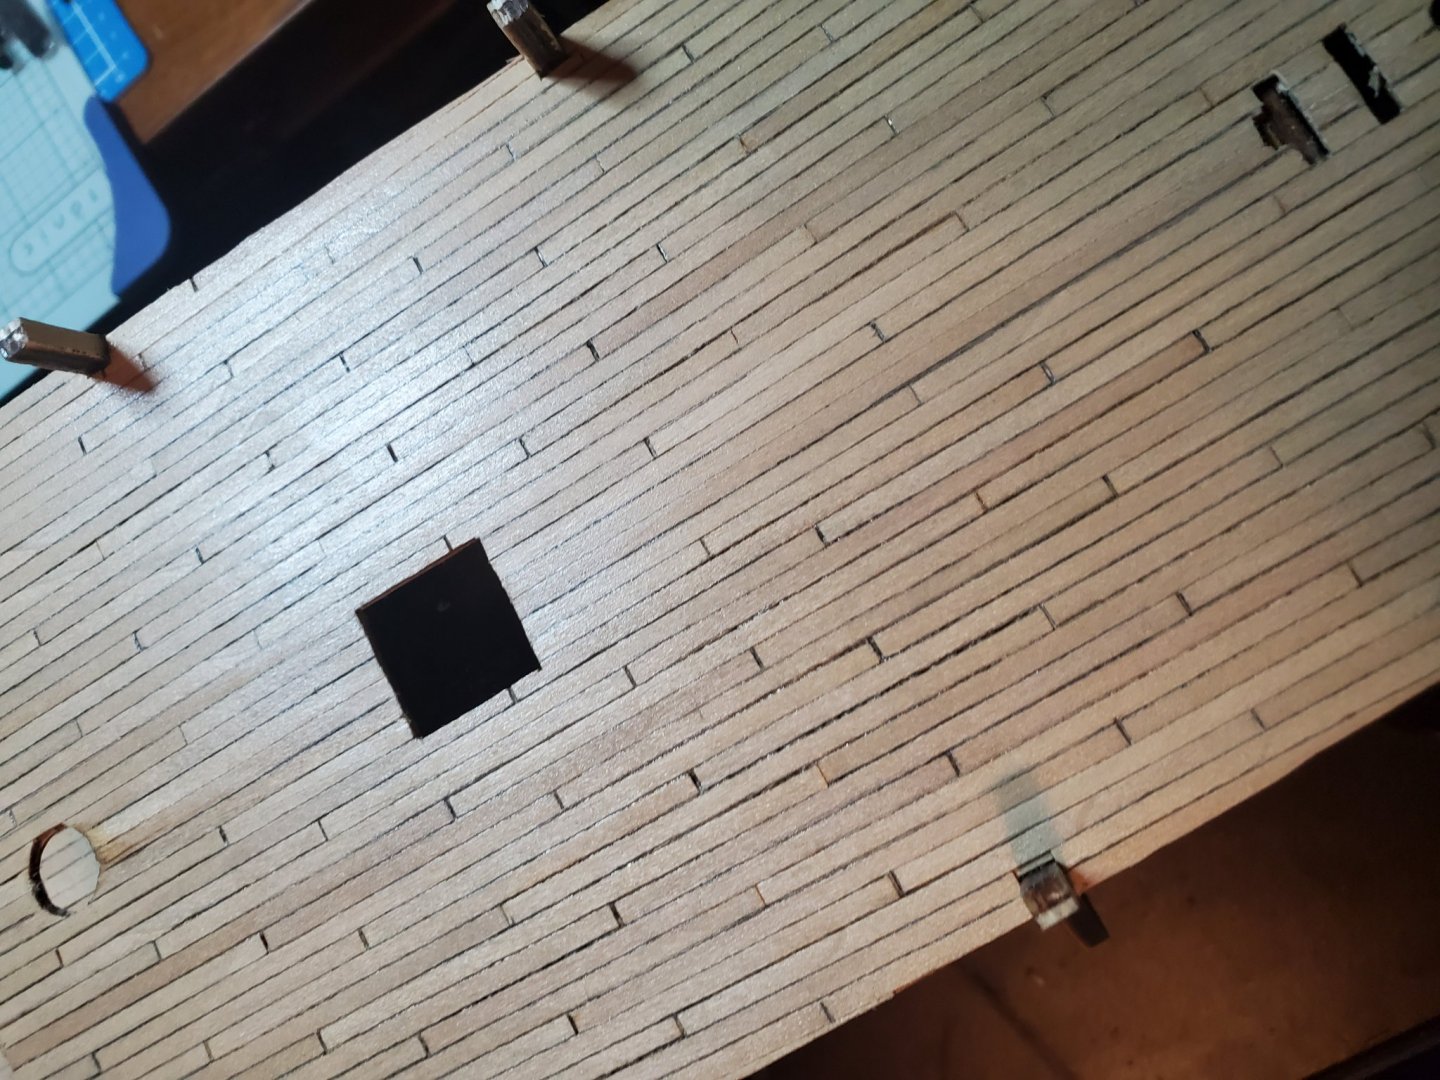
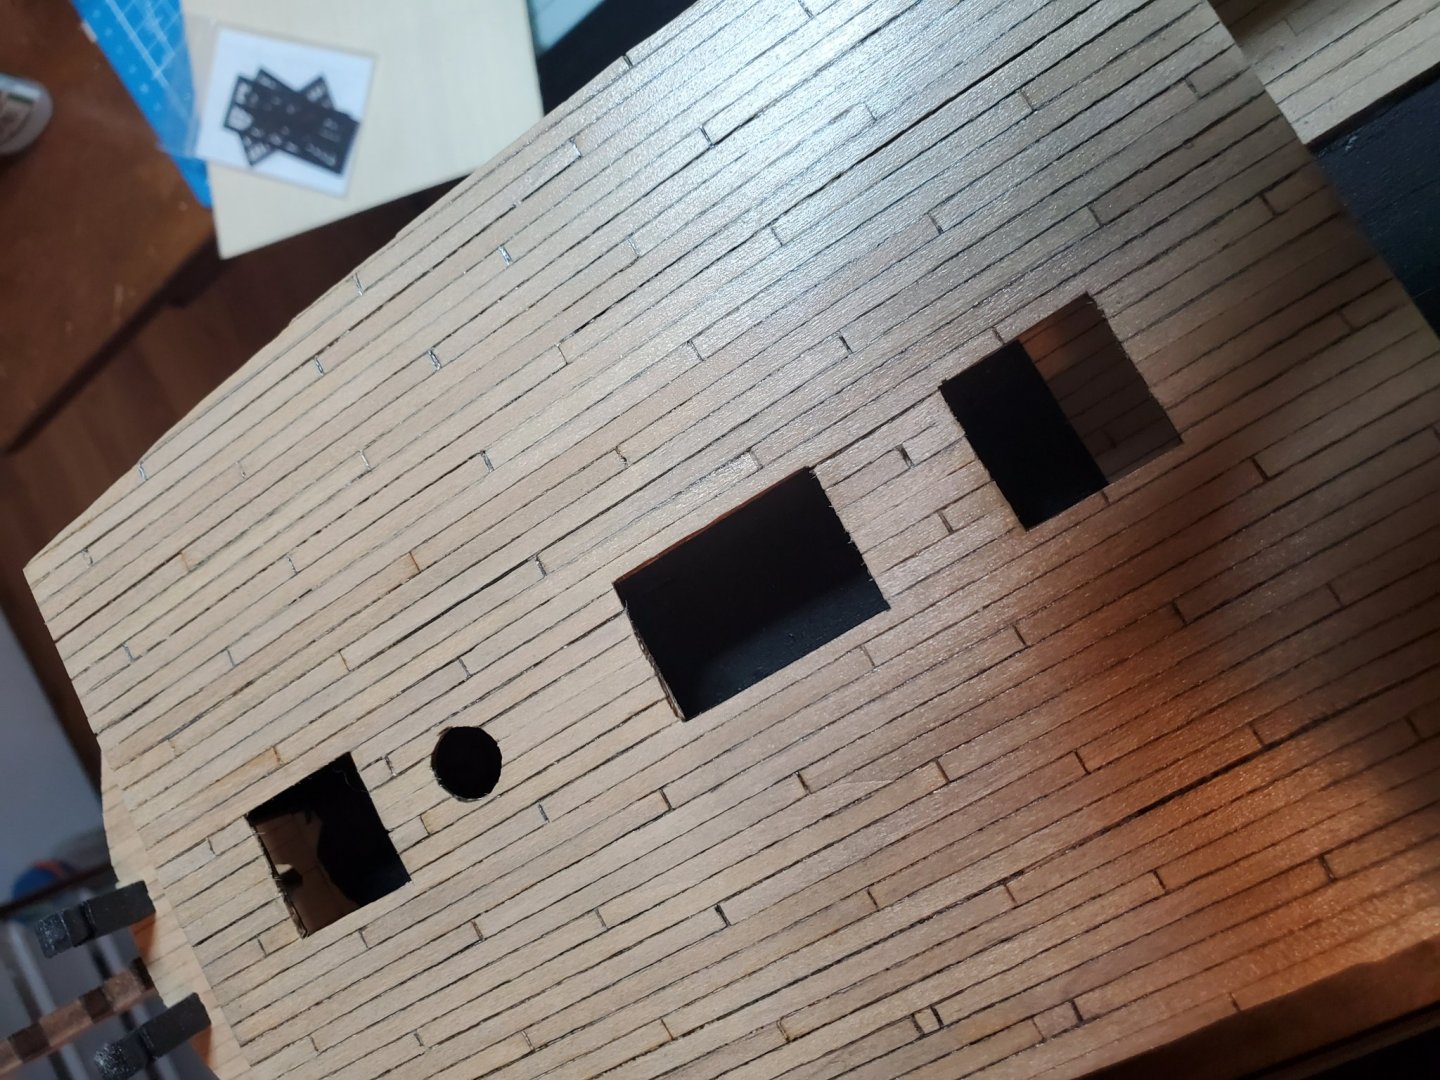
I got the quarter deck on and planked. I am very disappointed in the quality of the deck wood supplied with the kit. It is not consistent in thickness and the edges are too rough. It is very thin also.
It was a lot of work dealing with this poor quality wood. The results are almost acceptable. I was thinking of planking over this mess with some good quality 1 mm thick wood (which I wood have to order) but that will throw every height off 1 mm. I will think on this a bit. What do you guys think?
20200410_164218.thumb.jpg.1439f9dc24d562f1b608eec8186f06a0.jpg
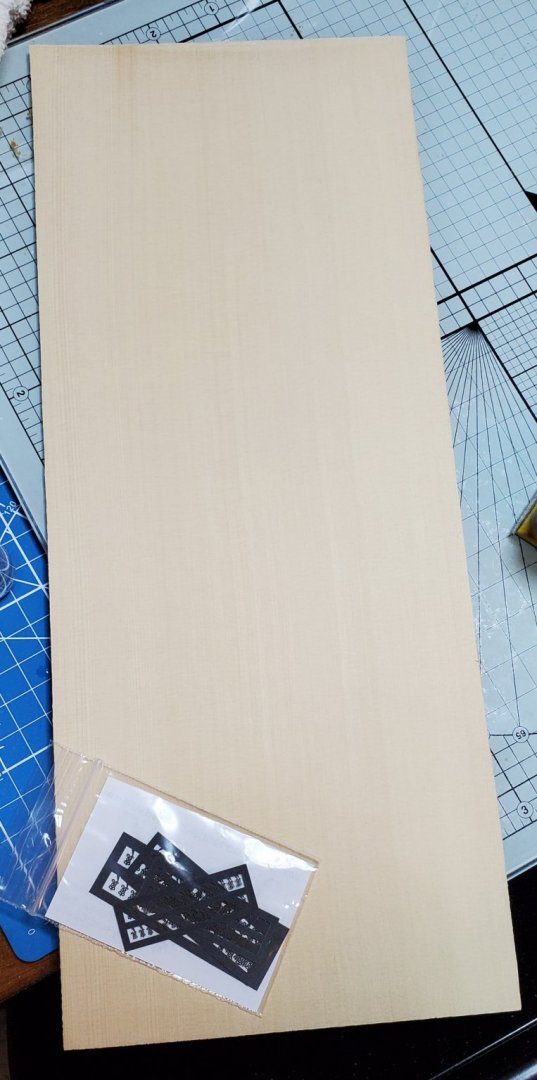
I got a package from Syren today. I ordered a sheet of 3/64" thick Alaskan cedar and the emblems for on the cannons. The wood is to start building my stern gallery and the deck cabins behind the ships wheel. The kit supplied items for these are just not acceptable to me.

Mark Frazier
 
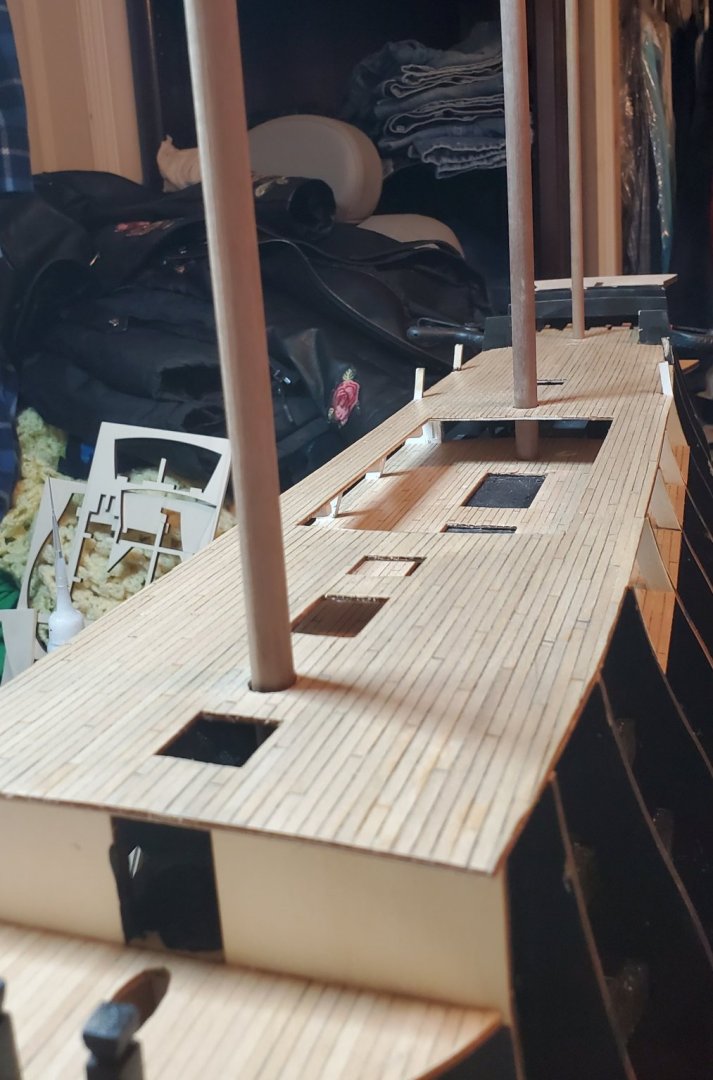
I sanded the decks to mostly level and applied a clear coat of poly. I will buff them lightly with 600 grit and another coat of poly to see how they look. They actually look okay from 2 feet away. The decks on the real ship are not perfect. The quarter deck you see in the videos, I do not believe is original as it is too perfect. The gun deck is a better representation of a 250 year old deck on the real ship.
20200410_181505.thumb.jpg.6cb8ccbdabb577b1cac9f3fc6e0801fc.jpg
20200410_181501.thumb.jpg.1e3a361edd886f0f08797f8955b6dcdc.jpg
I did not have a wider plank for a king plank so I laid two planks tight against each other in the center to simulate the king plank. I don't know how noticable it is but it was the best I could do with what I have available.

I used a pencil to simulate the caulking and left a tiny gap at the ends of the planks and ran a .5 mm pencil in them. I am not crazy about this method for simulating caulking, but it is the best method I know right now. These planks are too thin to use black paper. I would have done that had I had 1 mm planks. I will give this a day or two to grow on me.

I have ordered Casey brass black for the cannons and some smaller wire to try to make smaller hooks to match the scale better. It should be here next week.

Mark Frazier
 
I though I better check the holes in the decks for the masts. I checked all the framework for the masts fit but forgot to check the decks for alignment before planking and finishing. Sure enough, they are off about 1/16 ". I filed the holes a little to get the masts to fit in. It should be fine as the mast sleeves will cover the gap in the holes in the quarter deck.
20200410_193602.thumb.jpg.993380be3158e8a08629ab104b8fc0f3.jpg
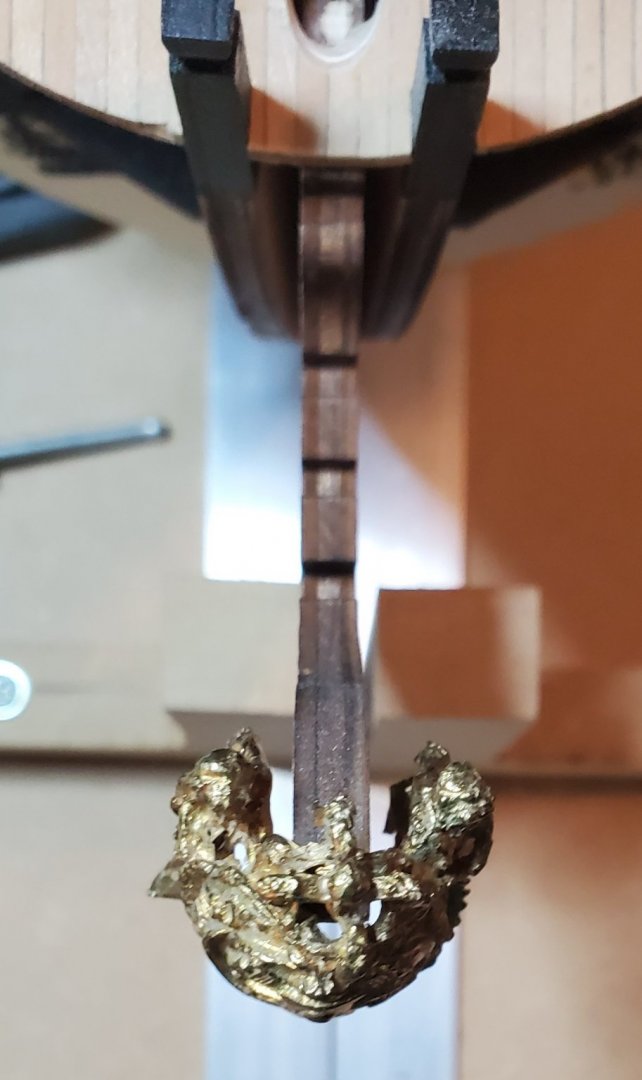
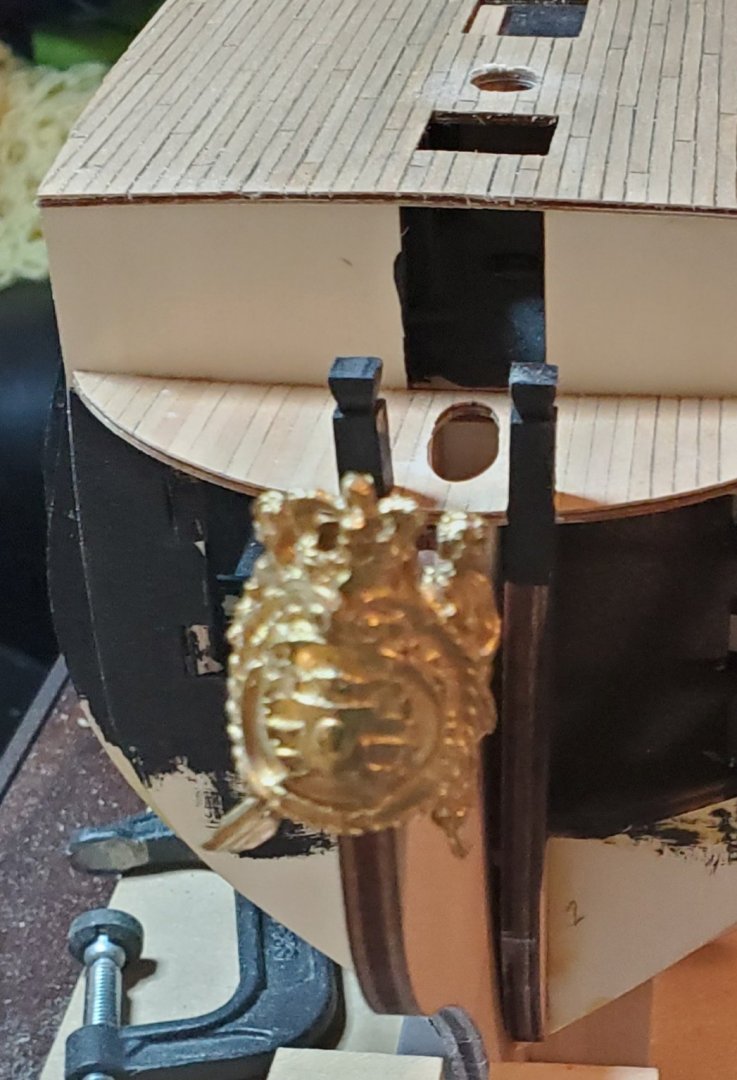
I thought I would check a few other things while at it and I remember. I don't want to use the figure head supplied. ( I see an order to Shipways for this).
20200410_195036.thumb.jpg.d6b10fce6aead4ef5d96fd9abcf7c89b.jpg
The gap on the back is 1/2" wide. There is not one word in the prints or instructions about this item. I am smart enough to know that this can't be bent without breaking as it is cast. What were they thinking? I am wondering what others who bought a Mantua kit did about this.
20200410_195012.thumb.jpg.5df13772b35eef35ff6abb236270272b.jpg
I am not going to need it for a while but I thought I would check it. I have no idea what to do with it yet. I was going to use a die grinder and dress the details to improve it and maybe even use it, but now I not so sure it worth trying. Any suggestions?

Mark Frazier
 
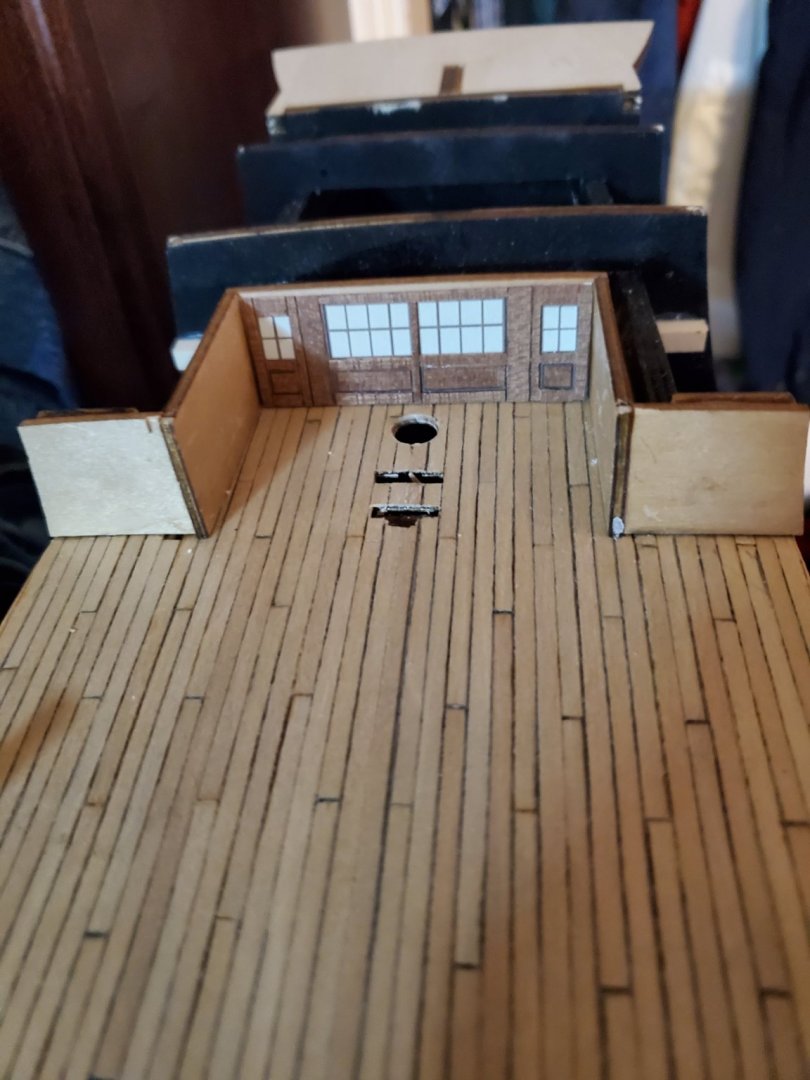
20200411_230849.thumb.jpg.1e578a0e2ca420f0c5a59ffd4d7c6f25.jpg
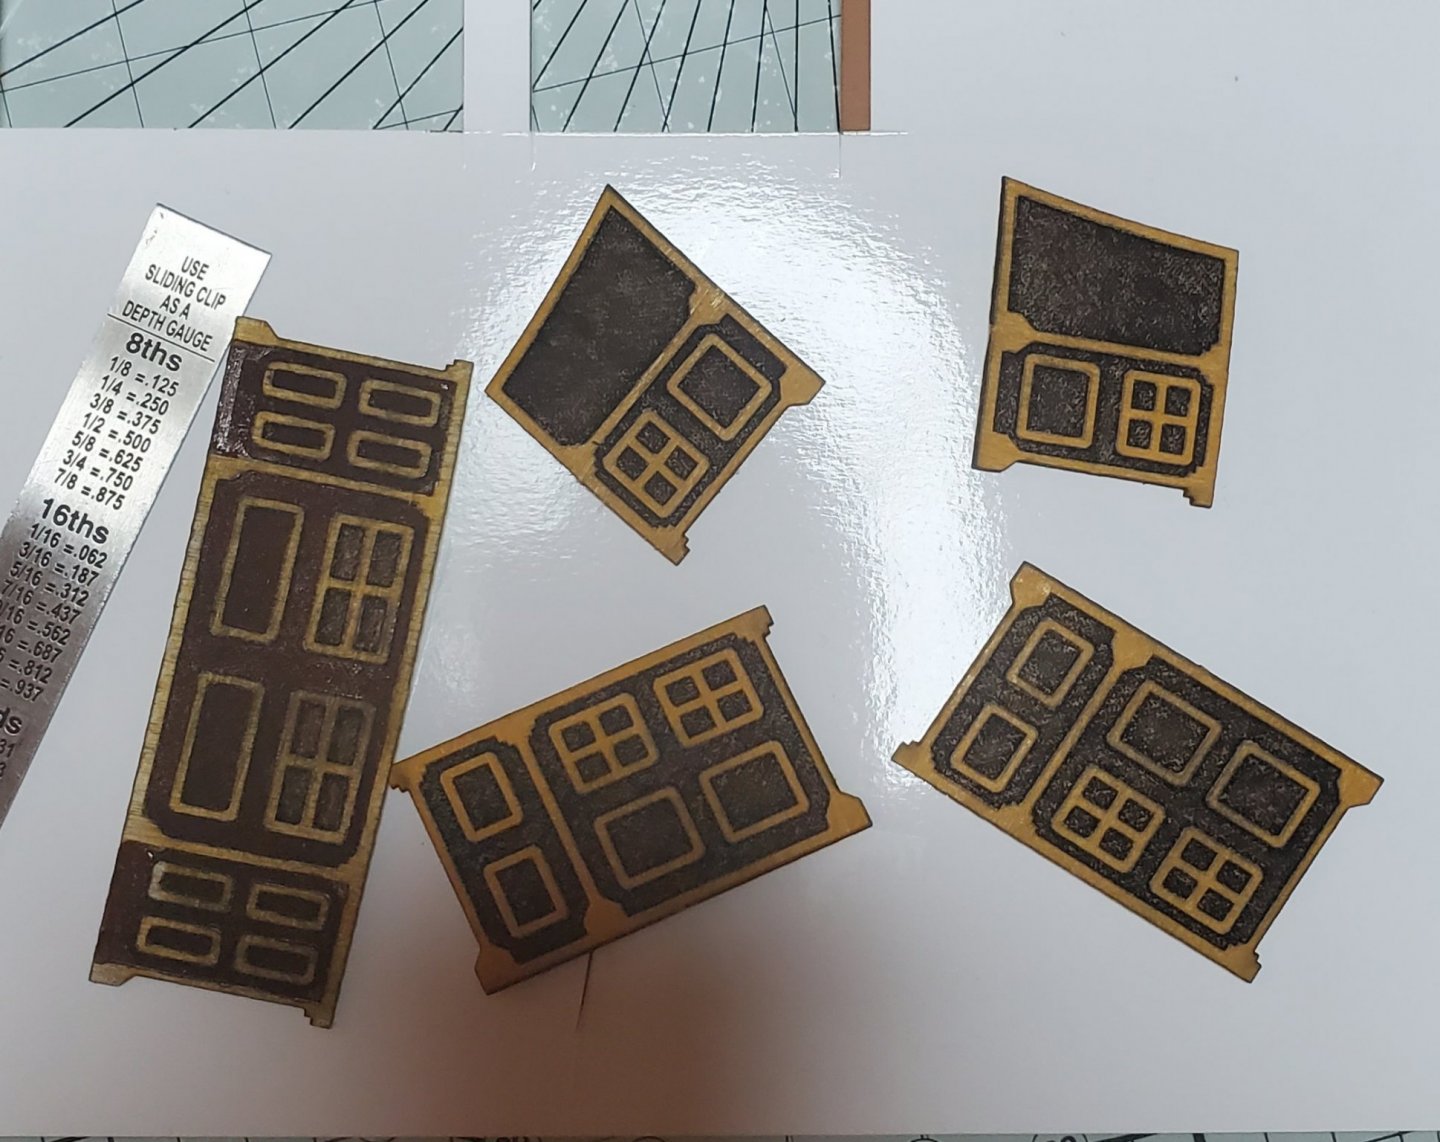
These are the cabin panels supplied with the kit and they are sorry pieces of junk.
I was going to scratch build some with the windows cut out and acetate windows. I have the materials..... a lot of work but very doable.......but ...... upon looking more closely, you will barely ever see them once the poop deck is on, the ships wheel, binacle, fire buckets, and poop deck stairs are installed and then a cannon under the stairs in front of the cabin. The space behind the cabins is an empty space so the windows should probably be white background. So I thought I would try something different. I don't know how this idea will be accepted.

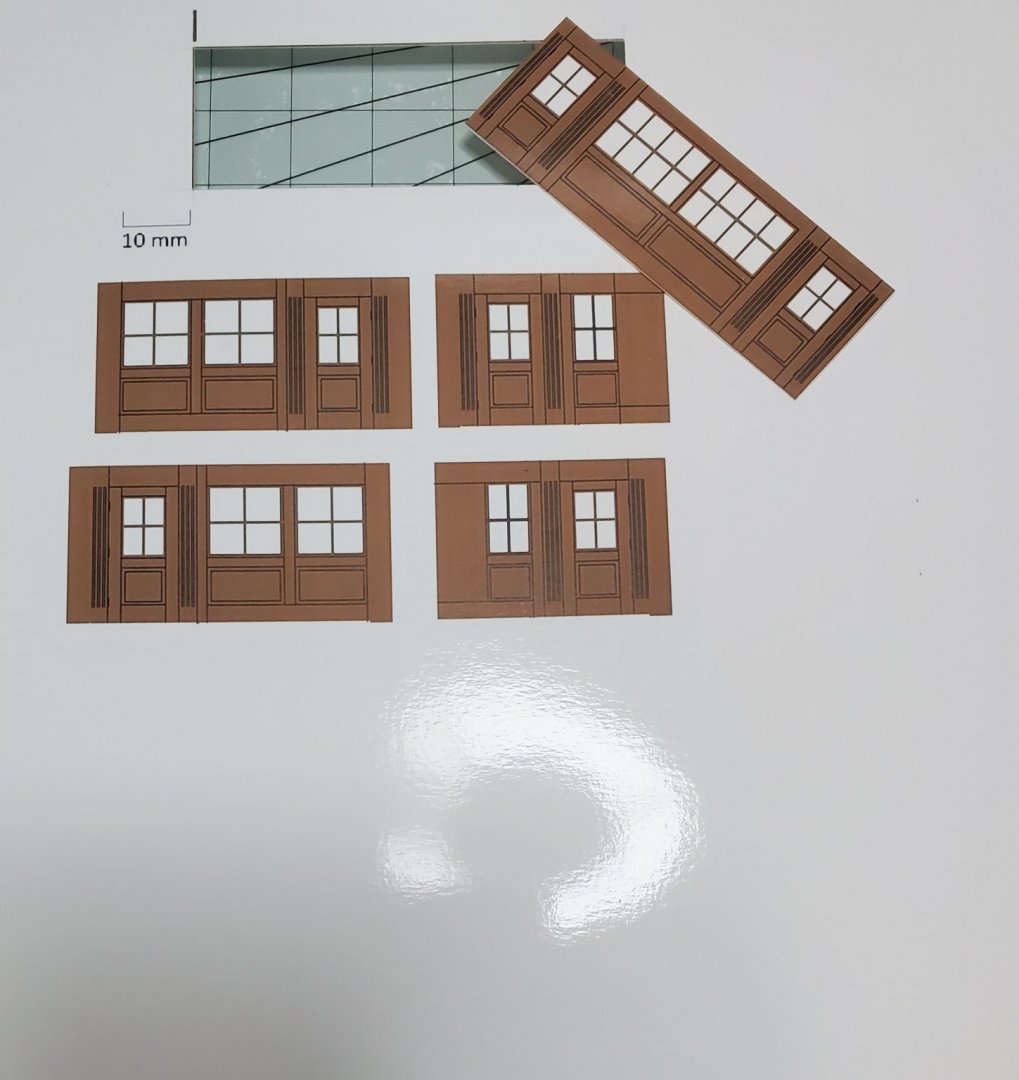
I designed panels on my computer, took about 3 hours, printed them out to scale on heavy photo paper and cut to size. The nice thing about this is I have great details right down to the door hinges. I will put blackened brass door knob (rings) on the doors using eyes and rings.
20200411_223759.thumb.jpg.e9e0554459283de735c75010e8d158f6.jpg
installed temporarily
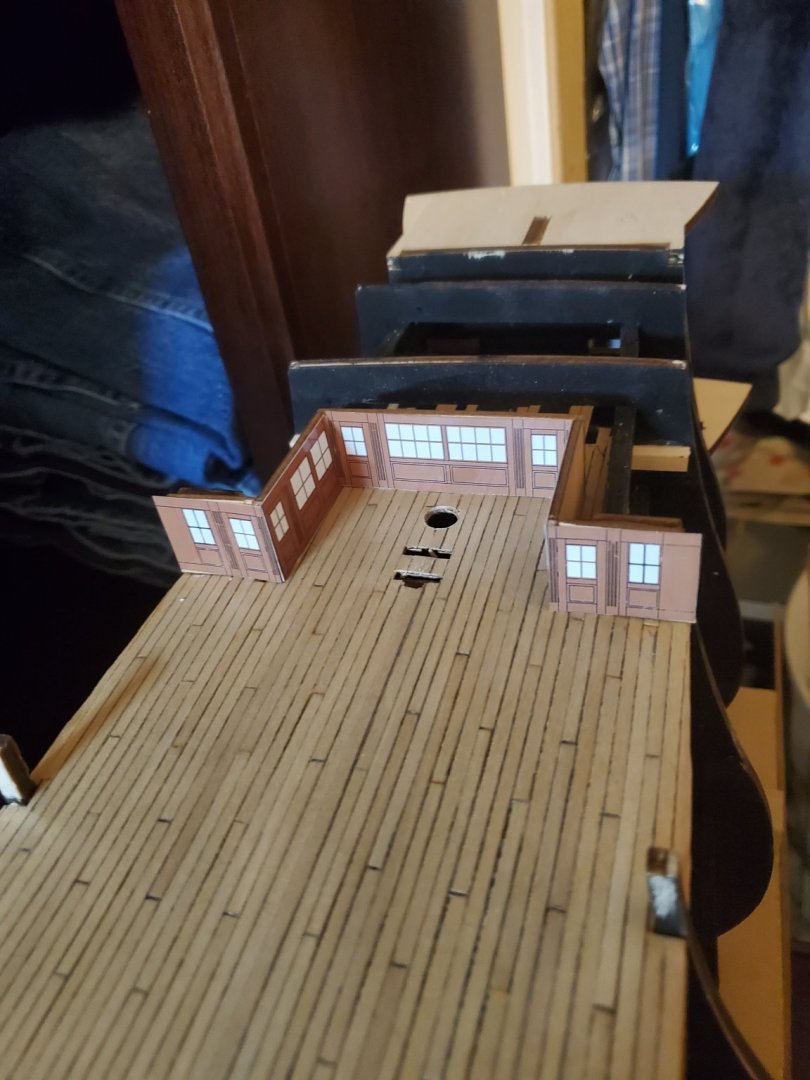
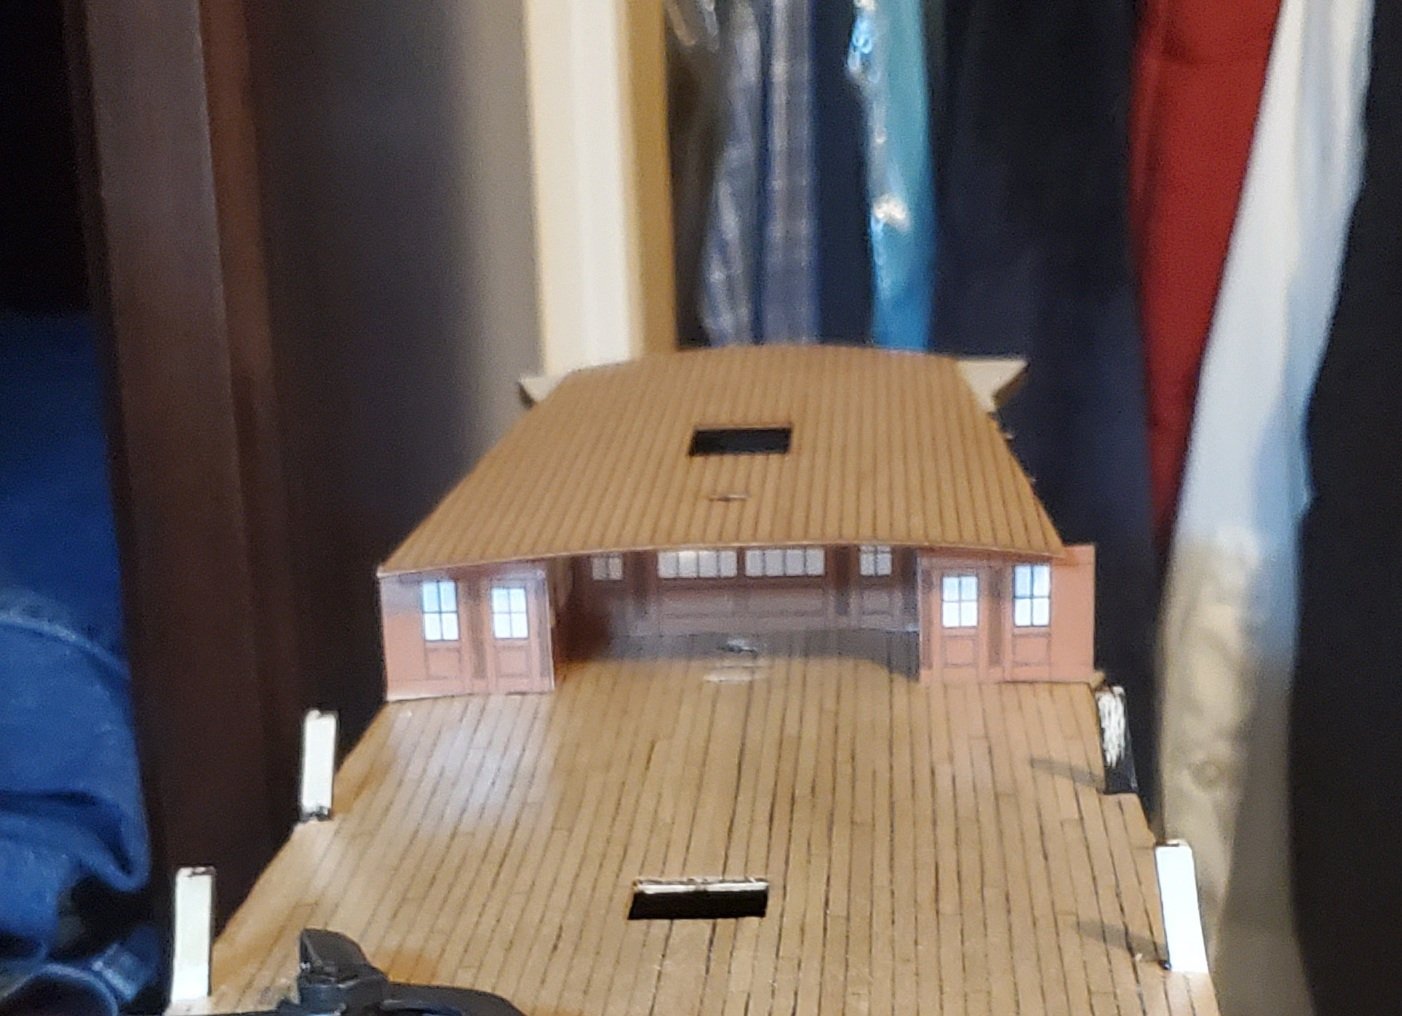
20200411_230911.thumb.jpg.c0b38ea5d11e12e4d0b9d162d4237c8a.jpg
20200411_231018.jpg.f337ad73857c48c81e61f0aa6fdd137b.jpg
Poop deck sitting in place. They actually look better than the photos. I have to cut the sides down after the glue dries. I like these and think I will keep them. The only change I considered was to take some photos of the cabin windows from the internet showing what is seen through them, shrink them down and put them in the window panels before printing, but at the small size I'm not sure it's worth the work. Maybe the windows should be blacked out. This is my first effort at trying this. Sometimes it takes a couple tries to get it right

Mark Frazier
 
On your figure head, if you use it......filler blocks.?...
Yes, I was supplied with a photo of the real ship with the figure head removed and there are cheek blocks to fill out the space. If this, crappy casting can be polished up with my die grinder, it may be usable. We shall see. I may order the Caldercraft figure head. Don't know yet.

Mark Frazier
 
The only fault I can find with your printed door and window panels is that the windows are way too light. If you cut them out and added a piece of buff colored paper behind them it might look a lot less glaring. I, personally, would also use some small pieces of stained wood to add some detail to the printed sheets - but that's just me. Its how I have done some paper model RR structures and adds a very nice level of detail. By the way - your decks look great.
 
The only fault I can find with your printed door and window panels is that the windows are way too light. If you cut them out and added a piece of buff colored paper behind them it might look a lot less glaring. I, personally, would also use some small pieces of stained wood to add some detail to the printed sheets - but that's just me. Its how I have done some paper model RR structures and adds a very nice level of detail. By the way - your decks look great.
You are correct. I thought the windows were too light also. I also considered adding some walnut trim. This was my first attempt, I am still figuring it out. I thought it might be a good alternative to scratch build the panels and getting details. Especially in an area that will be mostly hidden. I may still scratch build the panels.
 
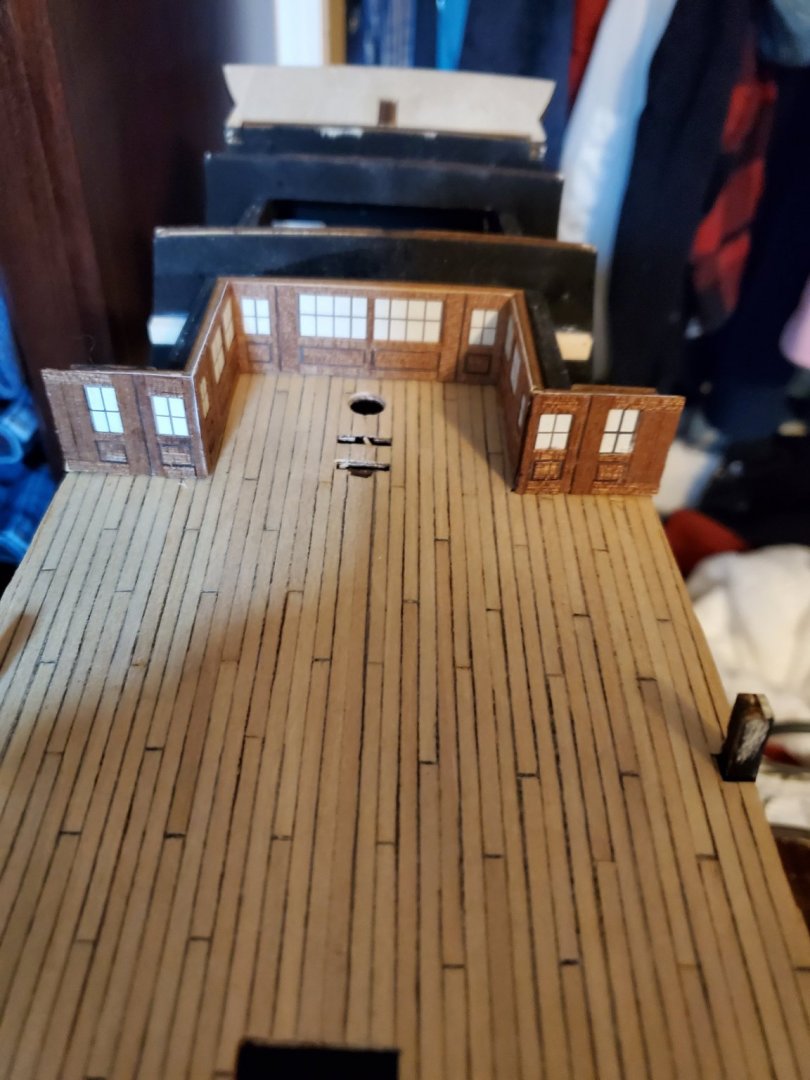
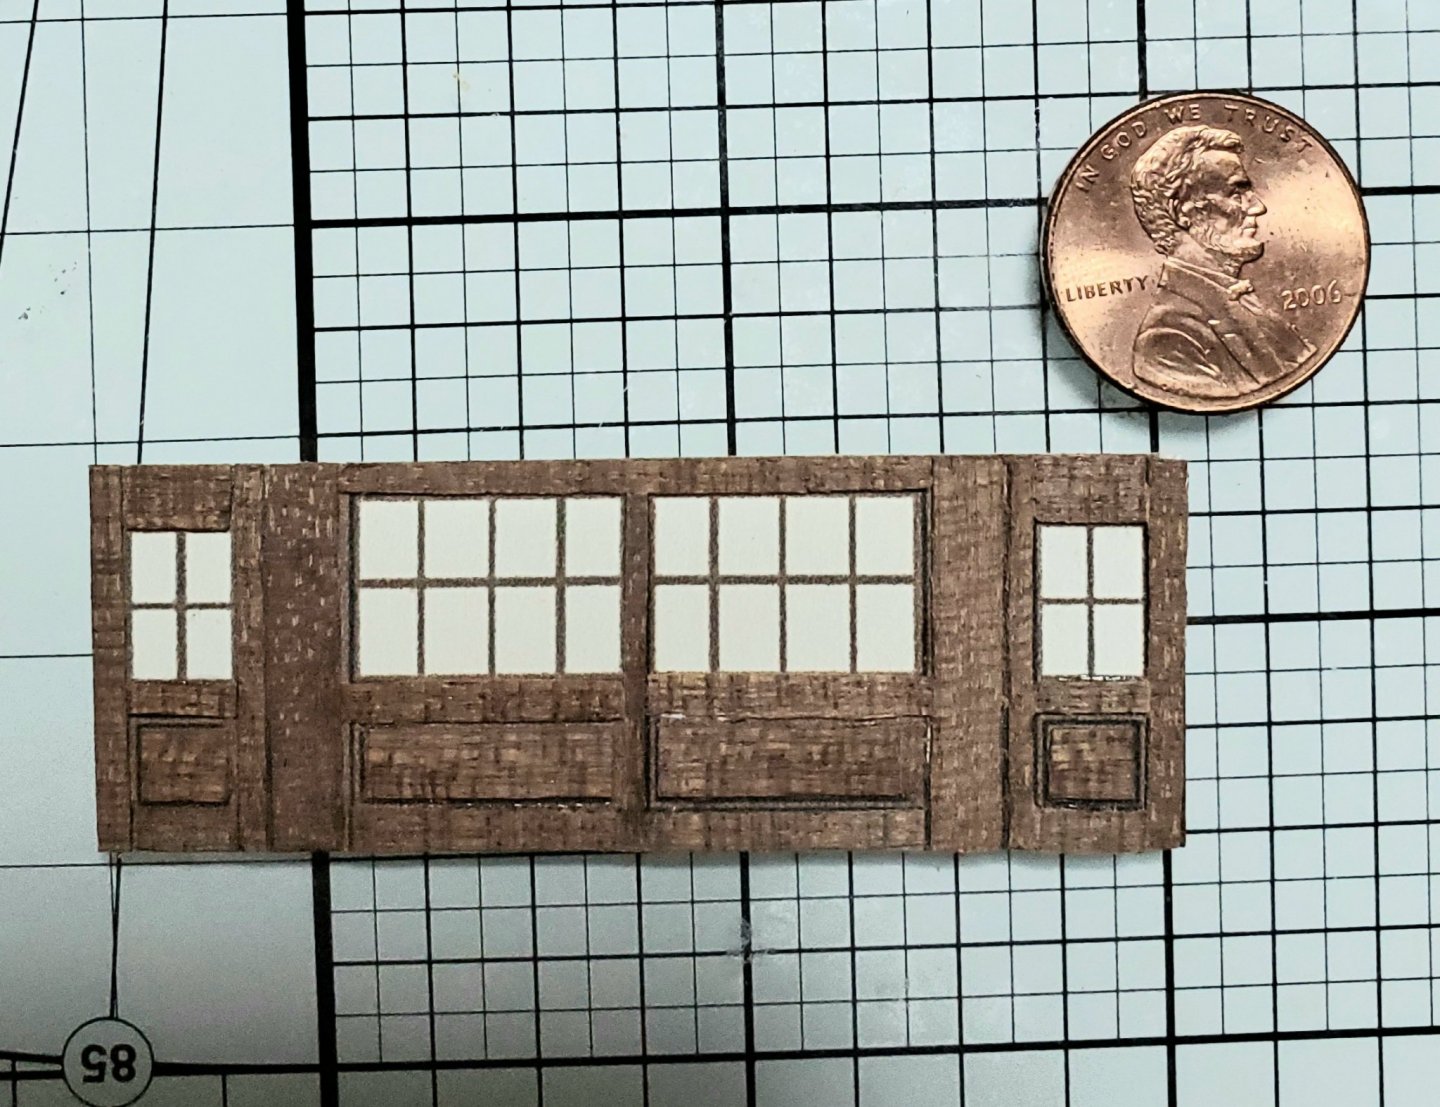
This is the final version of the cabins (I think). It is maxing my skill level I think. I printed the cabins from my PC on card stock. I also put a really light gray tint on the windows so they are not so bright white. After printing, I cut them out and cut little pieces of wood from .5mm thick left over mahogany , (I believe) planking from my last ship and glued each piece on the printed cabin pattern. There are 22 little pieces of wood on this one piece. After a very light sanding it is ready to install. I will not put a finish on these. This method is going to give me ,I feel, the best amount of detail and depth to the cabin walls. I like these but .... I do think they could be better.
20200412_155244.thumb.jpg.7cfec0aa9ae20e9a0c09a2401355b42f.jpg20200412_154804.thumb.jpg.dbfbd1c7b9ca4375d0c766e4fe0b01e1.jpg
Mark Frazier
 
20200412_212735.thumb.jpg.1d7539c3c6dd3321cad83d7e957df618.jpg
The cabins are finished and I am reasonably happy with them. ( I still have to trim the outside edges when glue dries. ) I printed them then glued tiny pieces of wood to the pattern. ( My problem is that I am a machinist and used to working with dimensions to .001 inches. That kind of tolerance just doesn't work with wood. )
I think these look great considering they will be very difficult to see the details once everything is in front of them. Now I am ready to start the first layer of planking.
Mark Frazier

(Once the brass black arrives, I can make door handles.
 
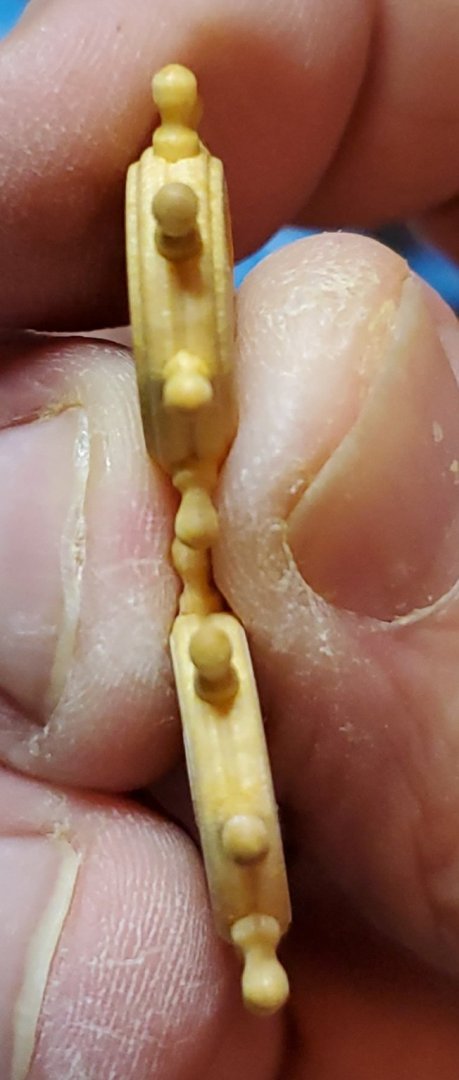
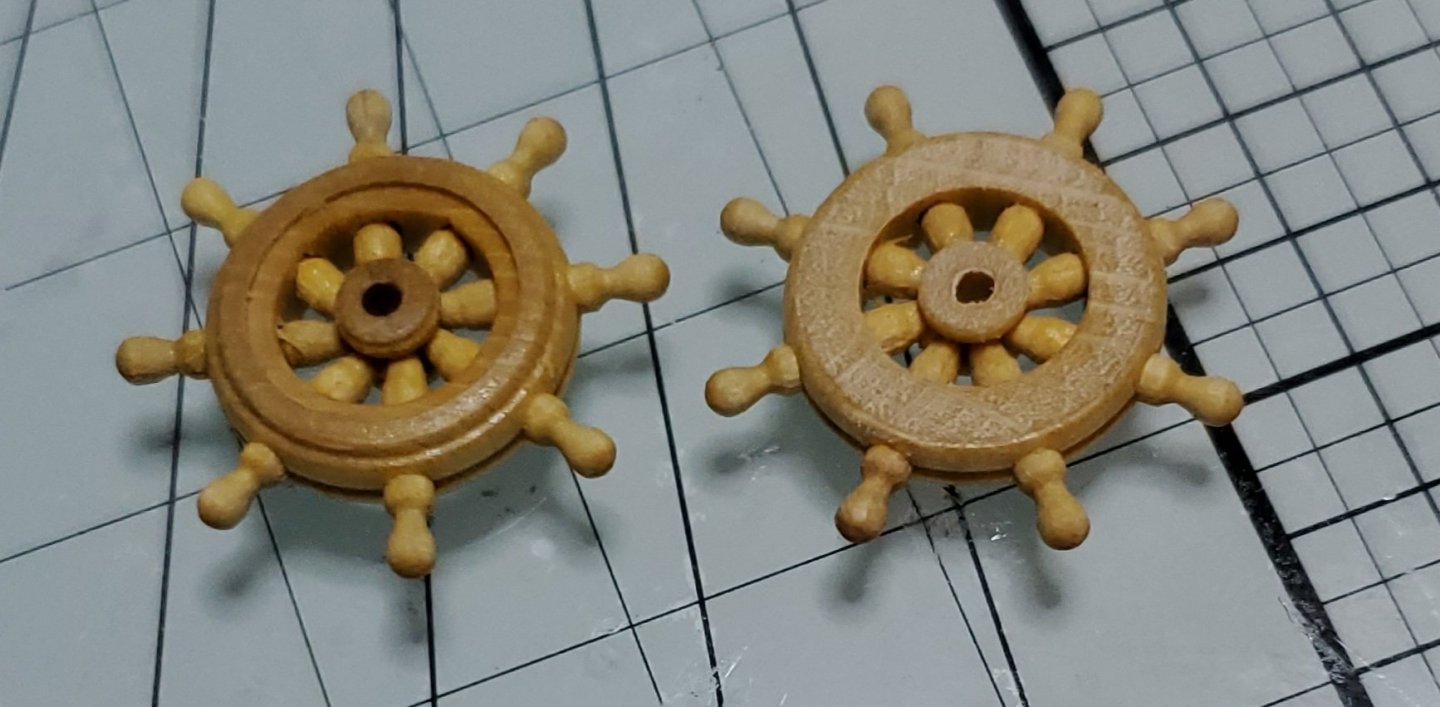
As I look ahead for more things to watch for, I noticed the ships wheels. They are way too thick and look bulky. These are twice the thickness they should be. I can order the correct scale ones but thought maybe these can be saved. You can see in the next photo, I thinned one down.
20200412_230051.thumb.jpg.82db23a1da052f4c4818ecb96ecac2b4.jpg
This is an improvement. I probably could go a little thinner.
20200412_230119.thumb.jpg.08e736f9025bac0e425d0315608906b9.jpg
If I thin them a little more, I think they will be okay. This wood doesn't take stain hardly at all. I will probably have to paint them wood brown. We shall see how they look when I get them done.

Mark Frazier
 
The cabin fronts look a lot better. I agree that the wheels are too thick., and the spindles are way over sized. I was reminded of something as I was reading one of my books on ship modeling - think of how big a person's hands would be at the scale you are working in. Of course it was said in relation to running rigging, but it could apply here too.
 
Yes, I have thought that myself. Even thinned down, the wheels are way out of scale. I think maybe I will look for something better. I haven't been able to find much though. There aren't a lot of choices out there. I don't know how hard it would be to try and make them.

Mark Frazier
 
[QUOTE="Mark Frazie
Next I will paint them, add all the hardware, then the wheels and rigging.
About the color. Does anyone know what the actual color of the carriages should be. The video tours of the ship I see online show them bright yellow, ( which I don't care for) I have seen them on builds painted different colors. I was wondering what color they were in 1765. White, yellow, yellow ochre, and brown are the most common colors I've seen them painted.

Mark Frazier
[/QUOTE]
I have the same dilemma. I've seen the carriages on the victory and I think (but do not know) that this is a "modern" affectation. All other models that I can remember have them as natural dark wood, red or black. Also the lower deck bulwarks are white - but the carriages at present are yellow. Looks weird to me. Would welcome any information as to colours when this was a fighting ship.
 
Yes, I have thought that myself. Even thinned down, the wheels are way out of scale. I think maybe I will look for something better. I haven't been able to find much though. There aren't a lot of choices out there. I don't know how hard it would be to try and make them.
if you cannot find anything close or suitable, try building yourself...a first step to scratch build! The only thing to be caution, if you like it... then you will start 'bashing' the kit and redo parts. :eek:
 
if you cannot find anything close or suitable, try building yourself...a first step to scratch build! The only thing to be caution, if you like it... then you will start 'bashing' the kit and redo parts. :eek:
I'm already bashing the crap out of the kit. Everything is such poor quality. This would have been a decent kit if Mantua put a little thought and effort into it. Half of the kit is completely wrong or very poor.

Mark Frazier
 
I'm already bashing the crap out of the kit. Everything is such poor quality. This would have been a decent kit if Mantua put a little thought and effort into it. Half of the kit is completely wrong or very poor.
Hello Mark,
Sorry to hear about poor quality of the kit. But on the bright side, you can build parts yourself as you already bashing it for the most part. Good luck!!
 
Hello Mark,
Sorry to hear about poor quality of the kit. But on the bright side, you can build parts yourself as you already bashing it for the most part. Good luck!!
Well, I have to say, my intention was/is to make a lot of things myself to increase the details, but I had no idea the Mantua kit was so poor. I actually ordered the Billings kit but the Coronavirus stopped that and I had to settle for this as it was in stock. My biggest headache now is getting materials I need or want. All the hobby shops are closed down, everything I try to order online is out of stock , and I'm stuck in the house and even so there is no place to go. This makes building a little more difficult. It just ups the challenge I guess.

Mark Frazier
 
Back
Top