HMS Victory - by Mantua Sergal - 1:78 scale

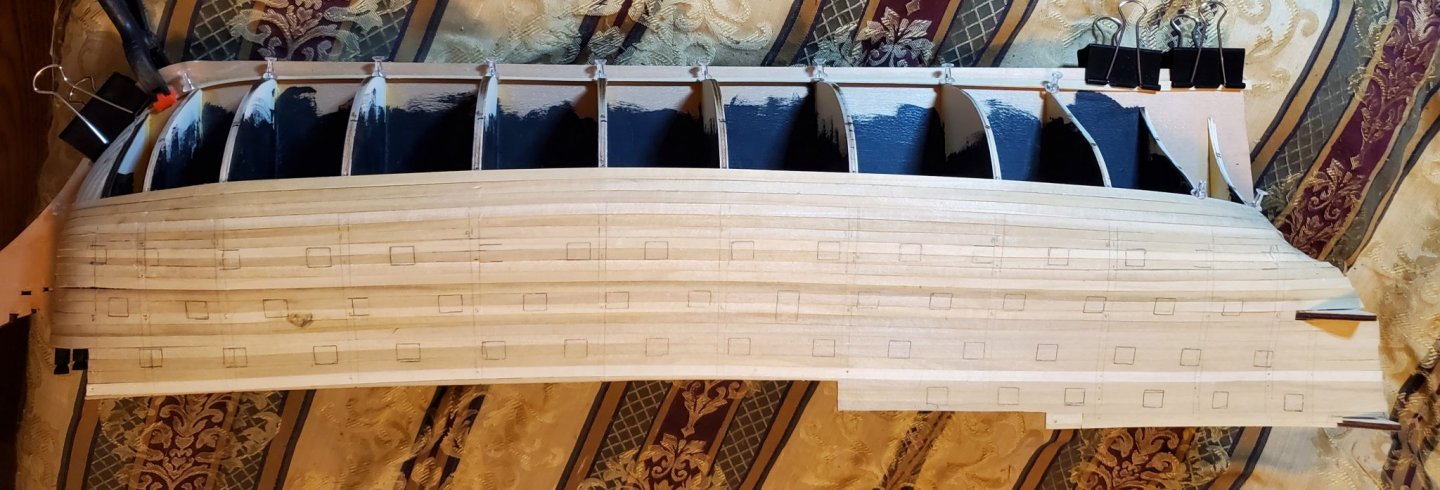
I marked the ports according to the pattern. I cannot move some of these the amount needed. I colored in the bulkhead interference.
20200422_165214.thumb.jpg.6a8199d76931e3dd48afea63c4e6497e.jpg

20200422_165151.thumb.jpg.870abfa8d6d1286b1af4260934e95ec1.jpg
I will mark the other side and move the ports to see how it looks.

Mark Frazier
 
I cut some squares of painters tape and put them in the gun port locations. This is with 12 of the front gun ports shifted to safe locations. At the stern, I moved four ports.
20200422_175409.thumb.jpg.8fa2cd9cf77a0a3fea1254577f336e4d.jpg

I think this may work. I don't think the odd spacing is too noticeable. What do you all think?

Mark Frazier
20200422_175354.jpg
 
Hi Mark. I don't think anyone when viewing the completed ship will ever question the gunport location - and more importantly - your solution works! This is really an oversight from the manufacturer.
 
I had the sam
Hi Mark. I don't think anyone when viewing the completed ship will ever question the gunport location - and more importantly - your solution works! This is really an oversight from the manufacturer.
It seems to be a common oversight throughout manufacturers. I had the same problem with a Santa Ana from AL. None of the measurements were correct to the plans. Maybe that's why these companies go out of business.
 
I am still planking away on the first planking layer. This is how I get myself in trouble, ( but I always seem to manage a way out), I lined off my hull and put tick marks for every plank on each bulkhead indicating the amount of taper needed and theoretically everything would work out even .... BUT .... as usual I get scared getting closer to the bottom and just had to go start from the bottom and plank up.
20200426_173142.thumb.jpg.458661c0479b782eda781cb6263ef2ff.jpg
20200426_173203.thumb.jpg.e17efc72fa8cb63d318ef67e2a7cf126.jpg
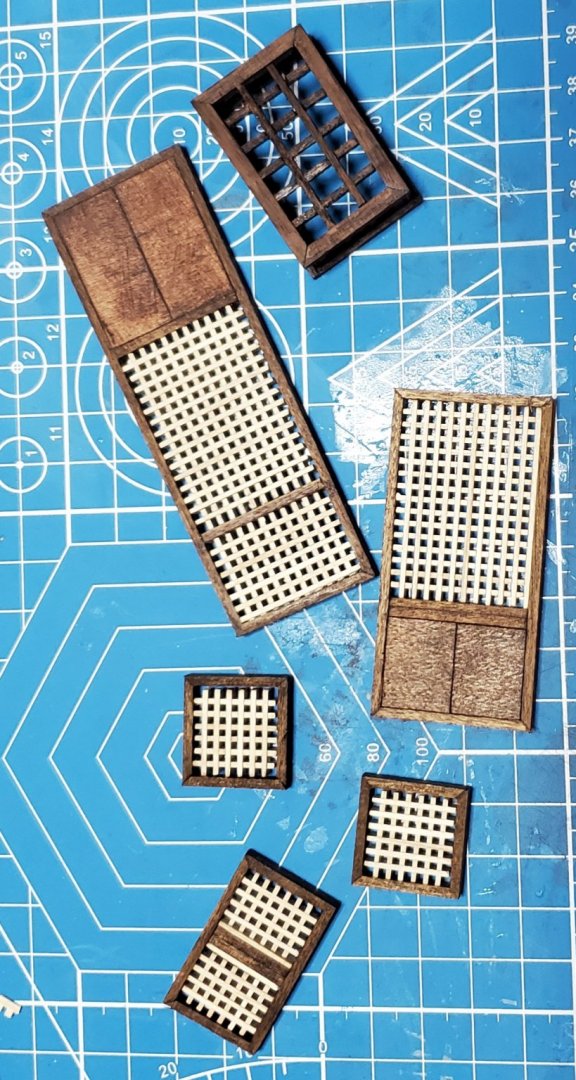
Now hopefully it all works out. AND .... I was waiting for glue to dry so I was sitting looking at my book by John McKay to check details and discovered a flaw, a problem, something wrong, (at least in my eyes ). The grates on the gun deck in my kit have doors on the end .... hatch covers ????? ... I don't know, but the book shows stairs in both these locations.

20200416_015753.thumb.jpg.b0b0e1757561dd309edb6ac477ba3fa5.jpg
20200410_163854.thumb.jpg.4cc404640e2ee91900770c836cdca2b5.jpg
Now, in my mind, this is a problem, .... could I cut these openings and install stairs? ..... yes .... should I ? ..... I'm not sure.... the kit calls for the doors here... in reality, they are stairs, but once the life boats are installed, no one will ever notice whether they are doors or stairs, but I will ( sometimes I hate being a perfectionist). Now don't get me wrong cause I am taking artistic license in the fact I do not plan on painting the outside of the hull or coppering it, so I will probably follow the incorrect kit plans when installing the wales because they will divide the colors of the wood. So does this give me permission to use hatch covers instead of stairs? .... maybe ...... no not really.... do I want to cut the deck out and cut up the gratings I built? .... not really .... so why do I feel the urge to make this detail correct? .... I have to think about this. What would you guys do? By the way, there are no stairs in the kit for here. ( asking myself, why does that even matter?) ...... sheesh... back to planking before I burn brain cells out.

Mark Frazier
 
Yes, Mark - being a perfectionist, is really not easy - sometimes I think it is a curse. I have read your post and re-read it, and it really seems that you will not be happy until you have made the change to stairs (whether they are ultimately covered or not). I would make the change to prevent the future "I should haves ..." This is just my interpretation of how you feel after reading your post. (If it's any consolation, I removed half the starboard side's planking yesterday because I wasn't happy.
 
Yes,Heinrich, That was my discovery from McKay's book. Two sets of stairs facing the middle. Now, my quandary is cutting the hole for them. This stupid kit has a panel under the deck in the center 5/32" thick. This would have been easy had I caught it earlier. I am convinced they did this just to make the kit easier to make ( more convincing a poor company). If ..... if... I can use the right angle attachment for my dremel and a circular saw blade for dremel .... I might be able to get in the space. If this does not work, I will have no choice but to leave it alone and that..... well, won't get into that. I will correct this.... if I can.

Mark Frazier
 
Well .... after sleeping on it and looking at all possibilities, I made a decision about the hatch covers or stairs (as it should be). While I found I can cut the hole for the stairs, there is no place to attach the bottom of them. There is a false part deck in the center but it is to far for the stairs to reach ( unless I make a really long set of stairs ... not likely). For this reason, I will stay with the hatch covers as in the instructions. If I had caught this earlier, I would have put a block in the bottom for the stairs to set on, but I ain't no way in this life tearing half the planking off to fix something no one will notice, ( at least not in my world).The only person(s) that would ever know is someone like us (and I'm the only one I know personally). I wish I could fix this to what it should be, but it just isn't worth the trouble as the view is about 80 percent blocked by the life boats and all the fixtures around this opening. So..... on with the planking and building a Victory.

Mark Frazier
 
Hi Mark,
I have this kit and your build is going pretty much like I want mine to go.
Awesome!
It is not the best kit but with some help and substitution of some parts, it can be made good. I was simply blown away by the poor quality materials and short cuts they took, but I think I can build a good representation of the victory with it.
I hope to see how you interpret the kit.

Mark Frazier
 
Well ..... the first planking layer is done and a preliminary sanding.
20200505_131406.thumb.jpg.bc7212bc3e602ea83c0a33c3144119f7.jpg
20200505_131353.thumb.jpg.035fb75637deca996a85b19de4815760.jpg
20200505_131340.thumb.jpg.ad36bac34829ec22811b48ac8ab43d30.jpg
There are some areas that need a little filler. I will fill those and sand again. Progress is slow at this point, but how well this is done will reflect on the rest of the build.

Mark Frazier
 
Slow and steady wins the race!

I think you are doing a good job on the kit. Looking for what needs fixed and fixing what can be done.

That's the mark of a quality built ship.
 
Slow and steady wins the race!

I think you are doing a good job on the kit. Looking for what needs fixed and fixing what can be done.

That's the mark of a quality built ship.
Thank you for the kind words. I do so want this build to be a good one.

Mark
 
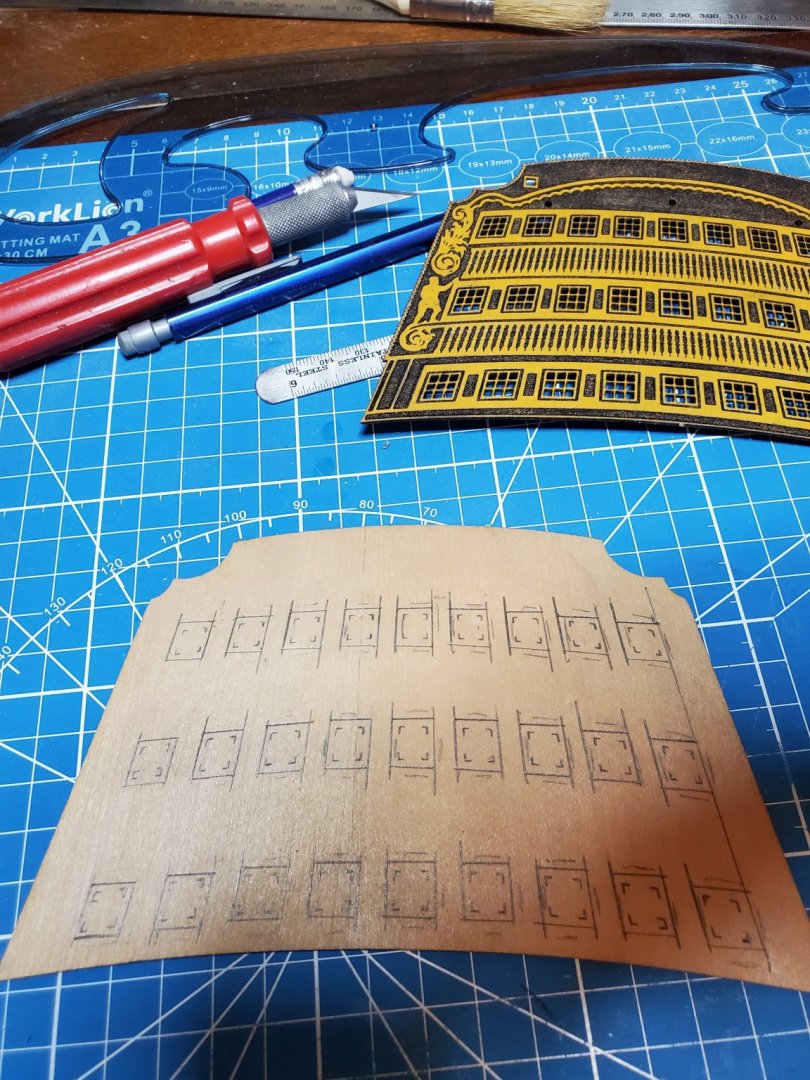
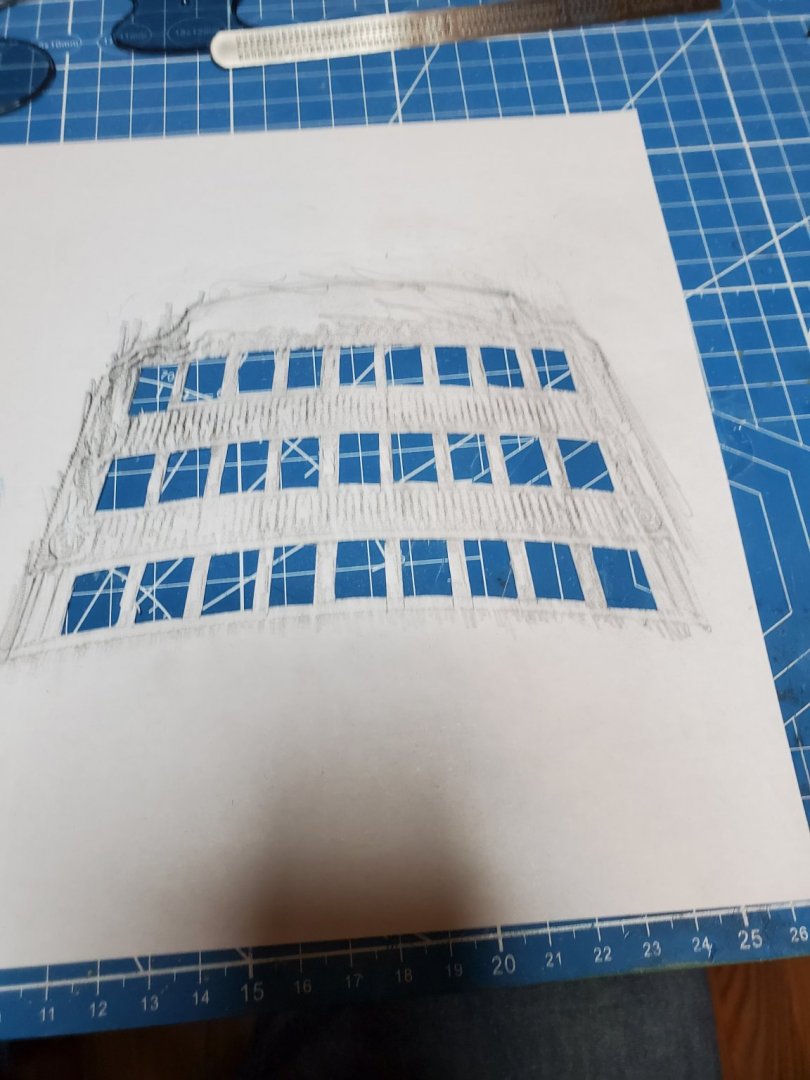
While getting the hull ready for second planking, I will start working on the stern. This is the part I have been worried about doing. The kit calls for painted wood behind the windows. I don't like that. I think I can use the stern parts as a base instead of making everything from scratch, at least I will try it. The worst that can happen is I have to start over from scratch, but if it works satisfactorily, things will be easier.
20200505_164333.thumb.jpg.c16508f23a973f6c1db757cfe8efc07f.jpg
I made a paper tracing of the stern panel and used it to lay out the windows.
20200505_170710.thumb.jpg.8ac309560f35348771fb79c32c48b38d.jpg
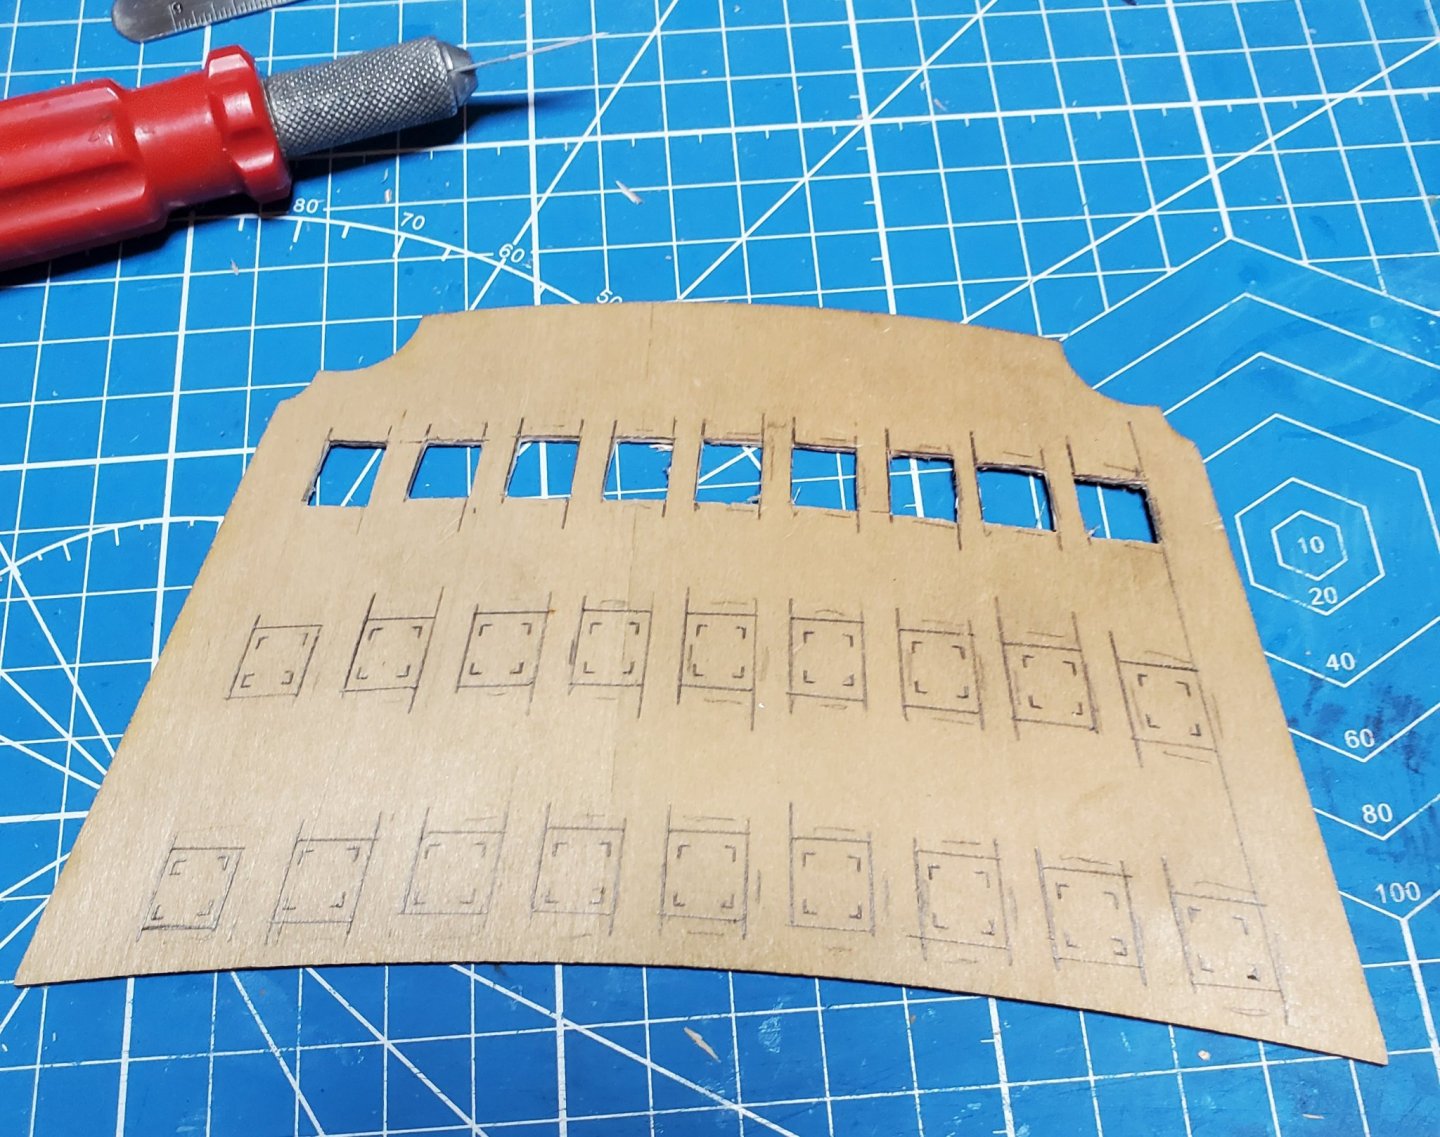
Next, I am cutting the windows out. I will like this much better than blocking them up.
20200505_174719.thumb.jpg.caa9eec79b27bfd49fc29165c3184ef6.jpg
It is going to take a few days to get all the windows cut out. This panel goes behind the etched stern panel. My plan is to plank the etched panel with 1 mm thick walnut and add trim around the windows. This will give depth to the rear of the stern and I can use the pillars between the window rows on the etched panel. I don't know how it will look until I try it, so we shall see. I need the stern framework on before I start the second planking.

Mark Frazier
 
I fully agree with you on cutting out the windows. It is certainly worth the try. I also like the idea of planking the etched panel with walnut and then adding trim around the windows.
 
Back
Top