wow....Guess what the postman just delivered... Cheers YT for the link.
-

Win a Free Custom Engraved Brass Coin!!!
As a way to introduce our brass coins to the community, we will raffle off a free coin during the month of August. Follow link ABOVE for instructions for entering.
-

PRE-ORDER SHIPS IN SCALE TODAY!
The beloved Ships in Scale Magazine is back and charting a new course for 2026!
Discover new skills, new techniques, and new inspirations in every issue.
NOTE THAT OUR FIRST ISSUE WILL BE JAN/FEB 2026
You are using an out of date browser. It may not display this or other websites correctly.
You should upgrade or use an alternative browser.
You should upgrade or use an alternative browser.
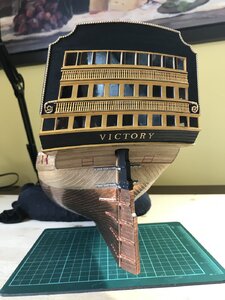
HMS Victory by Y.T.- Mamoli - 1:90 scale
The new version. I have the old motor driven one and it is certainly a nice tool.
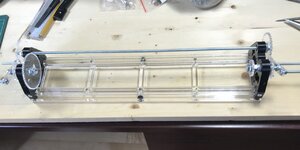
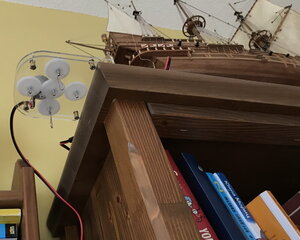
Would it be possible to show (and review) this machine in an extra thread here?Just received and assembled Domanoff Workshop Rope serving Tool. Looks good so far. It is nice it has industrial ball bearings at each rotating axel.
View attachment 161407
Tools, Lathes, Mills, Jigs and Techniques
This forum has combined all the Topics for Tools, Lathes, Mills, Jigs and Techniques
shipsofscale.com
On the Domanoff website they have a you tube video.Would it be possible to show (and review) this machine in an extra thread here?
Tools, Lathes, Mills, Jigs and Techniques
This forum has combined all the Topics for Tools, Lathes, Mills, Jigs and Techniquesshipsofscale.com
Yes I know - but this is subjective advertisement -> often it is very good to see and hear about the opinion and experience of a modeler.......(also subjective off course)On the Domanoff website they have a you tube video.
Domanoff actually has 3 versions of serving machine now including the old motor driven one!!! Great stuff.The new version. I have the old motor driven one and it is certainly a nice tool.
Excellent looking rope!!!! There are experts on SoS that can tell you all kinds of things about rope. Different directions of twist for different sizes of rigging... just mind boggling!!!! Almost a whole hobby in itself..I am amazed I was able to make it right first time
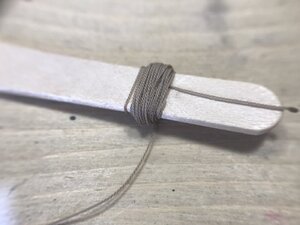
The workload starts when you have to make cable laid anchor ropes. But making your own is giving great fulfilment.Hi. I got my first ever mini rope made on Domanoff machine. It is 0.38 mm diameter. I am amazed I was able to make it right first time with no previous experience. Just was following Domanoff’s instructions. I am happy .
View attachment 161839View attachment 161840
That looks so much better. I'm working on same and wondering why do they supply garbage with these kits. Plus missing parts. I have a ZHL kit which is next, and it's the only kit I've ever rec'd that actually gave a full inventory.
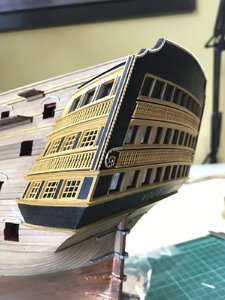
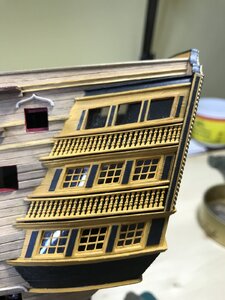
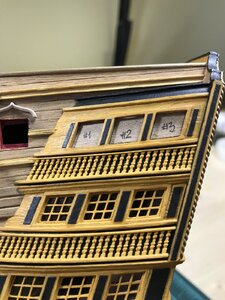
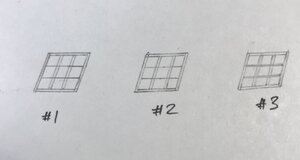
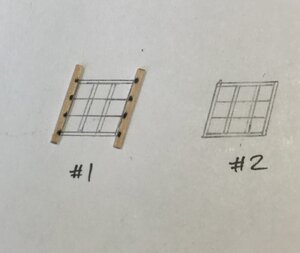
Here I will show you how I make the window frames. I finished 6. Now I have to make remaining 39 frames. Quite a task!
Sequence:
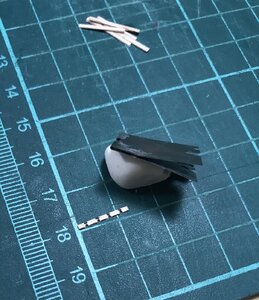
1) cutting out plenty of little sticks which will become my future vertical and horizontal window frame members. These are cut of 0.5 mm thick oak veneer.
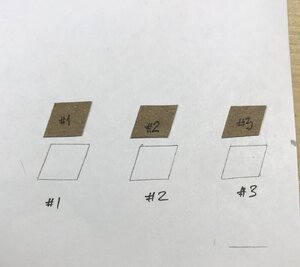
2) making carton templates to fit exactly into existing windows. There is no one window same size as the other one so each template is unique. I number them so I know which fits where after I take them out.
3) Using cardboard templates trace their outline on piece of paper.
4) draw outline of all future frame upright and horizontal members
5) I mark up with pen and cut our tiny notches on every frame member so they are assembled together same way ship grating pieces are getting made. For making notches quickly I made up a quick tool made of standard one side blade. Blade was annealed with torch, heated red hot and quenched into water, then tempered in my baking oven.
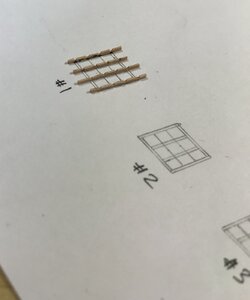
6) then every member is getting glued with PVA glue where it belongs on the paper. Whole frame is getting wetted with diluted PVA glue.
Rest is just cutting off the ends, cleaning up, grinding to proper thickness, ensure it fits into window opening, painting yellow and gluing into the window opening.
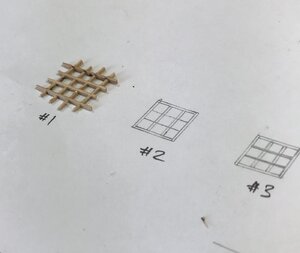


Last edited:
Look at newly added window frames assembly instructions above. I take pictures and upload them to this forum with my I-Phone. The comments however I am adding through my normal computer as it is much more convenient. So my instructions are getting added later after pictures were inserted through the I-Phone. This is a craziness with current technology.
Bellissimo registro di costruzione, dettagliato e pulito il tuo lavoro. Sei il mio riferimento
Grazie mille, Enzo.Bellissimo registro di costruzione.....
YT, hi, I'm working on the same model. Maybe you can help me with something. Going from Pg 8 to pg 9 and plan B. the parts numbers jump from 238 to 300. I'm stumped here and dont know what I'm missing. I understand the build process, but where are the parts? Maybe I'm being blind here and don't know. I can account for a few of those, such as lanterns, string and chain. But that still leaves a great deal unaccounted for, thnks, Ken
Hi Ken. On pages 8, 9, Table A and Table B I found bills of materials 222-239, 317-381, 240-250, 300-387 respectively. Part numbers 251 to 299 are missing entirely. I am just guessing this was done on purpose in order to be able to add some parts in future versions of this model which had never happened.
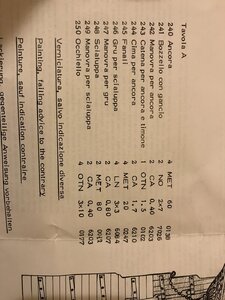
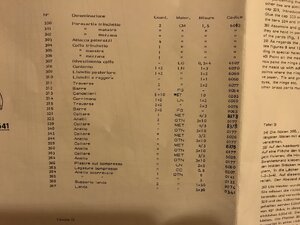


Thank you, YT. I'm just going to pick up with Plan B, #300 and just muddle along, where it should, hopefully, fall into place.Hi Ken. On pages 8, 9, Table A and Table B I found bills of materials 222-239, 317-381, 240-250, 300-387 respectively. Part numbers 251 to 299 are missing entirely. I am just guessing this was done on purpose in order to be able to add some parts in future versions of this model which had never happened.
View attachment 177971View attachment 177972


