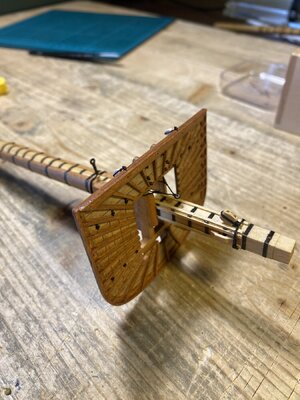
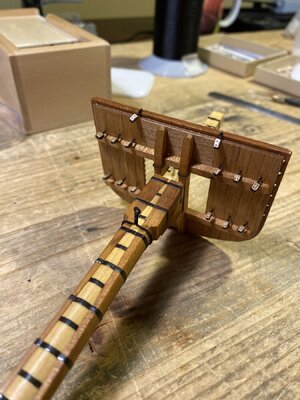
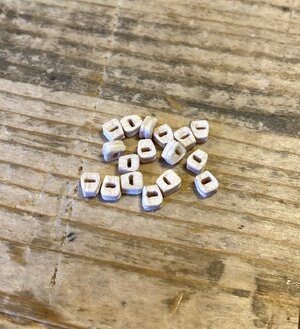
I ordered some from Cornwall a few weeks ago. They arrived rather quickly having come from England and arr very nice. I might order more for my full size ship later.Here you go (drip shields)...
Cornwall Model Boats Ltd
Suppliers of quality model ship and model boat kits, model boats, model boat fittings, hardware, radio controlled and static display models available. Our Worldwide mail order service offers modellers with a large range of model ship kits, ship fittings, ship plans, building materials, books and...www.cornwallmodelboats.co.uk
-

Win a Free Custom Engraved Brass Coin!!!
As a way to introduce our brass coins to the community, we will raffle off a free coin during the month of August. Follow link ABOVE for instructions for entering.
-

PRE-ORDER SHIPS IN SCALE TODAY!
The beloved Ships in Scale Magazine is back and charting a new course for 2026!
Discover new skills, new techniques, and new inspirations in every issue.
NOTE THAT OUR FIRST ISSUE WILL BE JAN/FEB 2026
You are using an out of date browser. It may not display this or other websites correctly.
You should upgrade or use an alternative browser.
You should upgrade or use an alternative browser.
HMS Victory by Y.T.- Mamoli - 1:90 scale
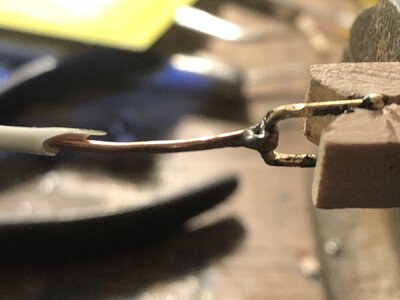
I may have found why my solder joints were not setting up properly. My soldering iron (battery-powered) was not getting hot enough. A change ofOnly thing I do not like about this soldering process is that solder material is too soft and bends before the copper wire. I wish I was able to do a silver soldering here. However I do not know what material I could use for making a soldering jig that would not ignite at the torch flame. Any help here?
batteries seems to have done the trick. I took some scrap 18-gauge copper wire and flattened one end. I secured my crane in a small clothes pin and clamped in in my vise. I next wrapped the flattened wire around the base of the crane, soldered the two and after a bit of clean-up with a file, the solder holds and I can mount it to the gunwales and midships rail. A bit of touch-up and I'm done.
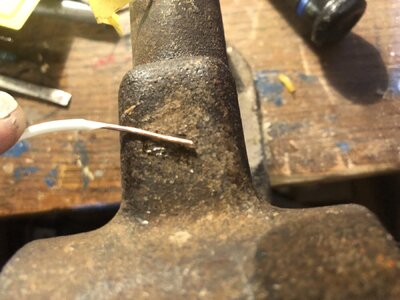
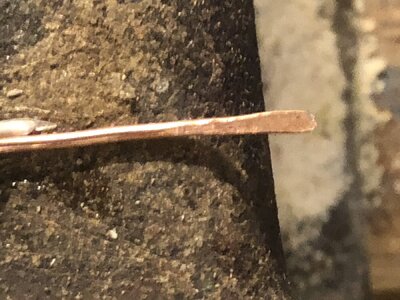
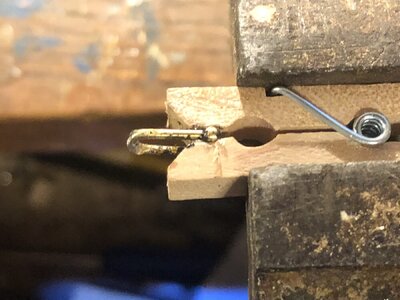
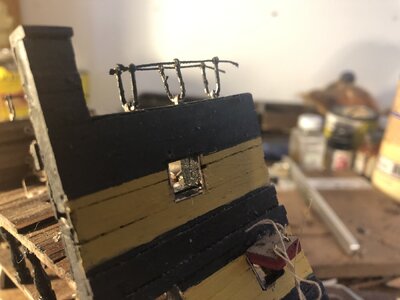
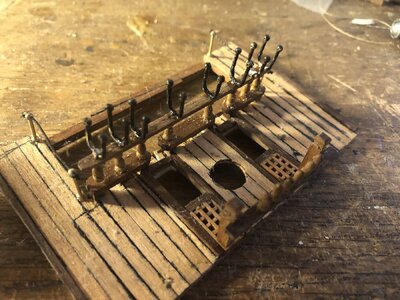
The joints, as long as I make them with a set of fresh batteries in the soldering iron, are holding quite well. I tin the wire first and that helps make the joint solid. They need to now that I am starting to "sew on" the netting which I got at a local wedding dress maker. I got a huge square only about 25-30 mm by 12 - 15mm piece. I do not have a satisfactory, safe place to try silver soldering, yet.I may have found why my solder joints were not setting up properly. My soldering iron (battery-powered) was not getting hot enough. A change of
batteries seems to have done the trick. I took some scrap 18-gauge copper wire and flattened one end. I secured my crane in a small clothes pin and clamped in in my vise. I next wrapped the flattened wire around the base of the crane, soldered the two and after a bit of clean-up with a file, the solder holds and I can mount it to the gunwales and midships rail. A bit of touch-up and I'm done.
View attachment 433735View attachment 433736View attachment 433737View attachment 433738View attachment 433739View attachment 433740
Some have mentioned fire brick or a thin (3/4{ or so) brick paver?? I wonder if a small section of cement board (like that used as a base for tile in a bathroom shower or tub) and use a Dremel burr to cut out for the parts to solder. You might be able to pick up a piece from a local store like a Lowes or Home Depot or whatever may be similar on your area. I would not use "Hardy plank" as it is mostly silica. Cutting it would release some harmful dust and you do not want to be breathing that without a substantial respirator equipped with HEPA filters.I may have found why my solder joints were not setting up properly. My soldering iron (battery-powered) was not getting hot enough. A change of
batteries seems to have done the trick. I took some scrap 18-gauge copper wire and flattened one end. I secured my crane in a small clothes pin and clamped in in my vise. I next wrapped the flattened wire around the base of the crane, soldered the two and after a bit of clean-up with a file, the solder holds and I can mount it to the gunwales and midships rail. A bit of touch-up and I'm done.
View attachment 433735View attachment 433736View attachment 433737View attachment 433738View attachment 433739View attachment 433740
- Joined
- Nov 6, 2022
- Messages
- 245
- Points
- 113

A mast is a mast unless you can match this mast. The detail is unmatched by any one I have ever seen. I look forward to seeing the process. I suspect you were a very detailed machinist and carpenter in your day. I love asking the youngsters at work, what is half of 5/16th inch? Or even give them a decimal equivalent. They do not care or even know how to answer. They pick up the cell phone with an answer, but do not know what it means. Your work is profound. I have done my time machining and wish I had the proper tools. But hey, I am getting there.
Thanks, etubino.Excellent Y.T. please keep going!
Thank you, dnalley.A mast is a mast unless you can match this mast. The detail is unmatched by any one I have ever seen.
No, dnalley, I had never been. I am mechanical engineer, still employed. I however always was a hands on with all kinds of tools.I suspect you were a very detailed machinist and carpenter in your day.
Ha-ha. This is a difficult one for a new generation. It is an easy one for me working for decades with Imperial and Metric measuring systems. Easy answer is 5/32.I love asking the youngsters at work, what is half of 5/16th inch?
- Joined
- Nov 6, 2022
- Messages
- 245
- Points
- 113

I did my most enjoyable work as mechanical engineer in the glass tempering business. Did some machining to get me out of the office (away from AutoCAD for a while) to clear my head and gain hands on experience. Did some Tig and Mig welding also. On the metal lathe, why not? As for those youngsters, they want CNC and walk away. We are losing the people who want to actually read a micrometer, or even a tape measure. Your work is phenomenal, and I can see you enjoy the process. Looking forward to all of your next posts.Thanks, etubino.
Thank you, dnalley.
No, dnalley, I had never been. I am mechanical engineer, still employed. I however always was a hands on with all kinds of tools.
Ha-ha. This is a difficult one for a new generation. It is an easy one for me working for decades with Imperial and Metric measuring systems. Easy answer is 5/32.
Typo.
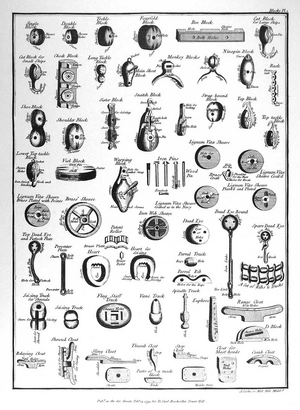
Victory rigging is going extremely difficult for me. My problem is I cannot do something I do not understand. It takes sometimes weeks for me to understand where and how some line starts and ends and their function. Comprehensive one source for Victory rigging doesn’t exist. I obtained and use 4 books to decipher each single part of rigging at a time. Most of the times what is shown in one book is obscure for understanding. Then I must use other three to finally exclaim “eureka , I got it”. Here’s an example. I struggled to understand a bowsprit standing rigging. I was looking for hours at great picture in McGowan book (most valuable book I have for this purpose by the way) and couldn’t get it. I read the verbal description of it in Longridge book about 20 times (this is the most obscure reading I ever had as it also goes with no pictures most of the time). Then I was looking onto diagrams in McKay book intermittently. Well I finally got it.
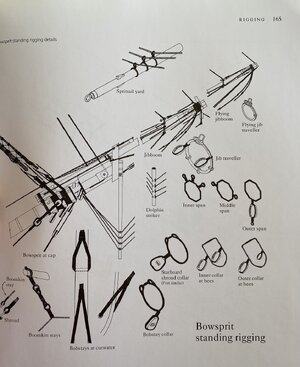

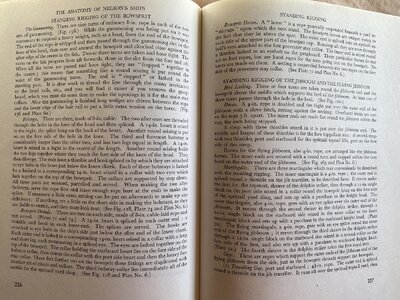

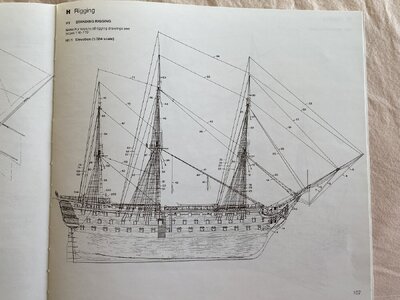
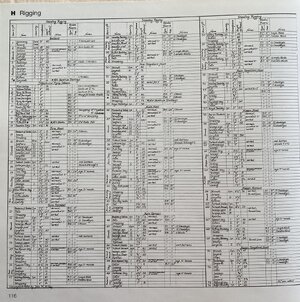



I think I should post all my findings on Victory rigging books on separate thread as it can be very useful for someone who looks for answers to Victory rigging questions.
- Joined
- Nov 6, 2022
- Messages
- 245
- Points
- 113

I see you changed your typing skills a little
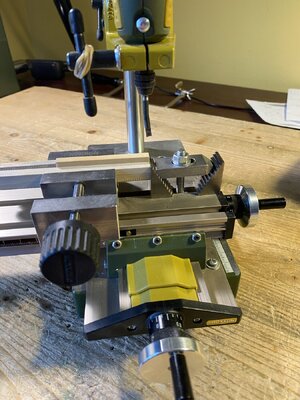
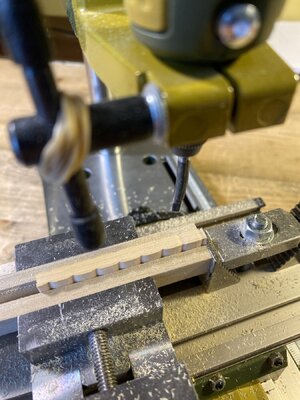
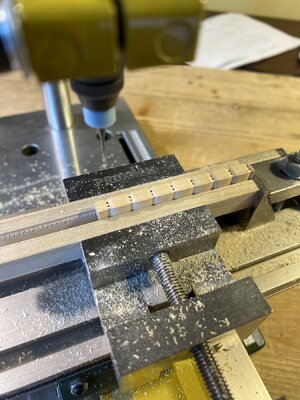
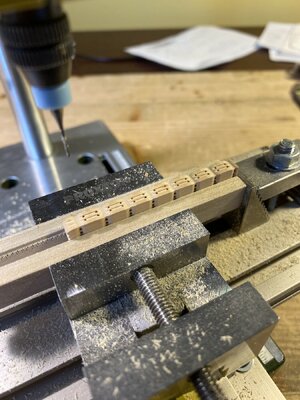
Here how I now make rigging blocks. Detailed description.
Block making process sequence:
1) On both swallow sides cut deep shape with profile cutter.
2) On both cheek sides cut shallow shape with profile cutter.
3) Change tool to end mill cutter bit.
3) On one of cheek sides drill strop-separator holes between blocks slightly over half way down.
4) Do same on the other cheek side.
5) On one of swallow sides groove the swallows. Drill sheave immitation holes a bit over half way through. Distance between two sheave holes is half of block height!
6) Do same on the other swallow side.
7) Separate blocks with jewellers saw. Start the cut on all four sides. Remember leaning the saw about 15 degrees clockwise for making a straight plumb cut. Blade is loaded in pull-to-cut way.
8) Finish shaping and cleaning the block on sandpaper glued to a wood plank.
9) File round grooves for strops on block cheeks.
10) Polish with bore machine polishing disk.
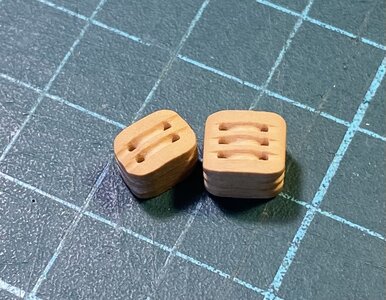
The blocks on last picture are 28 inches jeer blocks at 1:90 scale. It’s about 8 mm tall. They are not yet polished.


- Joined
- Nov 6, 2022
- Messages
- 245
- Points
- 113

Here is how I made one anchor block. I took a block off an old wagon, put it on the stove and cooked for one hour. Took my magic dust and shrunk it so no one could tell the difference of scale. Wrong century of block, wrong all the way, but I have only one thing left in me. Humor. Your work makes me want to finish something that looks at least as half as good as yours. At 1:90 scale the precision is so small. I think I should have added some garlic. ![DSCN0551[1].JPG DSCN0551[1].JPG](https://shipsofscale.com/sosforums/data/attachments/423/423800-8114df6e9bd4905f911d065f1259e1ab.jpg?hash=gRTfbpvUkF)
![DSCN0551[1].JPG DSCN0551[1].JPG](https://shipsofscale.com/sosforums/data/attachments/423/423800-8114df6e9bd4905f911d065f1259e1ab.jpg?hash=gRTfbpvUkF)


