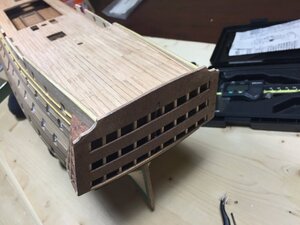
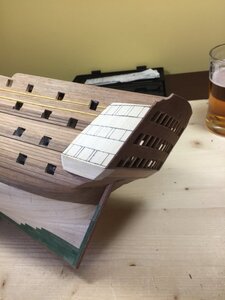
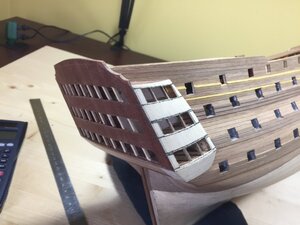
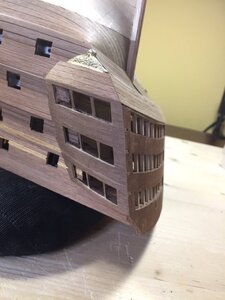
HMS Victory by Y.T.- Mamoli - 1:90 scale

Last edited:
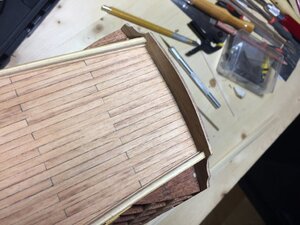
Excellent work YT.One option for the rails would be to shape out of solid.With care,the little scrolls could be included at the ends.You would need to source material as I doubt Mamoli has included anything suitable.If it helps,the dark walnut looks light American 'black' walnut whereas the lighter shade looks like European.

Kind Regards

Nigel
 
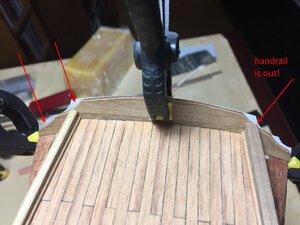
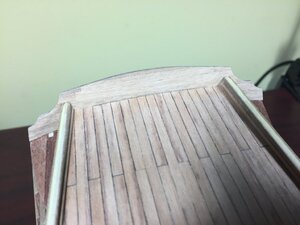
Making Mamoli's Victory is lots of fun as you have to constantly fix their design errors. When I was working on the board handrails I suddenly found out that the handrail joining stern inner wall on the deck is out off the wall outline. I scaled some good stern drawing from good book, printed it on paper, cut it out with scissors and attached it to my stern temporarily. Look what I got. Almost all outline just matches 99.9% but a very small curved top portion is off true. It is off just by amount that it has to be somehow fixed to have the handrails installed credibly. I still do not know how I am going to fix that.


IMG_6530.thumb.JPG.784518d4d12db6c61d6fe3a262131e23.jpg
 
Last edited:
Major breakthrough. Stern side windows. This issue was bothering me since beginning of build. If going by Mamoli's, one will get ugly model of stern. I go by my own understanding how things should look like. I looked at thousands pictures of real ship. This helps to decide what you want to do. Here is what I decided doing. See pics. I disregard plans and parts Mamoli provides. Windows will be cut out in side stern structure based on what I see on actual ship pics. I will try glass made of natural mica as one our French friends advised me on this forum.


IMG_6589.thumb.JPG.43171f14fd4bdbe1bcc347a06d16f408.jpgIMG_6590.thumb.JPG.2914c70e54a677cef72193f82d65dce3.jpgIMG_6593.thumb.JPG.08faf2ce477a679571b1ea23b893d46b.jpg
 
Last edited:
Stern side structure. The solid wood piece under the sides of rear quarters. I made one up now for both sides. It was not yet adjusted with rear surface hull shape. I will adjust later. It will look same beautiful as joint lines with side quarter hull shapes. I guarantee. If not I will re-do till it does. I already reworked quite a few pieces to look good to my liking.

IMG_6547.JPG
 
Interesting. I bought this little devise from Proxxson at Christmas time. Everyone here buys, so I followed the trend. Idea was using a drill stand to drill accurate holes at regular intervals. Also I was thinking machining some wood if required. Here I am so far. I do not know what to use this thing for. Every time I try using this machine it appears I can do it better with my hands. Question to the forum. What is use for this kind of machinery in our hobby?

IMG_6548.JPG
 
Hello Y.T. The picture shows three different components: A drill stand, a rotary tool (grinder) and the coordinate table (XY table). Actually, there is another component - machine vise. Together you get a device called the mini mill machine (click link), and you kinda lucky to have one!

Milling is the process of machining using rotary cutters to remove material by advancing a cutter into a workpiece. This may be done varying direction on one or several axes, cutter head speed, and pressure. Milling covers a wide variety of different operations and machines, on scales from small individual parts to large, heavy-duty gang milling operations. It is one of the most commonly used processes for machining custom parts to precise tolerances. (from Wikipedia)

In our hobby, we can use this assembly for almost unlimited possibilities. Why 'almost', well...it depends on the power\speed of your rotary tool and size parts you want to make. On youtube, there are many tricks using this mill. Good luck, and I am sure you will enjoy using it. You just need to know it better and practice.
 
The windows had been cut out and ready to accept mica strips to mimic glazing. Notice that I had cut windows independently of Mamoli's design of horizontal ribs and vertical sticks. This much I had expected. The cut out cavities will receive mica strips. Rest of window design will follow Mamoli's instructions.

IMG_6590.JPG
 
Actually window cavities are not ready accepting mica strips. Before this the side stern and the stern walls will be clad with 0.5 mm walnut wood strip veneer. Wait for more pictures to come.
 
Back
Top