-

Win a Free Custom Engraved Brass Coin!!!
As a way to introduce our brass coins to the community, we will raffle off a free coin during the month of August. Follow link ABOVE for instructions for entering.
-

PRE-ORDER SHIPS IN SCALE TODAY!
The beloved Ships in Scale Magazine is back and charting a new course for 2026!
Discover new skills, new techniques, and new inspirations in every issue.
NOTE THAT OUR FIRST ISSUE WILL BE JAN/FEB 2026
You are using an out of date browser. It may not display this or other websites correctly.
You should upgrade or use an alternative browser.
You should upgrade or use an alternative browser.
HMS Victory by Y.T.- Mamoli - 1:90 scale
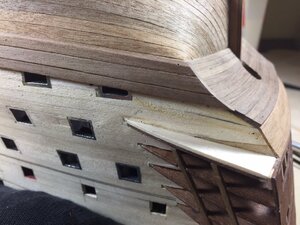
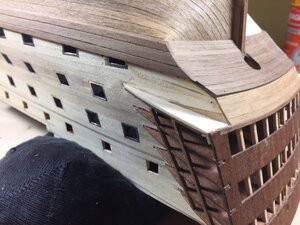
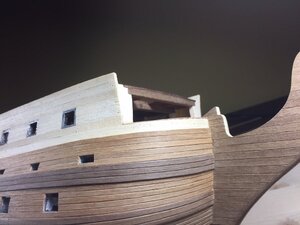
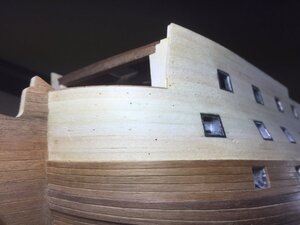
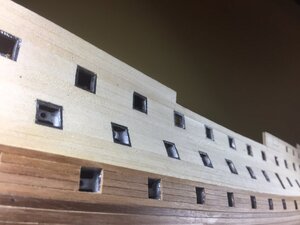
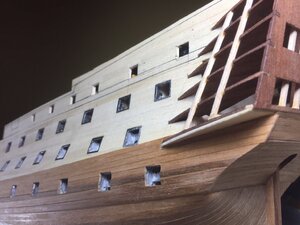
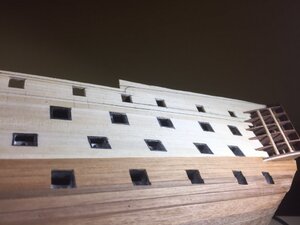
Progress is slow. Mostly because I am not too happy with results. I felt separation between planks should be more noticeable. I did chamfer plank edges. May be I should have applied a "dark caulking" technique with blackening the plank edges as we normally do on the deck planking. At the end you are the judge.


Last edited:
In my opinion, you are doing a great job with planking the hull. I like the idea of beveling planks, hence, I would use a black pencil "B" to mark edges. Alternatively, if you are using white glue (Elmers, Tilebond) you can dilute with black paint.
Thanks Jim. Diluting PVA glue with black paint could be a great idea but when gluing, I smear lots of extra glue all around the model cleaning it later with wet cloth. I did not learn better yet. I am afraid I will make whole model black first before benefiting of having black glue between planks only.
Your planking is really looking very good. Based on my taste I would not imitate caulking between the planks of the second planking, especially not in your scale of 1:90.
Planking looking great!!
I agree with Zoly, planking looking very neat. Did you bevel the edges 45 degrees of individual planks to make the spacing between planks? I can see you did a very good job shaping the first layer of planks.
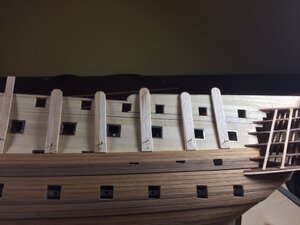
A very good idea, to use these wooden sticks (for icecream?) to hold the planks down!
Your first planking is very well prepared and sanded, so you are getting a great quality with your second planking
-> very good planks and wales - technically correct and well executed
Your first planking is very well prepared and sanded, so you are getting a great quality with your second planking
-> very good planks and wales - technically correct and well executed
Here is my working spot at my condo. I just upgraded my lighting to these two desk lamps. These lamp's beauty is that they are mounted to the table edge at back so there is no lamp pedestals around my work anymore. I used to always knock into these small lamps I had before. Now I have lots more of working space around my build. One more and probably not less important benefit is new lamps are high above my work providing me with much better lighting. You know how much these lamps cost me? Almost nothing. I ordered them from Home Depot Canada for only $25 Canadian dollars a piece. Food for thought.

G'day Y.T.
The most important thing any hobbiest could have is great lighting......the more and brighter the better if you ask me.
The most important thing any hobbiest could have is great lighting......the more and brighter the better if you ask me.
Very nice. I would not have thought about mounting them like that.
I think it can be a good tip for as simple thing as laying deck planks. Current fashion is blackening the edges of planks to mimic calking around the real planks. I am following this trend though sometimes asking myself would a real ship look as this if looked at at the scale 1 to 90? Nevertheless I had lots of trouble blackening my 0.5 mm thick planks with a pencil. I had splits. I had breakages. Now I do it differently. I glue a first lane of a center piece deck planks. No edge blackening so far. After they are bonded and dry I circle all sides with pencil. I glue around new set of planks. I do not blacken them till they are bonded and dry. Then I circle them with a pencil again. And again and again and again....
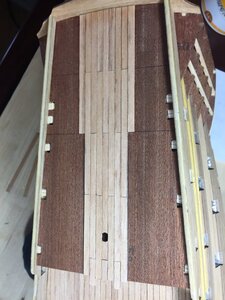

Last edited:
Wow. Thats an incredibly neat build. Well done.
Hello Y.T.,
You really build an amazing model.
I used for the chaulking another technique when I built my Golden Hind. I had cutted 10 strips in the right lenght and stappled them on top of each other. Then I clamped them together and painted them on one lenght and one width with black acyrlic paint. Usually I made more staples at once to have some planks to work with. This way I did not have problems with breakages with the very brittle wood for the planking
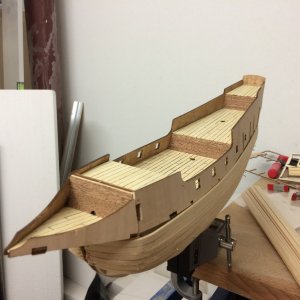

Mamoli drawings tell you that baseboard members at upper decks should be made of 2 mm x 2mm walnut strips they provide. Are you guys kidding? Why no one had ever stopped them since 1980 when these drawings were made? This would be totally disproportional in size to whole ship hull structure. I had to come up with much smaller section of a baseboard. I decided to split manually with X-acto knife 1 mm x 3mm profiles. After polishing the edges I was making them into something as 1 mm x 1.25 mm profiles. These ones I am starting gluing in as baseboards. See pics.
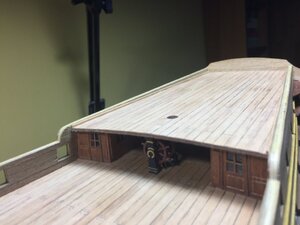
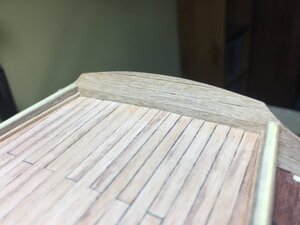


Last edited:
Wow I love this build YT.I think there is something really special when a talented modeller like yourself takes a dated kit and adds there own personal details whilst at the same time displaying great skill.
Your planking work is superb!
Kind Regards
Nigel
Your planking work is superb!
Kind Regards
Nigel
Hi Nigel, thank you.
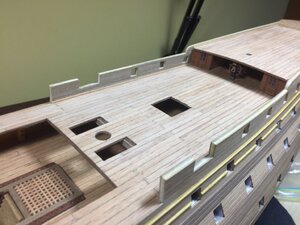
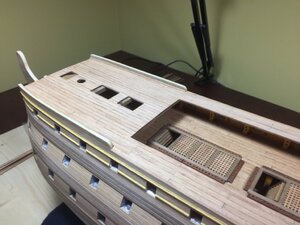
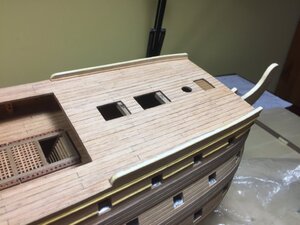
Here are more of baseboards. So all baseboards are now complete. All deck floor planking is complete. Nothing is lacquered or painted yet. After lacquering and painting all this is going to look much more attractive. Just bear with me. Now I am thinking how to make main top decorative rail on top of boards (sure no one will figure out what I am talking about). These are 1.5 mm x 5 mm walnut strips and should be bent in 5 mm wide plain. This is going to be difficult. Besides I plan rounding the outside side of this strip to resemble actual ship. I will show this in pictures what I am coming up with.


Last edited:


