-

Win a Free Custom Engraved Brass Coin!!!
As a way to introduce our brass coins to the community, we will raffle off a free coin during the month of August. Follow link ABOVE for instructions for entering.
-

PRE-ORDER SHIPS IN SCALE TODAY!
The beloved Ships in Scale Magazine is back and charting a new course for 2026!
Discover new skills, new techniques, and new inspirations in every issue.
NOTE THAT OUR FIRST ISSUE WILL BE JAN/FEB 2026
You are using an out of date browser. It may not display this or other websites correctly.
You should upgrade or use an alternative browser.
You should upgrade or use an alternative browser.
HMS Victory-Mamoli 1:90 Bruce Ives Build log
Hi Bruce
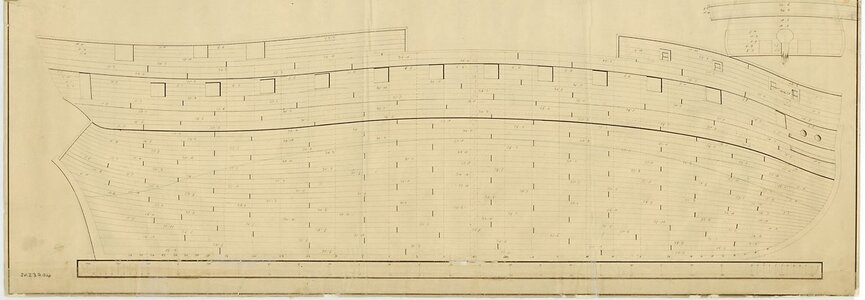
The planking seems to be following the line of the gun ports (or perhaps the ports are following the line of the planking) which is very odd. Assuming there is a second layer of planking will you have it also follow the line of the decks/gun ports like the first layer? If you look at any contemporary models or plans you will see that the planking does not follow the same line as the gun ports/deck sheer. In the second plan below, you can see the sheer of the wales which is the same as the sheer of all the hull planking. Compare these lines with the line of the gun ports which follows the line of the decks and you can see that there is no relationship between the line of the ports and line of the hull planking. The lines for Victory can be seen in the third plan below. Hope this kind of thing is found interesting and useful.
Allan
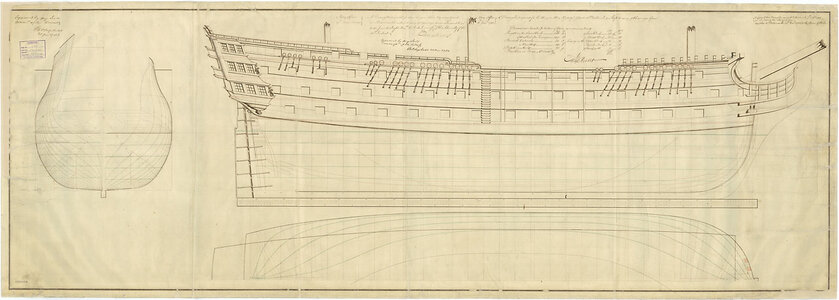


Hi Allan
There will be another layer of hull planking above the waterline and paper strips to simulate copper plates below.
My experience with planking is limited so I have started out in what I see as the simplest way. So far there have been no disasters! The model provides a quite elaborate set of wood strips for the second layer and I have yet to get to the stage of placing them. I see from the diagrams that you provided that the planking is more u shaped than the line of the gun ports. I will keep this in mind when I get that far.
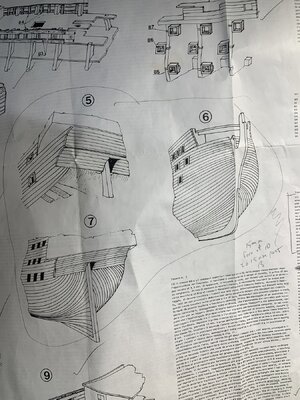
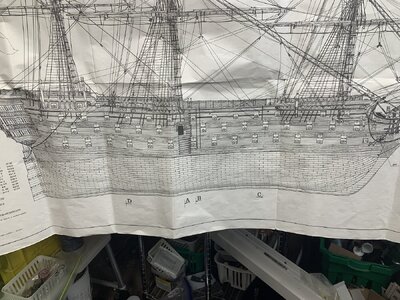
I have attached a couple of pictures from the instructions which I am attempting to follow. The first is a guide for the initial planking and the second is a rendition of the final product. In the first the planking seems to follow the lines of the gunports. The second is what I am going to attempt to achieve after the initial plank layer. The planks in the second do not follow the lines of the gunports. I will keep the log updated with my progress…….


Last edited:
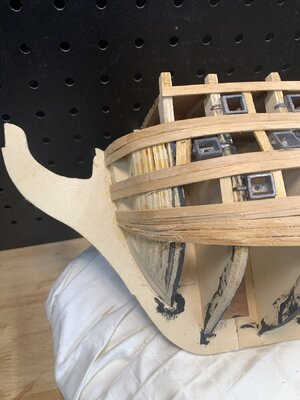
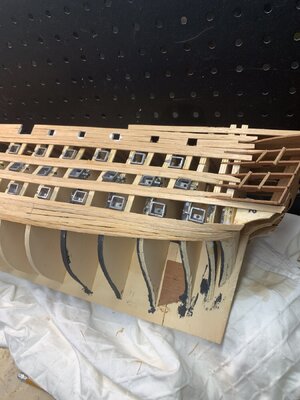
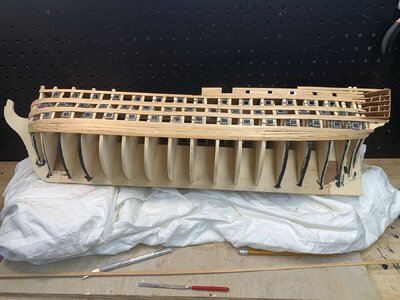
So I have found that it is not easy to plank the hull. But I decided that the ‘Damn the torpedoes…’ approach would actually get it done. Staring at it was getting me nowhere. I have attached a couple of pictures. Lots still to do but the end is in sight. Please don’t look too closely!! Wood is very forgiving and wood filler and sandpaper work wonders. (I hope). 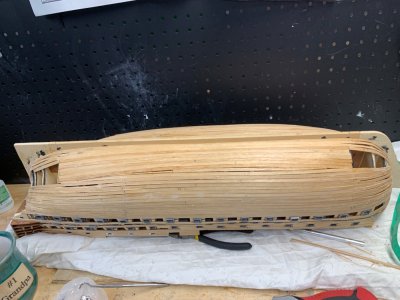
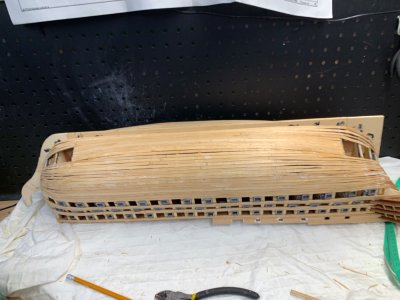


Good evening Bruce. Planking is a learned art. My first layer of my first ship was very thankful for wood filler and thin slithers of wood to fill gaps. Plenty sanding after tho. I am still far from getting it right however I find lining the hull and preparing helps. Cheers GrantSo I have found that it is not easy to plank the hull. But I decided that the ‘Damn the torpedoes…’ approach would actually get it done. Staring at it was getting me nowhere. I have attached a couple of pictures. Lots still to do but the end is in sight. Please don’t look too closely!! Wood is very forgiving and wood filler and sandpaper work wonders. (I hope). View attachment 469115View attachment 469114
Ha! "Damn the torpedoes" is an excellent way to build a ship. All my ships are built that way. Your looking good with this build Bruce and on the way to a great looking model. I hope to build this ship myself someday.
Everything I say gets kind words in return …Thank you!!
Usually where they are deserved.
The first layer of planking is complete. I have started to use the wood filler to smooth out the many dips and grooves. The metal gun ports and the areas around them will require the most work and I may try the dremel tool to speed things up. I will post a few pictures when I have made some progress.
I read a substantial way ahead in the instructions to try to prevent surprises. The instructions could be a lot clearer but I understood most of what needs to be done. The intimidating thing is how much more needs to be done!! One step at a time …
I read a substantial way ahead in the instructions to try to prevent surprises. The instructions could be a lot clearer but I understood most of what needs to be done. The intimidating thing is how much more needs to be done!! One step at a time …
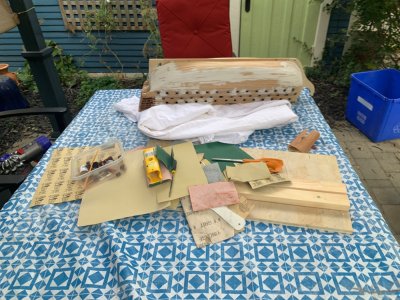
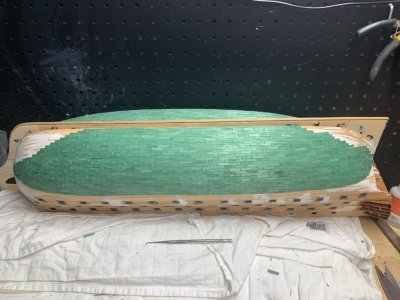
I discovered that I could fill and sand the hull forever so I bit the bullet and started putting the second layer on the hull. I used a laser level to mark the waterline and have begun to glue the little green pieces that represent the copper plates. I have attached a photo. Again, please don’t look too closely. The first is a picture of my outside sanding spot and the second shows where I finished today. It doesn’t look too bad. The instructions suggest using a particular paint when done to simulate the particular copper colour but I don’t think such a paint is available anymore. Will ponder what to do instead.
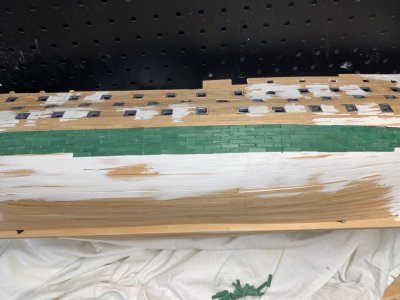


I have made significant progress putting the little green plates on one side of the hull. The pieces are wood - when I originally saw the bag I thought they were paper - so they are harder to shape than I expected. They are also more rough than I expected. I hope that when the plates are all on that I can give them a light sand without removing most of them. I will definitely have to give them a coat of some kind of paint too because there are many tiny gaps - I should probably have painted the hull first. I did paint the hull with a clear flooring sealer first.
On a more personal note I want to say that moving on with this model has given me a bit of a morale boost. There may be flaws in what I am doing but I sure am enjoying doing it!
On a more personal note I want to say that moving on with this model has given me a bit of a morale boost. There may be flaws in what I am doing but I sure am enjoying doing it!
I have almost finished the port side of the hull and have started the starboard side. I suspect that the hull will have a ‘best side’. Of course in the process I broke one or two things, but easily fixed. I am surprised at how heavy the model is now and how much white glue I have used. I need to wait for better weather to be able to take things outside to see what happens when I sand. I will post more pics once more progress is made.
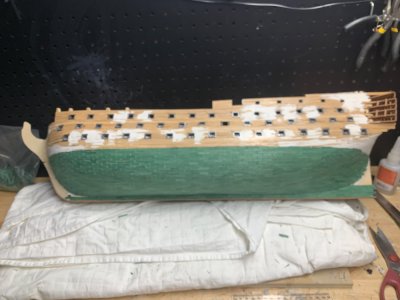
It has taken a bit of time but I am almost finished putting the little plates on the hull. It doesn’t look too bad and I have a plan regarding how to paint them once they are sanded and fixed up. I will let you know how that turns out. Once that is done I move on to placing the outer planks on the hull. I will try to follow the pattern in the instructions. It is quite elaborate to me as it uses about 10 different plank styles. The ‘damn the torpedoes’ approach seems to be working.


I’ve only just begun my review and will gradually be showing the progress I’ve made, but right now, I’m at the stage of copper plating. It’s a pity that by the time I get to showcasing it, you’ll already be far ahead!
No worries at all, we have no completions here, take your time; the slow you go the far you can reach.I’ve only just begun my review and will gradually be showing the progress I’ve made, but right now, I’m at the stage of copper plating. It’s a pity that by the time I get to showcasing it, you’ll already be far ahead!
I am now very tired of gluing little green strips. But I am done now, I hope. Only some trimming and sanding small places left. The pictures attached are flattering. In other spots there are holes. The picture on the box has the hull below the waterline a copper colour ( not sure why if the strips provided are green ) but I decided to leave it alone. It is a bit shiny because the sealer is still wet. Perhaps not completely authentic but my original painting plan to mimic what the instructions said was too risky. I now move on to placing the second level of hull strips. We will see how that goes.
On another theme, I assume the these old kits were created before the widespread use of cyanoacrylate glue. Without it I would not be able to build these models since there is no way I could use the tiny nails provided to hold the planks until the glue dries.
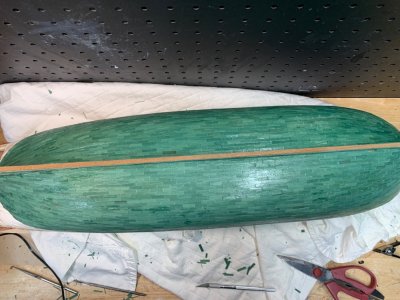
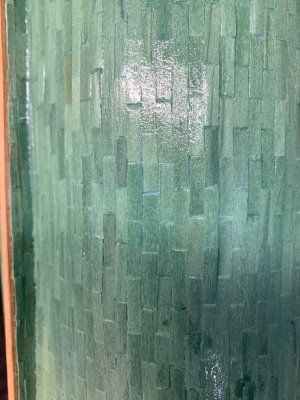
On another theme, I assume the these old kits were created before the widespread use of cyanoacrylate glue. Without it I would not be able to build these models since there is no way I could use the tiny nails provided to hold the planks until the glue dries.


Last edited:
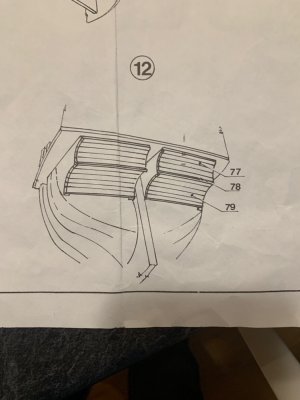
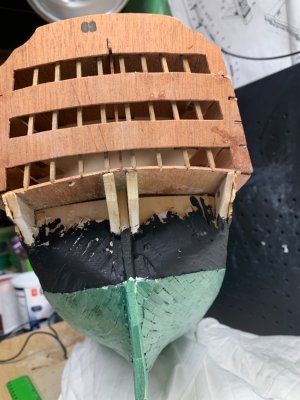
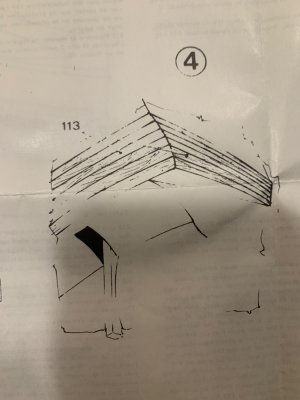
From the beginning I have been confused about how to put the transom together and shape it properly, In particular the part illustrated in diagram 12. I wasn’t sure I had the pieces holding the planking placed properly. So at this stage I have not put the planks on at all and looks like the photograph below. I did it this way because I was pretty sure that when I put the first layer of planking on the hull I would not be able to tuck it into the slot under the planking 79. This is especially true since diagram 3 illustrates that the second layer of planking looks like it tucks in as well. So I have decided to put the first layer of planking onto the top half before I put the second layer onto the bottom of the hull. This way I can make it look like diagram 4 before I put the planking on the bottom half. I hope that this does not paint me into a corner - this has happened before!
As an aside, the pieces provided as 112 are not remotely the right shape and are hard as rock!
My biggest concern now is that I may not finish this model until sometime in 2029!
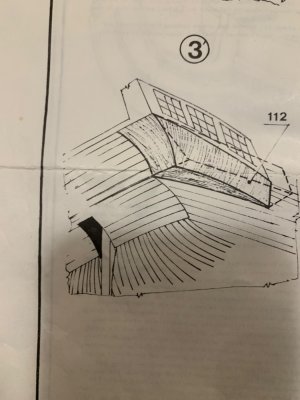
As an aside, the pieces provided as 112 are not remotely the right shape and are hard as rock!
My biggest concern now is that I may not finish this model until sometime in 2029!


I should add that I have looked carefully at YT’s build log and have found it a bit overwhelming for someone at my skill level. There is no way I can even begin to approach the quality of his work or customize the kit the way he did.


