Thank you. It is a massive project (why I did this for my first....who knows). I am having loads of fun tho and learning loads as I go. My next build will have zero guns
-

Win a Free Custom Engraved Brass Coin!!!
As a way to introduce our brass coins to the community, we will raffle off a free coin during the month of August. Follow link ABOVE for instructions for entering.
You are using an out of date browser. It may not display this or other websites correctly.
You should upgrade or use an alternative browser.
You should upgrade or use an alternative browser.
HMS Victory Mantua 1:78 (first build) by Grant Tyler
- Thread starter GrantTyler
- Start date
- Watchers 102
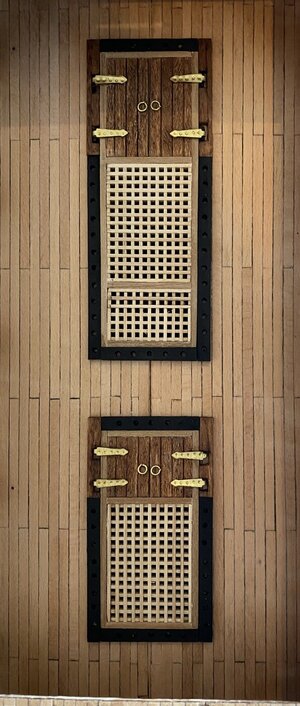
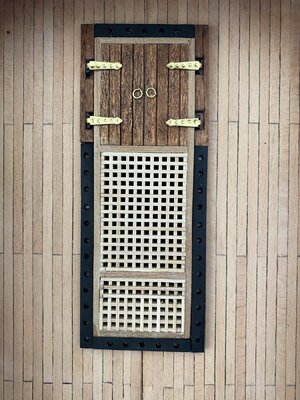
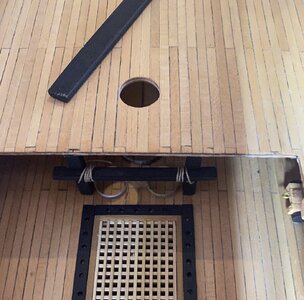
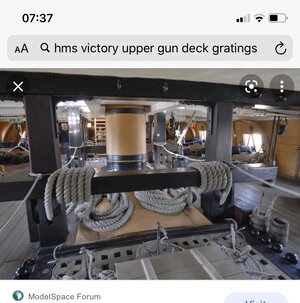
I completed the fix up of one of the gratings. I made canon ball racks by hand drill and marking with ruler. I used a pic of the real ship on the internet which showed some wood gaps by the steps- after I had made it I realized that the pic was on the middle deck on not upper. I also feels these have been added for tourist safety reasons. I also added hinge bases for the ones on the step doors. It looks real good on the ship and improvement -so it is fitted.
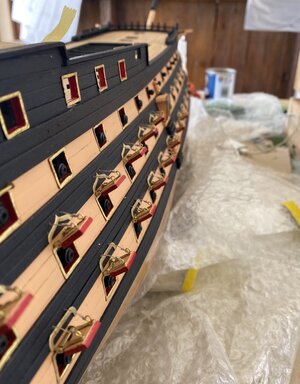
Some more gun ports done. Next ship will have no guns

Some more gun ports done. Next ship will have no guns
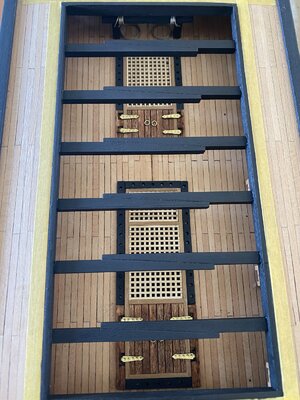
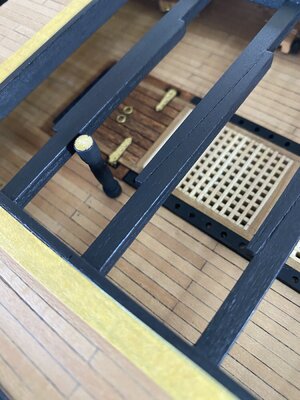
Ahhhhh.. looking at the photo above I left off my little brackets for the hatchway doors on my second grating. Gonna have to see if I can do something here as the square cuts are now too big...Happens when you rush a little.
Anyone know a good reference for me to learn all the terms and names for the ship, parts etc. I feel like a noob when posting this log and not knowing what to call the parts?
Anyone know a good reference for me to learn all the terms and names for the ship, parts etc. I feel like a noob when posting this log and not knowing what to call the parts?
I decided to put the "rings" on bowsprit (please help with reference for fittings and parts- I need to learn what things are called ). I have no idea how to attach these copper rings? The instructions are to drill a hole and nail these...I have decided to build with no nails. I also don't like the copper so going to paint these the colour of the bowsprit as per the Victory and deviate from instructions. Can you paint his with acrylic?
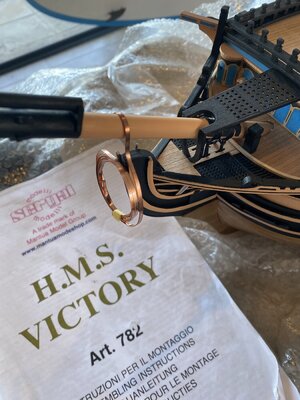
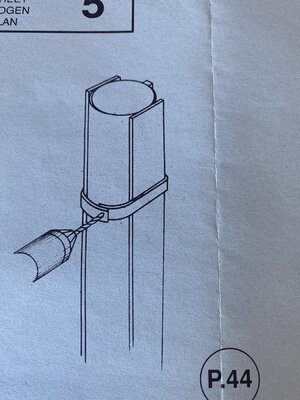
 ). I have no idea how to attach these copper rings? The instructions are to drill a hole and nail these...I have decided to build with no nails. I also don't like the copper so going to paint these the colour of the bowsprit as per the Victory and deviate from instructions. Can you paint his with acrylic?

First fight with the Victory after 6 months. Fitting the cannons to the upper gun deck proved difficult. The royal ship was called many names which where not fitting to her historical status.
Anyone building this kit should fit the guns and paint the inside prior to fitting the main deck. They are in and rather untidily so- hopefully we don’t see the inside?
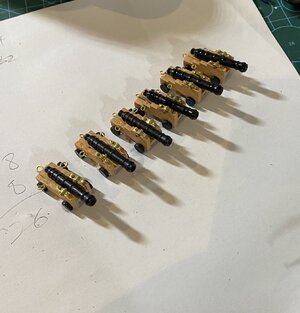
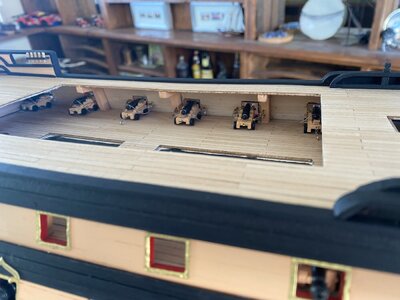
Anyone building this kit should fit the guns and paint the inside prior to fitting the main deck. They are in and rather untidily so- hopefully we don’t see the inside?


Hello Heinrich. Thanks for the encouragement. After fitting these My relationship with my ship was a little jaded.
I am going to blacken all my remaining brass per @Dematosdg advice earlier as the Mantua has loads of it. Obviously designed for wooden finish and not painted. If I don’t It will look like my HMS Victory was casted for a Bollywood movie. To get supplies and parts here in Sunny Melkbosstrand (winter is over ) do you have a recommendation for me? I also need some rigging blocks as my kit is short?
I am going to blacken all my remaining brass per @Dematosdg advice earlier as the Mantua has loads of it. Obviously designed for wooden finish and not painted. If I don’t It will look like my HMS Victory was casted for a Bollywood movie. To get supplies and parts here in Sunny Melkbosstrand (winter is over ) do you have a recommendation for me? I also need some rigging blocks as my kit is short?
The rings are mast bands.I decided to put the "rings" on bowsprit (please help with reference for fittings and parts- I need to learn what things are called). I have no idea how to attach these copper rings? The instructions are to drill a hole and nail these...I have decided to build with no nails. I also don't like the copper so going to paint these the colour of the bowsprit as per the Victory and deviate from instructions. Can you paint his with acrylic? View attachment 263551
View attachment 263552
- Joined
- Jan 9, 2020
- Messages
- 10,534
- Points
- 938

The rigging blocks are easy. Zou can get them from @zoly99sask at Dry Dock Model Supplies (they are a sponsor on SOS). For the blackening fluid most people seem to recommend Casey's Blackening or Bluing finish. However, I have no idea whether or not that can be air-freighted. My preferred supplier remains @Kolderstok Models in the Netherlands, for all my ship modelling needs. They have their own in-house blackening fluid, but once again, I'm unsure whether this can be sent par avion!
Thanks Dean. Going to take a while for me to get to know all these terms- like going back to University . Appreciate itThe rings are mast bands.
Thanks- I will see if these guys can freight here to my “little village”.The rigging blocks are easy. Zou can get them from @zoly99sask at Dry Dock Model Supplies (they are a sponsor on SOS). For the blackening fluid most people seem to recommend Casey's Blackening or Bluing finish. However, I have no idea whether or not that can be air-freighted. My preferred supplier remains @Kolderstok Models in the Netherlands, for all my ship modelling needs. They have their own in-house blackening fluid, but once again, I'm unsure whether this can be sent par avion!
I started The channels for the shroud dead eyes. I planked these with 0.5x3 deck planks. I experimented for first time with Indian ink as I wanted the planking lines to show. Found if I painted with normal acrylic these do not show.
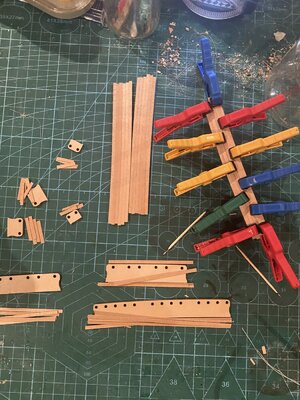
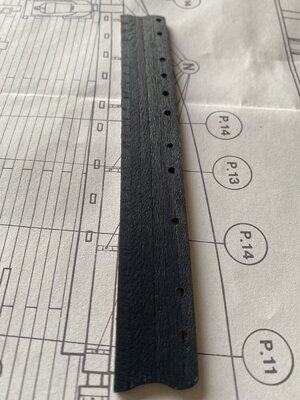
I will put a brushed final coat. I really enjoy painting with Indian Ink. I am going to research this medium on SOS more to see what you can and can’t do with it.


I will put a brushed final coat. I really enjoy painting with Indian Ink. I am going to research this medium on SOS more to see what you can and can’t do with it.
No worries, when I built my first ship I was inundated with terminology! Mast, yards, keel, bow, stern, bowsprit, lanyards, rat lines, dead eyes, knees, carlings, port, starboard, galley, stanchion, bulwarks, belaying pins, wales, trunnion, etc… I could go on and on, but you get the idea, it takes a few ships or more to learn all the terminology.Thanks Dean. Going to take a while for me to get to know all these terms- like going back to University . Appreciate it
Worked on the battery gun deck fittings and central waist framing.
I made some parts, including first rope coil. They fit under the quarter deck so my experiment will not be to visible, if at all. My process and my outcome and what I was attempting:
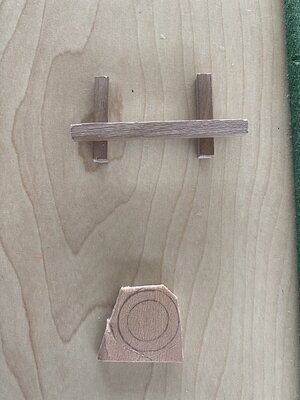
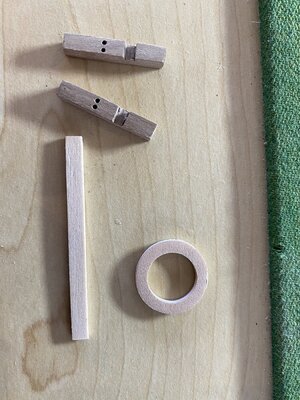
I fitted the central waist frames and transom however needed to fix up the painting. Sealed deck with Tamiya masking tape- don’t trust my painting skills.( I really find this product work well)
On this Kit the transoms (hope this is correct term) come as one unit and I used a ruler and large needle to make the appearance of a wood join. Using black paint a pencil or pen line did not show) unfortunately I did not get these right and can’t change them. The outcome as a whole still looks good tho.
The pillars (stanchions) provided are a problem
These are way too long? Strange as my deck fitting was correct. I checked that I fitted the central waist per instructions ( thought maybe I fitted upside down?). I will have to cut them however they loose there shape and design.
I made some parts, including first rope coil. They fit under the quarter deck so my experiment will not be to visible, if at all. My process and my outcome and what I was attempting:


I fitted the central waist frames and transom however needed to fix up the painting. Sealed deck with Tamiya masking tape- don’t trust my painting skills.( I really find this product work well)

On this Kit the transoms (hope this is correct term) come as one unit and I used a ruler and large needle to make the appearance of a wood join. Using black paint a pencil or pen line did not show) unfortunately I did not get these right and can’t change them. The outcome as a whole still looks good tho.
The pillars (stanchions) provided are a problem

These are way too long? Strange as my deck fitting was correct. I checked that I fitted the central waist per instructions ( thought maybe I fitted upside down?). I will have to cut them however they loose there shape and design.
Looking very good! On the columns, remove a little material from both sides and you should be ok.Worked on the battery gun deck fittings and central waist framing.
I made some parts, including first rope coil. They fit under the quarter deck so my experiment will not be to visible, if at all. My process and my outcome and what I was attempting:
View attachment 264481View attachment 264486View attachment 264488
View attachment 264494
I fitted the central waist frames and transom however needed to fix up the painting. Sealed deck with Tamiya masking tape- don’t trust my painting skills.( I really find this product work well)
View attachment 264495
On this Kit the transoms (hope this is correct term) come as one unit and I used a ruler and large needle to make the appearance of a wood join. Using black paint a pencil or pen line did not show) unfortunately I did not get these right and can’t change them. The outcome as a whole still looks good tho.
The pillars (stanchions) provided are a problem
View attachment 264496
These are way too long? Strange as my deck fitting was correct. I checked that I fitted the central waist per instructions ( thought maybe I fitted upside down?). I will have to cut them however they loose there shape and design.
The ships wheel is done- it was pretty horrid when I made it per instructions. You can’t really see it especially once the compass table is fitted in front of it. I stained it with wood stain, added two strips of copper and shaped the frame to be a little more Victory- ish. I used a square block to ensure fitted straight. Used a bit of Matt poly to take shine off copper- hope this is ok?
I had to adjust the 2 gun port frames on starboard of quarterdeck up to fit cannons. I will fix with small strips of Walnut later.
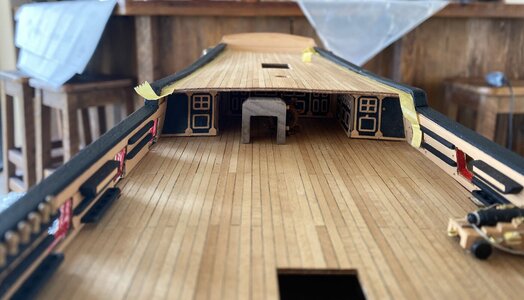
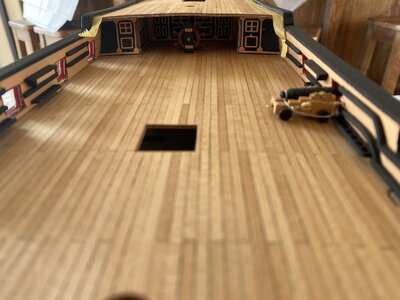
I had to adjust the 2 gun port frames on starboard of quarterdeck up to fit cannons. I will fix with small strips of Walnut later.


fitted more gun port lids.
I have had fun posting with Sos and appreciate so many of your comments and advice. I am off on my first adventure bike ride since my accident (10 months) for 7 days. Into Hogsback mountains, Barclay East and Baviaans Kloof a beautiful rugged part of South Africa. I will “see” you all on my return.
I have had fun posting with Sos and appreciate so many of your comments and advice. I am off on my first adventure bike ride since my accident (10 months) for 7 days. Into Hogsback mountains, Barclay East and Baviaans Kloof a beautiful rugged part of South Africa. I will “see” you all on my return.

