HMS Victory Mantua 1:78 (first build) by Grant Tyler

Good morning from a rainy Cape Town on this voters day. Back from a Brilliant ride in Hogsback and surrounds and had sometime to work on my Victory.

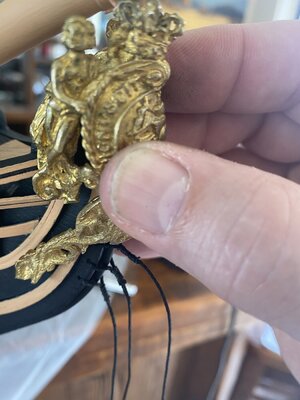
Did my first rigging lines from the bow to bowsprit. Not without challenges and learning new techniques- thanks Sos help forum as I had no idea.

First challenge. The instructions use 5mm dead eyes which is not correct. These are on the ship.


6BDAAA13-66BE-4BBD-80B4-F86020721271.jpeg

I am not building my ship historically however certain items grab me. So I drilled out a 5mm deadeye to try get this. Struggled not easy.
The second area was the positioning of the rigging on the bow itself per the instructions.

These came together at the bow and I wanted to get them more parallel to each other.
1FA97594-23C7-4611-B27C-4579284566A7.jpeg
 
I drilled the holes to achieve this to a degree how ever the figure head provided is too large (it is not to scale) and I will have to think how to sort this out. Here is my progress:
620FD7BC-5427-4096-9B41-E37CBB1D2ACA.jpeg

I had to redrill these holes as when the lower part of figure head tested it went over the upper Hole in photo above . The figure head in addition has to be seated and a notch cut in the bow which will accentuate this issue.

573FC05C-557F-4DFA-B7BD-1E0866143E90.jpeg
I use a small clamp and seized the 1mm thread (dyed using Indian ink and rubbing with a beeswax and mineral oil mix) with 0.25mm thread. You will notice the rounded 1x2 mm birch strip down the center of the bow which I added to look a little like real ship.

This is the outcome:
9DC5DC9E-53A3-48F1-BFCB-91A75D230289.jpeg

As I went each seizing improved I think. Any advice on how to avoid the little tags when I remove the excess threads?

I also attached my first dead eye (well my amended ones) to the bowsprit.
FEF9260C-E041-4F7A-BF9D-50EE7B5F2D08.jpeg

F059AB0C-A53D-4ADC-9302-597D1A856B5F.jpeg

1040AC56-9EDD-47E6-B6EC-60909F1FC6FD.jpeg

And then
472BC7D3-1FC9-4ED8-A436-0377E84B5C61.jpeg

Ha ha I had to break of the bowsprit insert to get them on - rookie at work.
5F4BD66E-B2C9-4540-8594-CA989555515A.jpeg
I love putting photos on the site as they show much the naked eye does not- see how my paint work needs touch up here which strangely enough you cannot see without magnifying.

Off to vote now.
 

Attachments

  • E63E0859-75A9-4F6C-9BC1-13C1C22DC989.jpeg
    E63E0859-75A9-4F6C-9BC1-13C1C22DC989.jpeg
    180.5 KB · Views: 24
Hi Grant. I really like your attitude to shipbuilding. You are so right - the macro photographs do show up what the naked eye can't see. So you have two ways of looking at it - take the pics from some distance or include those macros. Your choice to include them show that you can laugh at yourself when needed to, but more importantly it shows great confidence which is what I really like.
 
Hi Grant. I really like your attitude to shipbuilding. You are so right - the macro photographs do show up what the naked eye can't see. So you have two ways of looking at it - take the pics from some distance or include those macros. Your choice to include them show that you can laugh at yourself when needed to, but more importantly it shows great confidence which is what I really like.
Thanks Heinrich. Quick question - the block with holes in it -is this the toilet? I’m thinking of making one for my ship? I see no rope going through it- ROTF. BDEACBB7-84AA-402F-A5E9-7667AE184C38.jpeg
 
That is simply beautiful work Grant! The new pic looks great and makes me envious!
 
@Heinrich got me fascinated with the History of the ship I’m building. Something I found out while reading which matches my build a little. Prior to Nelson the gun port covers where painted the same color as the hull of the ship (not black). It was only when Nelson took command that he changed it to the chess board pattern. Problem for my build is it would also appear the yellow ochre with pinky thread was also introduced at that time. ROTFSometime in its History it would seem the hull was red?
 
Very interesting Grant. I just think it makes it far more interesting if one can attach a story to the ship/s we are building.
 
Decided to redo the rigging on my 12 pounder on the quarter deck. The kit had some 2.5mm blocks which I used. Wanting a clean deck I have opted not for rope coils but more like the Victory in Portsmouth the excess is wound on the recoil breech rope. I also used a thinker 1mm thread around the cannon itself. Dry fitted. Going for this:
B8611BAE-6142-4F98-904D-406A18C908D9.jpeg

63BC2EEB-0E77-445D-995E-35AC34F0D18D.jpeg439750CA-42DA-444D-A977-70DCDDF926DE.jpeg
 
Excellent rigging work - neat and clean! Thumbsup

By the way Grant ... are you on Dolphin Beach Estate?
 
Atlantic Beach ... been away for too long ...
 
Back
Top