• "Thank you for your Donations and Support"
    As we close this Annual Donations Drive, I want to thank you all for your Generosity in Donating to Ships of Scale. It is Greatly Apreciated !!!
    Ships of Scale continues to explore exciting things to offer to the Ship Building Community.

HMS Victory Mantua 1:78 (first build) by Grant Tyler

Tomorrow morning I plan do make this rope (I cannot find the nautical term). Do you have to tie a specific type of knot or do you just use good old granny knot? I assume it is used by crew to hold onto when navigating the top end of the bowsprit. Google is not helping me tonight ROTF
I think each knot needs to be a proper Monkey's Fist :eek:ROTF

On a serious note-when i was in the military the knotted ropes used a simple overhand (granny) knot. Personally I would use this or a figure 8 knot depending on which looks better.
 
Thank you. I have not progressed to airbrushing yet. On my to do list tho.

Imuse

I use 3m brand fine-line tape and if there is an area where I’m concerned about the possibility of bleed I airbrush a light coat of acrylic clear along the paint line then paint…..no bleed through and nice crisp paint line

That is exactly what I mentioned before. Cover the wood pores with wood sealer, primer, poly or varnish. You can use a brush and do a light pass. Once the pores are covered, no more capilarity.

For the future, try it first in a piece of the same wood.

Using a wood paint sealer will also help to get a homogeneous distribution of whatever stain you will use. It will avoid darker spots due to a higher pore absorption on some spots. Unless you want that effect. Will be seen as a kind of weathering effect. I like it on my decks.

Daniel
 
I think each knot needs to be a proper Monkey's Fist :eek:ROTF

On a serious note-when i was in the military the knotted ropes used a simple overhand (granny) knot. Personally I would use this or a figure 8 knot depending on which looks better.
I tested granny vs figure 8. Going with figure 8. Looks way better. Thank you
 
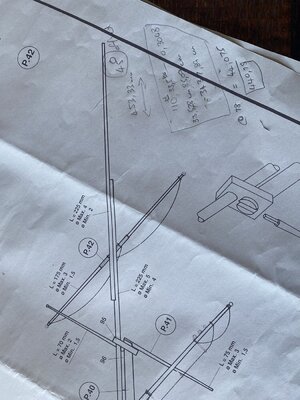
New challenge- these plans have very little detail and the way it suggests I attach the jibboom on is unclear. It also instructs the jibboom to be fitted off the cap and glued to the lower jibboom.

71EB9AA6-113B-4909-96BF-734490EAFB17.jpeg
There is no indication of the offset to port side and I have found out via google that it is at 45degrees. In addition if I covert the actual length of the bowsprit and jibboom on real victory (adjust for scale etc) I get 440.75 mm while my plans show 453.33mm. I am a little worried about my measurements as this difference may be due to the part of the bowsprit inserted into the deck for fitment.

Anyway my figure of 8 rope will have to wait until I sort this out ROTF

While these instructions are limited it does make me research and learn loads about my Victory which I’m finding fun rather than frustrating- not a bad thing.

Taking my staff for year end function for two days so shipyard is temporarily shut down.

Cheers
 
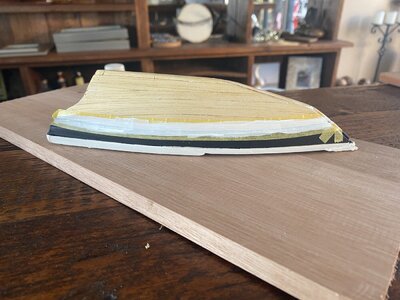
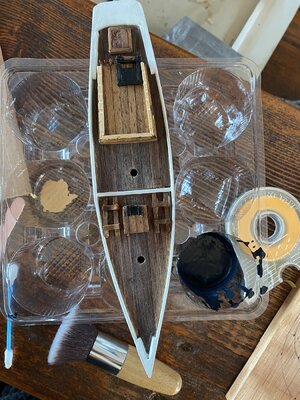
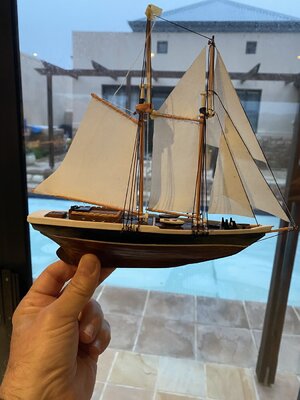
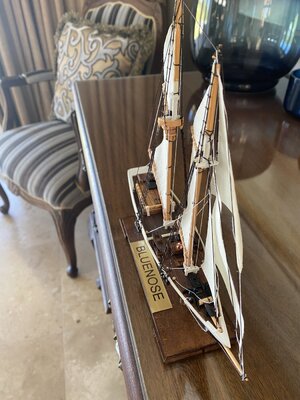
Good morning. A small deviation from my Victory- I hope you don’t mind. All my staff had to draw another person from a hat and had to make a Xmas present for that person which we gave at our function. I drew my Sales manager who is an asset to my business so I quickly built her built her a small Bluenose model from scraps left over and toothpicks and kebab sticks. Here is my build. It took 1 week and looking at some build logs on SOS so scale and accuracy was not possible.She loved it most importantly

CD24067C-0601-43B0-8725-DF65D713509F.jpeg0C5D91D8-8E50-4F20-AD78-FB437A92BD39.jpeg9634B948-963E-4CAA-AAF9-C3933CAD6485.jpegEBAA023A-34AC-4718-9FF3-730C5EBA35CB.jpeg4ABE6110-A9E8-4AD7-A02D-B0B1E79149DF.jpegC596499E-062D-4418-B37B-BAEEF4E4C411.jpeg

B5E4F5DF-FB58-4F93-AA95-81295ACE20CF.jpeg
309F5617-488E-4B94-A463-717C86DC4732.jpeg
1099821C-8482-4233-A1B6-27EAEED436FA.jpegCF3760FB-AE95-49B4-9CEC-2EF38E9B5023.jpeg
6EA8C216-EF37-44E5-90F5-7732CA324A7E.jpeg3357526F-E112-43C8-934D-DF7F04716A1E.jpeg
 
What an absolutely beautiful thought and gesture, Grant! I take my hat off to you for doing that . I am sure that your scratch-built will be cherished very much!
 
What a beautiful little model and gesture Grant, A week to build, heck it would take me a week just to plan it out….
Hand made gifts are treasures. Well done

Ron
 
Good morning- after watching great Rugby( SA beat Scotland and The Irish put one over the All Blacks (Brilliant game so excited for the Irish))I did some more work on my Bowsprit.

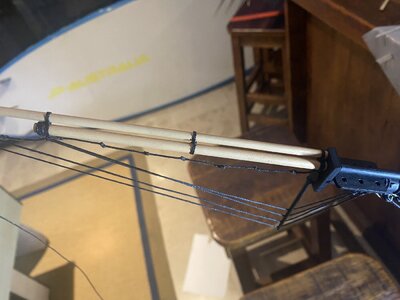
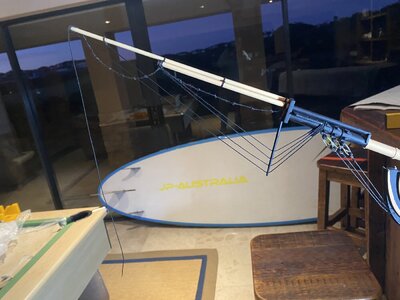
I deviated from the plans above and worked with my measurements of the actual boat. Extended the jibboom all the way to the cap at an offset of 40 degrees. Added in 3 small gamon lines.

I’m struggling a little with my thread maintaining its pattern once I knot it. I have rubbed it with a beeswax and mineral mix- cannot get a beeswax block here anywhere- not working to well. Got to make a plan here.

82C7C449-7B9E-497A-9CAF-AB18FFC11823.jpeg10E67AE9-6F15-43F9-A953-1A92C7C7178B.jpeg
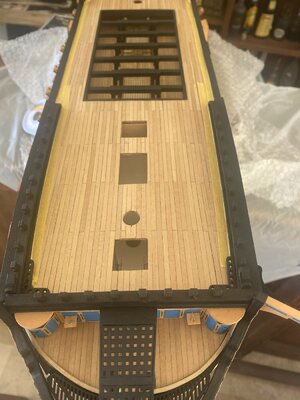
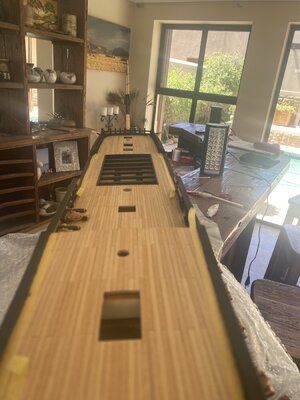
Going to do some more gun ports now- So happy to build this iconic Battle ship however no more ships with a 100 guns again.ROTF
 
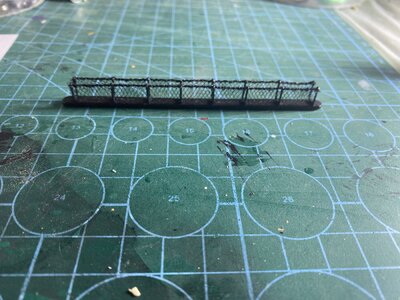
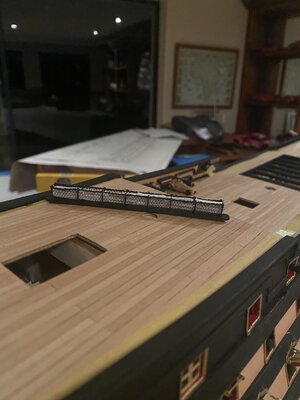
First netting work. I blackened the stanchion, cut netting to size, ironed them to shape and stitched them to the thread inserted through the stanchion. Used wood glue and water mix just in case.

I am not happy with this as looks scrappy. My little research on these netting’s - the crews hammocks are stored in the U of the netting which is used as protection from shot during battle. I am wondering if I can make these and insert? I have searched on SOS this and see some modelers has done this however seems massively tedious. 94294212-1E80-498A-B3CA-32ACBB822F73.jpeg
 
First netting work. I blackened the stanchion, cut netting to size, ironed them to shape and stitched them to the thread inserted through the stanchion. Used wood glue and water mix just in case.

I am not happy with this as looks scrappy. My little research on these netting’s - the crews hammocks are stored in the U of the netting which is used as protection from shot during battle. I am wondering if I can make these and insert? I have searched on SOS this and see some modelers has done this however seems massively tedious. View attachment 269770
Ha! More tedious than the rest of it?
 
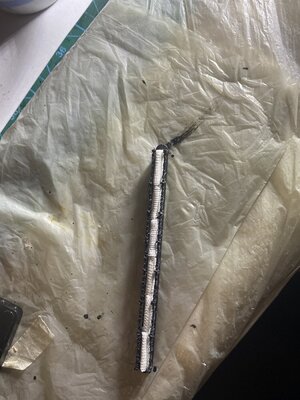
Made something which resembles a hammock- used muslin rolled and painted with PVa and water mix. The Victory had 820 crew including , 146 marines and 31 boys, and Admiral Nelson and Captain Hardy. What I found interesting is that the marines, while used during battle, main function was keeping the crew in order Re mutiny and during disciplinary process.

Shifts meant that around half the hammocks where stored up in the nets (say 410). Not only during battle where their function is protection re wood splinters, shot and sniper (didn’t help poor Nelson) but during sunny days to air them.

So I made some- they look good and I am not going to put the rope holding them together was to much. I made mine a little flat so will round them some more.

1CFBBE68-B0AE-4BDE-B7C8-30AE3E53E473.jpegB4687A32-1170-4EBA-A792-EF1114C0EC97.jpeg
 
Back
Top