• "Thank you for your Donations and Support"
    As we close this Annual Donations Drive, I want to thank you all for your Generosity in Donating to Ships of Scale. It is Greatly Apreciated !!!
    Ships of Scale continues to explore exciting things to offer to the Ship Building Community.

HMS Victory Mantua 1:78 (first build) by Grant Tyler

While I research and buy soldering products I thought I would go back and redo the things which glare at me and I don’t enjoy.

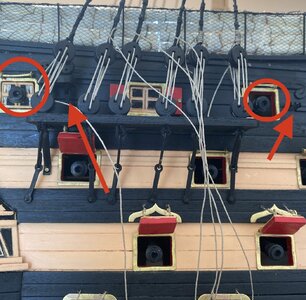
First is my closed gun ports- as previous discussed I forgot to add the gun supports for the top stern row (only 4 thankfully). Had to do some creative thinking.

I made 3 attempts at making a jimmy gun support through the gun port itself and lost all three into the depths of my hull- Eish. I then cut a 8x8 Plank of wood, drilled a hole for the cannon and epoxy glued(with “nails”of CA) onto to the bulkhead of the cabin walls. This worked.

For the most stern gun port there are no bulkheads to glue to so I made a window(with curtains)ROTF from the etching left over and made a cannon through the window. (A little builders license). Had to cut the cannon to a third using my dremel.

I think these are better- added the hinges for the quarter Davits- arrows. The gun port lids will be added after I complete rigging here as I am sure I will break them off- finesse not part of my repertoire.

4E3EB733-A037-4D5D-9566-1B929EFBF16F.jpeg
 
For the most stern gun port there are no bulkheads to glue to so I made a window(with curtains)ROTF from the etching left over and made a cannon through the window. (A little builders license). Had to cut the cannon to a third using my dremel.
Think of it as an enhancement to the cannoneer's quarters... ;)
 
While I research and buy soldering products I thought I would go back and redo the things which glare at me and I don’t enjoy.

First is my closed gun ports- as previous discussed I forgot to add the gun supports for the top stern row (only 4 thankfully). Had to do some creative thinking.

I made 3 attempts at making a jimmy gun support through the gun port itself and lost all three into the depths of my hull- Eish. I then cut a 8x8 Plank of wood, drilled a hole for the cannon and epoxy glued(with “nails”of CA) onto to the bulkhead of the cabin walls. This worked.

For the most stern gun port there are no bulkheads to glue to so I made a window(with curtains)ROTF from the etching left over and made a cannon through the window. (A little builders license). Had to cut the cannon to a third using my dremel.

I think these are better- added the hinges for the quarter Davits- arrows. The gun port lids will be added after I complete rigging here as I am sure I will break them off- finesse not part of my repertoire.

View attachment 290303
You've heard of 'loose canons' well this one just rolled off through the window?ROTF
 
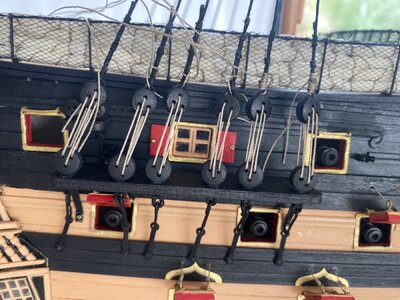
Back to ship building: had a little time this morning to fit some parts I had previously made.

1. Quarter deck gratings. I had a problem with these as I ran out of gratings. I used left over off cuts (Not long enough to fit across) and cut off the tiny inserts and superglued them between the upper combs parallel to the DP. Last 4 rows on port side. I also cut square for base of belay rack. Could not sand down as much as I would have liked tho they kept breaking off.

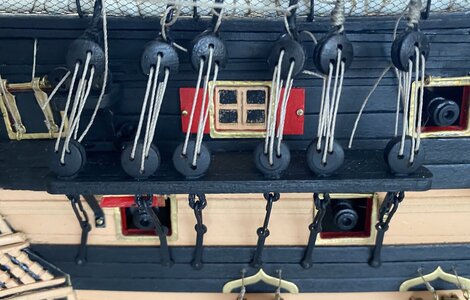
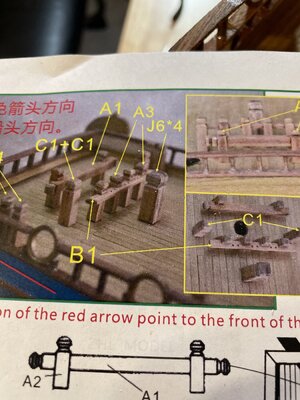
2: The belay pin racks. These as with many of the kit parts where out of scale - too thick, however I decided to run with them.
I did make the following changes tho:
- Made twin sheave rope holes (I will need these with my extra rigging lines)
- Cut the top of the pillars to make all four sides angled

Glue and fitted.
View attachment 289118View attachment 289119View attachment 289120View attachment 289121View attachment 289126View attachment 289128
View attachment 289130
Belay pin too small now (go figure kit designers:oops:). I can get longer AL ones which I have ordered- should solve this.
View attachment 289131

Happy Modelling.
Cheers
Grant
Your belaying pins are not too small, the rack board is way too thick! Looks like a 3 ply piece of plywood. You need a board one ply thick looking at the side view! ;)
 
Your belaying pins are not too small, the rack board is way too thick! Looks like a 3 ply piece of plywood. You need a board one ply thick looking at the side view! ;)
Good morning Dean- absolutely agree with you. I just got tired of changing scale on almost every item- it was like surrendering to the kitROTF. They have not yet said to me no way they got to come off. Maybe this will happen when the longer belay pins are insertedRedface
 
Good morning.
After destroying my last cannon - I had to revert to the closed gun port for the officers cabin. Cleaned it up better and got it fitting tighter- the problem is the kit hinges and brass framing of the gun ports are designed for them open.

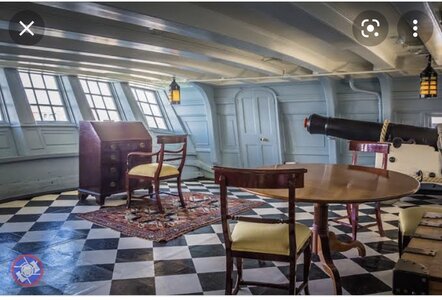
Anyway maybe Admiral Nelson and his officers are having a secret council in the officers cabin and the cannon is stored away as in photo:rolleyes:
AB429A00-A9A5-4F45-88E3-DDED5D861A11.jpegDD0A1301-76DF-4FF4-B221-E1C568BD4DC3.jpeg

Here is an interesting point- my shrouds which where tensioned have stretched. Luckily I did not tie off the lanyards as I want to fit the stays first so everything is tensioned correctly. I think I will do the same for the other mast shrouds where I leave them for a while prior to tying off? Let them stretch and sag a little too first.

I’m not sure if this is normal or it is just the quality of the thread provided?
 
Hi Grant,
I did a lot of research about ropes while figuring out how to make my own and I learned certain materials change with changing humidity levels. Did you install them in dry winter and now its humid summer for you? Could be that? Perhaps wiser friends can help.
Hello Paul. It could be that- they did go in at the beginning of summer and we have recently had some very hot humid days recently. The begging question is then: when one tensions the lanyards do we make them tighter depending on seasonal changes or just stick with the norm ? probably thread dependent as well.
 
While I research and buy soldering products I thought I would go back and redo the things which glare at me and I don’t enjoy.

First is my closed gun ports- as previous discussed I forgot to add the gun supports for the top stern row (only 4 thankfully). Had to do some creative thinking.

I made 3 attempts at making a jimmy gun support through the gun port itself and lost all three into the depths of my hull- Eish. I then cut a 8x8 Plank of wood, drilled a hole for the cannon and epoxy glued(with “nails”of CA) onto to the bulkhead of the cabin walls. This worked.

For the most stern gun port there are no bulkheads to glue to so I made a window(with curtains)ROTF from the etching left over and made a cannon through the window. (A little builders license). Had to cut the cannon to a third using my dremel.

I think these are better- added the hinges for the quarter Davits- arrows. The gun port lids will be added after I complete rigging here as I am sure I will break them off- finesse not part of my repertoire.

View attachment 290303
Loving the window with curtains Grant! Gives a false sense of security of a homely, safe and domesticated look and feel. And then a large black cannon suddenly protrudes out! Brilliant ROTF
- Mark
 
Back
Top