-

Win a Free Custom Engraved Brass Coin!!!
As a way to introduce our brass coins to the community, we will raffle off a free coin during the month of August. Follow link ABOVE for instructions for entering.
-

PRE-ORDER SHIPS IN SCALE TODAY!
The beloved Ships in Scale Magazine is back and charting a new course for 2026!
Discover new skills, new techniques, and new inspirations in every issue.
NOTE THAT OUR FIRST ISSUE WILL BE JAN/FEB 2026
You are using an out of date browser. It may not display this or other websites correctly.
You should upgrade or use an alternative browser.
You should upgrade or use an alternative browser.
HMS Victory Mantua 1:78 (first build) by Grant Tyler [COMPLETED BUILD]
- Thread starter GrantTyler
- Start date
- Watchers 102
Or this...
650pcs Heat Shrink Tubing Black innhom Heat Shrink Tube Wire Shrink Wrap UL Approved Ratio 2:1 Electrical Cable Wire Kit Set Long Lasting Insulation Protection, Safe and Easy, Eco-Friendly Material https://www.amazon.com/dp/B07WWWPR2X/ref=cm_sw_r_apan_glt_i_TKR73FPNFRH058DQ5GCT
Used on my last built, Pegasus, on masts and anchors.
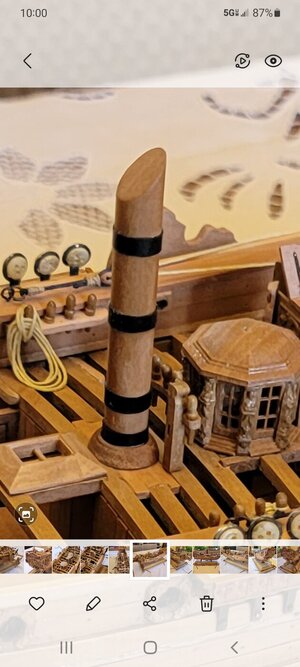
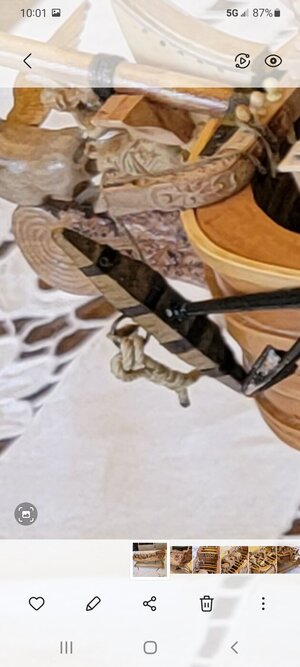
Cheers
Daniel
650pcs Heat Shrink Tubing Black innhom Heat Shrink Tube Wire Shrink Wrap UL Approved Ratio 2:1 Electrical Cable Wire Kit Set Long Lasting Insulation Protection, Safe and Easy, Eco-Friendly Material https://www.amazon.com/dp/B07WWWPR2X/ref=cm_sw_r_apan_glt_i_TKR73FPNFRH058DQ5GCT
Used on my last built, Pegasus, on masts and anchors.


Cheers
Daniel
I like that concept, Daniel. However, I am a bit skeptical about using it. What may happen overtime when it will dry out? It will be loosened or cracked? That would be interesting to know...Or this...
650pcs Heat Shrink Tubing Black innhom Heat Shrink Tube Wire Shrink Wrap UL Approved Ratio 2:1 Electrical Cable Wire Kit Set Long Lasting Insulation Protection, Safe and Easy, Eco-Friendly Material https://www.amazon.com/dp/B07WWWPR2X/ref=cm_sw_r_apan_glt_i_TKR73FPNFRH058DQ5GCT
Used on my last built, Pegasus, on masts and anchors.
View attachment 289975View attachment 289976
Cheers
Daniel
I like that concept, Daniel. However, I am a bit skeptical about using it. What may happen overtime when it will dry out? It will be loosened or cracked? That would be interesting to know...
That could be and is a good question. For sure, if I see that happening I will post it.
I took the idea here , from SOS. but I can't remember from what thread.
Those "rubber bands", have been covered with the shellac or poly I used. In a certain way are protected from the room weather changes
And if they have been designed to cover electric wires... hope they survive for a very long time. Nevertheless, no electrician will covers them with poly/varnish/shellac. I used them on my Slot Car hobby, for soldering the motor wires. That's a good way to cover the very small wires used on the car electronic board. Never failed after years. But the idea to use them on ship modeling came from SOS, from a post like mine.
Cheers
Daniel
Thank you for the tips Thomas and Daniel . The white cardboard is certainly something I can use and solves my problem. Appreciated . Cheers Grant
Great work Grant. I've been away for a little while and what did you do but add another 10 pages to your build log that I need to catch up on!After taking the below picture I decided to replace all my blocks. My ship needs all the help it can get so ordered a full new set. I just don’t like them. They are also too square for the Victory. See picture of Portsmouth Victory.
When replacing the Jeer blocks I will serve the line from the lashings it will look way better.
View attachment 284706View attachment 284707
View attachment 284708
Great watching you work GrantA hearty hello to everyone. Intermittently I have been trying my hand at rigging the dead eyes to the shrouds. I had a go using this methodology:
View attachment 285269
To align the dead eyes I used hardwood and measured the position of the dead eyes. I used the rigging plan provided to establish the position of the foremost one.
View attachment 285262
I secured the hardwood to the channel just behind the lower dead eyes already fitted. Using 3 nails through the first, 4th and last dead eyes, rather than wire in above diagram as it is easier to remove the board, it was fitted to the channel.
Making sure the shrouds looping around mast where all correctly positioned I pulled each one down to the lower deadeye on the Chanel and marked the board to reflect the vertical line of each shroud.View attachment 285264
The horizontal line was then draw in parallel to the channel at the height determined from the plan.
As each deadeye has the 3 holes all over the place (No uniformity)I had to place each deadeye individually and drill the holes for Each one with the upper center hole following the vertical line.
I then attached each dead eye with copper wire and placed it back on channel and inserted the nails.
View attachment 285265
I double checked the sequence and position of the shrouds around the mast and took the shroud line around the deadeye on the board fore to stern and made 3 lashing as per diagram above. I left a small gap on the lower lashing for the lanyard lines to go through to be tied off when I get to these one day. (I’m not sure if these are to big or not, However once done the lanyard line should cover the gaps. I attempted to keep each shroud tension the same (not so easy) and this was Grant guess work.
View attachment 285268
Once all done I removed the copper wires and nails. I repeated the same for port and starboard.
I have thought to buy new rope as this rope frays and doesn’t give defined detail, however I am too far into the process. If I change now there will not be conformity across my ship. I am happy however it could be better.
I now have to wait for my new blocks and this is a good thing as I need to pull myself back a bit and finish so many aspects I am still working on.
Cheers
Grant

Very interesting work - I watch with bated breath on the final outcome.
Never mind the quarter davits Grant, it's that mass of complicated ropes and lines in the background that give me the jitters! Looks a bit like my Friday night spaghetti dinner. But I'm sure you'll manage it just as well as you are doing everything else with your build, great workGood morning. Quarter Davits.
The fitment of the hinges for the quarter davits need to be installed prior to the completion of the dead eyes.....in my view. I think it will be difficult to do so once the shrouds are fitted.
Some details I would like to add to the kit instructions. In fact the whole rigging, block attachment, tackle etc need to be changed from the plans. The kit is devoid of such detail.
The real ship in Portsmouth:
View attachment 285554
View attachment 285559
I have marked the changes- inserted the shaped ridges along each Davit, drill the four holes for the tackle lines in each, add the blocks and change the rigging and attachment there of for each Davit.
A really good example of what to achieve is from Model shape way 3D.
View attachment 285557
I started this process:
Measured the Davits per instructions for length and scale using 3x3 walnut. I scratched my left over wood and found some 2x1 walnut strips which I glued based the Davit . With an exacto flat blade a blade I cut the leading edge off to get the shape of each. The hinges I soaked in acid for 10min and will apply antioxidant flat black paint(it works for me as I don’t have brass black here in SA).
View attachment 285558
View attachment 285552
I made a little stencil with 4 holes which I will use to try and get these drilled in correct place and consistent on each Davit-very little space to work with. I will use a 0.6mm drill bit....
......to be continued.
I need to pop into office for a while. Cheers Grant.
View attachment 285550
View attachment 285555

Ahhhh ... now you went and made me homesick againGood day from a glorious Cape Town - off the subject however it was a picture perfect day so I had to share: - if only my Victory could look this good
View attachment 286604
Cheers
I’ve used black card stock as well.
Thanks Vic for this tip. It’s like...duh so simple yet so effective. I am going with the white cardboard as on the Victory the mast band are painted the same color as the masts. I’ve seen guys using black at I do think it looks better but I’ve progressed too far to go black. Thanks
Thanks Vic for this tip. It’s like...duh so simple yet so effective. I am going with the white cardboard as on the Victory the mast band are painted the same color as the masts. I’ve seen guys using black at I do think it looks better but I’ve progressed too far to go black. Thanks
Good morning Mark. Thanks for your likes and messages- as you know on those glorious days Cape Town is a special place- when the SE not blowing-sorry didn’t mean to make you homesickAhhhh ... now you went and made me homesick again
Good afternoon- not often I get to play with my Victory in the afternoon. Progress with the fore and main masts. Made the stanchions for the balustrades from toothpicks cut to 1.2mm and used 3mm x 1.5 walnut for the balustrades. (As previously mentions total change from the kit). Used my trusty LEGO to get the right angle for each stanchion. 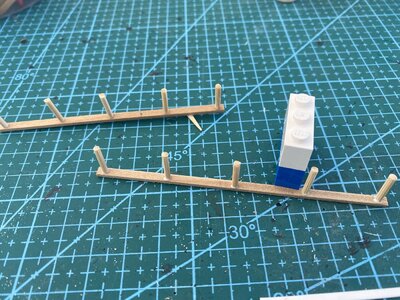
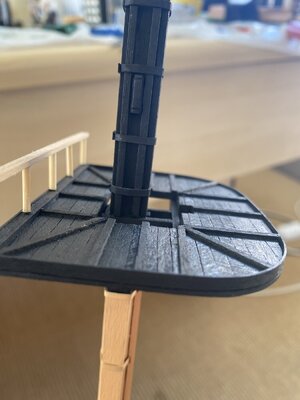
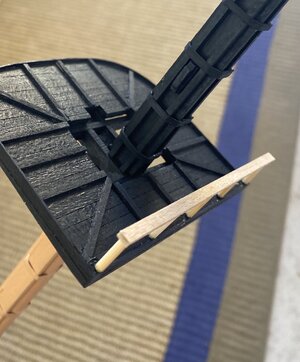
Now to paint nice Matt black


Now to paint nice Matt black
I never thought of using my legos for measuring right angles for stanchions! I just used my non-calibrated eyeballs.Good afternoon- not often I get to play with my Victory in the afternoon. Progress with the fore and main masts. Made the stanchions for the balustrades from toothpicks cut to 1.2mm and used 3mm x 1.5 walnut for the balustrades. (As previously mentions total change from the kit). Used my trusty LEGO to get the right angle for each stanchion. View attachment 290157View attachment 290158
View attachment 290159
Now to paint nice Matt black
A simple task done EXTREMELY well Grant. I admire your skills.
Hummm, a simple task? The only SIMPLE task that I’m aware of building these ships is opening the boxA simple task done EXTREMELY well Grant. I admire your skills.
Wow Grant! Crisp clean neat tight craftsmanship. Your work is fun to look at. Keep it coming.
Wow Grant! Just finished catching up on your log. Your skill is improving with every post! Great decision-making as well.
I like the cardstock better for bands on wood. With brass to brass, you can tack-solder one end and draw it tight and secure with solder again.
Whether this is your first build or 50th, you have so much to be proud of my friend!
I like the cardstock better for bands on wood. With brass to brass, you can tack-solder one end and draw it tight and secure with solder again.
Whether this is your first build or 50th, you have so much to be proud of my friend!
Good morning:
Vic LEGO has been my lifesaver many times. My uncalibrated eyes would most definitely let me down - horribly
Thank you Paul, Heinrich and Daniel.
Ron and True story indeed. Funny this hobby is (Yoda again). Those items I think are simple often turn out to be the most challenging (rigging my cannons is the prime example thus far)
Bill thank you for that. I have mentally blocked metal work and shied away from it- I think it is time to put my “big boy panties” on and go for it.
Vic LEGO has been my lifesaver many times. My uncalibrated eyes would most definitely let me down - horribly

Thank you Paul, Heinrich and Daniel.
Ron and True story indeed. Funny this hobby is (Yoda again). Those items I think are simple often turn out to be the most challenging (rigging my cannons is the prime example thus far)
Bill thank you for that. I have mentally blocked metal work and shied away from it- I think it is time to put my “big boy panties” on and go for it.
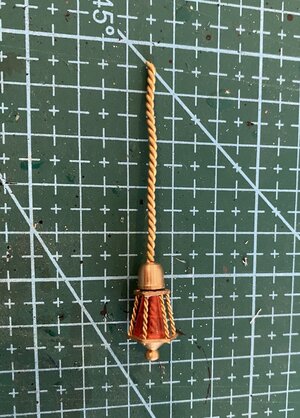
Good morning- I made the main mast lantern this morning as per the instructions. “Eish” I think this and looking at others builds of how metal work completes a model has “forced” me to give this a go.
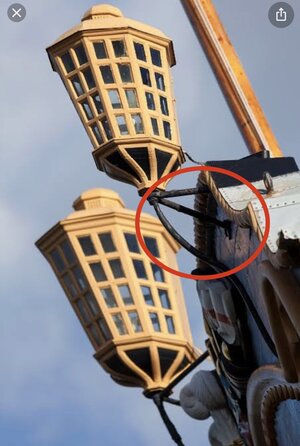
This is how it is supposed to be. I doubt I could make the lantern however I am going to give the brackets (circled) a go. Worst case revert back to kit )
I have also decided to add the metal hooks and brace to the upper deadeye on the top for the futtock shrouds.I initially made them per instructions(On my Mizzen) where the rope loop around the deadeye merely continues down to futtock strake.
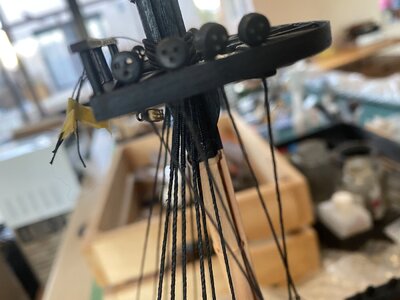
I hope I don’t make too much mess undoing these.
This may take a while as I need to buy the proper soldering iron, flux etc. I’m going to have to do some research here so any pointers will be valued. I can get these products locally from a cool online store here “Take a lot” - now I’m excited

This is how it is supposed to be. I doubt I could make the lantern however I am going to give the brackets (circled) a go. Worst case revert back to kit )

I have also decided to add the metal hooks and brace to the upper deadeye on the top for the futtock shrouds.I initially made them per instructions(On my Mizzen) where the rope loop around the deadeye merely continues down to futtock strake.

I hope I don’t make too much mess undoing these.
This may take a while as I need to buy the proper soldering iron, flux etc. I’m going to have to do some research here so any pointers will be valued. I can get these products locally from a cool online store here “Take a lot” - now I’m excited


