• "Thank you for your Donations and Support"
    As we close this Annual Donations Drive, I want to thank you all for your Generosity in Donating to Ships of Scale. It is Greatly Apreciated !!!
    Ships of Scale continues to explore exciting things to offer to the Ship Building Community.

HMS Victory Mantua 1:78 (first build) by Grant Tyler

Morning Grant,
Could you translate this into plain good old English? South African Dutch would do the trick as well... ROTF
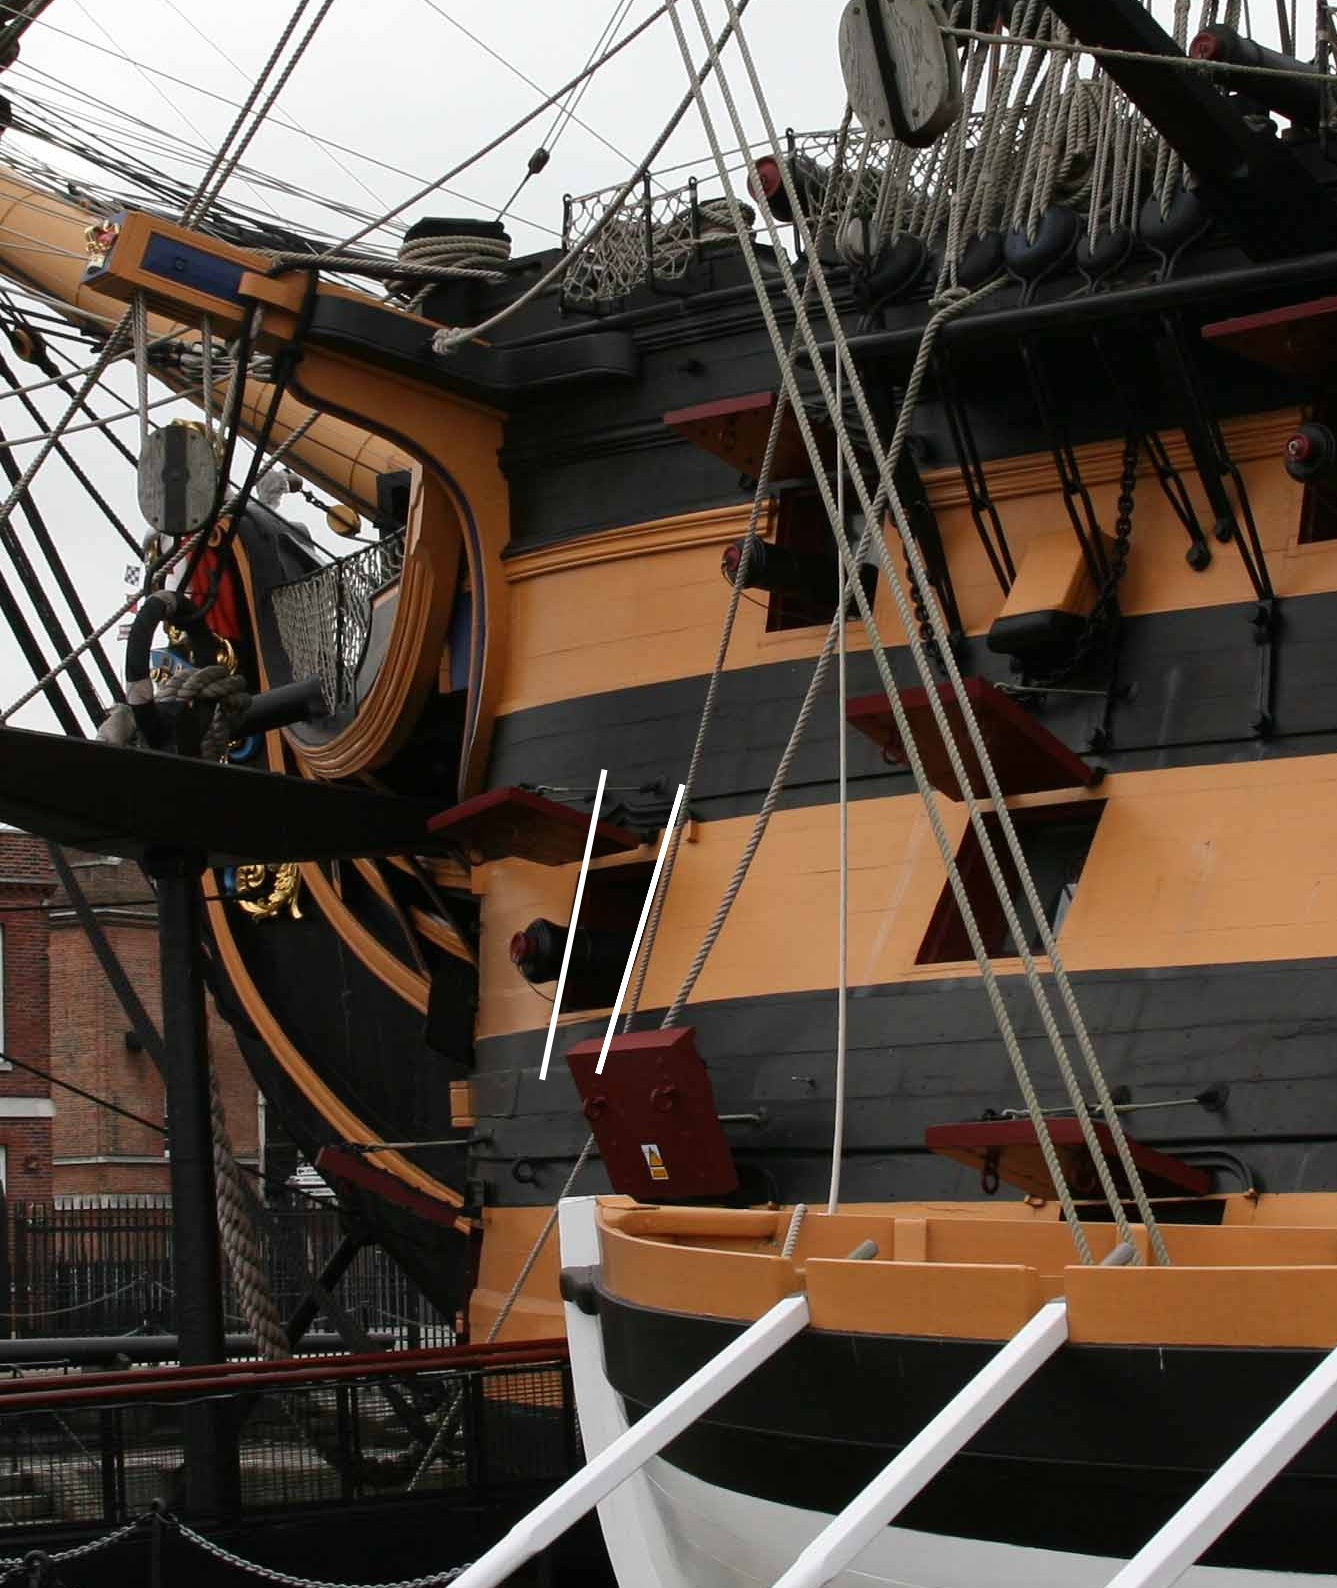
Just kidding, I just never knew the way anchors were handled on these vessels, it's more complicated than I imagined. In all a very informative post and, again, looking immaculately, Thumbsup
Johan
Goeie more Johan. Ek het gedink n prentjie sal n prettige illustrsie wees. Ek het ook baie van hulle gehou.....ROTF. South African Dutch (Afrikaans for you). PS my Afrikaans is not the bestRedface.Thanks for you compliment. Cheers Grant
 
block tied to the ring
Agree with Alexander. It's a bit strange. There must be a hook.

3764003.jpg
 
Grant, buddy, hi. Where did you see this method of attaching the anchor. I'm talking about a block tied to the ring and a rope? I see this for the first time.
Good morning Sasha. With my limited knowledge of ship building, I saw this on Gil Middleton’s build. Here is the Portsmouth Victory:
E0C1899C-AC46-4D8F-8E59-53BC8E017D68.jpeg
In Gils build he refers to David Steels reference on the site Historic Naval Association (The Elements and practice of rigging and Seamanship). I started going through this however it is a lengthy document so jumped to the Anchors.

I would have thought a simple bowline knot would work;)
Cheers Grant
 
I don't think you want to tie the block any time when you raise up the anchor, or to throw it into the sea with it :)

View attachment 305698
Thanks Walter- yes that makes complete sense - not going to put the block in the sea. I will have to make a hook around the block and attach the messenger line to the Anchor ring. This picture is a great reference. Cheers Grant. PS this is why make one first and let SOS crit it for you. Thumbsup Cheers Grant
 
Sorry I got here a bit late, doenload the Jotika Victory manual 2. It goes great detail on Shrouds, Futtocks etc, including recommended thead sizeing for each. WIth the 1:72 vs 1:78 thead size could be considered the same. I'll have a look at Plan 12 which goes into detail on connection. Details are also provided in the manual on anchor threads and fitting.
 
Sorry I got here a bit late, doenload the Jotika Victory manual 2. It goes great detail on Shrouds, Futtocks etc, including recommended thead sizeing for each. WIth the 1:72 vs 1:78 thead size could be considered the same. I'll have a look at Plan 12 which goes into detail on connection. Details are also provided in the manual on anchor threads and fitting.
Good Morning Paul. Thanks for this I will. Jokita (Caldercraft) best Victory kit by some margin. As I tell my staff...”good thinking Batman”;)Thumbsup
 
Hi Grant!

View attachment 305699
Another picture for understanding. The pulley with ring lifts the anchor out of the water. The other rope (rigging line) secures the anchor to the ship.

Best regards
Thomas
Thanks Thomas- Yes, this confirms @Walterone and @Alexander74 advice and questions. Makes it clear. Funny that now I see it it is obvious. Much appreciated. Cheers Grant
 
Sorry I got here a bit late, doenload the Jotika Victory manual 2. It goes great detail on Shrouds, Futtocks etc, including recommended thead sizeing for each. WIth the 1:72 vs 1:78 thead size could be considered the same. I'll have a look at Plan 12 which goes into detail on connection. Details are also provided in the manual on anchor threads and fitting.
Hello Paul. I downloaded them. Certainly will assist me. Re the Futtock shrouds I was super lucky as my guess work Re thread size matches these plans exactly. Re the tying off of the Futtock shrouds to the staves Caldercraft is not Historically accurate, however I am going to do redo mine their way. I don’t like the whipping on my first attempt (blue arrow). Whilst this enable me to lash them to the staves correctly the Futtocks don’t have whipping on them and they going to get in the way of the Ratlines. Cheers Grant
 
Hello Paul. I downloaded them. Certainly will assist me. Re the Futtock shrouds I was super lucky as my guess work Re thread size matches these plans exactly. Re the tying off of the Futtock shrouds to the staves Caldercraft is not Historically accurate, however I am going to do redo mine their way. I don’t like the whipping on my first attempt (blue arrow). Whilst this enable me to lash them to the staves correctly the Futtocks don’t have whipping on them and they going to get in the way of the Ratlines. Cheers Grant
C5953D36-9850-48D6-A1E0-096C220499BB.jpeg
 
You’re doing great for your first attempt! I’m really impressed, Grant. Looking at the pictures, it appears that the anchor rings are completely sheaved with dark rope and it has smaller sheaves of lighter rope. Is that what you did?
 
You’re doing great for your first attempt! I’m really impressed, Grant. Looking at the pictures, it appears that the anchor rings are completely sheaved with dark rope and it has smaller sheaves of lighter rope. Is that what you did?
Good evening Vic.Thanks. You are correct. However, I did sheave with the black but have not included the lighter small ones. I did one and preferred just the black. Cheers Grant
 
I am very happy that you are receiving such great help and references Grant. With your great execution, it will lead to a beautiful end result! Thumbsup
 
Good morning. I redid the anchor tackle. Made a hook. I used @Thomas Marocke diagram as I could not get the hook looking good around the block as shown by @Walterone. My “metal work” needs loads of work and some tools to assist. :rolleyes:. The sling and messenger lines will be connected when I fit the anchors later. Cheers Grant.
View attachment 305912
Lookin’ good, amigo!
 
Back
Top