Morning, I have just stumbled across this log. Very impressive and so inspirational. Great work that you are doing with this maze of plastic parts and pe parts.
-

Win a Free Custom Engraved Brass Coin!!!
As a way to introduce our brass coins to the community, we will raffle off a free coin during the month of August. Follow link ABOVE for instructions for entering.
-

PRE-ORDER SHIPS IN SCALE TODAY!
The beloved Ships in Scale Magazine is back and charting a new course for 2026!
Discover new skills, new techniques, and new inspirations in every issue.
NOTE THAT OUR FIRST ISSUE WILL BE JAN/FEB 2026
You are using an out of date browser. It may not display this or other websites correctly.
You should upgrade or use an alternative browser.
You should upgrade or use an alternative browser.
IJN AKAGI 1/350 by Hasegawa [COMPLETED BUILD]
- Thread starter Will @ Trilogy
- Start date
- Watchers 25
Want to thank everyone for the nice comments and all the likes. I've taken some time off setting up my shop that was just finished. Our house had an unfinished walkout basement that was just completed and we moved furniture and the likes in last week. My shop was completed with work benches, upper and lower cabinets, a wash sink and now to unpack boxes and setting up tools.
Again thank you all.
Again thank you all.
Congrats on your new shop. I wish you had taken photos of before and after of your new shop. Magic Mike
You're right I wish I had done that although I took some after construction. I'll take some when completed. I did take a nice video of after construction but I need to learn how to post videos.
It's been awhile since my last post but I have been busy getting the shop ready to use and we also took an Alaska cruise hoping to see aurora borealis but not to be. Cloudy everyday we were stranded in Seward docked. There was a large arctic storm down for the north with winds of 60-70mph and waves to 30' so the decision was to ride out the storm docked in Seward. Company refunded half of our fare and all drinks on board were free. Let me tell you a lot of people took advantage of free drinks including my wife. I'm a recovered alcoholic so the starbucks was my favorite place. We had a great vacation just to be without any outside disturbances. And now back to work. Oh! yeh I'm retired so back to modeling.
Short update to the Akagi. The lattice work under the foredeck has been completed. The deck has been dry fit to the superstructure and now I'm on to the center deck lattice.
Foredeck laying on the structure.
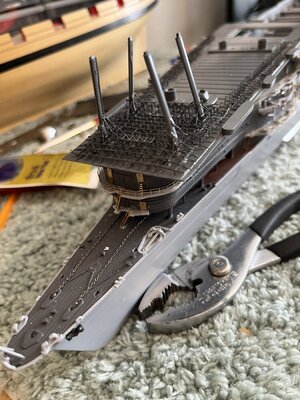
foredeck dry fitted
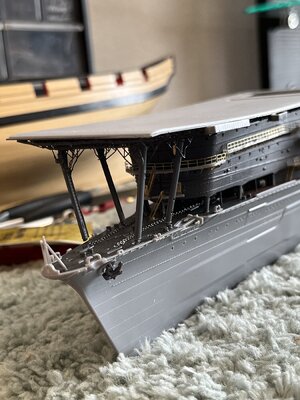
With the foredeck lattice completed and painted it was time to start the center deck lattice work. This is much more difficult in that I have no pictures or instructions. Spending a day trying to figure out the vague photocopy of the Hasegawa instructions left with more questions than answers. Last night during dinner it hit me. Build the plastic lattice and use that for the direction.
Plastic lattice
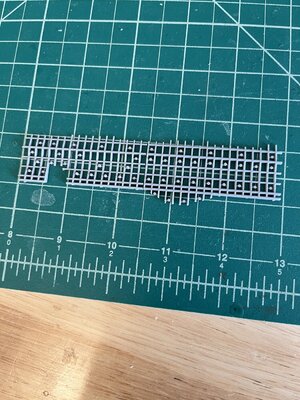
Now with the pattern to follow finding the PE parts became a matter of laying the PE fret over the plastic lattice.
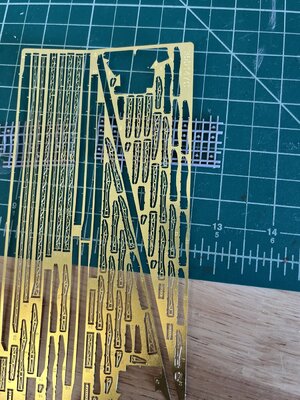
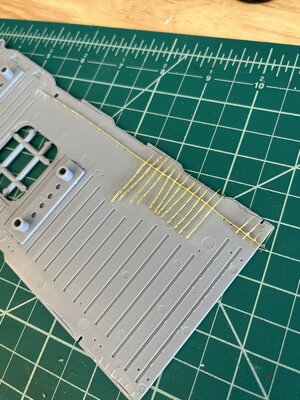
The first thing was to find the long longitudinal stringer where the cross pieces attach. I start with one of the stringers and after all the cross pieces are attached I can turn the assembly over and attach the balance of stringers straightening out cross pieces as I go. Also in the below photo you can see the forward pieces already attached
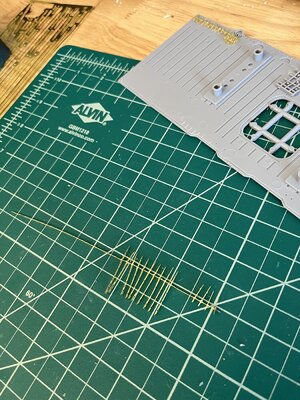
For clarity I placed the start of the assembly on the underside of the mid-deck.
Short update to the Akagi. The lattice work under the foredeck has been completed. The deck has been dry fit to the superstructure and now I'm on to the center deck lattice.
Foredeck laying on the structure.

foredeck dry fitted

With the foredeck lattice completed and painted it was time to start the center deck lattice work. This is much more difficult in that I have no pictures or instructions. Spending a day trying to figure out the vague photocopy of the Hasegawa instructions left with more questions than answers. Last night during dinner it hit me. Build the plastic lattice and use that for the direction.
Plastic lattice

Now with the pattern to follow finding the PE parts became a matter of laying the PE fret over the plastic lattice.

The first thing was to find the long longitudinal stringer where the cross pieces attach. I start with one of the stringers and after all the cross pieces are attached I can turn the assembly over and attach the balance of stringers straightening out cross pieces as I go. Also in the below photo you can see the forward pieces already attached

For clarity I placed the start of the assembly on the underside of the mid-deck.

Brilliant!It's been awhile since my last post but I have been busy getting the shop ready to use and we also took an Alaska cruise hoping to see aurora borealis but not to be. Cloudy everyday we were stranded in Seward docked. There was a large arctic storm down for the north with winds of 60-70mph and waves to 30' so the decision was to ride out the storm docked in Seward. Company refunded half of our fare and all drinks on board were free. Let me tell you a lot of people took advantage of free drinks including my wife. I'm a recovered alcoholic so the starbucks was my favorite place. We had a great vacation just to be without any outside disturbances. And now back to work. Oh! yeh I'm retired so back to modeling.
Short update to the Akagi. The lattice work under the foredeck has been completed. The deck has been dry fit to the superstructure and now I'm on to the center deck lattice.
Foredeck laying on the structure.
View attachment 397314
foredeck dry fitted
View attachment 397315
With the foredeck lattice completed and painted it was time to start the center deck lattice work. This is much more difficult in that I have no pictures or instructions. Spending a day trying to figure out the vague photocopy of the Hasegawa instructions left with more questions than answers. Last night during dinner it hit me. Build the plastic lattice and use that for the direction.
Plastic lattice
View attachment 397318
Now with the pattern to follow finding the PE parts became a matter of laying the PE fret over the plastic lattice.
View attachment 397319
The first thing was to find the long longitudinal stringer where the cross pieces attach. I start with one of the stringers and after all the cross pieces are attached I can turn the assembly over and attach the balance of stringers straightening out cross pieces as I go. Also in the below photo you can see the forward pieces already attached
View attachment 397321
For clarity I placed the start of the assembly on the underside of the mid-deck.
View attachment 397320
Awhile back I mentioned that we've been finishing the basement and that I would be getting a shop for my modeling. Well the basement is finished and really came out wonderfully with two bedrooms, a rec room, a small kitchen and one bathroom. The best part is the basement is a walkout onto our back yard patio. My shop was completed with the exception of paint the work surfaces. Several asked to see a video of the shop so I made a short video and please excuse my attempt of videography.
View attachment IMG_1308_Converted.mp4
Next is to order pegboard hooks, paint the work tops, and figure out where all the stuff goes. Not too much to ask. HeHeHe! and plank the deck on my HM Cheerful.
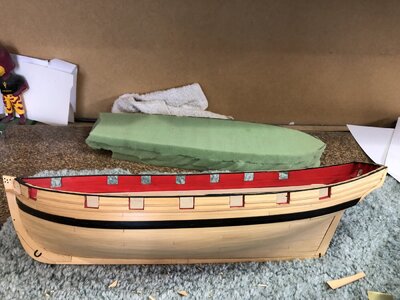
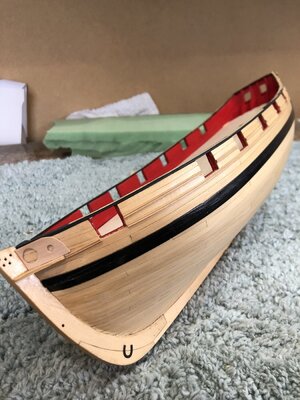
Finish the Akagi then Cheerful
View attachment IMG_1308_Converted.mp4
Next is to order pegboard hooks, paint the work tops, and figure out where all the stuff goes. Not too much to ask. HeHeHe! and plank the deck on my HM Cheerful.


Finish the Akagi then Cheerful
Will, unfortunately, there is only audio of your video. What could go wrong?
Good Morning Jimsky. I viewed the video and had video and audio so I'm not sure what happened. I took the video with my iPhone and converted the .mov into a .mp4 format. I would help is others could tell me if they had problems.
Sorry for the trouble, Will. I don't think the .mp4 format is supported for video on our forum. The best you can do is to upload your video to YouTube, and then share the link to the video. This is the way most of us do.Good Morning Jimsky. I viewed the video and had video and audio so I'm not sure what happened. I took the video with my iPhone and converted the .mov into a .mp4 format. I would help is others could tell me if they had problems.
Thanks Jim. I'll give youtube a try
I did publish the video on YouTube as suggested by Jim. With this I may publish videos of my works in progress, but time will tell.
Will, loved the video. Your basement has so much potential for ship building! Don't forget a nice sound system for back ground music as you work. Magic MikeI did publish the video on YouTube as suggested by Jim. With this I may publish videos of my works in progress, but time will tell.
Yeah...lots of useful space for your shop and machinery. It should be quite and cozy.
It's been awhile since I worked on the model so this week I started the PE under the middle deck. There are four areas of PE which actually are in each corner of the deck. The first is located forward port corner and is a fairly simple construction consisting of two rails and cross supports.
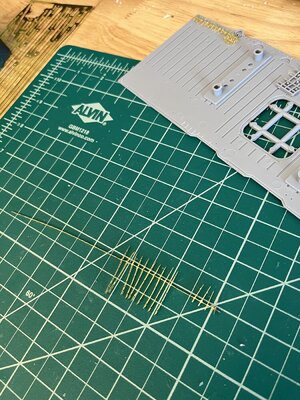
Next as the aft starboard corner which consists of one rail and 36 cross supports pieces. Now the problem was how to hold the rail vertical while place the cross pieces. Another issue was how to maintain the rails straight line will attaching the cross pieces. Studying the rail and deck I noticed bumps on the rail and dimples on the moulded piece which align locating the rail position. I glued the rail on the deck using the bumps and dimples locating the rail. Next it was just a matter of aligning the cross pieces to be glued.
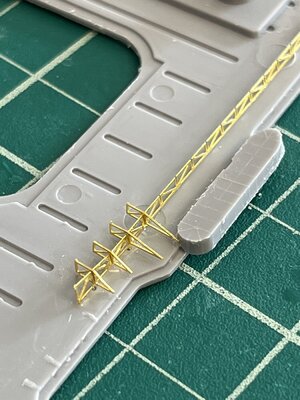
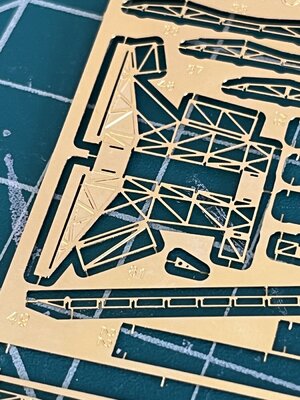
Here you can see the different lengths of cross pieces. This again caused much studying of the small prints to find the correct sizes and then searching the PE frets to find the parts. Fortunately the parts for this structure. WHEW!!!
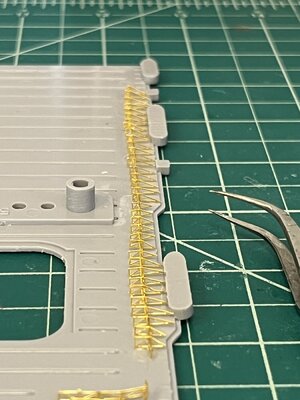
You can see the pointed ends meeting the edges caused the rail to have a bend. On previous dry fit sessions I learned that the square ends were flush to the superstructure walls so it becomes imperative keeping the points along the edges.
Next the PE with the deck supports that lay alongside the superstructure with rails and cross pieces. There five rails that the supports and the cross pieces attach. The supports are folded up forming the vertical upright stanchions.
 W
W
Getting the folded uprights into the five rails was difficult so I went another route and put the cross pieces the set in-between the upright supports. This also had another issue to consider in that the uprights sat between the flight deck underside and the below deck. These had to sit completely on the rail being flush with underside of the flight deck. With them flush the opposite end sat on the deck below the flight deck.
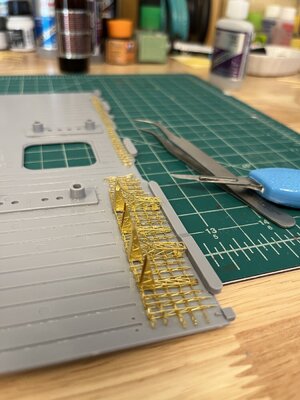
Here you can see the ends do not touch the edges so this would cause conflict with superstructure.
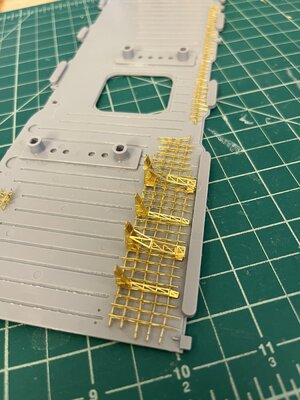
Thankfully this is only a dry fit installation and the edges can be set properly. I have on more PE assembly to complete and I'll post photos of completed and painted PE with some photos of the middle deck dry fit.
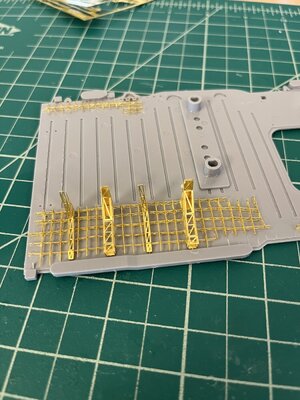

Next as the aft starboard corner which consists of one rail and 36 cross supports pieces. Now the problem was how to hold the rail vertical while place the cross pieces. Another issue was how to maintain the rails straight line will attaching the cross pieces. Studying the rail and deck I noticed bumps on the rail and dimples on the moulded piece which align locating the rail position. I glued the rail on the deck using the bumps and dimples locating the rail. Next it was just a matter of aligning the cross pieces to be glued.

Here you can see the different lengths of cross pieces. This again caused much studying of the small prints to find the correct sizes and then searching the PE frets to find the parts. Fortunately the parts for this structure. WHEW!!!

You can see the pointed ends meeting the edges caused the rail to have a bend. On previous dry fit sessions I learned that the square ends were flush to the superstructure walls so it becomes imperative keeping the points along the edges.
Next the PE with the deck supports that lay alongside the superstructure with rails and cross pieces. There five rails that the supports and the cross pieces attach. The supports are folded up forming the vertical upright stanchions.
 W
WGetting the folded uprights into the five rails was difficult so I went another route and put the cross pieces the set in-between the upright supports. This also had another issue to consider in that the uprights sat between the flight deck underside and the below deck. These had to sit completely on the rail being flush with underside of the flight deck. With them flush the opposite end sat on the deck below the flight deck.

Here you can see the ends do not touch the edges so this would cause conflict with superstructure.

Thankfully this is only a dry fit installation and the edges can be set properly. I have on more PE assembly to complete and I'll post photos of completed and painted PE with some photos of the middle deck dry fit.

Finished the forward deck lattice work and below are a few photos showing the detail and overall after painting.
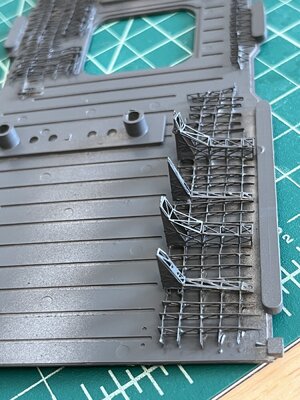
I've wondered what, where and how these interesting structures are used on the model below is a photo of them during dry fitting. Sorry for the dark lighting but it is all I had.
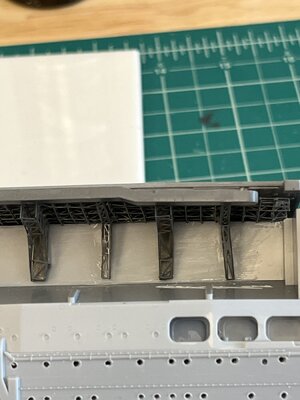
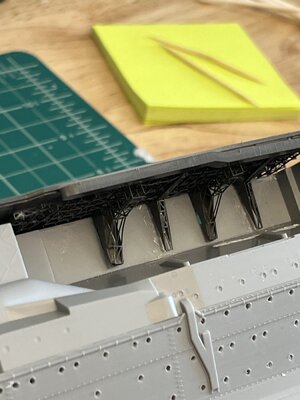
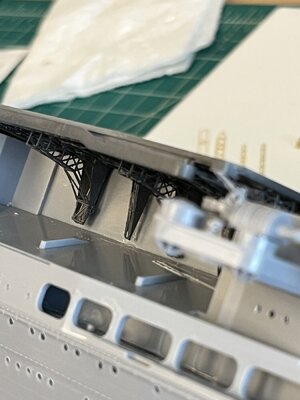
And once the deck is firmly attached the gaps under the lattice structures will be gone with the lattice sitting on the below deck.
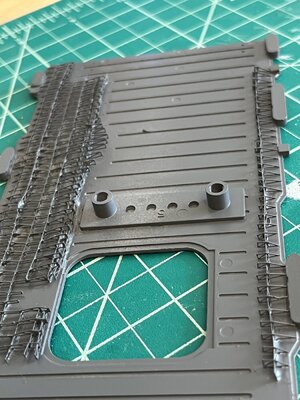
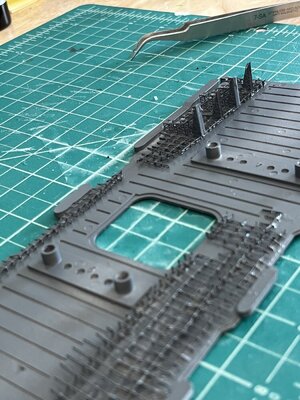
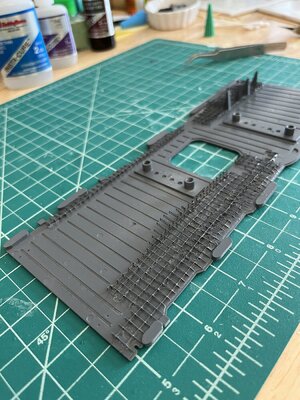
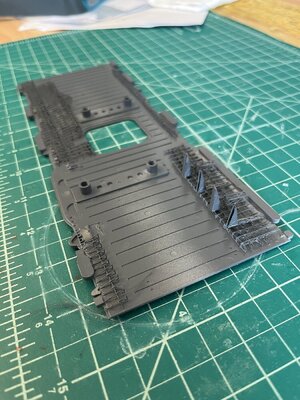

I've wondered what, where and how these interesting structures are used on the model below is a photo of them during dry fitting. Sorry for the dark lighting but it is all I had.


And once the deck is firmly attached the gaps under the lattice structures will be gone with the lattice sitting on the below deck.


Last edited:
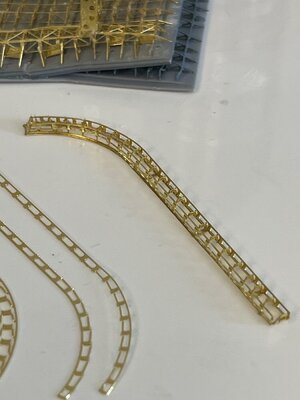
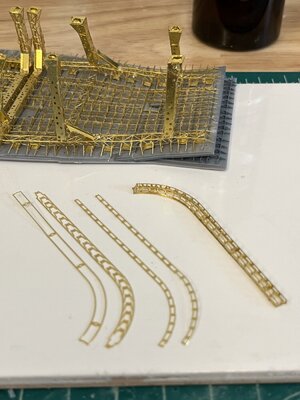
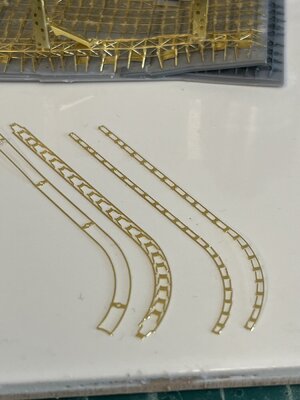
The last step of the under deck lattice work is tracks for the hoists. I've studied these on youtube for two days and finally realized that each of the tracks is comprised of four pe pieces. So with no plans to follow I just started to assemble the first track. One track done and four to go.
Completed track
The four pieces to make a track.
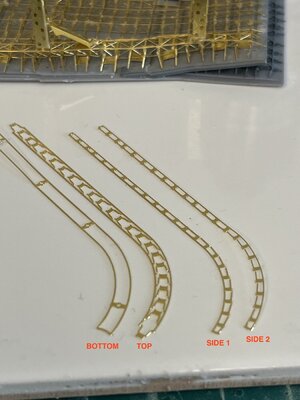
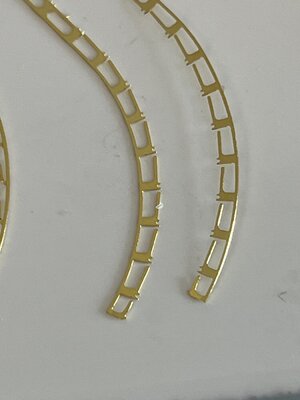
Assembling starts with attaching the TOP on the BOTTOM with just dabs of glue. Next the tabs on the TOP are bent vertical to the rails. SIDES 1 & 2 are placed resting on the previously bent tabs. Notice on SIDES 1 & 2 the tiny tabs protruding on opposite sides that align with pre-bent vertical tabs also notice in the curved areas the rail is not connected allowing them to be bent into shape.
This has been very demanding and while cleaning the desk I found Hasegags basic model up kit B.
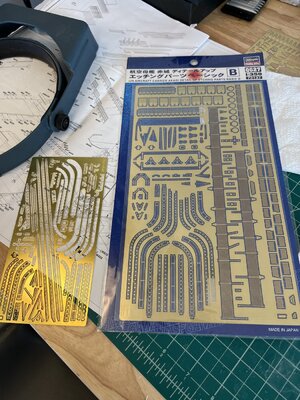
The SSModel pe alongside the Hasegawa pe giving an excellent view of both. Now I have to decide which to use.
Completed track

The four pieces to make a track.

Assembling starts with attaching the TOP on the BOTTOM with just dabs of glue. Next the tabs on the TOP are bent vertical to the rails. SIDES 1 & 2 are placed resting on the previously bent tabs. Notice on SIDES 1 & 2 the tiny tabs protruding on opposite sides that align with pre-bent vertical tabs also notice in the curved areas the rail is not connected allowing them to be bent into shape.

This has been very demanding and while cleaning the desk I found Hasegags basic model up kit B.

The SSModel pe alongside the Hasegawa pe giving an excellent view of both. Now I have to decide which to use.


