That is a bucket load of PE. You're doing a great job with it.The last step of the under deck lattice work is tracks for the hoists. I've studied these on youtube for two days and finally realized that each of the tracks is comprised of four pe pieces. So with no plans to follow I just started to assemble the first track. One track done and four to go.
Completed track
View attachment 405885
The four pieces to make a track.
View attachment 405893
Assembling starts with attaching the TOP on the BOTTOM with just dabs of glue. Next the tabs on the TOP are bent vertical to the rails. SIDES 1 & 2 are placed resting on the previously bent tabs. Notice on SIDES 1 & 2 the tiny tabs protruding on opposite sides that align with pre-bent vertical tabs also notice in the curved areas the rail is not connected allowing them to be bent into shape.
View attachment 405894
This has been very demanding and while cleaning the desk I found Hasegags basic model up kit B.
View attachment 405895
The SSModel pe alongside the Hasegawa pe giving an excellent view of both. Now I have to decide which to use.
View attachment 405886
View attachment 405887
-

Win a Free Custom Engraved Brass Coin!!!
As a way to introduce our brass coins to the community, we will raffle off a free coin during the month of August. Follow link ABOVE for instructions for entering.
-

PRE-ORDER SHIPS IN SCALE TODAY!
The beloved Ships in Scale Magazine is back and charting a new course for 2026!
Discover new skills, new techniques, and new inspirations in every issue.
NOTE THAT OUR FIRST ISSUE WILL BE JAN/FEB 2026
You are using an out of date browser. It may not display this or other websites correctly.
You should upgrade or use an alternative browser.
You should upgrade or use an alternative browser.
IJN AKAGI 1/350 by Hasegawa [COMPLETED BUILD]
- Thread starter Will @ Trilogy
- Start date
- Watchers 25
HAPPY THANKSGIVING to all who celebrate and to the rest a "great day".
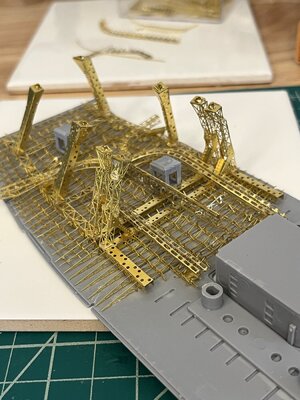
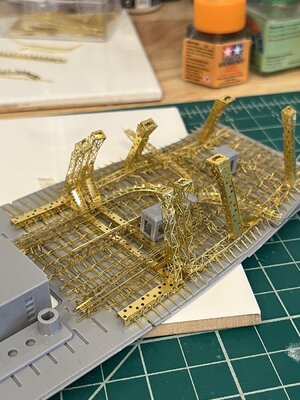
All the truss is complete and painted. A few photos of the completed crane rails mounted on the forward under deck truss supports.
Before paint.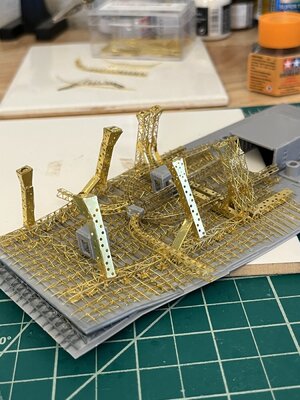
 gr
gr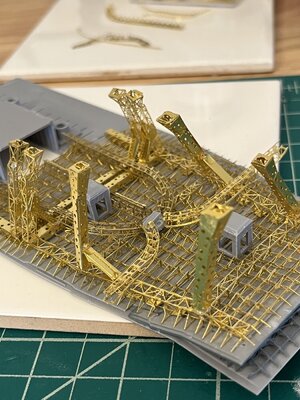
After priming with Mr. Surfacer 1200 and then painted with Tamiya TS-67 IJN Grey (SASBO ARSENAL)
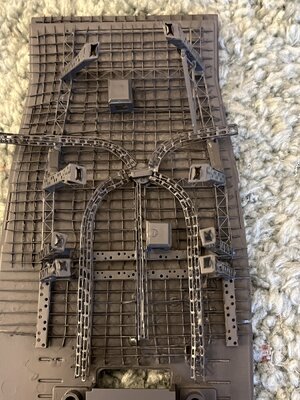
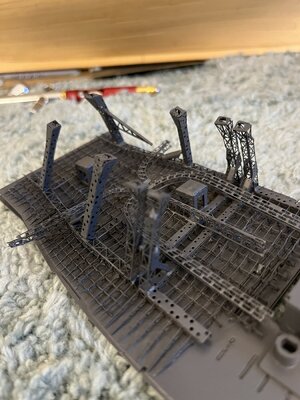
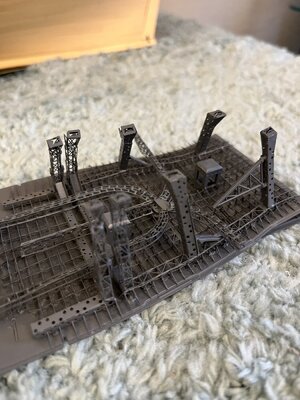
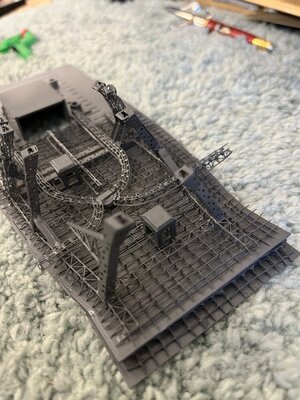
Now on the the plastic pieces completing the starboard structures.
All the truss is complete and painted. A few photos of the completed crane rails mounted on the forward under deck truss supports.
Before paint.


 gr
gr
After priming with Mr. Surfacer 1200 and then painted with Tamiya TS-67 IJN Grey (SASBO ARSENAL)


Now on the the plastic pieces completing the starboard structures.
That is an amazing amount of PE and kudos for the effort taken to install it all. How are your eyes doing? Did you use a magnifier of some type to place everything so delicately? Great job!!HAPPY THANKSGIVING to all who celebrate and to the rest a "great day".
All the truss is complete and painted. A few photos of the completed crane rails mounted on the forward under deck truss supports.
Before paint.View attachment 408923View attachment 408924View attachment 408925grView attachment 408926
After priming with Mr. Surfacer 1200 and then painted with Tamiya TS-67 IJN Grey (SASBO ARSENAL)
View attachment 408919View attachment 408920View attachment 408921View attachment 408922
Now on the the plastic pieces completing the starboard structures.

Thanks all for the looks and likes it really helps me as this has been a long and difficult build. As I age the only thing not affected by age are my eyes which are still 20/20. And yes Steve I do use a magnifier specifically a Donegan DA-7 OptiVisor. Actually I have two which I use with different magnifications. Even with those I still find it necessary to use a hand held magnifying lens. If your going to buy a magnifier I strongly suggest getting a quality one use by jewelers as the lenses are much clearer.
Hi Will. Thanks for the feedback. I had 20/20 vision into my mid-40's but now in my mid-60's not-so-much.Thanks all for the looks and likes it really helps me as this has been a long and difficult build. As I age the only thing not affected by age are my eyes which are still 20/20. And yes Steve I do use a magnifier specifically a Donegan DA-7 OptiVisor. Actually I have two which I use with different magnifications. Even with those I still find it necessary to use a hand held magnifying lens. If your going to buy a magnifier I strongly suggest getting a quality one use by jewelers as the lenses are much clearer.
Hey Steve mid-60s is not bad for when I was in my mid-60s everything but my eyesight deteriorated. HA HA HA
- Joined
- Jul 2, 2022
- Messages
- 137
- Points
- 88

That's a LOT of PE. Your extreme hard work has already paid off, looks fantastic! That detail punches this puppy to a new level. I've used a little PE, and always wondered if solder would be the way to go for a large amount. I looked at building a homemade PE welder (didn't work out), and just have never needed to buy an expensive one. But it seems like it would be good for a large amount. Well, you did great, the CA worked and you are still sane, so... 
Thanks for the nice comments Rocket and to the "likes". Now on to the detail A, B & C while completing the hull plastic.
Again thank you for looking and commenting
Again thank you for looking and commenting
Been too long for a post. I have been working on the last details before painting the hull and superstructures before attaching the flight decks. Using small pieces of masting tape to cover the previously painted wood decks portions.
Below is the read wood decking awaiting for masking.
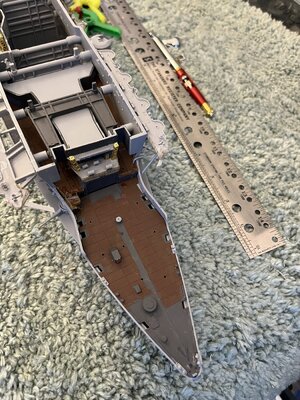
As shown below
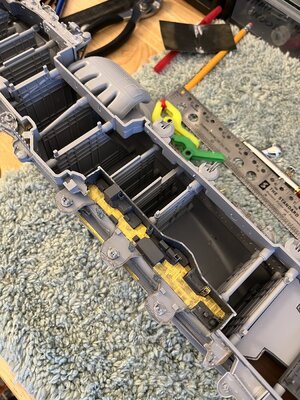
In the above photo shows just a minor about of damage caused when the ship fell to the floor while taping the after wood deck.
A better view of the damage done to the port side
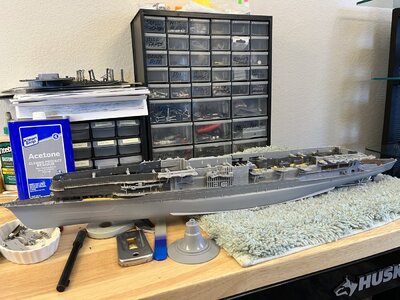
Photo etch bent or broken. Multiple guns of varying sizes broken. Decks broken of the superstructure. Next I will be assessing the amount of damage and how best to restore. In anger one thought is to complete the model and leave it as is hoping the deck and lattice pe will hide the damage on the side below the deck. I will finish no matter what.
Below is the read wood decking awaiting for masking.

As shown below

In the above photo shows just a minor about of damage caused when the ship fell to the floor while taping the after wood deck.
A better view of the damage done to the port side

Photo etch bent or broken. Multiple guns of varying sizes broken. Decks broken of the superstructure. Next I will be assessing the amount of damage and how best to restore. In anger one thought is to complete the model and leave it as is hoping the deck and lattice pe will hide the damage on the side below the deck. I will finish no matter what.
After completing most the reconstruction I decided to paint the hull.
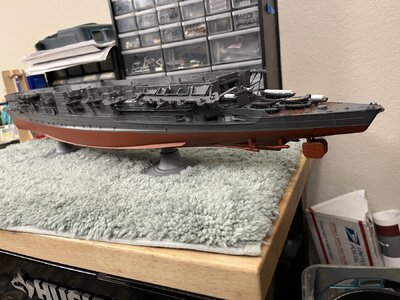
Notice the piece of decking still hanging down waiting for the underneath supports. In the drop these were broken into many pieces with top and bottoms still glued to the appropriate areas. I have to take a piece of sprue to stretch into the correct diameter and then glue them into the support locations. The tabs on the hanging deck were broken and there is not enough surface for the glue to adhere.
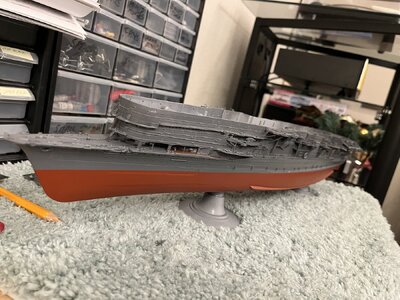
The red hull paint came out really nice. I'm very happy with the results.

Notice the piece of decking still hanging down waiting for the underneath supports. In the drop these were broken into many pieces with top and bottoms still glued to the appropriate areas. I have to take a piece of sprue to stretch into the correct diameter and then glue them into the support locations. The tabs on the hanging deck were broken and there is not enough surface for the glue to adhere.

The red hull paint came out really nice. I'm very happy with the results.
- Joined
- Aug 14, 2018
- Messages
- 829
- Points
- 403

Great looking ship, really well built. I am confidant that with your skills, by the time you are finished, the damage done in dropping her will not be noticeable. Great job JJ..
PS. Loved your Syren build.
PS. Loved your Syren build.
Flight deck installed after much fiddling getting the photo etch placed correctly. Just a few photos and then on to adding the wooden deck by Hasegawa. Almost forgot I spent quite awhile adding the support sanctions under the after structure port side after all was smashed during the drop. I used .047 Evergreen rod making the stanctions as the moulded pieces were shattered. Added the deck elevator covers now its ready for the wooden deck.
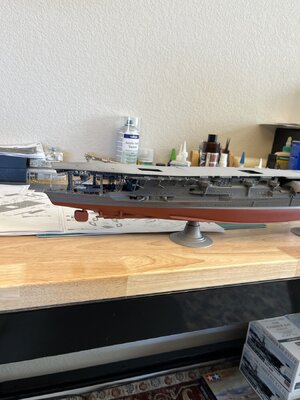
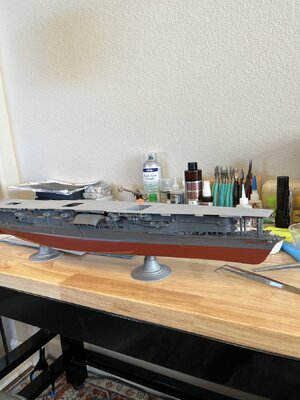
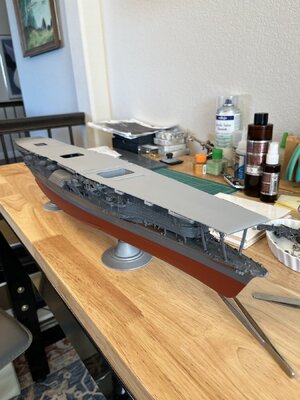
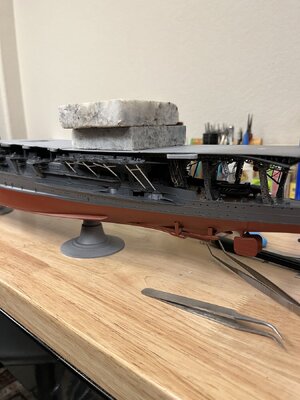
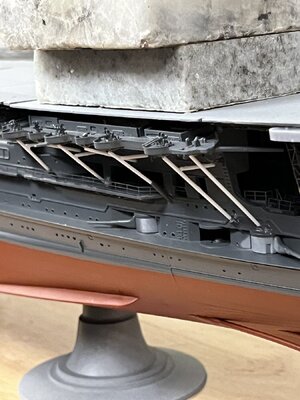
I found a few areas that needed additional glueing so you can see the 3" square pieces of granite slab samples left from our kitchen countertops holding the deck in place
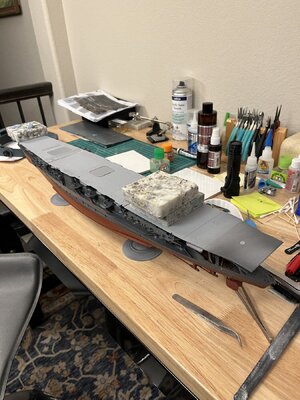
Now on the bow and stern railings that I had forgotten.


I found a few areas that needed additional glueing so you can see the 3" square pieces of granite slab samples left from our kitchen countertops holding the deck in place

Now on the bow and stern railings that I had forgotten.
Well Chris its good to start the day with humor. Yea the reconstruction is as complete as I'm going to make it. On to finishing. My wife was not so supporting (she said if I worked with a tidy work surface the ship might not have been so close to the edge). I cleaned up my table and realized she was correct. Now do I tell her she was right or just move one. HUMMMMMM.
- Joined
- Aug 14, 2018
- Messages
- 829
- Points
- 403

Letting your wife know that she is right only confirms what she has always known. Merry Christmas and a happy new year. JJ..Well Chris its good to start the day with humor. Yea the reconstruction is as complete as I'm going to make it. On to finishing. My wife was not so supporting (she said if I worked with a tidy work surface the ship might not have been so close to the edge). I cleaned up my table and realized she was correct. Now do I tell her she was right or just move one. HUMMMMMM.
There are so many responses but only a few wrong responses.
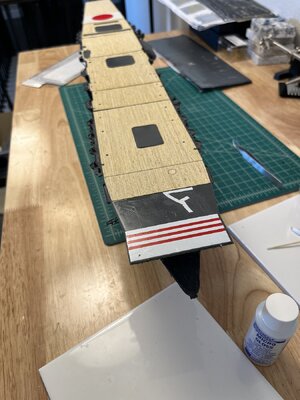
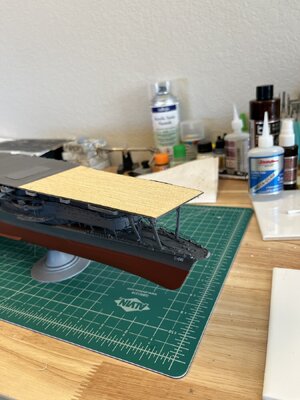
Deck firmly attached. Placed the photo etch elevator doors and painted the final coats of Sasebo grey to the deck and some on the sides covering all the repair work. With paint dry started the Hasegawa wood deck kit which is very yellow.
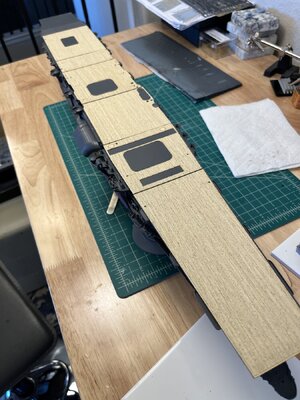
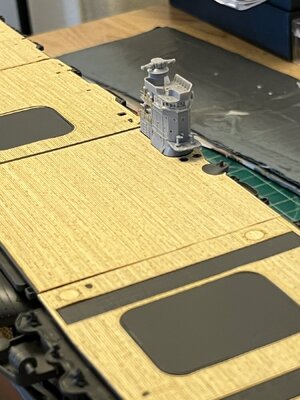
The deck was sprayed with a flat varnish which dulled the yellow and gave a slightly weathered look.
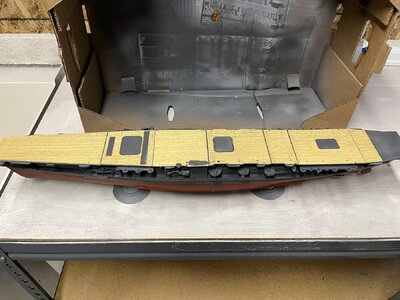
When dry I applied the slide ons as the deck looked in May of 1942.
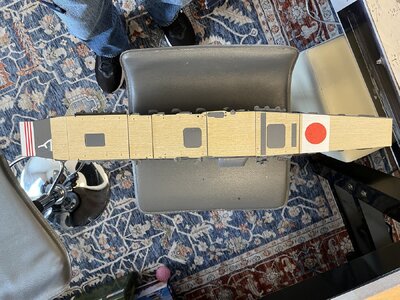
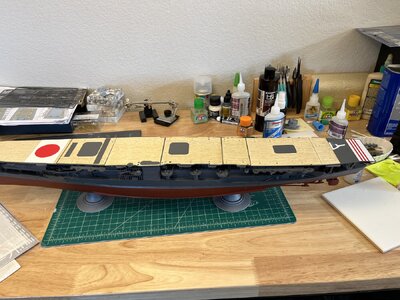
Next is to add dry rub lines on the deck and around the elevators.


The deck was sprayed with a flat varnish which dulled the yellow and gave a slightly weathered look.

When dry I applied the slide ons as the deck looked in May of 1942.


Next is to add dry rub lines on the deck and around the elevators.

Hi Will,Deck firmly attached. Placed the photo etch elevator doors and painted the final coats of Sasebo grey to the deck and some on the sides covering all the repair work. With paint dry started the Hasegawa wood deck kit which is very yellow.
View attachment 415804View attachment 415805
The deck was sprayed with a flat varnish which dulled the yellow and gave a slightly weathered look.
View attachment 415806
When dry I applied the slide ons as the deck looked in May of 1942.
View attachment 415819View attachment 415820View attachment 415821
Next is to add dry rub lines on the deck and around the elevators.
View attachment 415803
She continues to look amazing. Your hard work is showing.


