Thank you Paul. Much appreciated.Thank you, Grant. Multiplying skills are common on this forum!
Much appreciated Christian. I was expecting you to be the one who pointed out I was building the mirror image of TFFM. Not exactly sure how that happened but now I'm committed.
The first version or the fifth?
My solution was to glue a tiny rectangle of wood (the precise size of the interior of the frames) down to a piece of cardstock. I then built the perimeter frame around that rectangle of wood (glueing the corners). Then I added the mica glass (glued with CA to the perimeter frame). Now I could remove the window panel and insert the mullions. Like most everything, it was easy once I figured out how to make it easy.
You are using an out of date browser. It may not display this or other websites correctly.
You should upgrade or use an alternative browser.
You should upgrade or use an alternative browser.
Kingfisher 1770 1:48 POF
- Thread starter dockattner
- Start date
- Watchers 144
- Joined
- Aug 8, 2019
- Messages
- 4,927
- Points
- 688

And when he is done with it, he realise the actual log is just 3 pages if you filter all the wow's, dental discussions, life events and jokes.At your level of expertise I can’t help your friend with an answer. But I do know your friend needs to know how long it takes to read through your build logs.
- Joined
- Aug 8, 2019
- Messages
- 4,927
- Points
- 688

We don't know, but maybe he can still walk right under the table without hitting his head.Paul you must've been a Lilliputian in a former life to craft such exact, miniature features. A joy to watch
In your post of March 2, these photos: imag-0449 and 0523, showed long black hinges. Didi you purchase these and if so, from whom? If not, did you scratch build them? If this is how you "acquired" these very attractive pieces, how did you construct them and what material did you use? I need to make six pairs for my HMS VICTORY cross-section. The ones that came with the Corel kit are too big and unattractive. Any suggestions/advice will be greatly welcomed and appreciated.
These were recycled photoetch hinges that came with my Vasa kit.In your post of March 2, these photos: imag-0449 and 0523, showed long black hinges. Didi you purchase these and if so, from whom? If not, did you scratch build them? If this is how you "acquired" these very attractive pieces, how did you construct them and what material did you use? I need to make six pairs for my HMS VICTORY cross-section. The ones that came with the Corel kit are too big and unattractive. Any suggestions/advice will be greatly welcomed and appreciated.
But for the shot locker I just made the hinges from scratch:
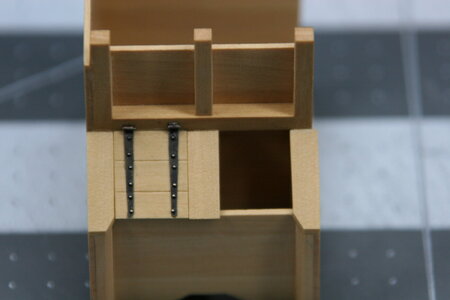
I started with brass bar stock 0.15 mm thick and 1.5 mm wide and used a sanding disc attached to a rotary tooth and sanded the taper. I then added 0.6 mm head bolts that I had made using brass rod and a cup burr.
Hope this helps.
Yes it does, thanks. Who made the Vasa you built? I am also working on a Vasa but it is a Corel kit and like my Victory cross-section kit, leaves a bit to be desired. I don't have hinges anything like what you had with yours. I do have quite a bit of photo-etch brass and steel (?) from the many jet models I have built and I am thinking I might be able to make some suitable hinges out of that material. I'll need to get some blackening solution. My C-S is 1/98, a bit smaller than yours but this photo gives me quite a bit to go on.These were recycled photoetch hinges that came with my Vasa kit.
But for the shot locker I just made the hinges from scratch:
View attachment 434099
I started with brass bar stock 0.15 mm thick and 1.5 mm wide and used a sanding disc attached to a rotary tooth and sanded the taper. I then added 0.6 mm head bolts that I had made using brass rod and a cup burr.
Hope this helps.
I based my build on the DeAgostini kit (this is virtually identical to the Artesania Latina kit) at 1:65ishWho made the Vasa you built?
I am using that model as well (DA has a cross-section model) and used DeAgostini's instruction sheets when I was building my Mamoli version of the full ship. I have often wished that DeAgostini sold individual parts like Cornwall, Model Expo, and other model makers. I have looked at the Eduard photo-etch site to see if there are any suitable "hinges" but have not found anything. Eduard makes photo etch items mostly for aircraft and modern warships. I'll try to fashion something from the remains of left over photo etched sprues.I based my build on the DeAgostini kit (this is virtually identical to the Artesania Latina kit) at 1:65ish
Hello Friends,
Progress has been slow. In part because I'm still figuring out a good work flow for this stage of the build - but probably more so because of limited modeling time.
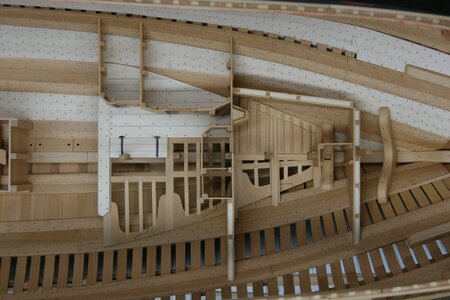
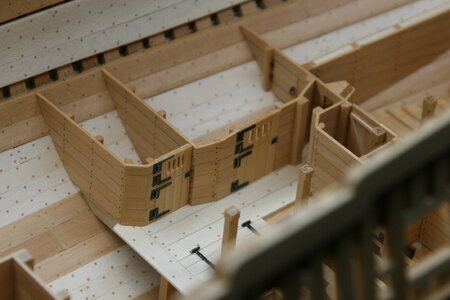
Nevertheless, I have now completed the rooms/spaces located on the aft platform. Worth noting is that I will only be including buildouts on the starboard side of the ship (generally speaking).
It's pretty much impossible to take good photos - this was the best I could do...
Overall view:
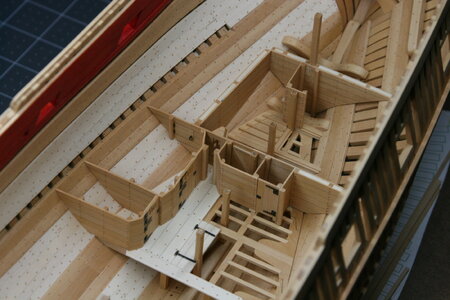
And now sneaking in as best I can:
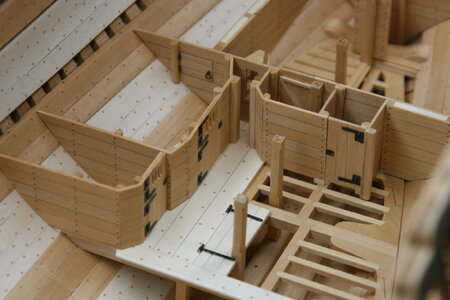
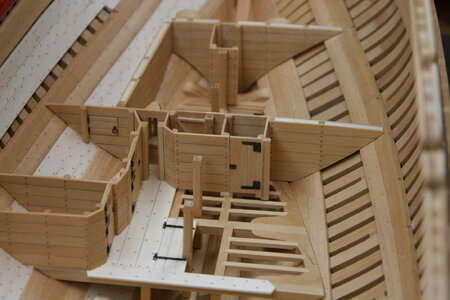
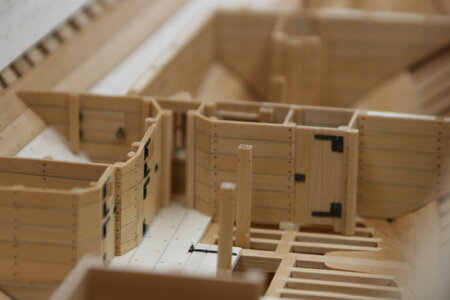
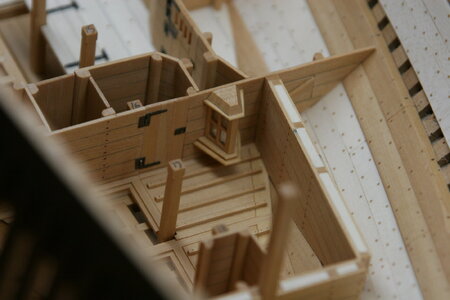
Next, I will turn my attention to the forward platform and then return to the center of the ship.
My thanks for the visit!
Progress has been slow. In part because I'm still figuring out a good work flow for this stage of the build - but probably more so because of limited modeling time.
Nevertheless, I have now completed the rooms/spaces located on the aft platform. Worth noting is that I will only be including buildouts on the starboard side of the ship (generally speaking).
It's pretty much impossible to take good photos - this was the best I could do...
Overall view:


And now sneaking in as best I can:


Next, I will turn my attention to the forward platform and then return to the center of the ship.
My thanks for the visit!
- Joined
- Sep 3, 2021
- Messages
- 4,907
- Points
- 688

Stunningly beautiful work...Hello Friends,
Progress has been slow. In part because I'm still figuring out a good work flow for this stage of the build - but probably more so because of limited modeling time.
Nevertheless, I have now completed the rooms/spaces located on the aft platform. Worth noting is that I will only be including buildouts on the starboard side of the ship (generally speaking).
It's pretty much impossible to take good photos - this was the best I could do...
Overall view:
View attachment 434852
View attachment 434847
And now sneaking in as best I can:
View attachment 434850
View attachment 434849
View attachment 434848
View attachment 434853
View attachment 434851
Next, I will turn my attention to the forward platform and then return to the center of the ship.
My thanks for the visit!
- Joined
- Dec 16, 2016
- Messages
- 1,096
- Points
- 493

Simply amazing, a treat for the eyes.Hello Friends,
Progress has been slow. In part because I'm still figuring out a good work flow for this stage of the build - but probably more so because of limited modeling time.
Nevertheless, I have now completed the rooms/spaces located on the aft platform. Worth noting is that I will only be including buildouts on the starboard side of the ship (generally speaking).
It's pretty much impossible to take good photos - this was the best I could do...
Overall view:
View attachment 434852
View attachment 434847
And now sneaking in as best I can:
View attachment 434850
View attachment 434849
View attachment 434848
View attachment 434853
View attachment 434851
Next, I will turn my attention to the forward platform and then return to the center of the ship.
My thanks for the visit!
That is a very good looking representative interior, Paul. Those ‘double doors’ with a double pair of hinges looks great.Hello Friends,
Progress has been slow. In part because I'm still figuring out a good work flow for this stage of the build - but probably more so because of limited modeling time.
Nevertheless, I have now completed the rooms/spaces located on the aft platform. Worth noting is that I will only be including buildouts on the starboard side of the ship (generally speaking).
It's pretty much impossible to take good photos - this was the best I could do...
Overall view:
View attachment 434852
View attachment 434847
And now sneaking in as best I can:
View attachment 434850
View attachment 434849
View attachment 434848
View attachment 434853
View attachment 434851
Next, I will turn my attention to the forward platform and then return to the center of the ship.
My thanks for the visit!
Regards, Peter
Your work is truly masterful Paul, clean lines, great attention to detail and beautifully constructed. Those photos show your work really well too.
Amazing work in miniature detail Paul. Hinges everywhere you would expect to see them. I can see you have made special effort to perfect them. The two hinges next to the hull on the port side for that wall opening, WOW tiny but look functional!!
- Joined
- Jan 9, 2020
- Messages
- 10,521
- Points
- 938

For once, I cannot elaborate any more!Stunningly beautiful work...
 WOW!
WOW!


