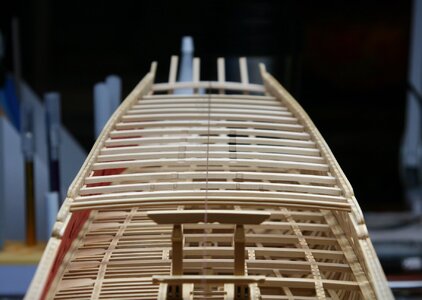
You are using an out of date browser. It may not display this or other websites correctly.
You should upgrade or use an alternative browser.
You should upgrade or use an alternative browser.
Kingfisher 1770 1:48 POF
- Thread starter dockattner
- Start date
- Watchers 139
The older two (the boys) have already asked. I told them they had to wait until they are 5 years oldLovely details Paul
View attachment 462406
Ps I think your grandchild is now old enough to start his first model with grandpa
A nice RC sail boat will be a great option.The older two (the boys) have already asked. I told them they had to wait until they are 5 years old. That day will be epic!
Incredible set of beams...looks like you went on a binge after returning from your fishing hiatus! Great work! Also wonderful pictures of those special times with family in the great outdoors!!! Thanks for sharing both!Hello Friends,
Family fishing trip has come to an end, and everyone is back home again.
My next step is to build out/detail the upper deck; but doing so requires knowing where the deck beams are located on the foredeck (forecastle deck?) and the quarter deck. Of course that means I need to fabricate those beams...
Quarter deck beams:
View attachment 462191
View attachment 462192
Quite a roundup (camber) on the quarter deck beams:
View attachment 462193
The most aft of the foredeck beams and the most forward of the quarter deck beams are unique in that they have a rabbet on top of them to receive the deck planks. They also have a molding on the exposed face of the beams (which I am only including on the quarter deck version)...
In profile:
View attachment 462194
View attachment 462197
I then spent an hour or so laying out these decks on the ship model during which I discovered that the quarter deck clamp was in the wrong position...
View attachment 462189
Of course, on both sides...
View attachment 462190
A fairly simple fix once I committed to what needed to happen.
Good morning Paul. I was wondering how many notches you have cut/milled so far…each one measured perfectly. Hmmm this is patience personified…..and I am considering a POF next- Eish .Cheers GrantThanks for the likes everyone!
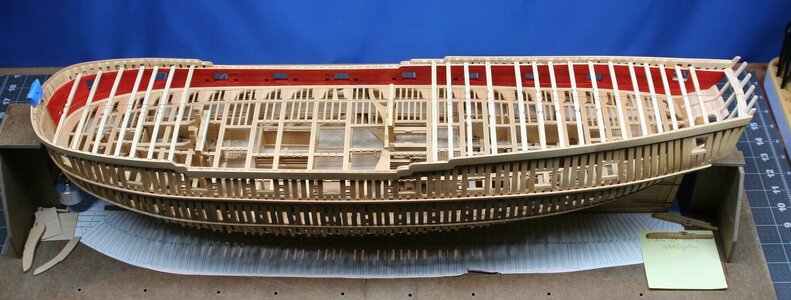
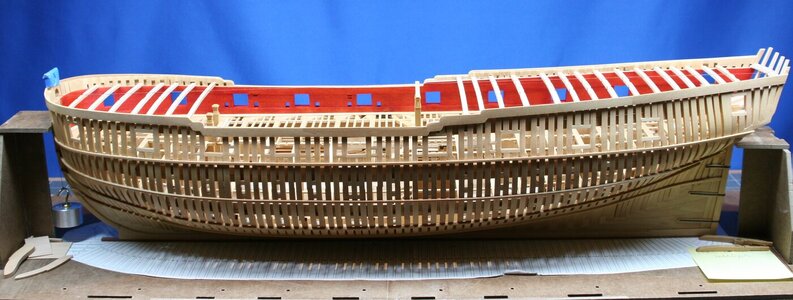
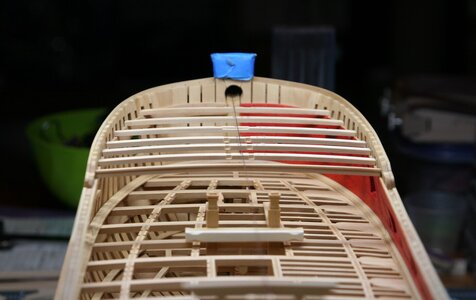
The fore deck and the quarter deck beams have been fabricated and roughly cut to length:
View attachment 462409
View attachment 462410
View attachment 462411
View attachment 462412
Curiously, these smaller upper-level beams are not let down into the deck clamps.
Thanks for stopping by!
For this time just a big WOW, Paul. The curved beams nice in lines. And what Grant wrote: all those notches!Thanks for the likes everyone!
The fore deck and the quarter deck beams have been fabricated and roughly cut to length:
View attachment 462409
View attachment 462410
View attachment 462411
View attachment 462412
Curiously, these smaller upper-level beams are not let down into the deck clamps.
Thanks for stopping by!
Regards, Peter
I fully underline and like to repeat the words by the collegues
- I love this kit and what you are doing out of it
- I love this kit and what you are doing out of it
Paul, I can only echo what others have said as to what you have accomplished with this build. I need a new dictionary as I've run out of superlatives.
What I find amazing is how you find the time to devote the hours to this project given your orthodontics practice and family commitments.
Well done sir!
What I find amazing is how you find the time to devote the hours to this project given your orthodontics practice and family commitments.
Well done sir!
Precision work, Paul—as always.
It is and remains a beautiful piece of work. As always, it is a feast for the eyes to read your report and admire the absolutely fine work.
- Joined
- Sep 3, 2021
- Messages
- 4,874
- Points
- 688

When observing your latest updates I just keep wondering how on earth you’re able to consistently produce these high quality parts.
My own handiwork is such that I can’t possibly create two parts the same. You on the other hand don’t seem to have a problem doing just that.
My own handiwork is such that I can’t possibly create two parts the same. You on the other hand don’t seem to have a problem doing just that.
That is a shame Paul, I know they could have learned a lot from you. Their loss my friend.When they learned of my association with SOS, I was conveniently left off the mailing/invitation list for the local gathering. Pity. I'm sure I could have learned a lot from them.
Just read through the last few pages, beautiful work as always. Those beams are excellent - dare I say another “notch” in your belt (I know, I know a bad play on words
Thanks, guys, for all the likes and encouraging posts!
I have been feeling a bit overwhelmed lately with this build. I have obviously made tons of progress - but the scope of the work that remains is humbling. Part of the problem is that it takes me forever to figure out how to do each new task. And then the simplest things seem to take me hours and hours to accomplish. On the other hand, I really do enjoy working on the model, so I guess it doesn't really matter how slow my progress is.
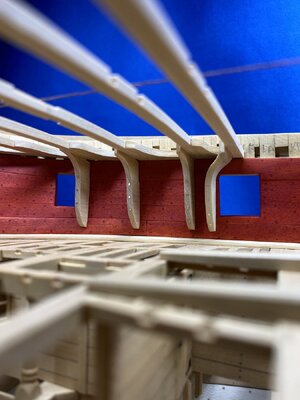
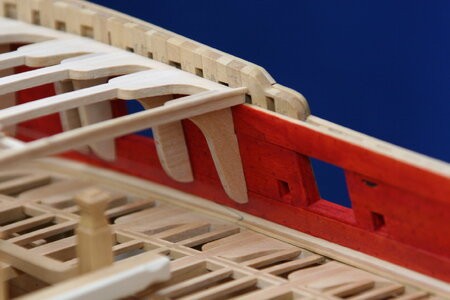
My last post presented the roughed in beams of the quarter deck and forecastle deck. Since then I have added the lodging and hanging knees to the fore deck:
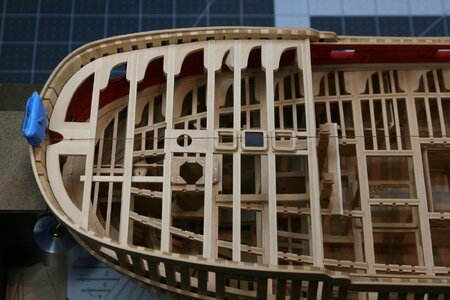
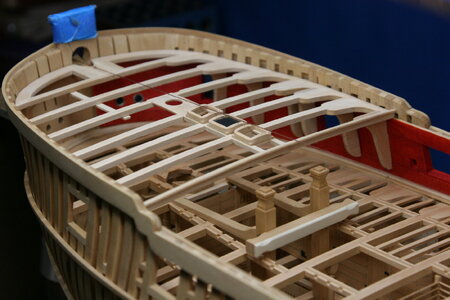
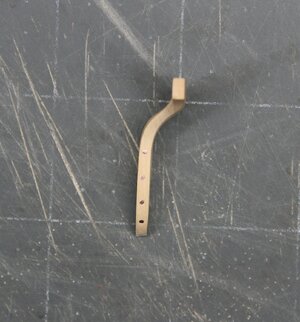
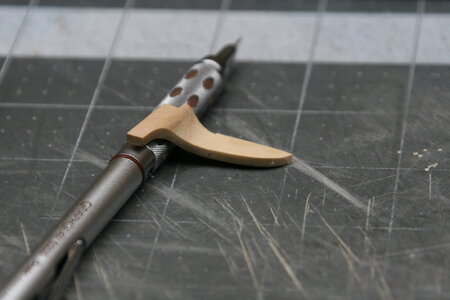
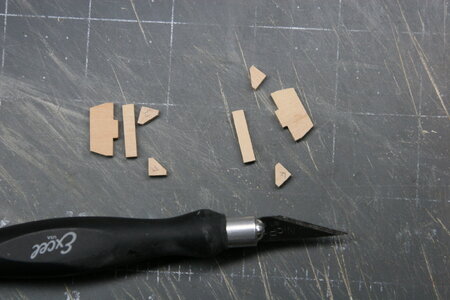
One of the hanging knees needed to be shaped in order to avoid a gun port. I started with a quadruple thick knee and contoured it accordingly:
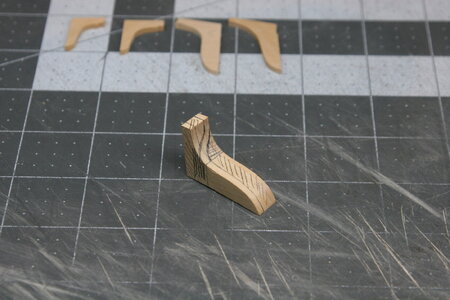
I used some extra care with the most aft of the hanging knees - it might be directly visible (or maybe not - it depends on where the bulkhead falls).
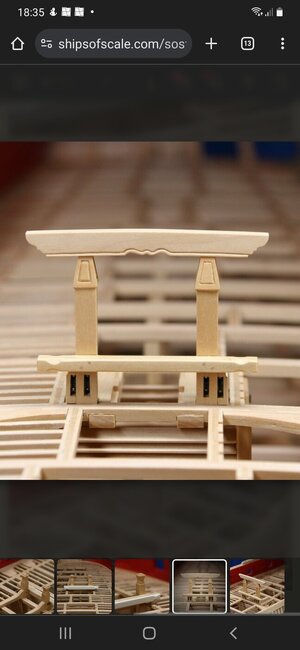
I also added these coamings. They were quite a project; they contain all the same elements of a larger frame but at a fraction of the size:
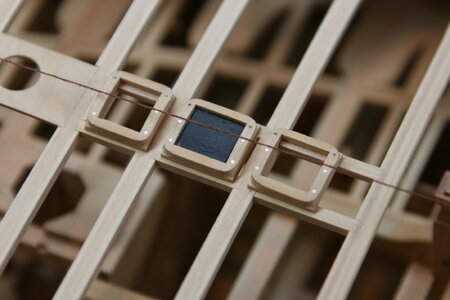
The fore and aft openings are for steam vents over the oven (these will have gratings - or maybe not). And the galley cowl will sit on the center opening (there is a space holder there for now - it will eventually be a steel/iron plate...).
A second posting will follow momentarily.
I have been feeling a bit overwhelmed lately with this build. I have obviously made tons of progress - but the scope of the work that remains is humbling. Part of the problem is that it takes me forever to figure out how to do each new task. And then the simplest things seem to take me hours and hours to accomplish. On the other hand, I really do enjoy working on the model, so I guess it doesn't really matter how slow my progress is.
My last post presented the roughed in beams of the quarter deck and forecastle deck. Since then I have added the lodging and hanging knees to the fore deck:


One of the hanging knees needed to be shaped in order to avoid a gun port. I started with a quadruple thick knee and contoured it accordingly:


I used some extra care with the most aft of the hanging knees - it might be directly visible (or maybe not - it depends on where the bulkhead falls).

I also added these coamings. They were quite a project; they contain all the same elements of a larger frame but at a fraction of the size:

The fore and aft openings are for steam vents over the oven (these will have gratings - or maybe not). And the galley cowl will sit on the center opening (there is a space holder there for now - it will eventually be a steel/iron plate...).
A second posting will follow momentarily.
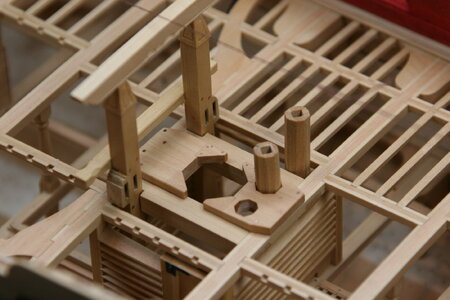
I also fabricated the foremast partner and mainmast partner:
Foremast partner:
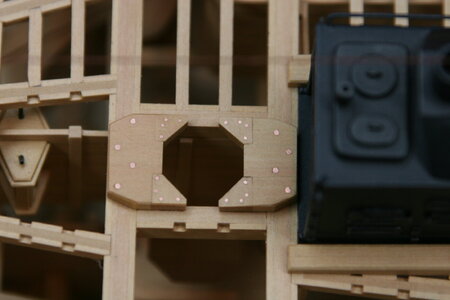
Mainmast partner:
I made this oven more than a year ago - just trying it in place (FITS!):
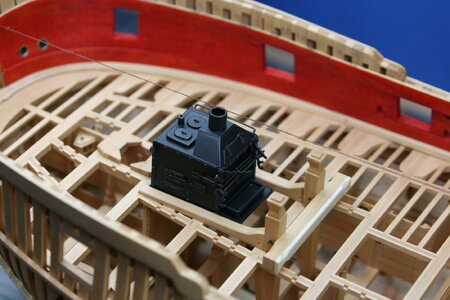
And just to complete the work on the oven, today I also fabricated the galley cowl:
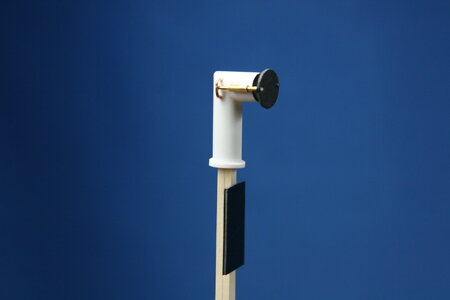
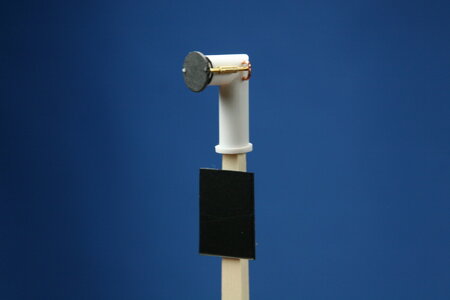
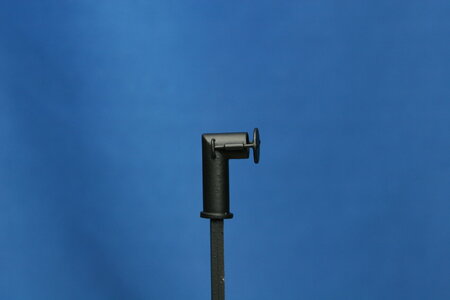
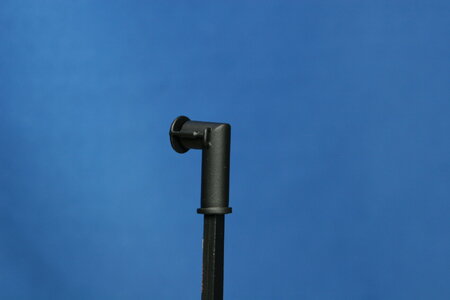
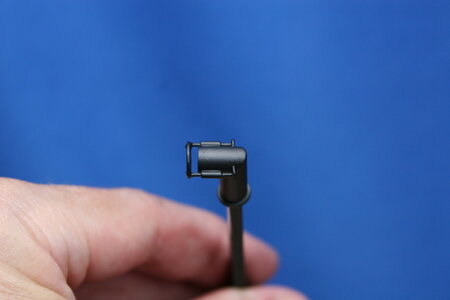
It will sit something like this:
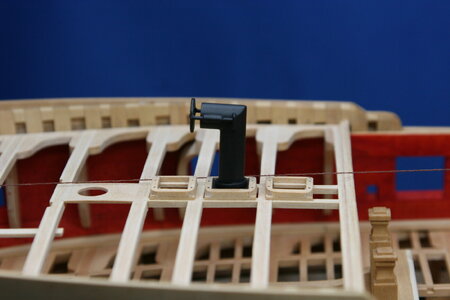
My hobby job requires my full attention the next couple of weeks so there will be a brief pause in this build report.
You are beyond kind for taking the time to see what I have been up to. You are appreciated!

Foremast partner:

Mainmast partner:

I made this oven more than a year ago - just trying it in place (FITS!):

And just to complete the work on the oven, today I also fabricated the galley cowl:


It will sit something like this:

My hobby job requires my full attention the next couple of weeks so there will be a brief pause in this build report.
You are beyond kind for taking the time to see what I have been up to. You are appreciated!
Oh, thank you!My hobby job requires my full attention the next couple of weeks so there will be a brief pause in this build report.
You are beyond kind for taking the time to see what I have been up to. You are appreciated!

Paul, Fantastic as always  Did you size the coamings to fit the gratings you made? Just curious as I have rarely been able to make gratings to perfectly match the coamings if I made the coamings first, but it is really easy to make the coamings to fit the assembled gratings so there are no open holes against the head ledges and coamings.
Looking forward to the next photos
Allan
Looking forward to the next photos

Allan
Thank you Paul for continuing to post your work and progress. Your techniques and thoughtfulness are superlative.Thanks, guys, for all the likes and encouraging posts!
I have been feeling a bit overwhelmed lately with this build. I have obviously made tons of progress - but the scope of the work that remains is humbling. Part of the problem is that it takes me forever to figure out how to do each new task. And then the simplest things seem to take me hours and hours to accomplish. On the other hand, I really do enjoy working on the model, so I guess it doesn't really matter how slow my progress is.
My last post presented the roughed in beams of the quarter deck and forecastle deck. Since then I have added the lodging and hanging knees to the fore deck:
View attachment 464061
View attachment 464063
One of the hanging knees needed to be shaped in order to avoid a gun port. I started with a quadruple thick knee and contoured it accordingly:
View attachment 464057
View attachment 464058
View attachment 464059
View attachment 464060
I used some extra care with the most aft of the hanging knees - it might be directly visible (or maybe not - it depends on where the bulkhead falls).
View attachment 464064
I also added these coamings. They were quite a project; they contain all the same elements of a larger frame but at a fraction of the size:
View attachment 464062
The fore and aft openings are for steam vents over the oven (these will have gratings - or maybe not). And the galley cowl will sit on the center opening (there is a space holder there for now - it will eventually be a steel/iron plate...).
A second posting will follow momentarily.
Personally I get so much joy from viewing your post, I feel I should be paying a subscription fee.
I would subscribe to Kattnerflix or Paul.
I will stay my eagerness for your next post while you go and straighten some teeth, but hoping you will get that over with quickly.
Well shoot. That's a fine idea Allan (making the gratings before the coamings).Did you size the coamings to fit the gratings you made?
That said, I'm not entirely certain I will add gratings. Antscherl presents these particular steam vent gratings as quite small (dimensionally the holes are smaller than any saw blade or end mill that I have).
I am also in the habit of leaving stuff off to improve the sightlines. I toiled over that oven -not sure how much of it I want to hide
Either way, your tip is GOLD!
Last edited:

