Kingfisher 1770 1:48 POF

...and this is ordered from who\where? Thank you...
Sergey (Bibigon who is a sponsor on our forum) couldn't get me boxwood (he supplied all the pear on my Vasa and his quality is excellent) so I placed an order with Vahur at hobbymill.eu. I am very happy with the quality of the wood I received.

Boxwood is hard to source (and expensive!). I only found one other supplier (who happens to be in the US), but Vahur was slightly less expensive even with international shipping.
 
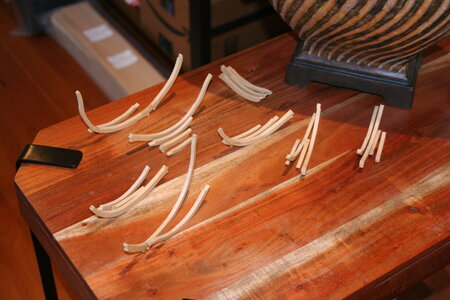
Here you go @Tobias...just a sampling of a rather sizable order of many different milled sizes (images are full sized so just click on them).

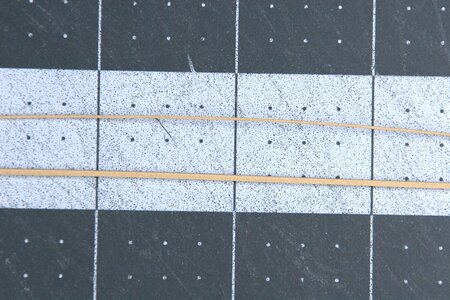
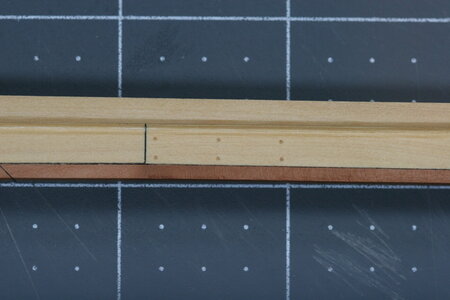
1 mm x 4 mm castello boxwood:

View attachment 360399 View attachment 360400

2 mm x 8 mm american holly:

View attachment 360402

1 mm x 1 mm black hornbeam:

View attachment 360401

2 mm thick panel of castello boxwood:

View attachment 360403

If you want to see more just message me.

Thanks Paul for the pictures, the quality looks very good.
...and this is ordered from who\where? Thank you...

Jim ordered the wood from Vahur. Hobbymill.eu
 
Paul,

YIKES, I'm already nineteen pages behind in your new log omg....:) - looking to be another brilliant build!!

So, I'm working on building a scratch rudder for my current ship (four pieces of wood). When I finish that - I'll check back into yours - you will be done and working on Kingfisher's protective case by then lol.....
 
I thought I should wrap up the documentation of the fabrication of the bend on my cast frames. I had previously added a 2mm strip on the forward side of the frame and I now needed to remove a 2mm strip from the aft side of that frame.

I considered several approaches ranging from just using files and sandpaper all the way to using my mill for the first time ever. In the end I used my disc sander but not before modifying it (@Steef66 would have made a new disc sander out of a bicycle wheel, the motor from a kitchen blender, and parts he ordered from Ali for just under 3 euro... but I lack his ingenuity).

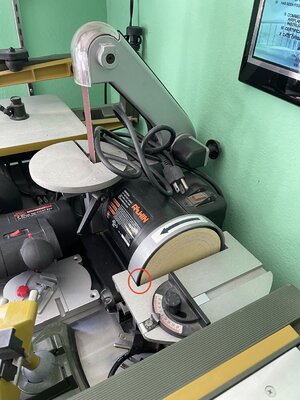
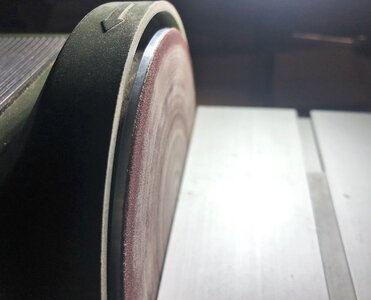
I think the following photos will make my modification of the disc sander clear:

View attachment 359755

View attachment 359756

I now have access to the edge of the disc...

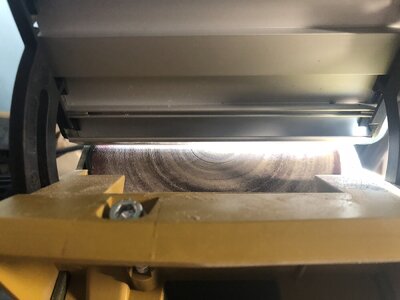
I marked out the portion I needed to remove:

View attachment 359757

And then carefully sanded back to the line checking over and over again for accuracy...

View attachment 359758

And this was the result:

View attachment 359759

View attachment 359760

I am currently sanding the fore and aft surfaces of the offset and cast frames and snapping joints out of carelessness. I decided it was best to stop for the day...

You are kind to follow my build!
Paul,

"You talked me into this" - have always been annoyed with the metal overlap on my cheap and very noisy sander, that also has a belt that I have almost never used.

Next build (hopefully in this lifetime) will be an around 800 BC Viking ship - that will be built with visible internal frames and plank by-plank. Your Proxxon sander looks to be a perfect upgrade, and it will be heavily used as well. (simple fix per your idea)
PS: a bit of an "ouch" on its price - oh well. As I tell my friends, "I don't want to be the richest skeleton in the cemetery".

Cheers,

IMG_8522.jpeg
 
Paul,

"You talked me into this" - have always been annoyed with the metal overlap on my cheap and very noisy sander, that also has a belt that I have almost never used.

Next build (hopefully in this lifetime) will be an around 800 BC Viking ship - that will be built with visible internal frames and plank by-plank. Your Proxxon sander looks to be a perfect upgrade, and it will be heavily used as well. (simple fix per your idea)
PS: a bit of an "ouch" on its price - oh well. As I tell my friends, "I don't want to be the richest skeleton in the cemetery".

Cheers,

View attachment 360708

Another option is one of the two disc sanders made by Jim Byrnes - they already have the edge of the disc available (one is fixed speed and the other is a bit smaller and variable speed). But they come at a premium (I have his thickness sander and his little table saw - the quality of the build is fantastic).
 
Paul,

Yes thanks, Jim Byrnes’ products have always been at the top of the list. That said, if I were a more prolific builder along with several more under the table waiting for their births and later launchings, I would have earlier considered purchasing some of his superb tools.

With only one more build in mind (current one is only my third in four decades - yikes o_O) The Proxxon sander will be a very acceptable upgrade from what I’m using. Actually, all of my table top tools are from Proxxon, except for the sander which will complete my tool needs. His Disc Sander is also way above my skill levels' need – indeed a beautiful tool.

As it’s been said, (generally speaking) “One’s work, to a great extent, also has to do with using very good tools”. Not excluding a high-level skill set. Your work will continue to be indicative of articulate skills and using excellent tools as well.
I think you will be happy with the Proxxon sander. The one thing that I dislike is the distance of the tilting table from the sanding disc. You will notice in my picture posted earlier that I have found it helpful to add a piece of thin metal to bring the wood closer to the sander. Double sided tape holds it temporarily in place.
 
I think you will be happy with the Proxxon sander. The one thing that I dislike is the distance of the tilting table from the sanding disc. You will notice in my picture posted earlier that I have found it helpful to add a piece of thin metal to bring the wood closer to the sander. Double sided tape holds it temporarily in place.
You are reading my mind, mon ami! One of my most recent projects was to fix the distance between the disk and the table. Of cause, I use my Proxxon mill to make the necessary changes.
IMG_2667.jpegIMG_2669.jpeg

I am planning to post the changes I made so everyone can do it (if they want) :cool:
 
זה מביא את הייצור המחוספס של המסגרות המרובעות לסיום. זה 55 מסגרות בודדות שיותוו בתחנות פריים לאורך הקיל (עם סט שטוח משולש אחד ליד האמצע):

View attachment 360235

הערימה הימנית צריכה לשבת על הערימה השמאלית אבל זה הפך למשחק ג'נגה לא יציב...

בשלב הבא, או שאמשיך בניסויים שלי על ברגים ומסילות - או שאולי פשוט אקפוץ למסגרות היריעה.

This brings the rough fabrication of the square frames to a close. That's 55 single frames that will be paired at frame stations running along the length of the keel (with one triple dead flat set near the middle):

View attachment 360235

The right-hand stack should sit on the left stack but that turned into an unstable Jenga game...

Next, I will either continue my trials on bolts and trenails - or maybe just jump into the cant frames.
impressive work, well done my friend
 
You are reading my mind, mon ami! One of my most recent projects was to fix the distance between the disk and the table. Of cause, I use my Proxxon mill to make the necessary changes.
View attachment 360779View attachment 360780

I am planning to post the changes I made so everyone can do it (if they want) :cool:
That would be great Jim if you could show that, then I don't always have to put a sheet of metal or a piece of wood underneath, like Paul does.
 
It started out as a promising week. After a busy stretch I was only scheduled to work three days and there would be lots of time for ship building...

First, I tackled the half frames (the fore and aft cant frames). That went very well...

IMG_9406.JPG

These are paired (port and stbd) and stacked on each other.

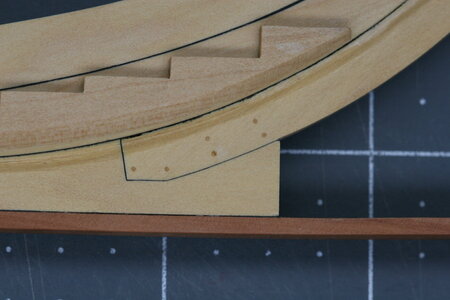
Next, I tried my hand at creating trenails with my new Byrnes drawplate. I was able to get 1 x 1 mm boxwood down to 0.53-0.56 mm (not sure why the size varies along the length of the strip). At 1:48 that would create a 1 inch (2.5 cm) peg. Perfect!

IMG_9408.JPG

And now in place:

IMG_9413.JPG

IMG_9422.JPG

I'm very satisfied with that result. The end-grain picks up the wipe-on-poly very nicely to my eye.

Speaking of wipe-on-poly (he says to build suspense...), now would be the perfect time to add a finish to the fore and aft faces of the frames. Once they are in place it will be very difficult to access those surfaces.

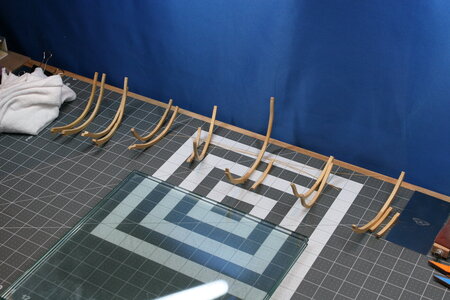
But, if the front and back surfaces of the frames are wet how can I put them down to dry? I know! I'll hang them from a string stretched tight (so it stays straight and the frames won't slump together)...

That should work great as long as I don't bump the string causing it to spring/snap and send frames crashing to the hardwood floor...

IMG_9410.JPG

IMG_9412.JPG

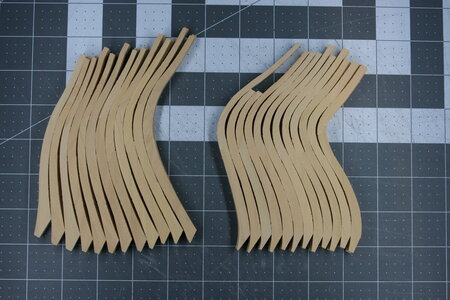
Yes, I did... Fifteen broken frames... One broken shipbuilder.

A project for another day because its Kattner Family Dinner tonight and I'm the chef (four kids with their spouses / friends along with grandkids). Cooking for this bunch is nearly impossible. Here are the restrictions across the group: no pork, no dairy (that's no eggs, butter, cheese, milk, etc.), no meat at all, no nuts, no soy, no gluten. ROTF

Looks like it's going to be apple sauce and beer.
 
Unlike others who would snivel about broken frames, I will be mostly alone and will say it is a Good Thing! Yea, you heard it right, good thing this happened now before you even attempt to install them. If they have to break, then this is the time that happened. I would rather investigate why this happened, no...no...not because they jump on the hard floor! It is a problem related to bad gluing, IMHO. I understand that is not really much surface for effective gluing, therefore you have to use a very strong and fresh glue. Also, maybe it was not enough pressure while glue curing?
In any case, I would try other frames how they can hold the pressure. Maybe it is a good thing to throw other frames on the hard floor?! :cool:

But you will think about all this tomorrow. Today, enjoy the Kattner Family Dinner where you are the Chef. BTW, does apple sauce require cooking? I know beer does, it is called brewing!

giphy.gif
 
It started out as a promising week. After a busy stretch I was only scheduled to work three days and there would be lots of time for ship building...

First, I tackled the half frames (the fore and aft cant frames). That went very well...

View attachment 361152

These are paired (port and stbd) and stacked on each other.

Next, I tried my hand at creating trenails with my new Byrnes drawplate. I was able to get 1 x 1 mm boxwood down to 0.53-0.56 mm (not sure why the size varies along the length of the strip). At 1:48 that would create a 1 inch (2.5 cm) peg. Perfect!

View attachment 361153

And now in place:

View attachment 361156

View attachment 361158

I'm very satisfied with that result. The end-grain picks up the wipe-on-poly very nicely to my eye.

Speaking of wipe-on-poly (he says to build suspense...), now would be the perfect time to add a finish to the fore and aft faces of the frames. Once they are in place it will be very difficult to access those surfaces.

But, if the front and back surfaces of the frames are wet how can I put them down to dry? I know! I'll hang them from a string stretched tight (so it stays straight and the frames won't slump together)...

That should work great as long as I don't bump the string causing it to spring/snap and send frames crashing to the hardwood floor...

View attachment 361154

View attachment 361155

Yes, I did... Fifteen broken frames... One broken shipbuilder.

A project for another day because its Kattner Family Dinner tonight and I'm the chef (four kids with their spouses / friends along with grandkids). Cooking for this bunch is nearly impossible. Here are the restrictions across the group: no pork, no dairy (that's no eggs, butter, cheese, milk, etc.), no meat at all, no nuts, no soy, no gluten. ROTF

Looks like it's going to be apple sauce and beer.
I believe it's the challenge Paul, at least that's what drives me. Believe me, you're not broken, the challenge lies before you!
As for desert try taking a candy bar then dip it in apple sauce, wash it down with a beer and see if foams up in your mouth. :D
 
Unlike others who would snivel about broken frames, I will be mostly alone and will say it is a Good Thing! Yea, you heard it right, good thing this happened now before you even attempt to install them. If they have to break, then this is the time that happened. I would rather investigate why this happened, no...no...not because they jump on the hard floor! It is a problem related to bad gluing, IMHO. I understand that is not really much surface for effective gluing, therefore you have to use a very strong and fresh glue. Also, maybe it was not enough pressure while glue curing?
In any case, I would try other frames how they can hold the pressure. Maybe it is a good thing to throw other frames on the hard floor?! :cool:

But you will think about all this tomorrow. Today, enjoy the Kattner Family Dinner where you are the Chef. BTW, does apple sauce require cooking? I know beer does, it is called brewing!

giphy.gif
I agree 100% Jim. There was something that went amiss with the gluing. Better address that now than real heartache later - now it's just a disappointment and slight delay.
I won't disagree here gentlemen. Many of the breaks are at the places I glued two pieces together. Did I fail to glue them adequately? Did I fail to clamp them together properly? Both are possible. Some of the breaks are in the vicinity of the glued joints but also show failure within the wood itself (that is, the joint itself remains intact but the wood is split consistent with its grain). At the end of the day, I have some remedial work to do. I won't call it a redo because this is not elective - but it is certainly re-covering ground that I thought I had already traversed. I will take great care to not rush this correction - I don't want to build frames that are inaccurate out of frustration...
 
After a busy stretch I was only scheduled to work three days and there would be lots of time for ship building...
I think I have the wrong job.

es, I did... Fifteen broken frames... One broken shipbuilder.
That's something that happens. If you installed the treenails in the frames they are much more stable. It's not so easy to give enough pressure on the small joint without moving the parts. I give some glue on the joint and pressure the parts for 5 minutes together with my fingers. I find that I have then much more control on the pieces as using a clamp.

Next, I tried my hand at creating trenails with my new Byrnes drawplate. I was able to get 1 x 1 mm boxwood down to 0.53-0.56 mm
0.5mm treenails. That is a great result and it is looking really good.
 
Back
Top