- Joined
- Sep 10, 2024
- Messages
- 909
- Points
- 353

Yes, and start paying more attention to people's faces instead of ... well ... you know.Just keep at it Paul, you know the old saying practice, practice, practice.

 |
As a way to introduce our brass coins to the community, we will raffle off a free coin during the month of August. Follow link ABOVE for instructions for entering. |
 |

Yes, and start paying more attention to people's faces instead of ... well ... you know.Just keep at it Paul, you know the old saying practice, practice, practice.


Eyes up...........Yes, and start paying more attention to people's faces instead of ... well ... you know.
Thanks, Dirk. I think you would not only excel - but like it as well.Super great, I'll have to try it sometime but your results are really great!
Dirk
Good tips, Russ. My thanks!One thing I remember from art class many, many years ago was that in human faces, the eyes are located almost exactly halfway between the bottom of the chin and the top of the head. It seems counterintuitive, because most people's hair covers enough of their forehead that it looks like their eyes are higher up. When you rough-sketch your faces, start by putting the eyes right in the center. Your center figure looks the most realistic, followed by the one on the right. The eyes on the left one are pretty high.
All that said, your ability to carve the detail so smoothly is wonderful. Once you get the proportions worked out, they'll be second to none!
I don't think I'll add more details - at some point I would run the risk of muddling everything up.Agreed...and he's already good at making boobs!
On a more serious note, you can add veins on the leaves with an xacto knife, also add definition to the hair using a knife as well. And you could add feathers to the wings that way too. It all depends how detailed you want the carving to be.
RIGHT!Just keep at it Paul, you know the old saying practice, practice, practice.
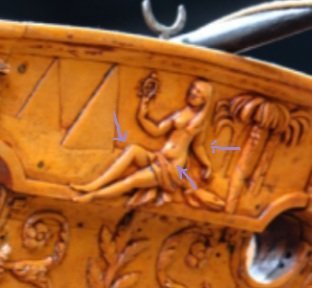
Good advice, Stephan. These faces are pretty small (about 3mm) so I probably should have either tried to do less with them or tried to do more with them (by taking the time to learn how to draw a face, and then how to carve a face, before I worked on these). I also feel like the bodies are dead rather than alive. Not sure how to correct that.You have to imagine the form in your head before carving. A face/head is very difficult. But the boobs look indeed good, I agree with Dean. It's easy to think about them
For the face I use the Loomis method. Works the best for me to positioning the eyes, noose, ears and mouth.
Post in thread 'An easy introduction to making wood ornaments by Stephan Kertész (Steef66)' https://shipsofscale.com/sosforums/threads/an-easy-introduction-to-making-wood-ornaments-by-stephan-kertész-steef66.16094/post-420069
Also watching carving video's of carving a head/face helps to see how to form the face in depth.
Don't give up, I think that you finally will achieve a good result that meets your expectations, because I see that your learning curve is very steep.
It’s looking great, you just started with this part of the hobby.

You can try to put more contour (muscles) in it. The tummy is more like a baby tummy. Round. Do you see what I try to say?I also feel like the bodies are dead rather than alive

Thank you, Stephan. I did try to do that in a few places but the limbs are so small that defining muscles looked out of scale. But maybe that's OK to create the right look. Do you think some exaggeration is necessary because of the reduced scale?You can try to put more contour (muscles) in it. The tummy is more like a baby tummy. Round. Do you see what I try to say?
Sometimes a little dimple in the space makes a huge difference to the look. See the frontleg of the lion. The tiny dimple in the leg by the arrow brings out the muscles and that brings in the life. I often use the X-acto knife to give the first cut of that accent. It helps me to lead the drill on the right spot.
View attachment 508068
When I look to often to the lion, I think it's not finished. But watch out with to small parts, you can overdo them. To much can destroy the look. And it is no shame to bin a part and start over. All practise to improve yourself.

That's up to you. You can try and when it goes wrong, start over. I know it's scary. It's very small. So look with just your eyes and not always on the macro pictures. when it is good with just the eyes.exaggeration is necessary because of the reduced scale


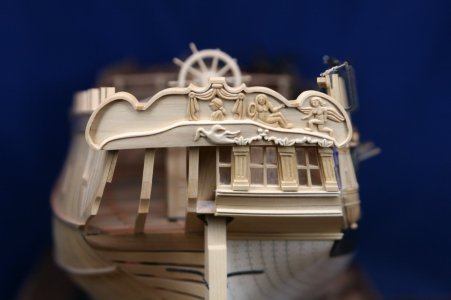
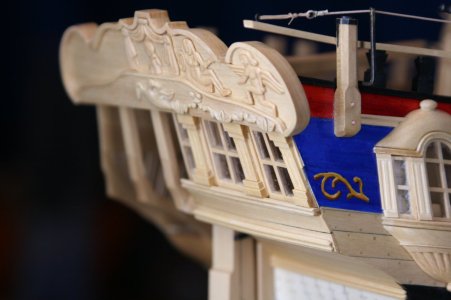
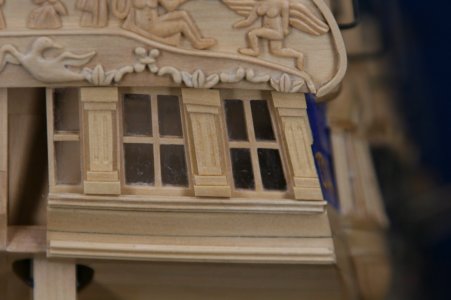
Good morning Paul. Way to go!! Really impressive for your first attempt. I personally do the 3D printing cheat as I cannot even present the most basic carving - so Kudos. Any other method of presenting these decorations would be out of “sync” with the rest of your build - you have owned this. Cheers GrantAs a defensive move to prevent me from agonizing any further over the relief carvings I went ahead and installed the tafferel on the ship along with the decorative columns that flank the lights (windows). This ensures the memorialization of my very first carving efforts and marks this Kingfisher as "this was as good as I could do at the beginning." Where will it all lead?
View attachment 508096
View attachment 508099
View attachment 508097
View attachment 508098
Thanks to everyone who encouraged me and offered suggestions for improvement. You are a fine bunch.
I fully agree with Grant, Paul. A first attempt on this scale with this dimensions! Bravo!As a defensive move to prevent me from agonizing any further over the relief carvings I went ahead and installed the tafferel on the ship along with the decorative columns that flank the lights (windows). This ensures the memorialization of my very first carving efforts and marks this Kingfisher as "this was as good as I could do at the beginning." Where will it all lead?
View attachment 508096
View attachment 508099
View attachment 508097
View attachment 508098
Thanks to everyone who encouraged me and offered suggestions for improvement. You are a fine bunch.
As always the macro photos are unforgiving. But my carpentry generally stands up to such scrutiny, so I'll just need to keep trying with the carving. Thanks for all your help, Stephan. You are a good friend.That's up to you. You can try and when it goes wrong, start over. I know it's scary. It's very small. So look with just your eyes and not always on the macro pictures. when it is good with just the eyes.
Thanks, Brad. I think I might just leave things as they are. Nothing else has been stained on the Kingfisher and I did painted figures on the Vasa so I'm over that...One word...Superb!
For a first attempt at carving, Incredible!!
Any painting or wood stains/oils planned?
