You are using an out of date browser. It may not display this or other websites correctly.
You should upgrade or use an alternative browser.
You should upgrade or use an alternative browser.
Kingfisher 1770 1:48 POF
- Thread starter dockattner
- Start date
- Watchers 143
Thank you. I am rather fond of it as well since it was my very first carving.Hello Paul
I had to do some catching up. Very good carvings. In contrary to others I particularly like the bird relief.
Thanks, Geoff. Still lots to figure out but things are incrementally improving.I really like following your problem solving skills as you venture into new dimensions of modeling. Great job Doc!
Thanks for this thoughtful and sympathetic post, Ken.Hi Paul, I always look forward to reading your updates, after a spell away. Very nice work on your carvings. Your relief work presents some great perspectives. Whenever I've done reliefs, I've learned to stencil more than one base piece. I usually take all 3 pieces to a very rough carved state. Reliefs, in most cases, in my experience, present better when they are thin relative to scale. I've found that the thinner the work, the higher the risk of breaking the piece. If that happens, I have 2 pre-carved pieces in reserve. A small waste of material, yes, but this allows my brain to maintain momentum, as I don't have to completely start from the beginning.
The other key step in carving reliefs, which I'm fairly certain you already do, is the grain and quality of the piece of wood you will be carving. Once small area of wider grain or imperfection, your relief looks more like a Ritz cracker crumbs than a carving.
If you allow me a small critique of your mermaid. I think her physique looks great! Her face might benefit from one or two small efforts. Her head is a little round and from the side, her face a little flat. You can safely create some cheekbones by removing a small amount of material under them, to create the "concave hollows" of her cheeks. The one other thing is her brow is a little flat. Anatomically, the brow and forehead protrude out more than the lower 2/3 of our faces, except for our noses, of course.
I've had a thing for mermaids (easy guys) since I saw some Walt Disney movie when I was a kid. I want to be attracted to her Paul. In her current state, I don't want to kiss her. Make a couple of changes and I'll pucker up.
My carving talent is probably very close to yours. Carving for me is much like the golf swing. I know exactly what a great golf swing is and looks like. I just find it terribly hard to achieve myself.Again, like the golf swing, "practice makes perfect"? I do practice, I hope with purpose. I've already carved 4 figureheads for my current ship and I've not yet started hull planking. Each new version is a little better than the last. My carving skill may produce a figurehead a year from now with continued practice, who knows.
Keep up the great work!
I agree that the thinner the relief is the better it looks. But the next time I carve a relief I will start with thicker stock. I was limited in depth by my choice to use 1 mm material to start. I should have used something thicker and then sanded down the back side until I finished with something that still looked like a relief. At least that will be the thing I try next.
The mermaid face is particularly vexing to me. It looks better than the face on the reliefs but still looks rather sub-human. Yes: too round and too flat. The cheeks are concave, though that is not well represented in the images I selected, so there is something else wrong there. The flat brow you see here is the improved version as it was even flatter. I stopped because her forehead was already getting 'separated' from her hair. It may also help to bring her chin back. I may take another shot at her face now that I'm home from my morning activities. But, unlike you, I am less inclined to pitch this one and begin again.
I'll repeat something I said in another post: it is my initial thought to invoke the challenge of scale in defense of my work. The problem with that theory is I have seen much better work than mine at this same scale. Just need to keep trying...
Though I will say this: her face does look more smooch-able free from the criticism of the macro lens.
Hi Glenn. Welcome back. There is certainly some carry-over from my profession to this hobby. The hobby I WANTED to be good at, however, was golfI've been MIA for close to six month and have missed this site, especially your work, Paul. But I got another ~50 pages of the Kingfisher to check out, which is awesome. Binge builds.
These carvings are going so well! I often see people with dentistry training do so well. Many of the masters have a hand piece that would make a dentist drool.
As a chemist, I hope I turn out to have a super power like metal finishes or something, but so far, it's hit or miss.
Beautiful work as always! I would go back and hit Like for all the cool stuff, but I would blow up your notifications.
 (in truth I didn't want golf to be a hobby - I wanted it to be my profession). Alas... here I am trying to figure out how to make a tiny mermaid out of wood. What a strange world we live in
  .
.Thanks, Stephan. Yes...learning. Her face is better (Loomis) but still wrong. I'm going to work on it a bit more but if you have any tips...That is a good looking mermaid. She is looking great. You are a quick learner.
- Joined
- Aug 8, 2019
- Messages
- 5,011
- Points
- 738

It was for me a great help seeing a video of someone making a head from Fimo (sculpy). To see how a nose and eye lay to each other in depth. Maybe it's a help for you too.Thanks, Stephan. Yes...learning. Her face is better (Loomis) but still wrong. I'm going to work on it a bit more but if you have any tips...
What sexy shapes)))Next up the plans call for a mermaid flanking the gallery:
View attachment 509158
I redesigned the mermaid into something I thought I might be able to carve and traced that out on a stick of boxwood:
View attachment 509159
I cut that out and then did the same on the remaining faces:
View attachment 509160
View attachment 509161
Some preliminary shaping:
View attachment 509162
View attachment 509163
View attachment 509164
This is where I am at this evening:
View attachment 509165
View attachment 509166
View attachment 509167
View attachment 509168
I'll uses fresh eyes tomorrow to revise this further and figure out if I dare add something to represent the scales on the tail (or not).
Thanks for stopping by!
A brief update...
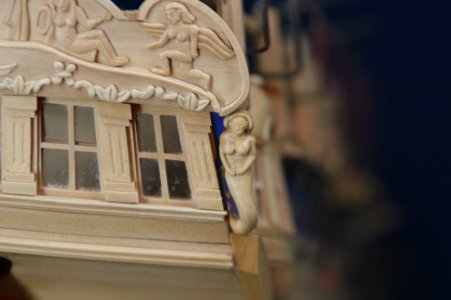
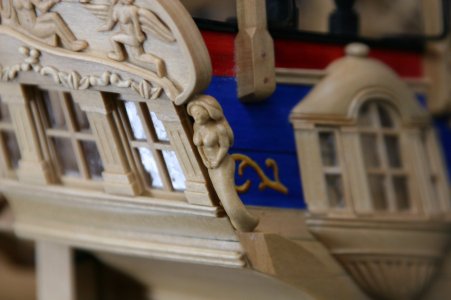
Earlier this week I installed the mermaid that flanks the gallery on the stern of the ship:

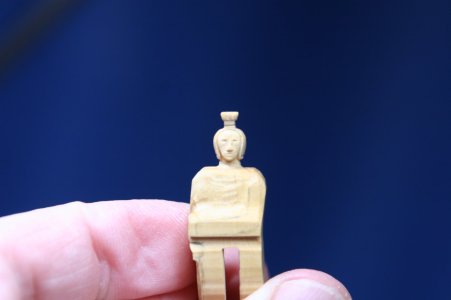
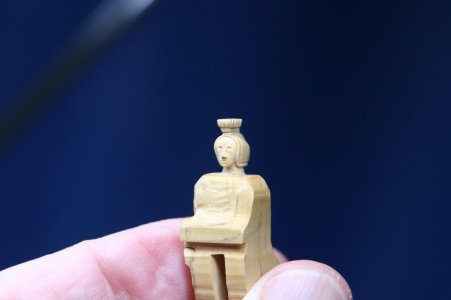
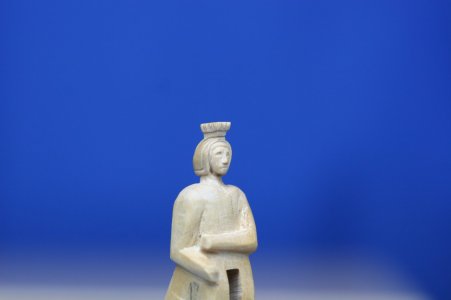
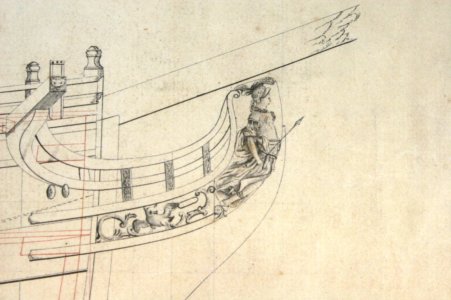
Next, I turned my attention to the figurehead. As far as I can tell the drawing is of a king or a knight who is spear fishing...
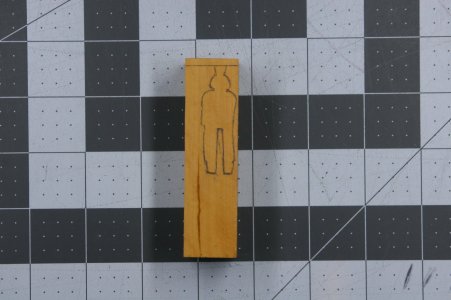
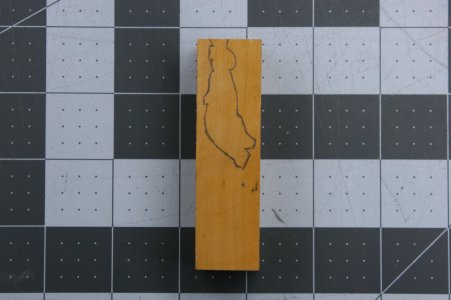
I drew up a version of that figurehead and copied it over to a piece of castello boxwood and roughly cut out the shape using a scroll saw:
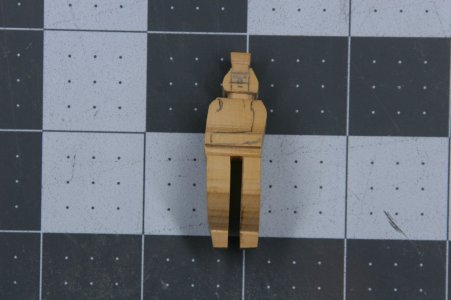
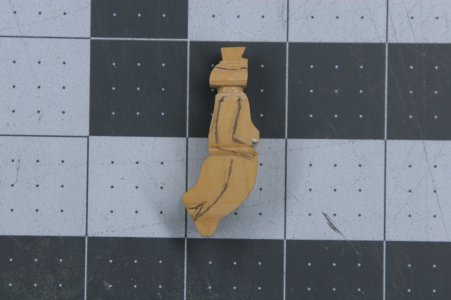
As the figurehead carving "lives or dies" based on how the head and face turn out, I decided to work on that part first.
It's not done, but this is far enough along to know I can run with it:

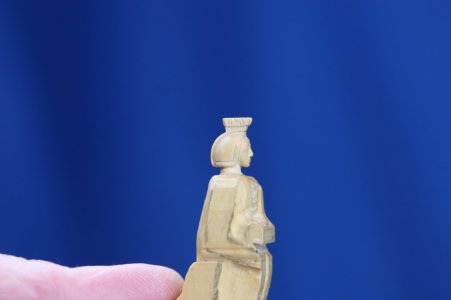


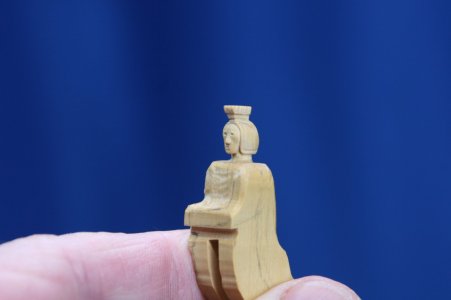
Yes, I know you can do better . But I feel like I am incrementally improving (or not)
  .
.
Earlier this week I installed the mermaid that flanks the gallery on the stern of the ship:


Next, I turned my attention to the figurehead. As far as I can tell the drawing is of a king or a knight who is spear fishing...

I drew up a version of that figurehead and copied it over to a piece of castello boxwood and roughly cut out the shape using a scroll saw:


As the figurehead carving "lives or dies" based on how the head and face turn out, I decided to work on that part first.
It's not done, but this is far enough along to know I can run with it:


Yes, I know you can do better
- Joined
- Aug 8, 2019
- Messages
- 5,011
- Points
- 738

There will be a time that you love them. AndI'm starting to hate faces...
Yes I think so, these are your first carvings. You improve after each work you do. And your grow is fast. A new talent discovered.But I feel like I am incrementally improving (or not).
Cool!! And how do you glue such figured parts so that they hold firmly, but also so that the glue is not visible?A brief update...
Earlier this week I installed the mermaid that flanks the gallery on the stern of the ship:
View attachment 509951
View attachment 509952
View attachment 509953
Next, I turned my attention to the figurehead. As far as I can tell the drawing is of a king or a knight who is spear fishing...
View attachment 509959
I drew up a version of that figurehead and copied it over to a piece of castello boxwood and roughly cut out the shape using a scroll saw:
View attachment 509947
View attachment 509948
View attachment 509949
View attachment 509950
As the figurehead carving "lives or dies" based on how the head and face turn out, I decided to work on that part first.
It's not done, but this is far enough along to know I can run with it:
View attachment 509954
View attachment 509955
View attachment 509956
View attachment 509957
View attachment 509958
Yes, I know you can do better. But I feel like I am incrementally improving (or not)
.
Hi Paul,
What helped me a lot was looking a lot at roman marble sculptures. There is plenty to find on Google in high res pictures.
See below for instance a carved face of a 18th century small statue I photographed a few weeks ago.
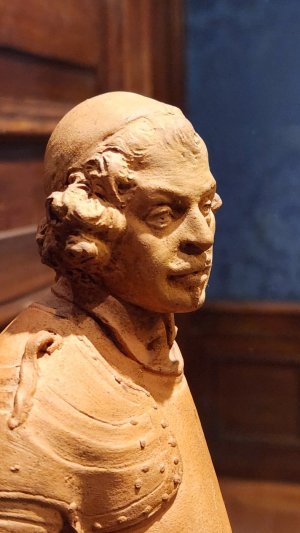


You need to add more expresion to the face.
Your eyes should be carved deeper into the face, by doing this you create a more prominent nose and cheek bones.
And always devide a face into proportional parts with the eyes in the middle.

Your current eyes are in the spot of the eyebrows.
You can still correct it
As soon you get the hang of it I am sureyou will love it.
What helped me a lot was looking a lot at roman marble sculptures. There is plenty to find on Google in high res pictures.
See below for instance a carved face of a 18th century small statue I photographed a few weeks ago.


You need to add more expresion to the face.
Your eyes should be carved deeper into the face, by doing this you create a more prominent nose and cheek bones.
And always devide a face into proportional parts with the eyes in the middle.

Your current eyes are in the spot of the eyebrows.
You can still correct it
As soon you get the hang of it I am sureyou will love it.
CarefullyCool!! And how do you glue such figured parts so that they hold firmly, but also so that the glue is not visible?
 ...
...Thanks, Stephan.There will be a time that you love them. And
Yes I think so, these are your first carvings. You improve after each work you do. And your grow is fast. A new talent discovered.
Good suggestions, Maarten. I actually marked out the eyes in the right place but somehow they drifted up during various 'corrections' of other things. I'm not so sure it can be fixed, though...Hi Paul,
What helped me a lot was looking a lot at roman marble sculptures. There is plenty to find on Google in high res pictures.
See below for instance a carved face of a 18th century small statue I photographed a few weeks ago.
View attachment 510000View attachment 510001View attachment 510002View attachment 510003
You need to add more expresion to the face.
Your eyes should be carved deeper into the face, by doing this you create a more prominent nose and cheek bones.
And always devide a face into proportional parts with the eyes in the middle.
View attachment 510004
Your current eyes are in the spot of the eyebrows.
You can still correct it
As soon you get the hang of it I am sureyou will love it.
I'll try with new energy another day. Today I'm just depressed
 .
.Kurt Konrath
Kurt Konrath
Carving should be easy for you just drill like it is a cavity that needs cleaned out......
As for Mermaid scales, you might try using thin bridal net or other fine mesh held in place and apply thin wash or varnish over to leave a pattern to carve if you dare.
As for Mermaid scales, you might try using thin bridal net or other fine mesh held in place and apply thin wash or varnish over to leave a pattern to carve if you dare.
Good afternoon Paul. Yep.. But I feel like I am incrementally improving (or not).
Eish. Drives me crazy but I know you will persevere with the figurehead Paul. Your stern gallery is impressive. First time carving or not it is really good. Cheers GrantNew energy. New day. Same result...


