Thats a very pleasant looking outdoor area for working on the model, Paul.
You are using an out of date browser. It may not display this or other websites correctly.
You should upgrade or use an alternative browser.
You should upgrade or use an alternative browser.
Kingfisher 1770 1:48 POF
- Thread starter dockattner
- Start date
- Watchers 144
Good morning Paul. Breaking frames….must drive you mad. That little crack sound Eish. I also think with the amount of sanding required with boxwood increases the risk of breakage over softer woods. Beautiful environment to sit, sand, relax and suck in the feeling of the success……until the little cracking soundAnd now after preliminary shaping with a rotary tool...
View attachment 376399
View attachment 376402
View attachment 376401
View attachment 376403
View attachment 376400
The Kattner Sanding Center:
View attachment 376397
View attachment 376398
I have become increasingly frustrated by my (lack of) success gluing frames. You may recall that I dropped a bunch of frames earlier in the build and many of them broke (in some cases at the glue joint).
Since then, I am constantly repairing cant frames that are breaking off of the deadwood and at the top of the frames where they are joined with little filler pieces. I used Titebond and it is either old glue (Amazon) or the wrong product. It dries very brittle and I am now using PVA to make repairs. I would call it a learning experience but I'm not sure what I'm learning...
This a holiday weekend in the US when we remember those who have served in the military: freedom isn't free. Thank you to those who served so I can sit in my backyard and not have to worry about anything more concerning than glue...
The ship is looking very good Paul! I think you’re doing great work! 
Kurt Konrath
Kurt Konrath
Hey Doc, did you use the other arm this time to get the muscle tone evened up!
The stern is shaping up well!
Keep up the good work and photos.
As for dropping and breaking stuff, your not alone for sure in that catagory!
The stern is shaping up well!
Keep up the good work and photos.
As for dropping and breaking stuff, your not alone for sure in that catagory!
- Joined
- Aug 8, 2019
- Messages
- 4,934
- Points
- 688

I'm not a glue expert, but why titebond? We use here White glue. Pva you call that overthere I believe. You got 2 kinds D2 and D3, D3 is water resistance. Perfect for modeling.
Another thing is, you bought the kit second hand, how old is it, where was it stored? It could dried to much or something like that. Castello or boxwood is normally very strong.
I got this once with a piece of aliexpress, just 1 piece the rest was perfect. And the piece that broke wasn't like the rest. It looks, feels less dence and lighter.
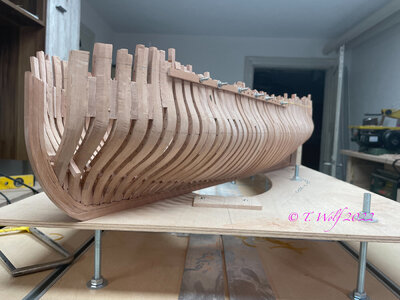
Good morning Paul, the rear looks really beautiful. If I may ask, why did you take it out of the mold and start sanding it already? From my experience it is very dangerous to do this because you have no stability in your hull, by sanding with a vibratory sander this vibration is transferred to the wood and the frames break again. I would leave the hull in the jig for as long as possible until it's fully built and then start sanding inside. Then attach the first reinforcements in the interior before I start sanding the outside, also attach a wooden strip to the top edge on the outside, this provides additional protection.

Hi Stephan,I'm not a glue expert, but why titebond? We use here White glue. Pva you call that overthere I believe. You got 2 kinds D2 and D3, D3 is water resistance. Perfect for modeling.
Another thing is, you bought the kit second hand, how old is it, where was it stored? It could dried to much or something like that. Castello or boxwood is normally very strong.
I got this once with a piece of aliexpress, just 1 piece the rest was perfect. And the piece that broke wasn't like the rest. It looks, feels less dence and lighter.
Titebond is PVA, use it myself and never had an issue with it. Also Titebond has water resistant and regular.
Thanks Stephan. Titebond was recommended to me for gluing in places with an open end-grain as it was thinner and could soak into that end-grain better. I have found that to be generally true - the bonding surface that fails is the 'other side' of the glued joint.I'm not a glue expert, but why titebond? We use here White glue. Pva you call that overthere I believe. You got 2 kinds D2 and D3, D3 is water resistance. Perfect for modeling.
Another thing is, you bought the kit second hand, how old is it, where was it stored? It could dried to much or something like that. Castello or boxwood is normally very strong.
I got this once with a piece of aliexpress, just 1 piece the rest was perfect. And the piece that broke wasn't like the rest. It looks, feels less dence and lighter.
And yes, the kit is older. I cannot answer your question with regard to storage conditions. The boxwood is like rock compared to pear...
Thanks Maarten. You are correct. The wing transom does not seat fully into the sternpost (I actually mentioned this in passing in a much earlier post). As the rabbet has yet to be refined in that area (it remains undersized) I was hoping to 'solve' that problem later in the build but it most likely won't turn out quite right... Sigh.Paul,
I noticed that the top transom timber is not joining the rabbet in the stern post.
Did you check this with the drawings?
View attachment 376440
At the transome timbers the rabbet is wider.
Wonderful work Paul. I hate it for you that you have such a breakage problem. Tobias has an interesting point though, maybe some temp longitude reinforcing at the top? I really don't know.
Well, I guess the short answer is "I was just following the instructions" though in retrospect I can affirm that you are absolutely right. With the frames only connected at their ends they are quite fragile. I'm not using a vibrating sander but the sanding wheel in the rotary tool does 'chatter' a bit because of the density of the boxwood so things are absolutely vibrating.Good morning Paul, the rear looks really beautiful. If I may ask, why did you take it out of the mold and start sanding it already? From my experience it is very dangerous to do this because you have no stability in your hull, by sanding with a vibratory sander this vibration is transferred to the wood and the frames break again. I would leave the hull in the jig for as long as possible until it's fully built and then start sanding inside. Then attach the first reinforcements in the interior before I start sanding the outside, also attach a wooden strip to the top edge on the outside, this provides additional protection.
View attachment 376438
I think the suggestion to sand now was related to access to the interior (easier now than when the midships frames are in place) - but that wouldn't have been an issue on the exterior. There aren't any build logs of this LSS kit showing this stage of construction (due to a server failure over at Model Ship World many years ago) so I don't know if others ran into this issue. I guess I doubt it because those builds were completed by guys who were MUCH more experienced and skilled than I am.
For the record, I did try to use scrapers rather than a sanding tool on the interior, but the boxwood just shrugged that off with a laugh...
Always learning...
- Joined
- Aug 8, 2019
- Messages
- 4,934
- Points
- 688

Try pva dilluted with a small amound of water. I use that for the glueing of the cherry at this moment. You just need a thin film of glue. It is strong enough to hold the connection but with force it break on the glue not on the wood. Maybe worth to give it a try. I use 5% water on the White glue. (Pattex D2)
You can allways decide to flatten it and add a thin layer of boxwood on top.Thanks Maarten. You are correct. The wing transom does not seat fully into the sternpost (I actually mentioned this in passing in a much earlier post). As the rabbet has yet to be refined in that area (it remains undersized) I was hoping to 'solve' that problem later in the build but it most likely won't turn out quite right... Sigh.
- Joined
- Oct 23, 2018
- Messages
- 718
- Points
- 353

Wonderful work Paul. If I am back from my holiday you have all frames installed.
I think, that you did not have enough pressure on the small joints during the glue is not dry. I know this problem form building the frames for my cutter.
If you have to less pressue you can break the joint without damaging the timber, if you have enough, normally the timber breaks.
I also use Titebond if I want to have a short open time and Ponal if I need a longer open time for glueing.
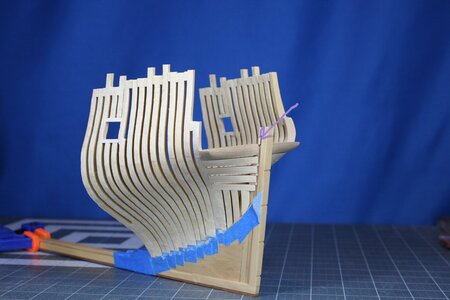
I know none of you have slept well in anticipation of the preliminary sanding of the aft cant frames... So here is a photo tour:
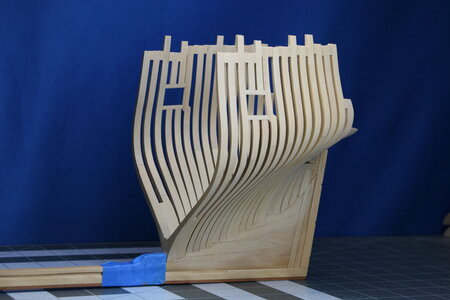
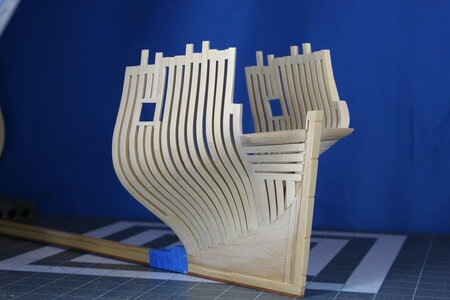
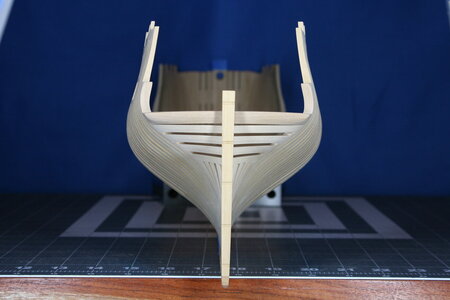
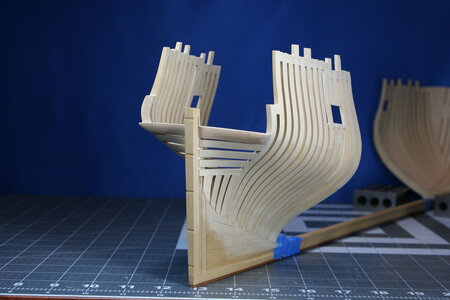
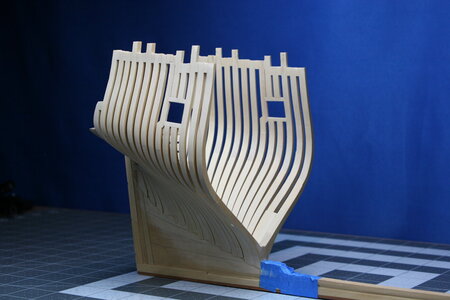
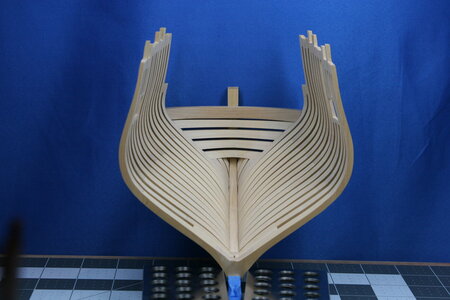
There is still more to do but I need to take a break. In particular I need to further refine where the frames merge with the deadwood (and this is true at the front of the ship as well) but sanding has lost its charm (if it ever had that rare and desirable quality).
The overall appearance:
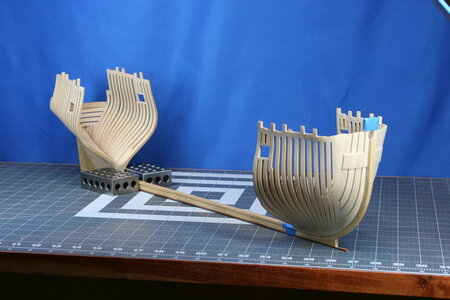
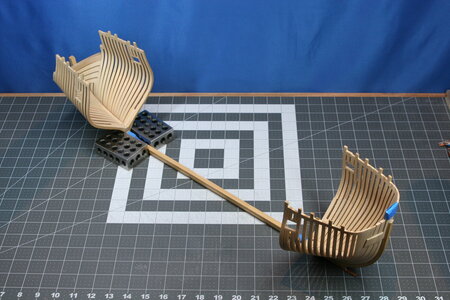
Onward!


There is still more to do but I need to take a break. In particular I need to further refine where the frames merge with the deadwood (and this is true at the front of the ship as well) but sanding has lost its charm (if it ever had that rare and desirable quality).
The overall appearance:


Onward!
Last edited:
Gorgeous Paul! I will sleep like a baby now! 

I know none of you have slept well in anticipation of the preliminary sanding of the aft cant frames... So here is a photo tour:
The overall appearance:
View attachment 376708
Onward!
You mean you’ve been sanding so much the midships section is no longer there and has turned to saw dust?

Stunning work Paul, truly impressive.
In truth I did sand off the tip of a finger - there are no fingerprints left so I can now pull off that big heist I've been contemplating...You mean you’ve been sanding so much the midships section is no longer there


