-

Win a Free Custom Engraved Brass Coin!!!
As a way to introduce our brass coins to the community, we will raffle off a free coin during the month of August. Follow link ABOVE for instructions for entering.
-

PRE-ORDER SHIPS IN SCALE TODAY!
The beloved Ships in Scale Magazine is back and charting a new course for 2026!
Discover new skills, new techniques, and new inspirations in every issue.
NOTE THAT OUR FIRST ISSUE WILL BE JAN/FEB 2026
You are using an out of date browser. It may not display this or other websites correctly.
You should upgrade or use an alternative browser.
You should upgrade or use an alternative browser.
Krick “Alert” U.S. Cutter, 1/25 scale
- Thread starter Pathfinder65
- Start date
- Watchers 23
-
- Tags
- krick u.s.cutter alert
Kreuzpollar/Cross Bollards:
Fourteen of these are required. I again used the mini belt sander to shape the tops and a couple of jigs to drill the holes for the brass inserts.
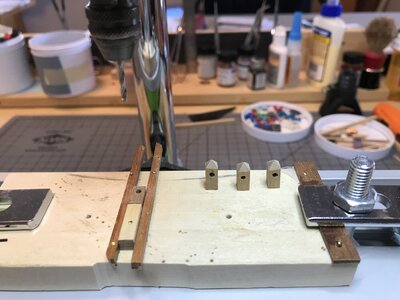
The Dremel tool and X-Y table helped immensely. Each piece required a pilot hole followed by 1.96mm final hole. When done the pieces looked like little birdhouses.
The next step was to drill the bottom of the pieces for the brass mounting pin.
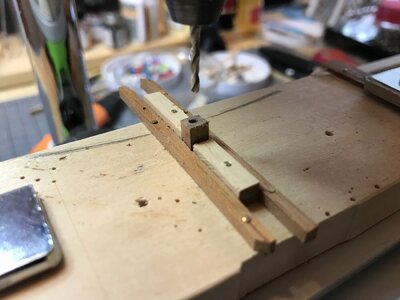
The process called for another little jig to hold the piece square to the Dremel drill. Once again the process was repeated fourteen times.
There probably is an easier way to have done this, but the process worked for me.
Jan
Fourteen of these are required. I again used the mini belt sander to shape the tops and a couple of jigs to drill the holes for the brass inserts.

The Dremel tool and X-Y table helped immensely. Each piece required a pilot hole followed by 1.96mm final hole. When done the pieces looked like little birdhouses.
The next step was to drill the bottom of the pieces for the brass mounting pin.

The process called for another little jig to hold the piece square to the Dremel drill. Once again the process was repeated fourteen times.
There probably is an easier way to have done this, but the process worked for me.
Jan
Hi Jan!
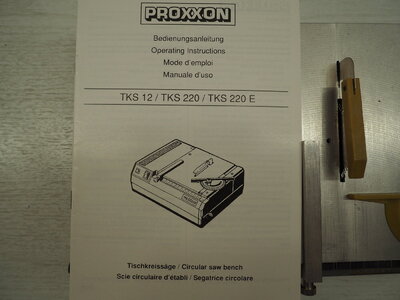
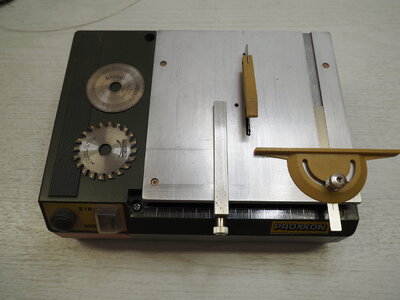
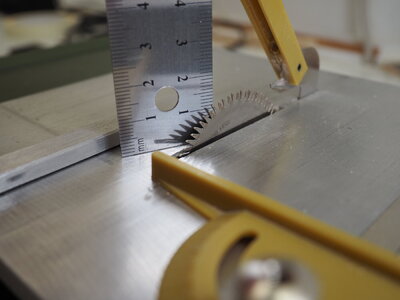
I have had this Little saw for 30 years without any problems. Of course, it does not have, like the high quality saws, no saw blade height adjustement and no inclination of the saw blade. The width scaling has to be adjusted with test cuts if it is to be accurate. For very short planks, less than 3 mm, a wood must be cut as a base, otherwisw these tiny pieces will be sucked down between the saw blade and the worktop.
I have known this machine for a long time and can deal with its shortcomings very well. For today's machine tester it will probably fail.
But - it is affordable and sufficient.
Best regards
Thomas
Last edited:
BRRRR:
Winter is coming, 16 degrees F this morning, snowblower just arrived from it’s tuneup, grass is white from Frost and last of outdoor Winter chores are done.
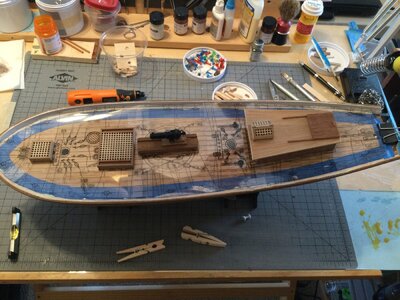
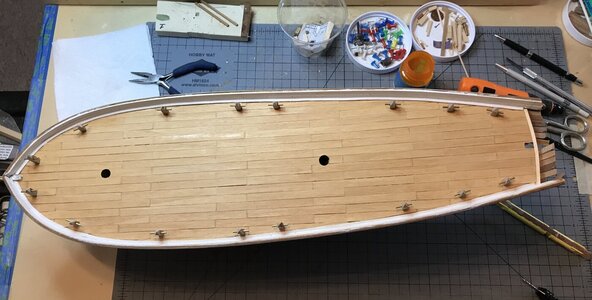
Sorry for the light reflection, I’m using my template to mark out all the deck apparatus locations. I think this is better method than trying to scale everything from the build plans.
Jan
Winter is coming, 16 degrees F this morning, snowblower just arrived from it’s tuneup, grass is white from Frost and last of outdoor Winter chores are done.

Sorry for the light reflection, I’m using my template to mark out all the deck apparatus locations. I think this is better method than trying to scale everything from the build plans.
Jan
Last edited:
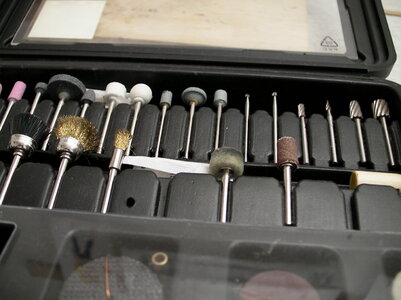
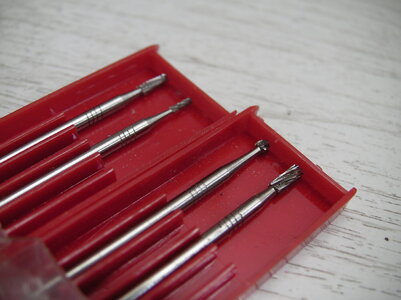
Dremel Tool for milling:
I've been trying to use my Dremel to mill some slots into four Kreuzpoller/Cross Bollards. But when I apply any pressure the milling bit tends to wander. Any suggestions????
Jan
I've been trying to use my Dremel to mill some slots into four Kreuzpoller/Cross Bollards. But when I apply any pressure the milling bit tends to wander. Any suggestions????
Jan
Hi Thomas,
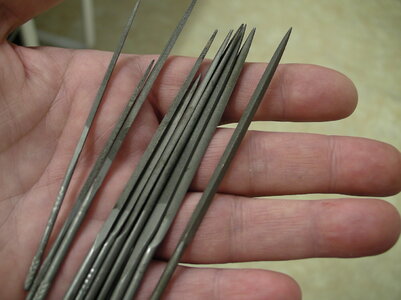
I gave my Dremel a try. Its mounted in a drill stand and I have an X-Y table attached to the stand. The piece I was trying to mill was fastened to the X-Y table.I checked the Dremel and thought it was all square to the work, but once the bit touched the piece to be milled and I applied pressure by cranking the table in, the milling bit moved off the line I was trying to work. Fortunately I was using a test piece trying to figure out this method. Your right though, my needle files are just the thing.
Jan
Hi Jan!
When milling, it is important how the motor rotates. In any case, the cutting edges of the milling cutter must go into the material. It is very important whether I go into the wood from the left or the right . Attempts to work against the cutting edges of the cutter will only result in squeezing the wood.
Also important: If the motor rotates clockwise (as usual), the workpiece is approached from the left to right, i.e. against the direction of rotation of the milling cutter.
With best regards
Thomas
Last edited:
Going back to the question of a small table saw a few months ago I purchased the Proxon FET for $319.17 + Shipping, and added a finer 80 tooth sawblade. It works well for basic ripping, crosscuts with angle guide and extension, as well as a tilting blade. The numerical adjustments are not that good and I get close before doing a test cut and then use the micro adjustment to refine it. From what I see the Byrns is much better for the control settings but is on the higher price side.Test fit of the Cross Bollards:
Couldn't resist test fitting these little pieces after working on them today.
View attachment 194031
The deck needs one more coat of paint and then the transom will be installed.
Jan
Outside of hand tools my only "shop" equipment in addition to the table saw are: Micro-Mark Microlux 81631 3-speed drill press (super value package) together with an X-Y table and mini drill press vise (with the package); Micro-Mark scroll saw value package with extra blades, also from them was a belt and disk sander, another hand tool is a Micro-Make Hi-Speed grinder with the required digital power transformer along with an accessory 3-jaw keyless chuck for 1/64 - 1/8 inch capacity.
All of those are pretty basic, not fancy or expensive tools for what I foresee I may be needing. Luxury additions would be the Byrns table saw and a "thicknesser" which in larger size would be a planner.
Happy shopping and crafting. Rich (PT-2)
Hi Rich,
Your shop/modeling tools sound like great additions and useful pieces to acquire. I’ve been taking notes on what, where and how different tools are bought, used and critiqued by members. There is a lot of diversity ranging from “good enough” to ”high quality precision”. Price seems to be the biggest factor for most. I’m still a “novice” builder and mostly bumble my way through the various stages, learning as I go. I’ve found that my full size shop tools, ie., band saw, 10” table saw, drill press and belt sander are great for 1:1 projects they aren’t much help working with 1:25 and smaller scales.
Jan
The choices are also partly made by a recognition of how much use related to the priority to model building and to our own useful life ahead. Some excellent equipment, while serving well, if not an affordable cost to benefit paid out over X years, has led me to pass those by and better use our old age resources where they are or may be needed. As you said, it is a very personal and individual set of choices. Rich (PT-2)Hi Rich,
Your shop/modeling tools sound like great additions and useful pieces to acquire. I’ve been taking notes on what, where and how different tools are bought, used and critiqued by members. There is a lot of diversity ranging from “good enough” to ”high quality precision”. Price seems to be the biggest factor for most. I’m still a “novice” builder and mostly bumble my way through the various stages, learning as I go. I’ve found that my full size shop tools, ie., band saw, 10” table saw, drill press and belt sander are great for 1:1 projects they aren’t much help working with 1:25 and smaller scales.
Jan
Hi Heinrich,You guys make me drool with all your talk about tools!
 , lot‘s of talk, but no acquisitions. I’m slowly developing the skills that I hope will help with my Duyfken build. I have to admit there are some great tools available but other than the little table saw I think I’m all set. At 78 years young I still enjoy the challenge of “hmm, how am I going to do this”.
Jan
Dumb Question:
@1:25 scale how long should the Belaying pins be?? The ones supplied in the kit are about 12mm, but seem short to me.
Jan
@1:25 scale how long should the Belaying pins be?? The ones supplied in the kit are about 12mm, but seem short to me.
Jan
Possibly the length is related to the thickness of the rail itself. A standard handle portion would accommodate a palm width plus ~3 inchers from the two real brass ones that I have which went through a 1/2" metal railing and are 6" lower part. For models you may want longer ones for placement of faux line loops. Rich (PT-2)Dumb Question:
@1:25 scale how long should the Belaying pins be?? The ones supplied in the kit are about 12mm, but seem short to me.
Jan
That answers that question.Possibly the length is related to the thickness of the rail itself. A standard handle portion would accommodate a palm width plus ~3 inchers from the two real brass ones that I have which went through a 1/2" metal railing and are 6" lower part. For models you may want longer ones for placement of faux line loops. Rich (PT-2)
Doing a rough calculation, I would guess that the scale pin would be between 12 1/2mm and 15mm. The ones in the kit measure about 13mm.
Jan


