Krick “Alert” U.S. Cutter, 1/25 scale

Altogether, it was not an unsatisfactory result, Jan! And, we so learn and make adjustments. The main things is that you tried something new and it certainly has potential. I wonder what would happen if you toss the blocks into a tumbler used for cleaning brass cases during the reloading process.
 
Altogether, it was not an unsatisfactory result, Jan! And, we so learn and make adjustments. The main things is that you tried something new and it certainly has potential. I wonder what would happen if you toss the blocks into a tumbler used for cleaning brass cases during the reloading process.
Hi Heinrich

I'm going try to make horizontal tumbler to see if my theory is worth following up.

Jan
 
Hi Heinrich,

The results of the spinning experiment.

View attachment 220057

It took a LOOOOOOONG time. I think together a better result I'll have to add some sort of sandpaper paddle inside the pill bottle. With the present set up the pieces were not tossed up against the sandpaper liner inside the pill bottle enough together a good finish. It was worth a try but now will be a project for later.

Jan

I've used those blocks, broke more than I made.
I used wood glue but still some came apart, like when tightening a rigging line.

They look cool, but I would prefer if they were already pre-built.

Just my 2cents.
 
I've used those blocks, broke more than I made.
I used wood glue but still some came apart, like when tightening a rigging line.

They look cool, but I would prefer if they were already pre-built.

Just my 2cents.
Hi Rowboat.

Just another experiment while learning new skill sets. Like you I much prefer using some of the finished blocks offered by other vendors.

Jan
 
The Masts Continued.

Managed to do some more work on the masts. I tried some of the different techniques suggested for shaping the masts and finally settled on using my drill press and two 3M sanding blocks. That method worked well for me.

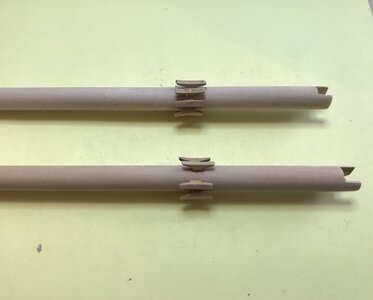
So today I've started on the various attachments to the masts. I needed to add six cleats to the Main mast and eight cleats to the Foremast. Interesting little job. The cleats were to be made up from two pieces (a top and bottom). With my usual dexterity I destroyed more than I completed. So it was off to find an alternative. A little bit of research on the net and I found one.


230B4D77-FEA7-4D74-8E39-D60807D661F9_1_201_a.jpeg

A much better looking product than my attempts. The deck of the Alert has quite a slant (rake??) so the cleats will (more or less, that's my plan) be parallel to the deck once the masts are placed (stepped?).

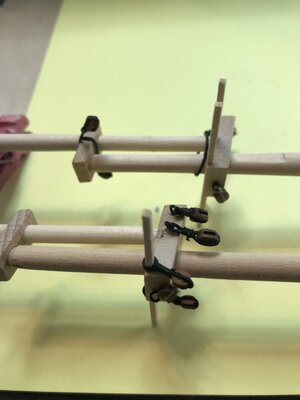
I've also started "Stropping" (Haven't learned all of the Sailor talk yet) the blocks and placing them in the proper spots on the masts. I'm not really satisfied with my effort so far, so it's more research as to how to do that properly and how with my eight thumbs and two fingers I can accomplish it. I'm trying to use the cordage that came with the kit and avoid the horrible twisted wire method from my first ever build.

5B2F85F8-D728-4569-B2AB-B0D392A4A773.jpeg

I've tried different methods of holding the blocks while trying to "whip" the ends to make and eye or attach one to an eyebolt. I've order a "third hand" gadget and hope that will help with this process. Blocks, cleats and other deck items are much more visible @1/25 scale. I've done a lot more "do overs" to avoid "the it looks good from here mentality".

Jan
 
Good work Jan! I am sure that the experienced men will offer sound advice if needed.
 
Double Post:

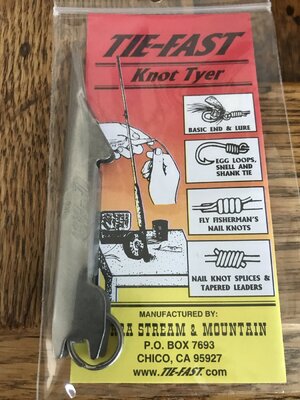
I saw this tool/jig posted on one of the other Forum threads. I ordered one just to see how it would work "Stropping" blocks. My efforts so far using other methods have been unsatisfactory and I'm in the process of re-doing all the blocks I've done to date.

1DB7E69A-76EA-4736-A2C4-1C4B70F8C4E9.jpeg3C3AA82A-503F-46B3-94F1-9AA506B38B61_1_201_a.jpeg

My first try using this gadget turned much better than I expected.

Jan
 
Very impressive Jan. It looks like a good tool to have.
 
Jan's little helper:

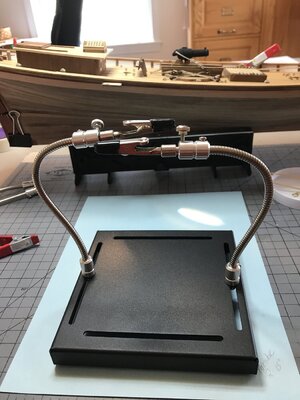
I'm sure that I have eight thumbs and only two fingers. So I went shopping and found this gadget.

72E67EC7-D471-4E5D-9662-DD03C0DE599B.jpeg

It comes with four arms the short ones shown and two more that are about 15 inches long. I found all sorts of variations but most of them had magnetic bases, etc. Magnets are a "no no" for me so I opted for this model.

My source was Banggood

Jan
 
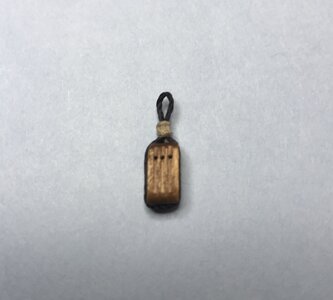
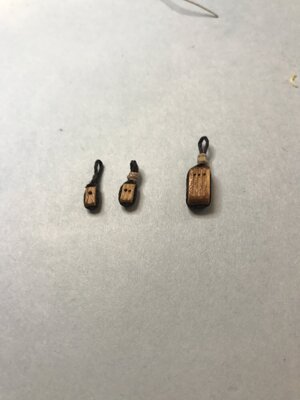
The results of my block stropping experiment.

9885D191-B3AB-45E9-ACF4-A5EA982487A7.jpeg

I used over size thread for both the block stropping and the whipping/ seizing to show what can be done with the tie-fast tool. Using smaller diameter thread looks a lot better.The 4mm block on the left has 1.0mm and 0.25mm thread, the 5mm block in the middle has 1.0mm and 0.5mm, while the 9mm block has 1.5mm and 0.75mm thread.

I did the 4mm and 5mm blocks the same-way as the 9mm block. It takes a bit of patience and a little pre-planning. I think the tool will work great for doing blocks as well as seizing shroud lines. There is a more detailed explanation of my bumbling attempt on the "A way of seizing" thread post #26.

Jan
 
Back
Top