I used the sycomore .5mm for the trim. 2 pieces on each side. 1 for the vertical & curve which I bent & the 2nd. for the horizontal. Due to the compound curves involved it's the only way I could make it work. Alot of fiddling & trimming to get it right. I also did the little piece in front of the walnut trim board.Looking good, and nice trim work on the front of the bulwark at the bow... the kit picture just shows the exposed edges of the boards, which I thought was kinda bad looking.
View attachment 419907
-

Win a Free Custom Engraved Brass Coin!!!
As a way to introduce our brass coins to the community, we will raffle off a free coin during the month of August. Follow link ABOVE for instructions for entering.
-

PRE-ORDER SHIPS IN SCALE TODAY!
The beloved Ships in Scale Magazine is back and charting a new course for 2026!
Discover new skills, new techniques, and new inspirations in every issue.
NOTE THAT OUR FIRST ISSUE WILL BE JAN/FEB 2026
You are using an out of date browser. It may not display this or other websites correctly.
You should upgrade or use an alternative browser.
You should upgrade or use an alternative browser.
La Candelaria - Occre Build log
- Thread starter Alan56
- Start date
- Watchers 21
-
- Tags
- la candelaria occre
I did the exact same thing on my HMS Beagle.This morning I discovered my first big mistake & it's because I did not pay close enough attention to the instructions. It is correctable for the most part but it will still be noticeable.
Looking at the deck planking you will see where the deck attaches to the the bulkheads. Well, you should not be able to see the bulkhead tabs. Yup, I went & trimmed out the 12 notches on the deck & now I need to patch those notches. I can do it but it will be noticeable.
Looking at the photo you'll see I have a walnut trim piece attached which is meant to be there at a latter stage. That will cover the majority of my blunder.
So, how will I attack this boo boo? Here's my plan & if anyone has a better solution please chime in.
#1: Stain & seal the mortar deck before attaching the main deck. I originally intended to stain & seal the main deck before installation.
#2: Install the main deck.
#3: Patch 12 bulkhead tabs(notches) with deck planking. The wood grain will not match.
#4: Apply vertical planks to bulkhead that meets main deck at stern.
#5: Stain & seal main deck.
I'm not discouraged at all but I hate messing up. Thanks.........Al.View attachment 397728
the main difference between hot water and steam is the much higher temperature in steam- about 200º c, which destroys some of the bonds in your wood. you can then use Your jigThanks for the tip. I layed the planks in very hot water for about an hour then using a pin board I constructed I placed the plank between the pins & using a clothes iron pressed the plank into shape. I repeated this process until the plank was close to the shape of the bulwark. Post#49 shows the pin board.
An update on the La Candelaria includes attaching trim to the front of the keel & the door on the forecastle deck.
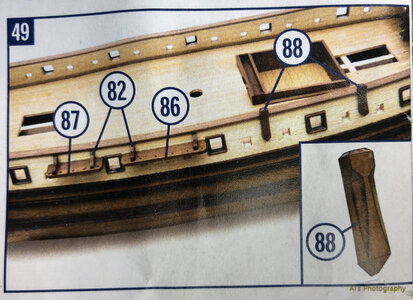
2nd. photo shows the Simson post that needs to be carved & trimmed. I've been spending the last couple weeks doing some of this small detail work.
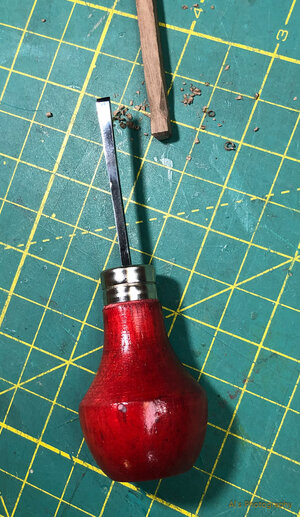
3rd. photo shows the chisel I used to carve out the post. I made several jigs to assist in this fine detail work & if anyone is interested I'll post photos of them.
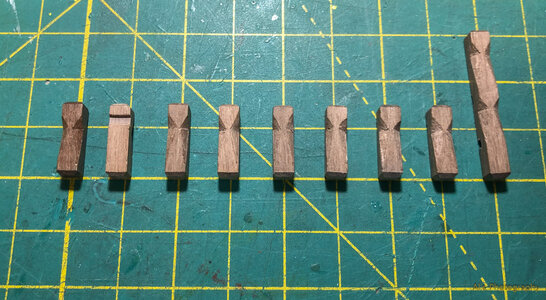
4th. photo shows the 8 completed posts. 1st. post at left is finished. 2nd. post is upside down showing the notch that fits into the top trim on the bulwark. I did not bevel the bottoms as shown in the directions. The post to the right is a double post & I need to make one more.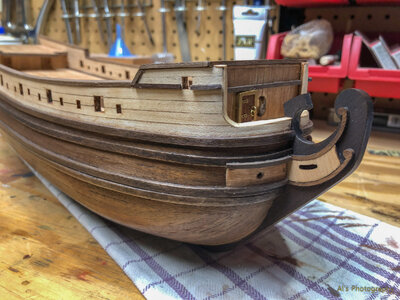


- Joined
- Jun 17, 2021
- Messages
- 3,199
- Points
- 588

Isn' that "Sampson-post"?
You could be right. Occre's instructions call it "Samson post".Isn' that "Sampson-post"?
- Joined
- Jun 17, 2021
- Messages
- 3,199
- Points
- 588

I just looked it up. Samson, no"p". Looks like basically a bollard with a pin through it at a right angle to prevent a lone from slipping over the end, where tugging or towing is required. I guess the notches serve the same purpose.
Absolutely a well-built Hull. It is really beautiful to look at - el capiAn update on the La Candelaria includes attaching trim to the front of the keel & the door on the forecastle deck.
2nd. photo shows the Simson post that needs to be carved & trimmed. I've been spending the last couple weeks doing some of this small detail work.
3rd. photo shows the chisel I used to carve out the post. I made several jigs to assist in this fine detail work & if anyone is interested I'll post photos of them.
4th. photo shows the 8 completed posts. 1st. post at left is finished. 2nd. post is upside down showing the notch that fits into the top trim on the bulwark. I did not bevel the bottoms as shown in the directions. The post to the right is a double post & I need to make one more.View attachment 423987View attachment 423989View attachment 423994View attachment 423995
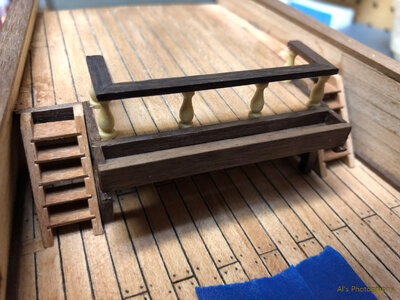
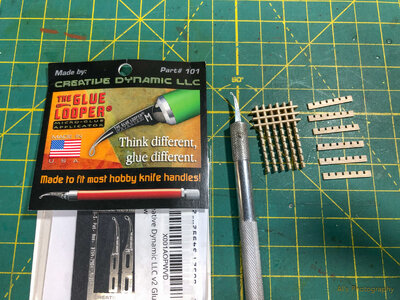
It is a fantastic build- makes me jealous - but at my time there were not that many new and EXPENSIVE TOOLS- I was always an amateur still, but anyway a lot of fun with more than 30 models builtThe last few days I got the stairs to the quarter deck installed along with the fire bucket box & Q.D. railing.
I'm currently working on the grating. I picked up the Glue Looper a while back & it's really handy for placing tiny amounts of CA glue in the notches of the grating.View attachment 425317View attachment 425318
Good afternoon Alan. I love what you have done so far. Awesome. Cheers GrantThe last few days I got the stairs to the quarter deck installed along with the fire bucket box & Q.D. railing.
I'm currently working on the grating. I picked up the Glue Looper a while back & it's really handy for placing tiny amounts of CA glue in the notches of the grating.View attachment 425317View attachment 425318
Thanks. Your not that far behind, your just taking a differant approach. I haven't even looked at the canons yet & I really like your port frames.Coming along awesome! I wish I had more time to keep up.
Looking great so far! 


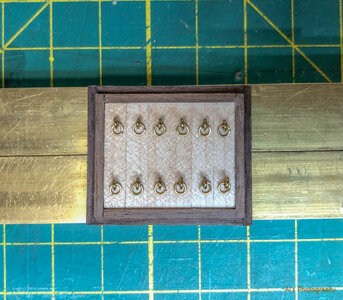
Looking great so far! : YES IT IS A HACH, USED WHEN BIGGER PARTS AS BARRILS WITH FOOD AND RUM HAS TO BE STORED BELOW DECKI've been working on this part but I do not know the correct name for it. Possibly a hatch cover?
I have it assembled & the holes for the rings are drilled. Blue tape helped me in aligning the holes for drilling.View attachment 426439View attachment 426441
Thanks El Capi, I kind of figured as much but being a first time ship builder I'm not that familiar with the names of some of the parts. Occre's instructions doesn't say what each individual parts are ether.Looking great so far! : YES IT IS A HACH, USED WHEN BIGGER PARTS AS BARRILS WITH FOOD AND RUM HAS TO BE STORED BELOW DECK
no problem. I have a few pages wih the technical words. if in doubt, just ask.Thanks El Capi, I kind of figured as much but being a first time ship builder I'm not that familiar with the names of some of the parts. Occre's instructions doesn't say what each individual parts are ether.


