-

Win a Free Custom Engraved Brass Coin!!!
As a way to introduce our brass coins to the community, we will raffle off a free coin during the month of August. Follow link ABOVE for instructions for entering.
-

PRE-ORDER SHIPS IN SCALE TODAY!
The beloved Ships in Scale Magazine is back and charting a new course for 2026!
Discover new skills, new techniques, and new inspirations in every issue.
NOTE THAT OUR FIRST ISSUE WILL BE JAN/FEB 2026
You are using an out of date browser. It may not display this or other websites correctly.
You should upgrade or use an alternative browser.
You should upgrade or use an alternative browser.
I was several days sick with a cold, so no real activities. Today I tried first time my new sander with fairing one frame.
I was in beginning afraid, that the sander is going to fast so that I have to be very carefully with the frame.
But it goes slowly so it is possible to sand the frame down very exactly......step by step ...... it is going very good.
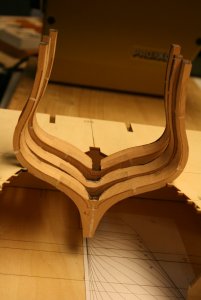
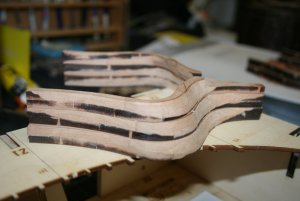
First photos showing only one side done. Using a grid 100
View attachment 37289View attachment 37290
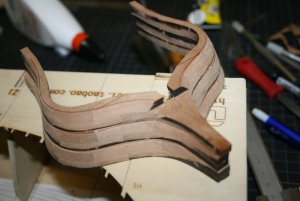
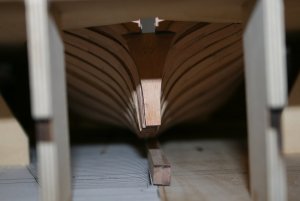
I left a little bit meat, so I can adjust the frames when I install them on the keel and into the jig
View attachment 37291
View attachment 37292
I am happy with the result, getting a very smooth surface. Also now I can see, that it was good to keep the connecting joints between the futtocks of one frame as small as possible. Sanded you can see every small unperfect connections.......so today I am happy
Good evening Uwek, waw with this sandermachiene, sanding the frames is much easier, how many of these do you have to do for your Salamandre?
Greetings
DJ
Good evening Uwek, waw with this sandermachiene, sanding the frames is much easier, how many of these do you have to do for your Salamandre?
Greetings
DJ
Hallo DJ,
many thanks for your interest....
All together there are 44 frames / ribs to install, but not all of them have to be sanded and faired.
The showed frame is one of the frames very close to the stern, so much more fairing works necessary. The frames in the center part of the hull even need no fairing, means only some smaller sanding in order to remove the laser char, mean more "cleaning"....
So I think there will be appr. 25 frames which needs fairing to get the correct shape
A Little Bit a frustrating evening. I am at the same stage like ADC, but my parts of the keel and stem are not so good fitting to each other. So a lot of small cutting, sanding, chiseling etc......but there is still a long way to go. Also the thickness of the elements are not equal, like ADC mentioned already in his topic, so this is also not making the task easier. And at the end I hit my finger with a chisel.......
But I guess this is also part of our hobby.......tomorrow will be a better day......and still it makes fun
But I guess this is also part of our hobby.......tomorrow will be a better day......and still it makes fun
A Little Bit a frustrating evening. I am at the same stage like ADC, but my parts of the keel and stem are not so good fitting to each other. So a lot of small cutting, sanding, chiseling etc......but there is still a long way to go. Also the thickness of the elements are not equal, like ADC mentioned already in his topic, so this is also not making the task easier. And at the end I hit my finger with a chisel.......
But I guess this is also part of our hobby.......tomorrow will be a better day......and still it makes fun
good morning uwek, yes you are 100% right, sometimes you have those days that nothing succeeds, but the next day it runs like a train, that is indeed the beauty of our hobby
greetings from Oostende
dj
Hi Uwek, I found that the stem piece connecting to the first part of the keel quite tricky. Eventually it all worked out well. Overcoming these little challenges is a rewarding aspect of the hobby. I cut my thumb also when building the stem and beakhead. Is your finger OK?
Thanks to DJ and ADC for your kind words.....today there will be no real modeling, but tomorrow I will restart the attempts with the stem pieces, and in-house that I can show the results asap.
The finger is ok, no big problems....the biggest problem was yesterday, that I do not like blood on my wooden parts of the model. It is destroying the appearance......
So I learned also something yesterday...... I have to store some plaster or first aid things in the hobby room, so I can proceed with work......
- Joined
- Oct 24, 2017
- Messages
- 23
- Points
- 48

Congratulations! What a difficult job to sanding, but I'm sure that in the end it will be a work of art. 


On Friday I received after some waiting time the spare parts of the building jig by Max, so now the real work can start
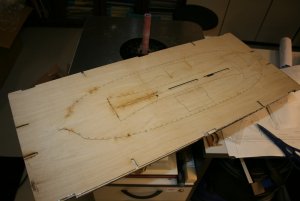
Before I put the different elements together I glued on the baseplate the ancre drawing on the correct place.
In addition I added with some pencil lines the locations of the frames and the main axis / center line
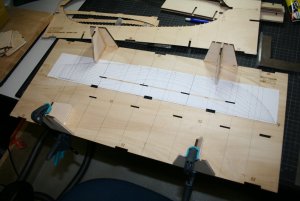
Due to the fact, that it is important, that the second level board is exactly over the base, means that the center line of the second boord is vertical matching the center line of the base, I used a small perpendicular on both ends
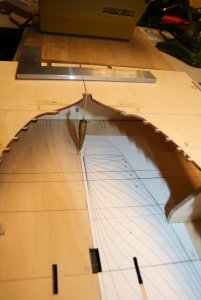
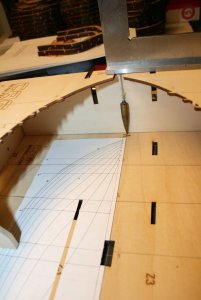

Before I put the different elements together I glued on the baseplate the ancre drawing on the correct place.
In addition I added with some pencil lines the locations of the frames and the main axis / center line

Due to the fact, that it is important, that the second level board is exactly over the base, means that the center line of the second boord is vertical matching the center line of the base, I used a small perpendicular on both ends


Yes. It is a very good help also later on during construction of the interior, or even during installation of the frames ...... i am using this small plumb very oftenGood idea with the plumb line Uwek. Will use it also when time to fit the parts.
Some report of the progress......Due to the fact, that my family is on a short trip, and this without me, I was able to proceed with intensive sanding and fairing the frames.......now only 9 frames are left, which I hope to finalize tomorrow evening.
I have one correction to my answer to DJ in post 123. Only 7 frames have no need for fairing, but off course char cleaning and small corrections of the imperfect glueing etc. (these frames can be identified in the next photos, they are slightly darker)
In addition I have to say, that the laser marks on each element are very accurate and also the final fitting into the jig is very good.....so one compliment to the producer / supplier CAF
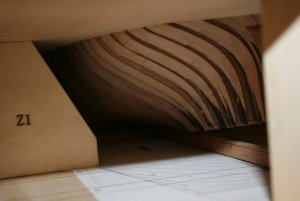
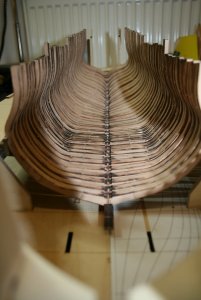
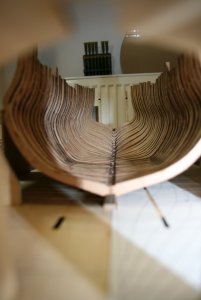
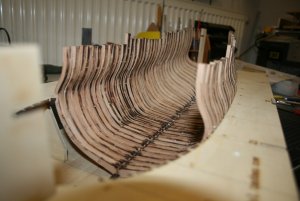
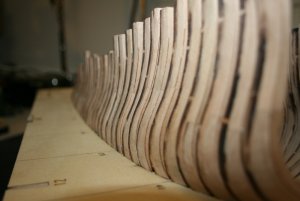
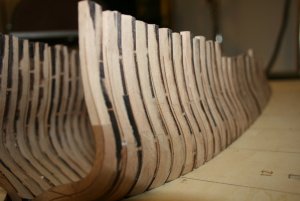
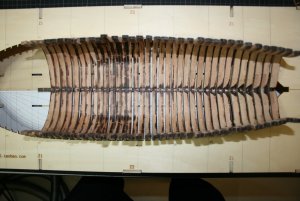
Here you can see frames 10 to 44 arranged in the jig, laying on the keel, but not glued, so the first dry fit
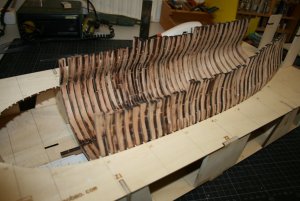


After the preliminary sanding of all the frames with the spindle sander I want to show you today the necessary cleaning of the sanding drum
After sanding the frames the drum looks usually like this.
The problem is, that the abrasive quality is getting less and less, so some cleaning is necessary.
Cleaning is prolonging the lifetime of the sanding sleeves.
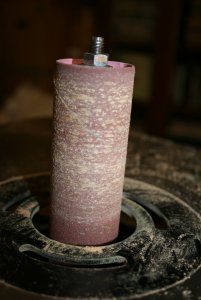
Available are abrasive cleaners, which I regularly use. You can see on the photo the use of such a cleaner during turning the spindle
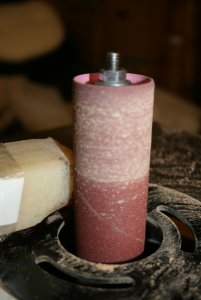
This is the drum after using the cleaner.
the saw dust is gone, but still there are areas where rest of the wood-glue are picking on the sandpaper
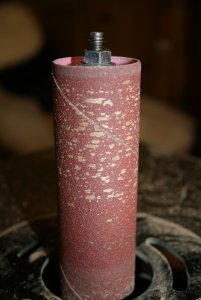
These rests of glue have to be removed. For this I am using a grill cleaning brush with steel bristles
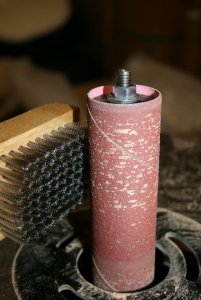
This is the final result of cleaning the sleeve.....ready for the next sanding
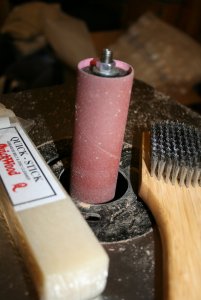
After sanding the frames the drum looks usually like this.
The problem is, that the abrasive quality is getting less and less, so some cleaning is necessary.
Cleaning is prolonging the lifetime of the sanding sleeves.

Available are abrasive cleaners, which I regularly use. You can see on the photo the use of such a cleaner during turning the spindle

This is the drum after using the cleaner.
the saw dust is gone, but still there are areas where rest of the wood-glue are picking on the sandpaper

These rests of glue have to be removed. For this I am using a grill cleaning brush with steel bristles

This is the final result of cleaning the sleeve.....ready for the next sanding

In the tools section Pathfinder65 asked this:
Good question......I have to say that it is to 95 % not reducing the grit.
The abrasive cleaner definitely not, and the steel brush I use with switched off sander.
The using of the steel brush II do only to get rid off the glue rests on the sleeve! Not in general!
The sleeve installed on the drum shown on the photo represent the status after sanding appr. 40 frames and is still working, not like new, but it is working ok.
The main problem are the sticker rest of glue.....with them on the surface no real good sanding is possible, due to the fact, that the wood is sliding over it, without any grit at this area.
Hi Uwe,
Does the cleaning process remove the “grit” of the sanding drum and lessen it’s effect?
Good question......I have to say that it is to 95 % not reducing the grit.
The abrasive cleaner definitely not, and the steel brush I use with switched off sander.
The using of the steel brush II do only to get rid off the glue rests on the sleeve! Not in general!
The sleeve installed on the drum shown on the photo represent the status after sanding appr. 40 frames and is still working, not like new, but it is working ok.
The main problem are the sticker rest of glue.....with them on the surface no real good sanding is possible, due to the fact, that the wood is sliding over it, without any grit at this area.
In the tools section Pathfinder65 asked this:
Good question......I have to say that it is to 95 % not reducing the grit.
The abrasive cleaner definitely not, and the steel brush I use with switched off sander.
The using of the steel brush II do only to get rid off the glue rests on the sleeve! Not in general!
The sleeve installed on the drum shown on the photo represent the status after sanding appr. 40 frames and is still working, not like new, but it is working ok.
The main problem are the sticker rest of glue.....with them on the surface no real good sanding is possible, due to the fact, that the wood is sliding over it, without any grit at this area.
Hi Uwe,
I haven't done the amount of sanding your doing but I found that I could clean my sanding pads of glue residue with a damp rag soaked in very hot water. I use the rag sparingly wiping in the same direction and don't press hard enough to wet the sandpaper. Might this work for you?
Hi Uwe,
I haven't done the amount of sanding your doing but I found that I could clean my sanding pads of glue residue with a damp rag soaked in very hot water. I use the rag sparingly wiping in the same direction and don't press hard enough to wet the sandpaper. Might this work for you?
I will give it a try . Many Thanks for the hint.....
Working with the spindle sander I realized one additional point, which could / should be a reason for buying a specific spindle sander.
When I sanded the frames which are very close to the bow the width of the frames is getting smaller (this is clear)
and in addition the angle of the fairing is getting bigger.
See the situation on the photo
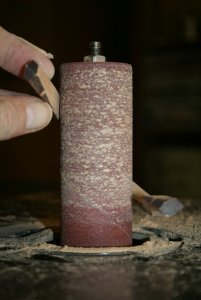
First of all it is important that the other inner side of the frame (on the photo on the right) is not touching the spindle, otherwise you get some not wanted sanding marks.
If you want to use the spindle sander for such frames it is very important, that the spindle is long enough.
Mine is 15 cm, but there are spindle sanders on the market with only 11 cm, so the inner sides of some frames can not be sanded with a short spindle.
Also important is the availability of spindles with small diameter, in order to sand also small curves of the inner sides of frames.
When I sanded the frames which are very close to the bow the width of the frames is getting smaller (this is clear)
and in addition the angle of the fairing is getting bigger.
See the situation on the photo

First of all it is important that the other inner side of the frame (on the photo on the right) is not touching the spindle, otherwise you get some not wanted sanding marks.
If you want to use the spindle sander for such frames it is very important, that the spindle is long enough.
Mine is 15 cm, but there are spindle sanders on the market with only 11 cm, so the inner sides of some frames can not be sanded with a short spindle.
Also important is the availability of spindles with small diameter, in order to sand also small curves of the inner sides of frames.
Good idea with the plumb line Uwek. Will use it also when time to fit the parts.
I have to agree with ADC.
That's s very good and functional idea mate.
The forms looks brilliant.Havagooday mate
Greg


