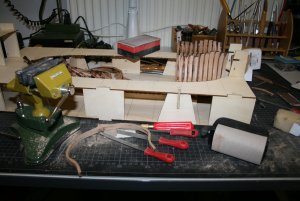
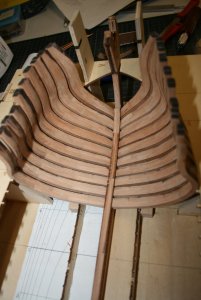
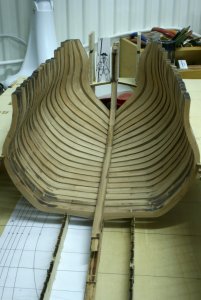
LA SALAMANDRE, bomb ketch - POF - (CAF-models, 1/48)

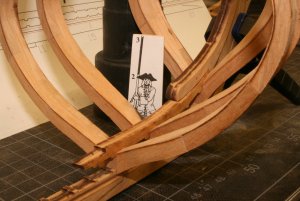
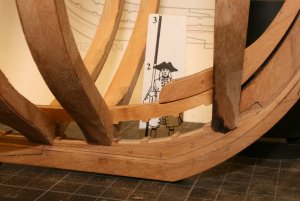
With the keel and stem prepared I started to dryfit the first frames. Herefore I have to sand the floor timbers in the contact area to the keel

IMG_1841.JPG

and the first fitting of the frames directly on the keel

IMG_1836.JPG

there is still a lot of detailed sanding necessary, so that the outside of the frames will correlate with the rabbet

IMG_1839.JPG IMG_1840.JPG
 
One more info

When the frames are correctly on top of the keel and I move them all to one side, I can recognize a gap of appr. 2mm between the frame to the jig.
This gap to the jig of 2mm I have at every frame! see herefore the attached photo.

IMG_1837.JPG

Means when I install them later permanently on the keel there will be on both sides 1mm to the jig.........this info related to the ADC built who has a close contact to the jig, due to the fact, that his frames are slightly wider than mine.......we will see :cool:
 
When the frames are correctly on top of the keel and I move them all to one side, I can recognize a gap of appr. 2mm between the frame to the jig.
This gap to the jig of 2mm.......


G'day Uwe
Is it possible to put some packing under the top sheet of the cradle, so that all the frames will be tight when you dry fit, so there's no problem when you add glue.
This would be a great time to use the chair doctor glue.
If you don't know what it is , press HERE to see my post about it.
19366-1b1653cc46d4de548ec7aced4f2a6f4f.jpg
I used the chair doctor glue today, and it works splendid.
Just a thought about the gradle and glue mate.
Happymodeling
Greg
 
Some more progress on the Salamandre.
I made the sanding of the scores on the upper side of the floor timbers of the first frames.

IMG_1852.JPG

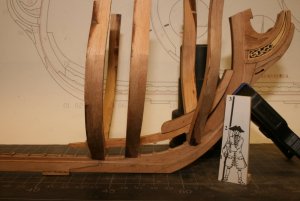
and also prepared the parts 8 and 22 of the futtock. It is important, that the complete arrangement of the keel, frames and futtock will fit together. This I do outside the jig, for me it is better so I can adjust and check every element and the fitting together after every sanding.
With these photos I think it is visible how the elements are working together. Here only frames 1, 5 and 7 are on the frame.

IMG_1857.JPG IMG_1860.JPG

IMG_1859.JPG

There ist still some fine work necessary, that everything is fitting.......the task for this evening.....
 
(click on the photos to expand the size)

Yesterday evening I prepared the other parts of the keelson, gluing the two half together.....
due to the fact I had to wait for the hardening of the glue,
I started with another important part of the vessel and rather complicate construction of the model.

These are the hawse pieces which have to fit between the stem and the frame No.1

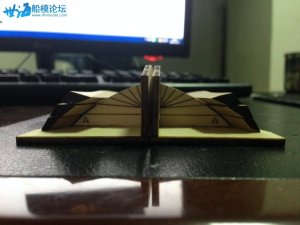
Once it should look like this (next 2 photos borrowed from another chinese building log)
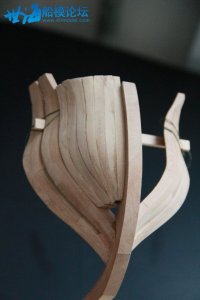
45.jpg

And this is a view during the preparation of the pieces.
Take a close look to the jig -> these laser marks like shafts of sunlight are missing on my jigs :eek:
IMG_0526.jpg

Searching in the web, there are some different ways how other modelers executed these hawse pieces,
and it also seems, that the supplier revised this part of the kit several times......

f.e. here are the pieces completely parallel and not tapered (also borrowed from different chinese logs)
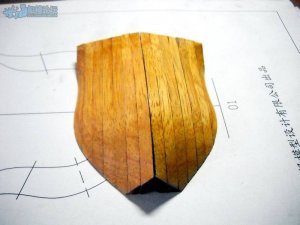
DSCN2862.jpg IMG_1125.jpg
but this seems to be the actual version of the kit


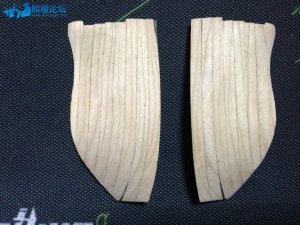
Due to the fact, that I have to check more in detail the CAF- and also Boudriot- drawings, so I only prepared the two small jigs, which are included in the jig and preliminary prepared the timber parts / pieces.

On every side we have seven hawse pieces
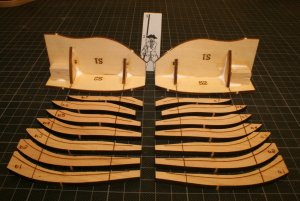
IMG_1877.JPG

Here you can see one step of thinking..... "how it is planned to put them together?"....."Ok" ..... "could be, but ....."
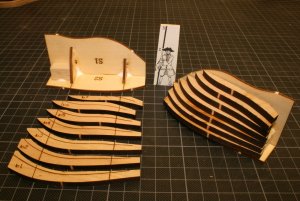
IMG_1878.JPG

Due to the fact, that this will be a very important step, and not to make a mistake, with loosing all of the kit-timbers with wrong sanding activities, ...... more thinking and research is necessary
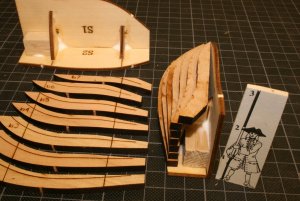
IMG_1879.JPG

Only to explain to you my friends, I want to show you, what the instructions are saying
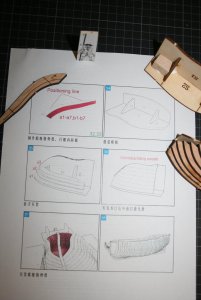
IMG_1880.JPG
"Yeees......and?"

to be continued ......
 
Hi Uwe,

That part of the build looks like a lot of compound curves. Is there a "jig" that will aid in laying out that shape?

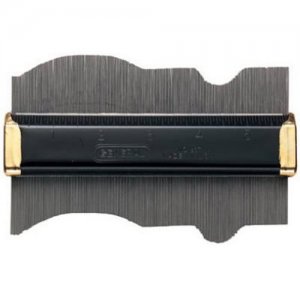
I've used this tool quite a bit on wood working projects. Is there anything similar for model ship builders??

4113TW3kSIL.jpg
 
Hi Uwe,

That part of the build looks like a lot of compound curves. Is there a "jig" that will aid in laying out that shape?

I've used this tool quite a bit on wood working projects. Is there anything similar for model ship builders??

View attachment 39186

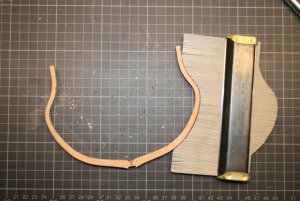
Yes, we are using the same or similar tools....somewhere I have it and used it f.e. to compare the bulkheads or hull planking of each sides of the ship.
I will search in evening for mine....
 
Hi Uwe,

That part of the build looks like a lot of compound curves. Is there a "jig" that will aid in laying out that shape?

I've used this tool quite a bit on wood working projects. Is there anything similar for model ship builders??

View attachment 39186

You can see, that the version for the ship modeler is very similar........ correctly I am using the identical one
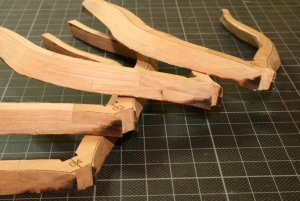
IMG_1923.JPG

I arranged this photo, that other friends, which do not know this small tool can recognize,
how to use it and in which situations of modeling it can be helpfull
 
Hi Uwe,

I am missing your small soldier in this photo .
Very handy tool while shaping the ps an sb side. Use it a lot. It popped into my mind to use it for positioning whales copy sb to ps and vice versa. I haven't done that yet, you mentioned you use it for planking but did you use it also for positioning the whales?

Maarten

Until now I did not use it for the positioning of whales, I mentioned planking in my post....I used it for the first planking and the sanding after putting some filler.
For installation, or better marking of the location of the whales I would use a waterline marker, which is more precise ( I guess ). Maybe possible to use it secondary to counter check the first measurement.
 
@Maarten
What I forgot......the soldier had yesterday his free time / holiday.... he needed one day off, due to too much sanding dust....
BTW: it is a French shipwright, not a soldier. This or similar figurines are on every drawing of Jean Boudriot monographies. Every time in the scale of the drawing. In hand he hold usually a measure-stick ( Maßstab)
 
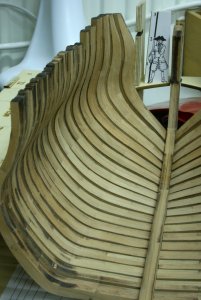
Once more I worked some hours on the frames and the keelson........but I do not see realy the progress or improvement.
Maybe this feeling is coming up, because in moment I do not permanently glue, but still make dry-fitting, sanding a little bit here and there.....
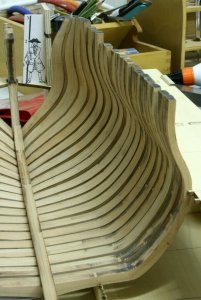
IMG_1962.JPG IMG_1964.JPG

BTW: Today I reached in total the first hundred working hours with the kit, just to get a feeling how long it takes.........let us see

To be continued........
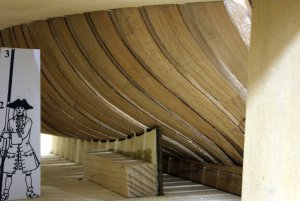
 
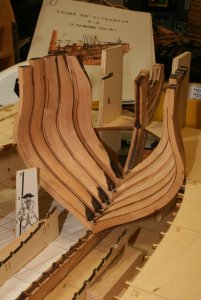
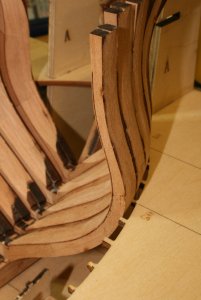
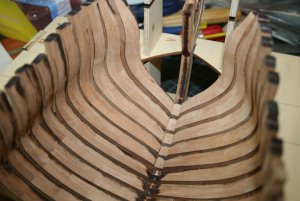
Some more frames are prepared to fit on top of the keel and all notches, that the keelson elements are also fitting. Everything still dryfit.
I decided, that I have to prepare and sand all the outside and inside areas of the frames close to keel and keelson, means all the laser char have to be removed and the frames have to get more or less the final form. I guess later on, when the parts are glued together, it will be much more complicate to sand the frameclose to the keelson. So a better preparation is necessary and this takes some time (and brings some dust).

IMG_20831.jpg

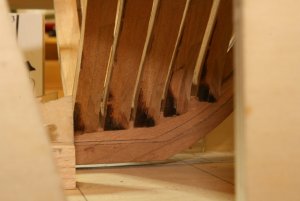
A closer look

IMG_20841.jpg IMG_20861.jpg

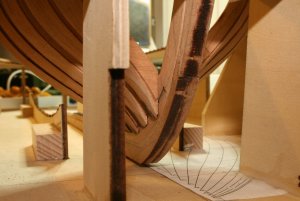
I like this view from the level of the keel, on the right hand side frame No.1, following in direction to left the other frames

IMG_20871.jpg

To be continued........
 
Great work Uwek, I have been travelling and very distracted lately and not doing much work or following the forum. A family wedding, started new part time work and ordered a new car. I like your jig idea for setting out the planks. I have to consider doing something similar. I have nearly finished fine sanding to the ribs and ready to do final dry fitting to the keel. Though not doing a detailed log like you I estimate about the same amount of hours. There is much time just thinking and examining and one must always think several moves ahead before doing any actual work. I find several hours pass very quickly with not much done and I even forget to eat lunch because I get so involved.
 
Last edited:
Great work Uwek, I have been travelling and very distracted lately and not doing much work or following the forum. A family wedding, started new part time work and ordered a new car. I like your jig idea for setting out the planks. I have to consider doing something similar. I have nearly finished fine sanding to the ribs and ready to do final dry fitting to the keel. Though not doing a detailed log like you I estimate about the same amount of hours. There is much time just thinking and examining and one must always think several moves ahead before doing any actual work. I find several hours pass very quickly with not much done and I even forget to eat lunch because I get so involved.

Thanks for your reply.....it is every time good to get your feedback and to compare a little bit our work and experience with this model.
Also if there is not so much progress it is for me and a lot of other members very interesting to see. So when ever your time makes it possible Post in your or in my log.
Related to the work: I fully agree with you, that there is a lot of testing, thinking, examining necessary. But this I like very much with these kind of kits -> somehow you feel like a scratch model shipwright.....and I enjoy this very much. Keep care and „see“ you soon 8-)
 
Uwe ,those frames are looking awesome,but I am aware that this process is really time consuming.
Zoltan

Many thanks for your reply......
I am realy happy by myself, how good the frames are looking. Especially on a close look like in the last photo, I think, that it is certified the detailed work during preparation of the separate frame elements like the futtocks etc. . The joints are very small.
Due to the fact, that i plan not to plank the complete hull, one side will be open to see the interior, the frames will be partly visible..... the time will show..... and about the rigging we have to stay in contact ;)
 
Back
Top