-

Win a Free Custom Engraved Brass Coin!!!
As a way to introduce our brass coins to the community, we will raffle off a free coin during the month of August. Follow link ABOVE for instructions for entering.
-

PRE-ORDER SHIPS IN SCALE TODAY!
The beloved Ships in Scale Magazine is back and charting a new course for 2026!
Discover new skills, new techniques, and new inspirations in every issue.
NOTE THAT OUR FIRST ISSUE WILL BE JAN/FEB 2026
- Home
- Forums
- Ships of Scale Group Builds and Projects
- Le Coureur 1776 1:48 PoF Group Build
- Le Coureur 1776 1:48 Group Build Logs
You are using an out of date browser. It may not display this or other websites correctly.
You should upgrade or use an alternative browser.
You should upgrade or use an alternative browser.
LE COUREUR - french Lugger 1776 - POF kit from CAF in 1:48 by Uwe
- Joined
- Mar 19, 2020
- Messages
- 206
- Points
- 213

How long did you soak the planks for Uwe?Yesterday I had one hour free time, so I was able to start with the other side of the inner planking
I make it the same way and order like the first side - starting with the plank close to the keelson
View attachment 193478
The last group it was one day, but this is much too long - because of shrinkage because of drying I have now partly some small gaps between the planks - so I guess one or only some hours only would be betterHow long did you soak the planks for Uwe?
Ach Ja -> and the strips are not getting softer with much more hours in waterThe last group it was one day, but this is much too long - because of shrinkage because of drying I have now partly some small gaps between the planks - so I guess one or only some hours only would be better
Something different from the daily planking....
Yesterday I was taking a first look at the next possible working steps - maybe the outside planking or going further with the inside structure?
Let us take a first view on the bulkheads
This is the manual description
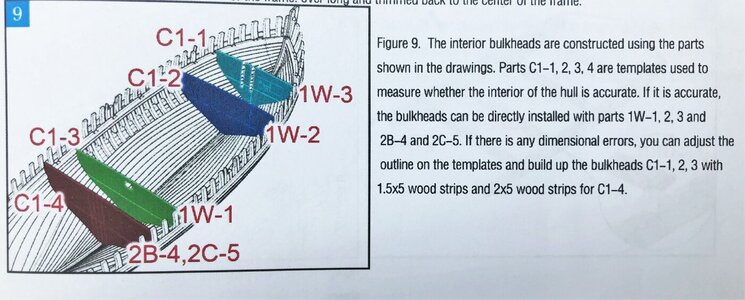
The parts on wooden sheet C1 are only templates in order to get the correct outer shape, so that the final bulkhead will fit smoothly into the hull
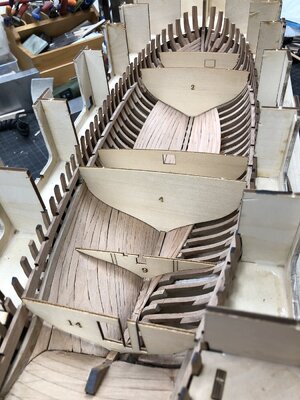
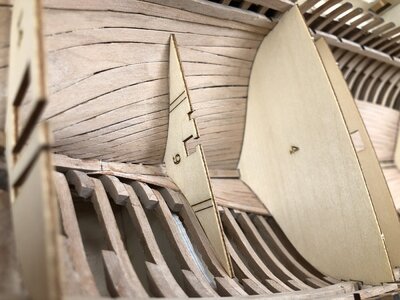
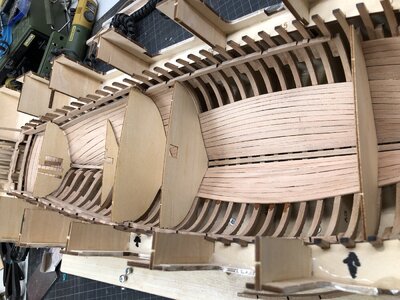
Good to know, how this will work
Step by step I am coming to the situation, that I have to decide, which areas will be covered (internal planking, external planking and deck planking) or uncovered, in order to see the interior structure.
The advantage of the bigger spacing between the frames will produce a good side view inside, so I think I will not completely plank the outside later on, maybe one half of the hull, or main parts of one side will be unplanked ..... let us see. So maybe I start with the interior first to get a good impression before I make the hull planking.....
Yesterday I was taking a first look at the next possible working steps - maybe the outside planking or going further with the inside structure?
Let us take a first view on the bulkheads
This is the manual description

The parts on wooden sheet C1 are only templates in order to get the correct outer shape, so that the final bulkhead will fit smoothly into the hull


Good to know, how this will work
Step by step I am coming to the situation, that I have to decide, which areas will be covered (internal planking, external planking and deck planking) or uncovered, in order to see the interior structure.
The advantage of the bigger spacing between the frames will produce a good side view inside, so I think I will not completely plank the outside later on, maybe one half of the hull, or main parts of one side will be unplanked ..... let us see. So maybe I start with the interior first to get a good impression before I make the hull planking.....
Last edited:
Very nice work Uwe, you are overtaking your Salemandre.
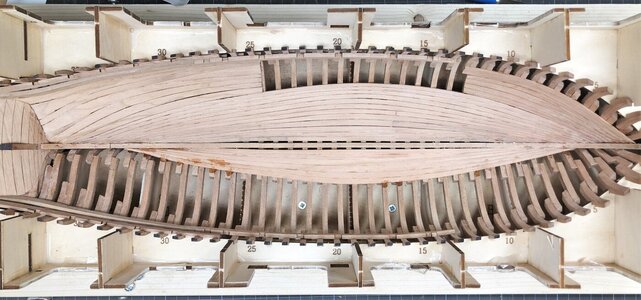
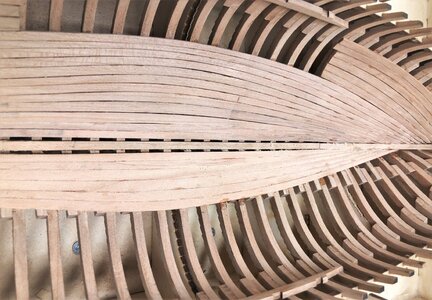
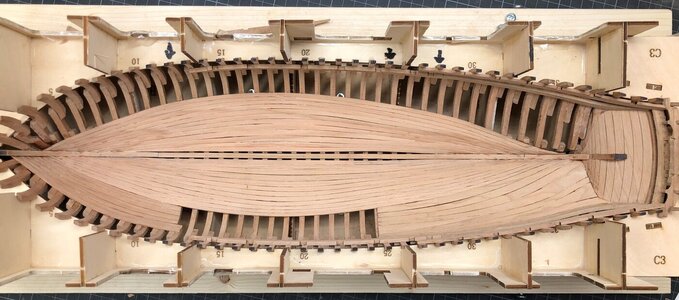
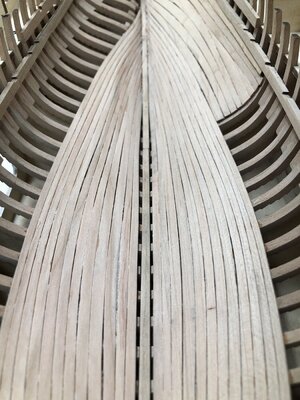
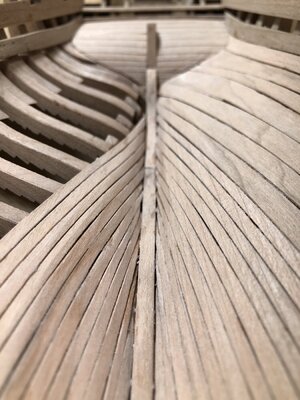
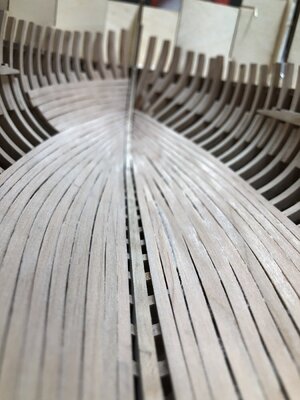
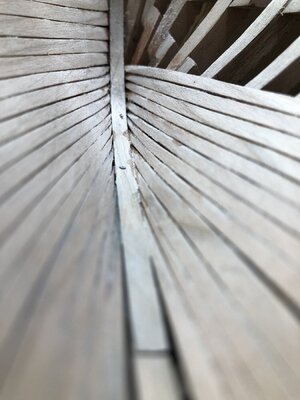
Yesterday I installed the last planks of sheet 1P and now I can really show the difference in the result.How long did you soak the planks for Uwe?
So with this photos I want to warn and advise everybody not to soak the planks too long in water
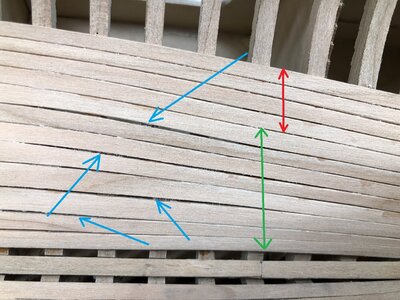
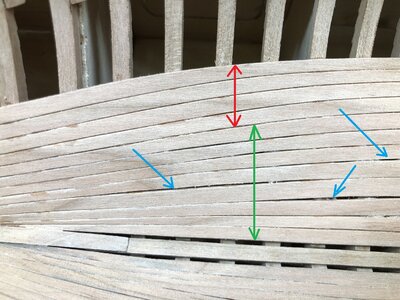
The red marked area I left the planks between 0,5 and 1 hour in water - enough, that they were soft enough to adjust the form, and there is a very limited shrinkage visible
the green marked areas are the planks, which were over night or up to 1 day in water - soft for handling, but after installation and drying, the shrinkage is visible with partly gaps between the planks.
Off course the total gap between two planks is the shrinkage of both planks
The not nice gaps are marked with the blue arrows
=> I learnt something, so please learn by my error and do not make the same error
=> These gaps are not very problematic, if you fill the hold with some stone ballast and barrels etc. but if you can avoid it.....
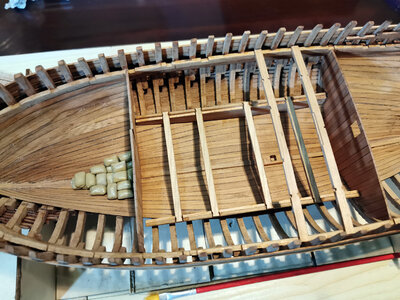
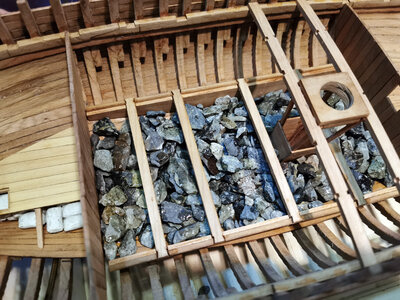
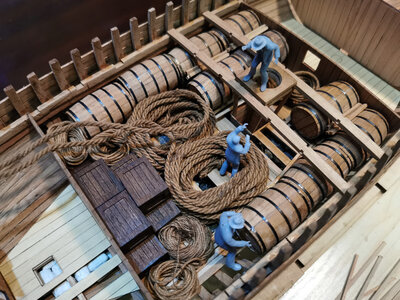
Here are photos from CAF with "covered" planking - somehow before and after
If we didn't have you, you're just our forward thinker. Thanks alot.
Hallo friends,
in post #189
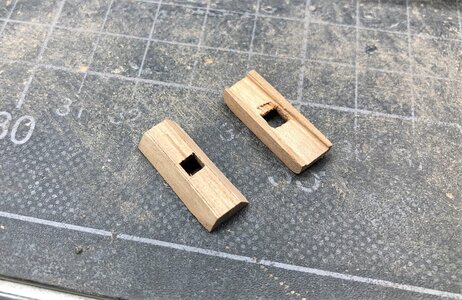
I mentioned, that I made in the beginning the part 08-2 in a wrong way
on the left side you can see the "wrong" part filed out of the kit part - on the right the corrected one build scratch
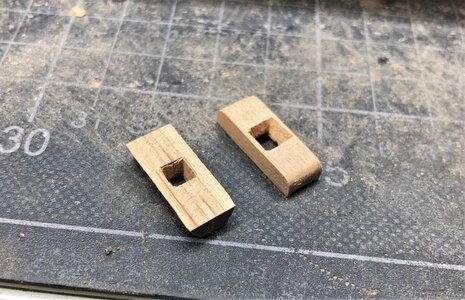
the bottom side which will law on top of the keelson
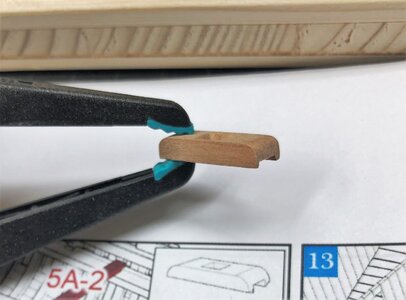
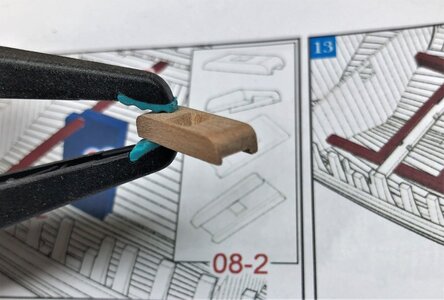
Here sitting on top of the keelson
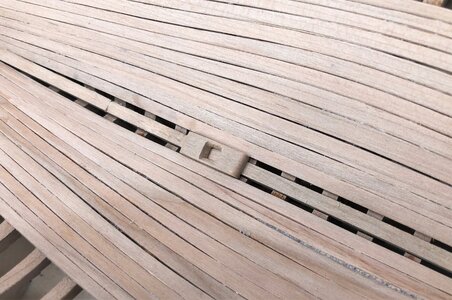
with the help of the cnc-formed beam 5A-2 and the template 3C-1 the correct location of the mast foot will be defined
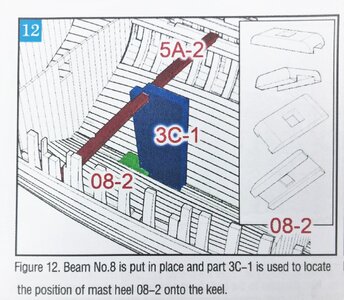
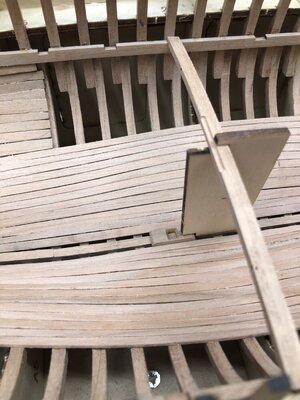
It is important, that you use this template to define the exact location of the mast-foot, due to the fact, that the structure of the beams, mast and mast-partners is effecting the location and not other parts like frames etc.
=> the clamp is defining the location of beam and with this the mast - the beam is defining the template 3C-1 - and the template is defining the mast-foot
in post #189
LE COUREUR - french Lugger 1776 - POF kit from CAF in 1:48 by Uwe
Well done Uwek. I'll follow your example in the next days Thanks - so I am looking forward to see yours. Next clamp to be installed was the Part 2A-4- marked with the green arrow in the following sketches of the manual Be aware, that on these sketches a different plank is shown and not the...
shipsofscale.com
on the left side you can see the "wrong" part filed out of the kit part - on the right the corrected one build scratch

the bottom side which will law on top of the keelson


Here sitting on top of the keelson

with the help of the cnc-formed beam 5A-2 and the template 3C-1 the correct location of the mast foot will be defined

It is important, that you use this template to define the exact location of the mast-foot, due to the fact, that the structure of the beams, mast and mast-partners is effecting the location and not other parts like frames etc.
=> the clamp is defining the location of beam and with this the mast - the beam is defining the template 3C-1 - and the template is defining the mast-foot

Here I want to refer to my post #212
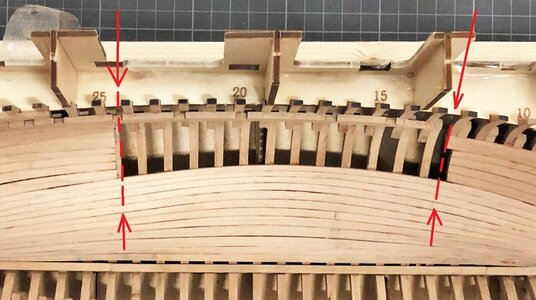
in which I mentioned the possible ending of the inner planking at midship
My "solutions are wrong, which I know in the meantime, latest tomorrow I will show you why I came to this conclusion.
Nevertheless I want to give you the hint already now, where the planks should end.
According my actual knowledge the planking should completely overlap and cover the frames 12 and 25 !!!
LE COUREUR - french Lugger 1776 - POF kit from CAF in 1:48 by Uwe
Very good build Uwe, your build log is exceptional and will be of great help to those building or thinking of building this wonderful kit
shipsofscale.com
My "solutions are wrong, which I know in the meantime, latest tomorrow I will show you why I came to this conclusion.
Nevertheless I want to give you the hint already now, where the planks should end.
According my actual knowledge the planking should completely overlap and cover the frames 12 and 25 !!!

Last edited:
Uwe, I noticed that a few frames has double toptimber. Just wonder if you it is something you have forgot or postponed on purpose?
I have postponed these additional top timber for the time, when I remove the hull out of the jigUwe, I noticed that a few frames has double toptimber. Just wonder if you it is something you have forgot or postponed on purpose?
Looking great, Uwe. So, notches in the deck clamps are laser cut, right? Do you have to square them, so that beams sit perpendicular to the keel?Here I want to refer to my post #212
in which I mentioned the possible ending of the inner planking at midshipLE COUREUR - french Lugger 1776 - POF kit from CAF in 1:48 by Uwe
Very good build Uwe, your build log is exceptional and will be of great help to those building or thinking of building this wonderful kitshipsofscale.com
My "solutions are wrong, which I know in the meantime, latest tomorrow I will show you why I came to this conclusion.
Nevertheless I want to give you the hint already now, where the planks should end.
According my actual knowledge the planking should completely overlap and cover the frames 17 and 25 !!!
View attachment 194704
the beam notches in the clamps are caused by the laser cut in 90° rectangular to the clamp, means, that at midhsip they are well rectangular to the keel - going aft or fore you will have to adjust them slightlyLooking great, Uwe. So, notches in the deck clamps are laser cut, right? Do you have to square them, so that beams sit perpendicular to the keel?
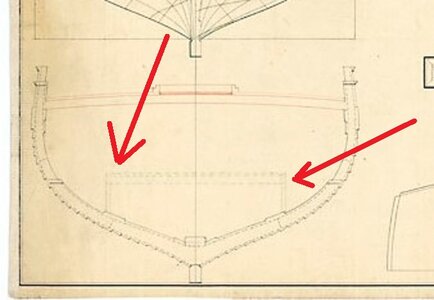
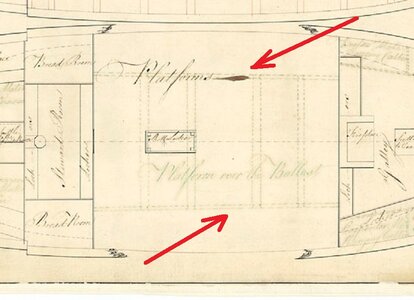
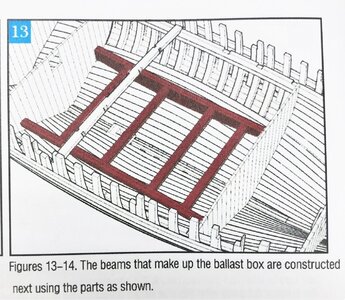
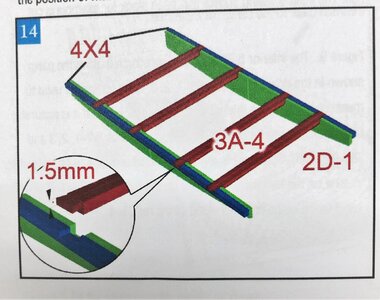
The first element of the interior is the ballast box which I prepared
This "Platform over the Ballast" was shown in the contemporary drawings "in green ink" available at the NMM
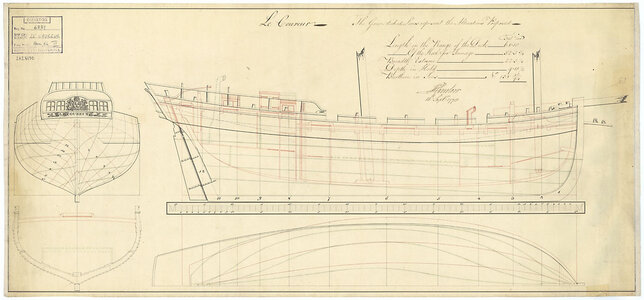
Scale: 1:48. A plan showing the body plan with stern board and decoration and name on stern counter, sheer lines with inboard detail modifications proposed in green ink, longitudinal half-breadth, and midship section showing the clinker framing, for 'Coureur' (1778), a captured French lugger, as modified to an 8-gun Schooner. Signed by John Henslow [Master Shipwright, Plymouth Dockyard, 1775-1784; later Surveyor of the Navy, 1784-1806].
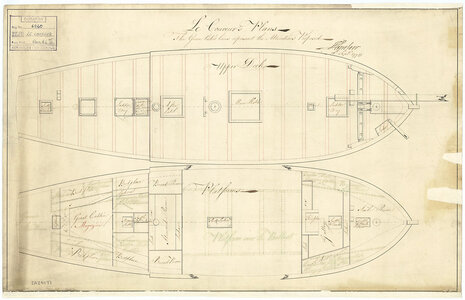
Scale: 1:48. A plan showing the upper deck, and fore and aft platforms, with proposed modifications in green, for 'Coureur' (1778), a captured French lugger, as modified to an 8-gun Schooner. Signed by John Henslow [Master Shipwright, Plymouth Dockyard, 1775-1784; later Surveyor of the Navy, 1784-1806].
and here some excerpts showing the "box"
from Wikipedia:
 en.wikipedia.org
This means for the purist:
If you want to build and show the HMS COUREUR (captured 1778) you should install the Platform over the Ballast
If you want to build the french version of the Le COUREUR (launched 1776) before the capture, than there was this platform not installed
Here you can see also the difference
HMS COUREUR like Tom build with the CAF test build
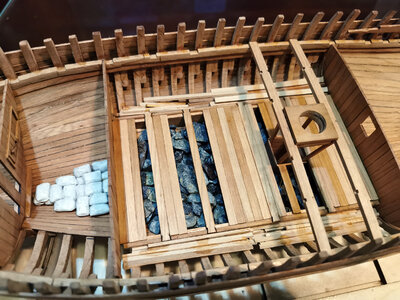
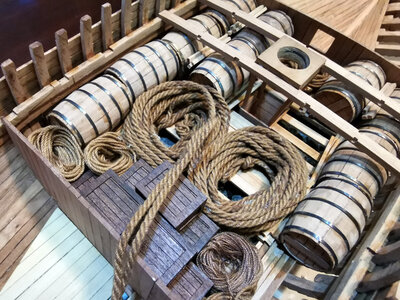
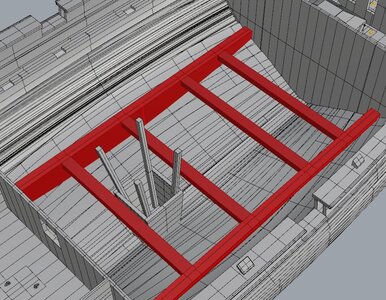
or the french version of Le Coureur shown in this 3D-animation without the "box or platform - here the stowage is laying directly on the inner planking, without the ballast stones
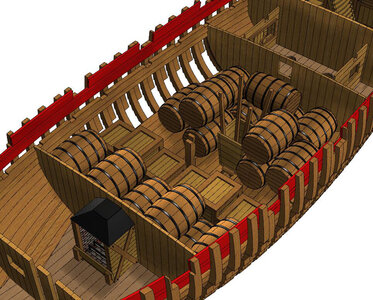
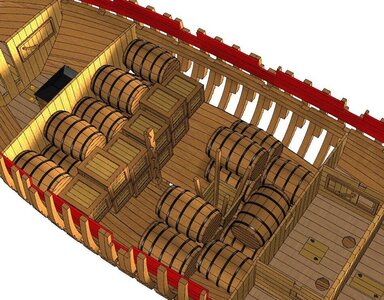
This "Platform over the Ballast" was shown in the contemporary drawings "in green ink" available at the NMM

Scale: 1:48. A plan showing the body plan with stern board and decoration and name on stern counter, sheer lines with inboard detail modifications proposed in green ink, longitudinal half-breadth, and midship section showing the clinker framing, for 'Coureur' (1778), a captured French lugger, as modified to an 8-gun Schooner. Signed by John Henslow [Master Shipwright, Plymouth Dockyard, 1775-1784; later Surveyor of the Navy, 1784-1806].

Scale: 1:48. A plan showing the upper deck, and fore and aft platforms, with proposed modifications in green, for 'Coureur' (1778), a captured French lugger, as modified to an 8-gun Schooner. Signed by John Henslow [Master Shipwright, Plymouth Dockyard, 1775-1784; later Surveyor of the Navy, 1784-1806].
and here some excerpts showing the "box"


from Wikipedia:
- HMS Coureur (1778) was a French lugger that Jacques and Daniel Denys built at Dunkirk and launched on 8 May 1776.[1] Alert, under the command of Lieutenant William George Fairfax, engaged and captured her on 17 June 1778, in advance of the declaration of war. In the engagement Coureur, under the command of Enseigne de Rosily, had five men killed and seven wounded out of her crew of 50. Alert had four men wounded, two mortally.[2] The British took Coureur into the Royal Navy under her existing name. She was under the command of Lieutenant Christopher Major on 21 June 1780 when two American privateers, the Fortune and the Griffin, captured her outside Bonavista Bay after an action that cost her three men killed and four wounded.[3] The Americans put Major and 30 of his men aboard Griffin, which fell prey the next day to Fairy.[4]
HMS Coureur - Wikipedia
This means for the purist:
If you want to build and show the HMS COUREUR (captured 1778) you should install the Platform over the Ballast
If you want to build the french version of the Le COUREUR (launched 1776) before the capture, than there was this platform not installed
Here you can see also the difference
HMS COUREUR like Tom build with the CAF test build


or the french version of Le Coureur shown in this 3D-animation without the "box or platform - here the stowage is laying directly on the inner planking, without the ballast stones


Last edited:
As always extremly informative, a real decision-making aid.
Hallo Adi,As always extremly informative, a real decision-making aid.
As I mentioned - is is something for the purist and the final decision, will be also often subjective, how you want to present your model finally. In addition also a question of how much "material" like barrels, boxes etc. is available and will be shown. Because with the "box / platform" you will need less stowage.....
I think in moment, that I will finally install this platform and fill it with some stone ballast, but also will name my ship with her french name LE COUREUR.......
In addition my partly not nice inner planking with shrinking gaps between the planks will be covered and get not visible with the stone ballast
Now let us show the information given in the manual
and I found this animation on the web-page of CAF
Hallo Uwe, I also do not know yet exactely in which direction I should tend, But somehow the original Le Coureur appeals to me more. I like the the Lugger rigging very much. The English Coureur is a schooner, If I'm not mistaken.


