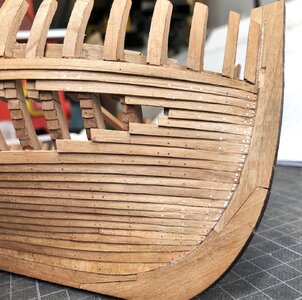
LE COUREUR - french Lugger 1776 - POF kit from CAF in 1:48 by Uwe

I am of course no authority on the matter... nor do I pretend to be an expert.

According to documentation (74-gun ship, vol.1) nails, in general, were proportioned as follows:

The length of the nails to be used is defined by a ratio indicating that it must penetrate the underlying timber by 5/9th of the length of its shank. Thus, if a 4-inch plank is nailed to the frame, the nail used should be 9 inches.

I cannot remember the exact ratio off the top of my head, but the dimension of the nail’s section (width of the shank) is also dictated by a ratio based on length. What I can say is that the head is approximately square. The head of the nail should be twice the width of the top of the shank. The shank of the nail is square although tapered following certain specifications: including the proportion of the actual tapered point.

Further info: the head of the nail must be countersunk (not protrude) into the lumber.

As far as planking nails are concerned, a twist of sealant material is applied under the head. The documentation indicates that the nail should be countersunk and that the countersink should take that into account.


Planking on Le Coureur
Given the information from the monograph and more specifically the representation of the hull as shown in plate 3, no treenails were used in this vessel. The text does not mention the use of treenails. I would remind the reader that usually (and that may be on larger ships or on carvel planked vessels), below the waterline, the planking was fastened by 1 nail and 1 treenail on each frame. Above the water line, where the planking is not clinker-style, upper-works, 2 nails.


G.
 
Last edited:
Not only the nails would be covered with pitch, but the entire hull below the waterline.
Personally, I do not think that the nails should be blackened: this said it probably is a matter of taste, but, of course, this is only my humble opinion...
G
 
Last edited:
Hallo friends,
first of all many thanks for the interesting comments and given information. This is very helpful.
During the weekend I worked mainly on the nailing, better bolting of the outside hull planking.

As mentioned earlier I am making the planking now with copper nails, a product from aeronaut, which are selling these nails in bags of 50 gramm, which means appr. 1.850 nails per bag. So one bag could be enough for the entire hull planking. For the wales I will use one ore two sizes bigger ones.
The marking of the bolt locations I described already earlier in this topic.
I am usually pre-drilling holes for the nails one size smaller, so here I am drilling holes with diameter 0,5mm.

Do you know the film "Kill Bill"? - you can call me now "Kill Drill" !!!

With a Proxxon drill it is not possible for me to drill several holes with this small drill without braking the drill. So therefore, in order to reduce the drill consumption to a tolerable quantity I am drilling the holes by hand.....every single hole - and this also very carfully not to break........

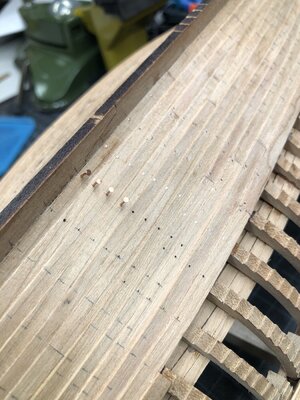
Here you see one frame exais marked with pencile,
the one above the holes are marked with a small dott with a fine scriber, so that the drill has a good lead
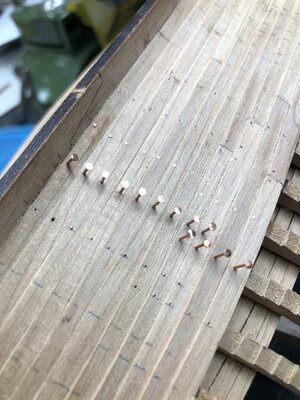
and the one above the row with predrilled holes and 5 nails insattled (using tweezers and a very small jeweler hammer)
IMG-5709.jpg

all nails hammered (very gentle) of one row
IMG-5710.jpg

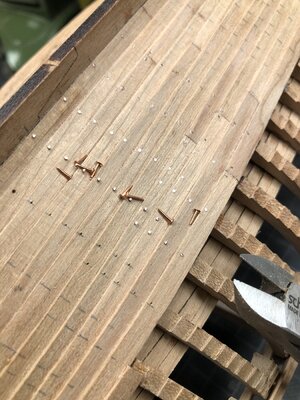
cutting with side cutter - ready for sanding (this I do once more with my Pfeil set of files also shown in the past)
IMG-5711.jpg
 
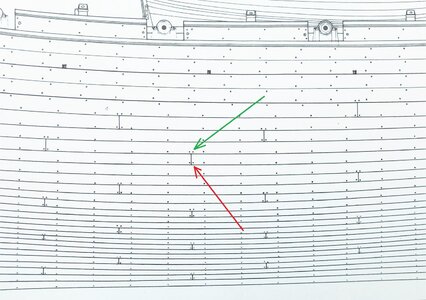
One important information about the nailing pattern given by Jean Boudriot in his monograph.

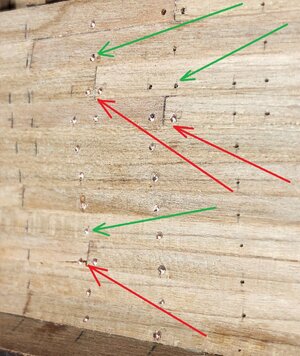
On every connection between a plank and a single frame (area) one nail should be made, but where a butt joint of a plank is located on a frame (butt joints are every time only on top of a frame, each end of the plank should be fixed with one nail. (red arrow)
On the same axis, on the plank above the butt joint, also two nails should be used (green arrow)

Let us take a look at the Boudriot drawing showing this principle.IMG-5337aa.jpg

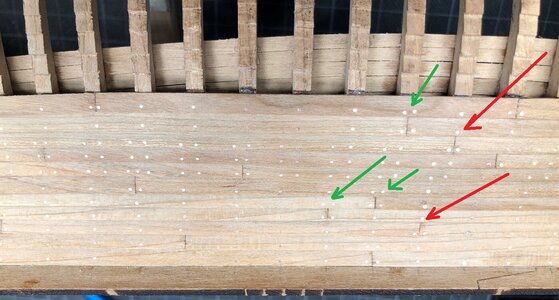
On the first (desaster) trial I forgot this pattern and was too concentrated on the production of these washers -> on the left row of nails I made it wrong and installed only one nail - on the right one it is correct
IMG-5684a.jpg

and here a better overview of my planking pattern with installed bolts - with red arrows are marked the two locations, where I did this wrong - so green arrow is correct
IMG-5714aa.jpg
 
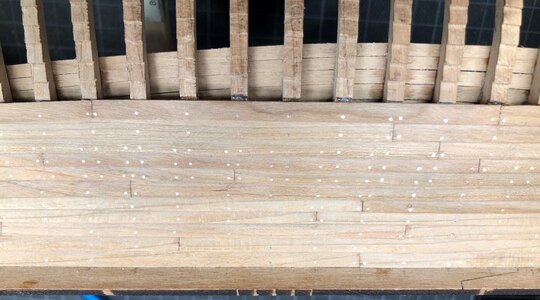
Step by step and with every evening some dozens more nails / bolts are installed

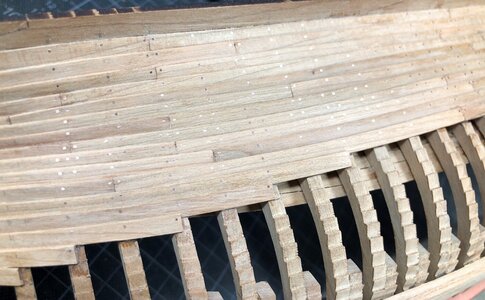
some impressions

IMG-5714a.jpg

IMG-5713.jpg

IMG-5715.jpg

IMG-5716.jpg

IMG-5717.jpg

IMG-5719.jpg

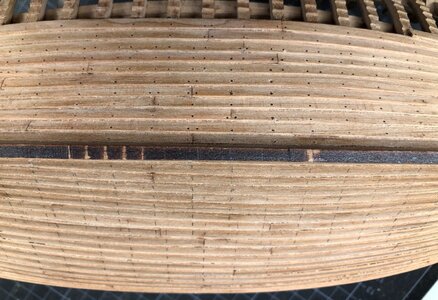
Very interesting to see with the insattled and filed copper bolts, that only with a correct direct light irradiation the nails are shiny. All the other nails heads are dark, between black and dark brown.
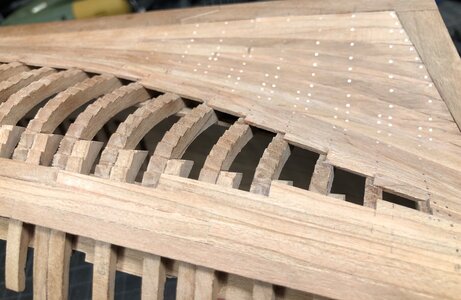
If you take a look at the last photo with birdview you can see, that all bolts are dark....... so the hull is not looking like a christmas tree

Tomorrow I can show the nailing on the stern area - with finishing of this side I managed to install appr. 1/3 of all nails
 
Great discussion and work about the nailing Uwe.
It show that still up to today the French and Brits do things differently :-) .

I think you cant compare the two clincker build hulls of Alert and Le Coureur as they are so different. Not only the notched frames but also the way the frames are build, as well as the difference in room and space between the setup of the frames between the two ships.

Your research lead to a great comparison.
 
"Kill Drill" got some new small tools, necessary as small helpers on the work of the Le Coureur

I ordered once more these thing from company Karl Fischer in Pforzheim

Goldsmith Tools, Workshop Equipment, Findings & Pearls, Gemstones - Karl Fischer GmbH

Goldsmith Tools Shop. Since 1895, the Karl Fischer GmbH offers everything to the jewelry manufacturing. Tools and accessories for watchmakers, jewelers, model makers, opticians and other professional groups. Repair equipment, tools, machinery, findings, jewelry parts, gemstones, beads and...
www.goldschmiedebedarf.de


For my eyes to see the small nails better - btw very comfortable to wear only 150 gramm with 5 different magnifing glasses and LED lamp
IMG-5729.jpg


IMG-5731.jpg


I ordered also some sanding sticks - they are relatively cheap and good quality, so I will give them a try
IMG-5732.jpg


these sanders are a very good helper to reach better some spots - very good quality and not these cheap (in quality) one´s
IMG-5734.jpg


and the new set of twincut burrs from Busch plus some drills with a very helpfull wooden box - therefore "Kill Drill" - I need constant supply because of my hitman activities with drill killing on the Le Coureur
IMG-5735.jpg
 
Great work, Mon Amie (as always)!! This redundant\monotory work already pays off and looking gorgeously. I saw some darker spots than others. Is this a result of different light angles or?
Yes it is pure the angle of light - It is interesting to have the hull in hand and change the angle - sometimes you get the impression, that there are only wooden treenails and no metal bolts - I will see in future, how the effect will be, when the hull is treated with oil, when the timer is even darker....

BTW: Many Thanks to all your positive comments and likes - much appreciated
 
"Kill Drill" got some new small tools, necessary as small helpers on the work of the Le Coureur

I ordered once more these thing from company Karl Fischer in Pforzheim

Goldsmith Tools, Workshop Equipment, Findings & Pearls, Gemstones - Karl Fischer GmbH

Goldsmith Tools Shop. Since 1895, the Karl Fischer GmbH offers everything to the jewelry manufacturing. Tools and accessories for watchmakers, jewelers, model makers, opticians and other professional groups. Repair equipment, tools, machinery, findings, jewelry parts, gemstones, beads and...
www.goldschmiedebedarf.de


For my eyes to see the small nails better - btw very comfortable to wear only 150 gramm with 5 different magnifing glasses and LED lamp
IMG-5729.jpg


IMG-5731.jpg


I ordered also some sanding sticks - they are relatively cheap and good quality, so I will give them a try
IMG-5732.jpg


these sanders are a very good helper to reach better some spots - very good quality and not these cheap (in quality) one´s
IMG-5734.jpg


and the new set of twincut burrs from Busch plus some drills with a very helpfull wooden box - therefore "Kill Drill" - I need constant supply because of my hitman activities with drill killing on the Le Coureur
IMG-5735.jpg
Hi Uwe, just checked their website and I see the guy retired after your purchase :-).

Great collection of additional tools.
 
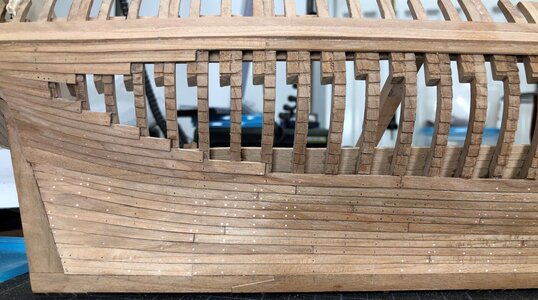
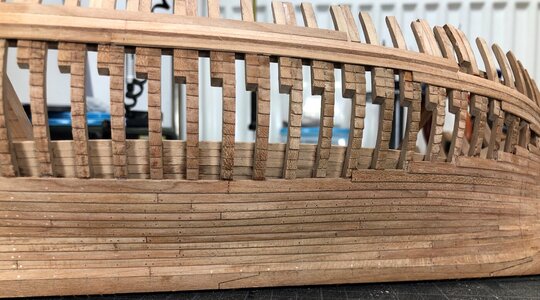
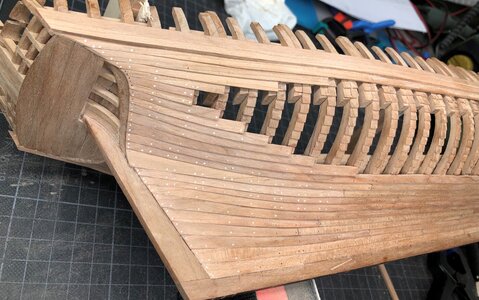
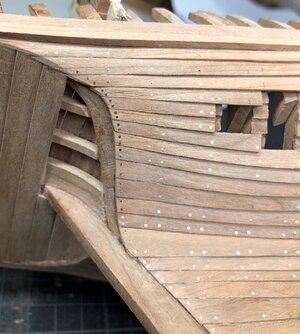
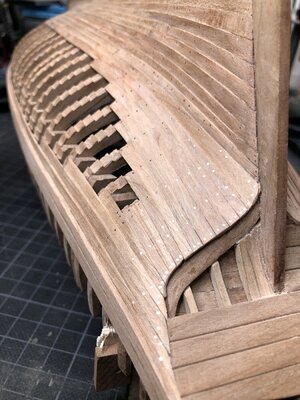
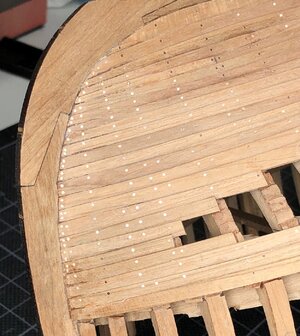
Yesterday I finished the nailing of the first side of the hull - so also the bow is finished (only some final sanding is necessary)
Especially here with teh small width of the planks it is visible, that also 0,6mm nails can be very dominant
-> but with smaller biamteres I would kill much more drills - so I am relatively happy with the result

IMG-5737.jpg

IMG-5739.jpg
 
Back
Top