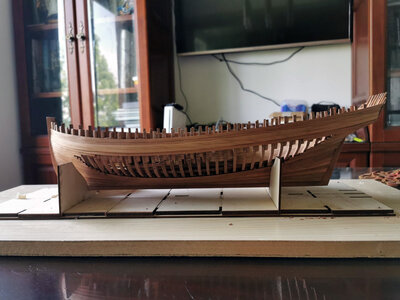
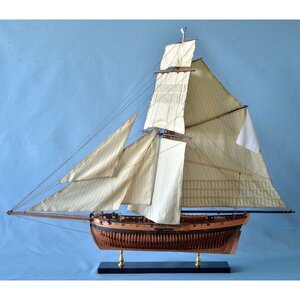
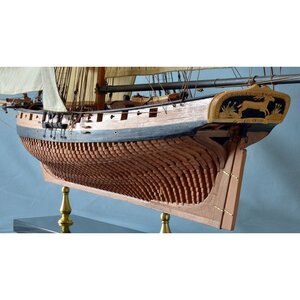
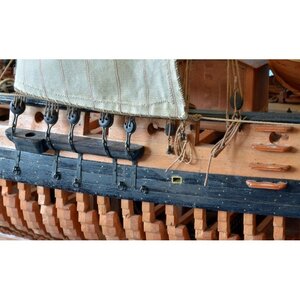
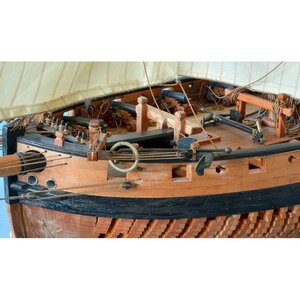
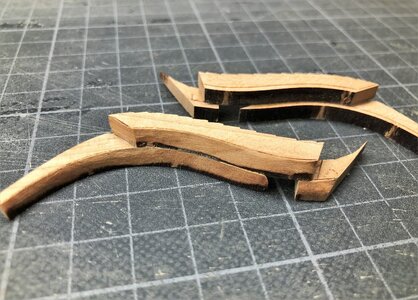
LE COUREUR - french Lugger 1776 - POF kit from CAF in 1:48 by Uwe

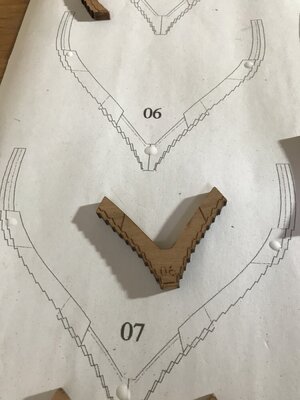
Possible definitely! I was asking myself also the same thing and decided to make the beveling after the parts of one frame are fixed together

After I made some experience with the frames I think it will be better to make it really afterwards.
1) With this you can achieve a more accurate edge on the teeth where the frames are "double"-sided, means at the connections between futtock and floor timber or futtock and top timber - see here the green lines
2) also on some frames the last step is not a complete one, so it would be more problematic to bevel these areas in the correct angle - see here the red arrows
View attachment 184092
I agree with Uwe. Fairing the parts first might also result in a less accurate fit when glueing the futtocks to the other parts. Particularly if you look at the drawing template you will see that the template profile is that of the unfaired frames F1BCDA5C-6C7C-46FA-B1F4-936E5826E796.jpeg
 
Lots of nice work Uwe! Are you waiting to clean the char from the inside of frames after the ribs are installed on the keel as part of the fairing job? Also - will you remove the "steps" on the ribs areas where the planking will be left off? Or just leave them? I like this kit very much.
 
Lots of nice work Uwe! Are you waiting to clean the char from the inside of frames after the ribs are installed on the keel as part of the fairing job? Also - will you remove the "steps" on the ribs areas where the planking will be left off? Or just leave them? I like this kit very much.
Apologies for replying to a question posed to Uwe but it’s one I have been pondering on. I looked at one of CAF’s Tom’s pictures on the CAF website and it appears he left the clinker steps on. I’m not sure what would historically would be the correct look for a clinkered frame. Maybe Uwe can enlighten us.
6EB800EC-CA7F-4260-B6C5-1286205FC043.jpeg
 
Lots of nice work Uwe! Are you waiting to clean the char from the inside of frames after the ribs are installed on the keel as part of the fairing job? Also - will you remove the "steps" on the ribs areas where the planking will be left off? Or just leave them? I like this kit very much.
Apologies for replying to a question posed to Uwe but it’s one I have been pondering on. I looked at one of CAF’s Tom’s pictures on the CAF website and it appears he left the clinker steps on. I’m not sure what would historically would be the correct look for a clinkered frame. Maybe Uwe can enlighten us.

Hallo friends,

the french lugger like the Le Coureur had clinkered hulls.
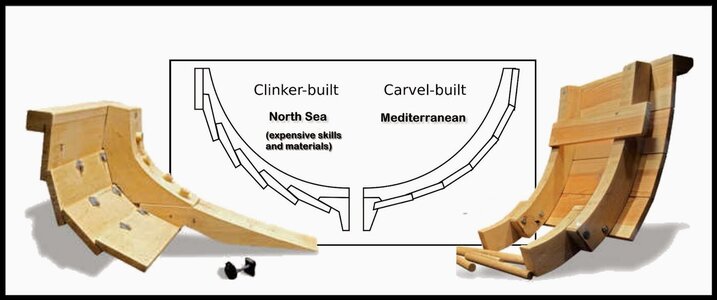
The following sketch is showing the principle difference between clinker and carvel planking (taken from boat building, but the same principle - even more important when the planking is thicker like on boats)
clinker-carvel.jpg

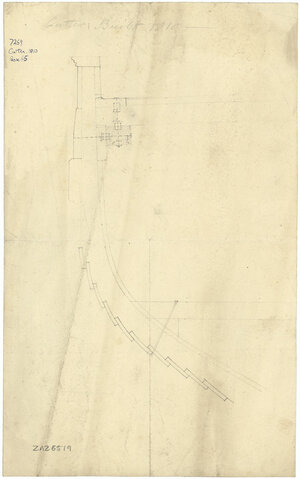
the frames of the original ship had such steps - we take a look at the NMM drawings

j0464.jpg
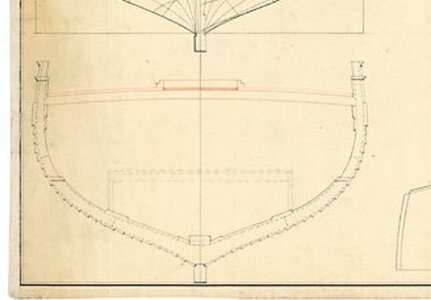
No scale. Plan showing a part section illustrating the under-deck knee support fixtures for an unknown clinker-built Cutter (1810


j0873.jpg
j0873a.jpg
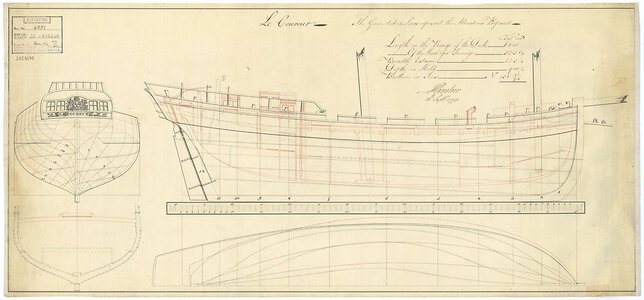
Scale: 1:48. A plan showing the body plan with stern board and decoration and name on stern counter, sheer lines with inboard detail modifications proposed in green ink, longitudinal half-breadth, and midship section showing the clinker framing, for 'Coureur' (1778), a captured French lugger, as modified to an 8-gun Schooner. Signed by John Henslow [Master Shipwright, Plymouth Dockyard, 1775-1784; later Surveyor of the Navy, 1784-1806].


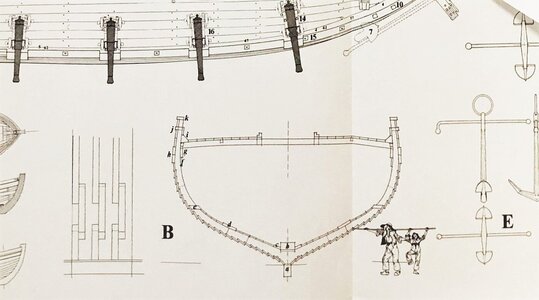
Than we can also take a look at the drawings made by Jean Boudriot in his monograph of the Le Coureur - although this monograph did not include all frame drawings, but there is a cross section shown
coureur18aa.jpg

and if we take a look at Jean Boudriot monograph / drawing set of the Le Cerf, which had also a clinkered hull.
Here take a look at the beautiful build model by M. Frölich
monographie-du-cerf-cotre-1778 (3).jpg

monographie-du-cerf-cotre-1778.jpg

monographie-du-cerf-cotre-1778 (2).jpg monographie-du-cerf-cotre-1778 (1).jpg

Excerpt from the booklet of the Monograph by Jean Boudriot and Hubert Berti
cerf9a.jpg


Long explained an answer for a short question - Sorry for this!!!

Summary:
The steps in the frames can stay - only with more accurate sanding.
The frames of the kit are prepared very accurate and according the correct technique used at this time
 
Lots of nice work Uwe! Are you waiting to clean the char from the inside of frames after the ribs are installed on the keel as part of the fairing job?
Hallo,
your first question was still open....
It is not only the char inside, which has to be done also, but also the beveling and fairing of the inside form. Here I have the experience from the past, that it is often important to wait until the exact height sitting on top of the keel of each single frame can slightly be different.
f.e. 0,5mm incorrect height of the steps on the keel plus 0,5mm incorrect height of the foot of the floor timber is already 1mm difference in total.
So I plan to prepare the inside fairing of most of the frames, when I am making the final dry fit of the frames on top of the keel...... I will see .... but definitely not necessary in moment, so I wait with this work a little bit.
 
Thanks Uwe, I am learning today! One other question since you mentioned fairing the inside of the frames... Can you also fair the outside of the frames? It seems with the placement of the steps on the outside that you will distort the steps if you attempt fairing on the outside? Or do you fair with a very long skinny file or sander and follow the steps? How do you maintain the steps and fair the hull at the same time? As you mention - the same 1mm out of fair issue will be on the outside of the frames if it is out on the inside of the frames....
 
Hallo friends,

the french lugger like the Le Coureur had clinkered hulls.
The following sketch is showing the principle difference between clinker and carvel planking (taken from boat building, but the same principle - even more important when the planking is thicker like on boats)
View attachment 184197

the frames of the original ship had such steps - we take a look at the NMM drawings

View attachment 184194
No scale. Plan showing a part section illustrating the under-deck knee support fixtures for an unknown clinker-built Cutter (1810


View attachment 184195
View attachment 184196
Scale: 1:48. A plan showing the body plan with stern board and decoration and name on stern counter, sheer lines with inboard detail modifications proposed in green ink, longitudinal half-breadth, and midship section showing the clinker framing, for 'Coureur' (1778), a captured French lugger, as modified to an 8-gun Schooner. Signed by John Henslow [Master Shipwright, Plymouth Dockyard, 1775-1784; later Surveyor of the Navy, 1784-1806].


Than we can also take a look at the drawings made by Jean Boudriot in his monograph of the Le Coureur - although this monograph did not include all frame drawings, but there is a cross section shown
View attachment 184198

and if we take a look at Jean Boudriot monograph / drawing set of the Le Cerf, which had also a clinkered hull.
Here take a look at the beautiful build model by M. Frölich
View attachment 184201

View attachment 184202

View attachment 184200 View attachment 184199

Excerpt from the booklet of the Monograph by Jean Boudriot and Hubert Berti
View attachment 184203


Long explained an answer for a short question - Sorry for this!!!

Summary:
The steps in the frames can stay - only with more accurate sanding.
The frames of the kit are prepared very accurate and according the correct technique used at this time
Nice post...................
 
Hallo,
your first question was still open....
It is not only the char inside, which has to be done also, but also the beveling and fairing of the inside form. Here I have the experience from the past, that it is often important to wait until the exact height sitting on top of the keel of each single frame can slightly be different.
f.e. 0,5mm incorrect height of the steps on the keel plus 0,5mm incorrect height of the foot of the floor timber is already 1mm difference in total.
So I plan to prepare the inside fairing of most of the frames, when I am making the final dry fit of the frames on top of the keel...... I will see .... but definitely not necessary in moment, so I wait with this work a little bit.
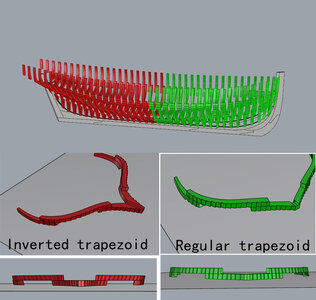
Your construction speed is really very fast. It took me almost a whole month to finish these ribs, especially every tooth needs to be precisely polished
And these ribs are very easy to make mistakes when they are installed. They are arranged differently from other ships
Most of the ribs are centered in the middle, and the front and back arrangement is mirror image, while Le coureur is not
So it is very easy to install errors before and after the installation

Tom
 
Some more progress on the frames - better it is more testing how to make it and good good and fast the works can be done with my available hand and power tools can be done - so I am still in the learning period - maybe I need the first frames as spare parts from @CAFmodel if the result is not good enough ;)

But I have to say, that the learning curve is going up.......

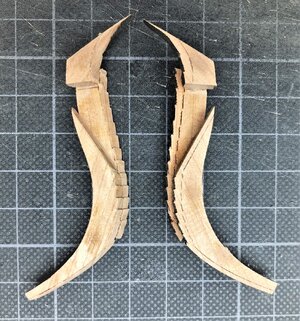
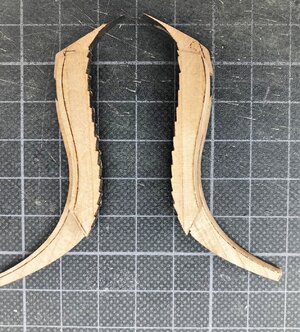
Here you can see on the bottom the first frame N. 8 after the first fairing with files - on the top frame No.9 without fairing
View attachment 182471

View attachment 182472

The back side of the two frames - here I used my spindle sander, but only a small part can be done
View attachment 182473

so back to my Proxxon with the small sanding drum - means the insides of the frames I will do with the Proxxon
View attachment 182474

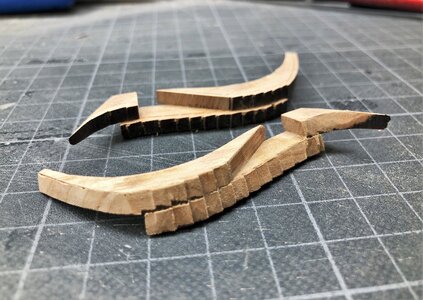
One more experience which I had and I recommend this to everybody - with to much forces, especially with steep floor timber, it can easy break following the grain of the timber - can also easy to be repaired, but you should know, that this can happen
View attachment 182475

View attachment 182476

It is getting better and better, so yesterday evening I had five frames prepared
View attachment 182470

Hope to get some advise from @CAFmodel related to my post #11 and by @Chello in his post #23 of this topic

to be continued ........
If you need to add the board, please contact me in time
 
Tom, I asked in another thread but is the deck framing correct for the Lugger of that period? Are there no lodging or hanging knees and mast, hatch partners etc? Do you know if there is a plan that could be used to frame the deck ( a cutter perhaps?) Or is the Andre plan correct?
 
Thanks Uwe, I am learning today! One other question since you mentioned fairing the inside of the frames... Can you also fair the outside of the frames? It seems with the placement of the steps on the outside that you will distort the steps if you attempt fairing on the outside? Or do you fair with a very long skinny file or sander and follow the steps? How do you maintain the steps and fair the hull at the same time? As you mention - the same 1mm out of fair issue will be on the outside of the frames if it is out on the inside of the frames....
You are right, that outside we have in principle the same situation. I am planning to cover definitely one side with planking, so here I do not have to prepare the steps in the frames extremely accurate, Also some rest of char can stay, because it will be covered by the planks. The other side I will minimum partly be open showing the frames, I hope, that I can adjust slightly the steps afterwards, when I know exactly which parts will be visible.
I think, that with this kit we will have an extreme learning curve. Personally, but especially to see what others made and the final result. Somehow trail and error - so the following modelers will have some advantages....
 
I want to show as an example a very interesting frame, axis 37. so you can see the complexity which was solved by CAF with double sided laser markings - I really hope, that every element will fit well

left side preliminary adjusted following the laser markings - right side original status without fairing / beveling
IMG-4556.jpg

IMG-4557.jpg

IMG-4558.jpg

IMG-4559.jpg

You see, that everywhere I left some "meat" for final corrections
 
Back
Top