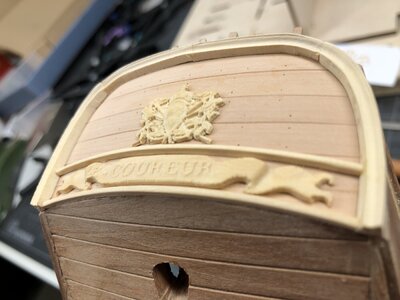
Hi Uwe, that build is very inspirational to me. Great stuff. 
-

Win a Free Custom Engraved Brass Coin!!!
As a way to introduce our brass coins to the community, we will raffle off a free coin during the month of August. Follow link ABOVE for instructions for entering.
-

PRE-ORDER SHIPS IN SCALE TODAY!
The beloved Ships in Scale Magazine is back and charting a new course for 2026!
Discover new skills, new techniques, and new inspirations in every issue.
NOTE THAT OUR FIRST ISSUE WILL BE JAN/FEB 2026
- Home
- Forums
- Ships of Scale Group Builds and Projects
- Le Coureur 1776 1:48 PoF Group Build
- Le Coureur 1776 1:48 Group Build Logs
You are using an out of date browser. It may not display this or other websites correctly.
You should upgrade or use an alternative browser.
You should upgrade or use an alternative browser.
LE COUREUR - french Lugger 1776 - POF kit from CAF in 1:48 by Uwe
Uwe, you have outdone yourself again. It just looks good and is a real help for us follower, Mr. Brass Bender.
My friends - many thanks for the comments and all the likes received.....
As I mentioned - now it is time to finish the stern, so that I am able to finish the entire hull (f.e. last nails at the planking, rails at the aft area)
As usual in the beginning of this session I want to show the sketch from the manual
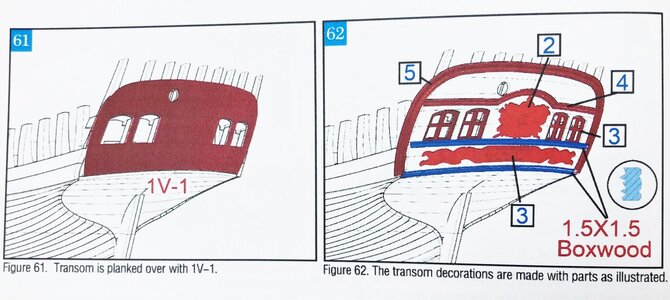
Today we are working on the part 1V-1, the intire stern planking. Originally the kit part is one sheet, with lasered planking lines and cut outs for the windows.
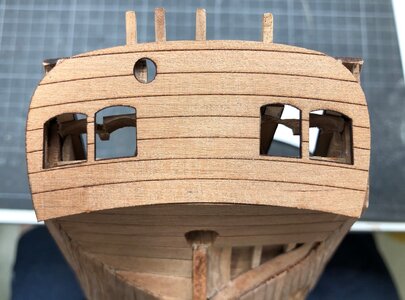
First photos is showing 1V-1 sitting on the stern construction - on the first view it is looking, like it fits well
and here the transom decorations, cnc carved boxwood (the middle part is slightly too long and should be shortened in the middle section, but this is on purpose by CAF - and we will see later on, that it is very well prepared
A longer time ago, we had once already some talks in an other topic about the four windows at the stern:
Jean Boudriot defined them as "false"-windows, so that the window frames are only decorations on a completely planked transom.
CAF interpreted them as real windows with glass and therefore had this round elements in the stern structure defining the upper part of the window openings. For this the deck is also slightly higher than in the Boudriot drawings
The level of the deck by CAF - with enough space (and height) for the windows
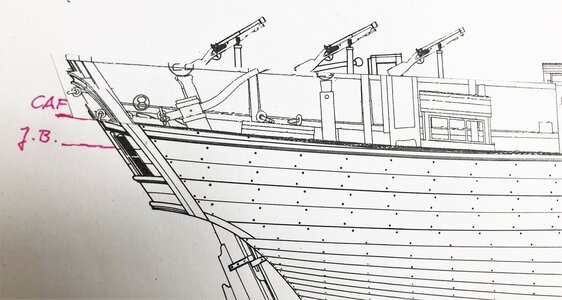
The deck level by Boudriot, which is ending directly in half height of the windows
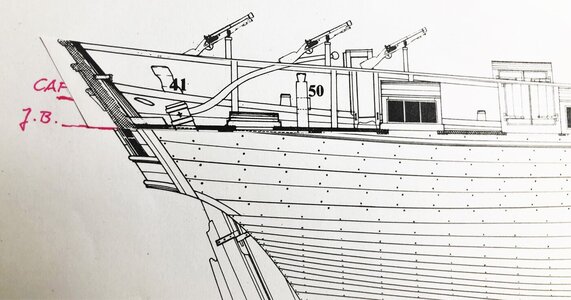
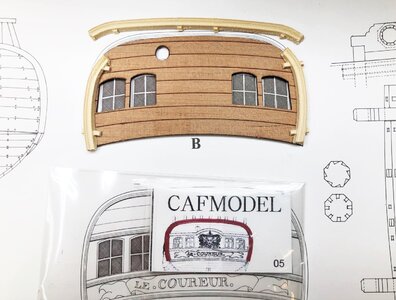
I decided once, to make the stern with the false windows, so therefore I had to replace the part 1V-1, which has the cut outs for the windows
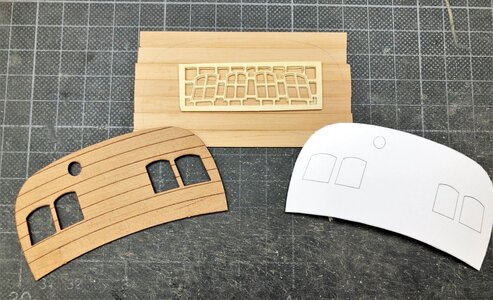
So took some wider pear strips and glued them together in order to get a planking (at the top center with boxwood cnc carved frames (part of the kit).
On the right side you can see a cardboard template in the size of the 1V-1
As I mentioned - now it is time to finish the stern, so that I am able to finish the entire hull (f.e. last nails at the planking, rails at the aft area)
As usual in the beginning of this session I want to show the sketch from the manual

Today we are working on the part 1V-1, the intire stern planking. Originally the kit part is one sheet, with lasered planking lines and cut outs for the windows.
First photos is showing 1V-1 sitting on the stern construction - on the first view it is looking, like it fits well

and here the transom decorations, cnc carved boxwood (the middle part is slightly too long and should be shortened in the middle section, but this is on purpose by CAF - and we will see later on, that it is very well prepared
A longer time ago, we had once already some talks in an other topic about the four windows at the stern:
Jean Boudriot defined them as "false"-windows, so that the window frames are only decorations on a completely planked transom.
CAF interpreted them as real windows with glass and therefore had this round elements in the stern structure defining the upper part of the window openings. For this the deck is also slightly higher than in the Boudriot drawings
The level of the deck by CAF - with enough space (and height) for the windows

The deck level by Boudriot, which is ending directly in half height of the windows

I decided once, to make the stern with the false windows, so therefore I had to replace the part 1V-1, which has the cut outs for the windows
So took some wider pear strips and glued them together in order to get a planking (at the top center with boxwood cnc carved frames (part of the kit).
On the right side you can see a cardboard template in the size of the 1V-1

Hello, Mon Amie. I am always amazed by your methodical practice and show us the comparisons between the CAF model and the actual plans set from JB. Also, the willingness to achieve the best possible results without 'bashing' the kit. To me, this is great! Members can see what the actual kit can offer.
Small observations, The planks on the original (from kit) transom are curved (red arrows), on your new scratch build transom they are straight (green arrows). Are those transom planks straight on the JB plans or?
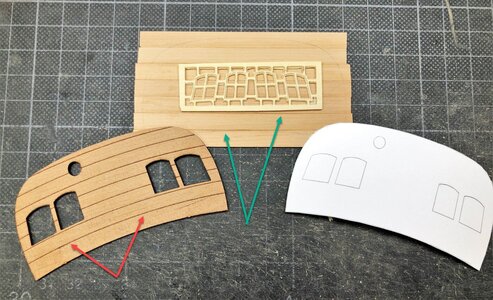
Small observations, The planks on the original (from kit) transom are curved (red arrows), on your new scratch build transom they are straight (green arrows). Are those transom planks straight on the JB plans or?

Good observation and a very good point to discuss more in detail - I was also thinking about over a longer time. I will show you my thoughts and try to give the infromation tomorrow in a following post......Small observations, The planks on the original (from kit) transom are curved (red arrows), on your new scratch build transom they are straight (green arrows). Are those transom planks straight on the JB plans or?
View attachment 249793
How to start with the explanation ......Hello, Mon Amie. I am always amazed by your methodical practice and show us the comparisons between the CAF model and the actual plans set from JB. Also, the willingness to achieve the best possible results without 'bashing' the kit. To me, this is great! Members can see what the actual kit can offer.
Small observations, The planks on the original (from kit) transom are curved (red arrows), on your new scratch build transom they are straight (green arrows). Are those transom planks straight on the JB plans or?
View attachment 249793
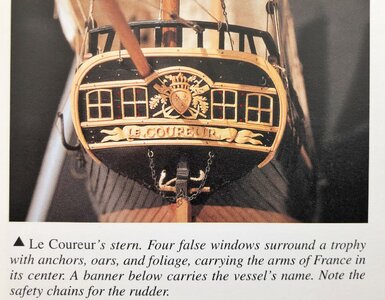
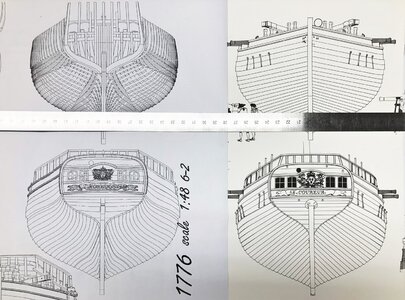
Here are the drawings of Boudriot and also CAF showing the final appearance of the stern of the Le Coureur
on the left CAF - on the right Boudriot - you can see also the differences and different interpretations in the designs
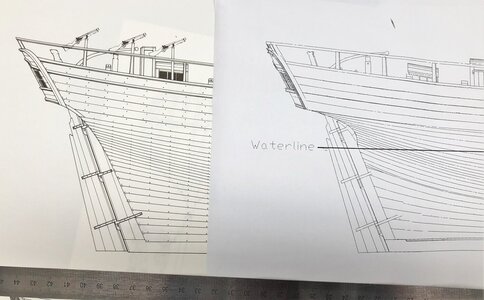
and here we can see the relatively big inclination of the Transom (this time left Boudriot and on the right CAF)
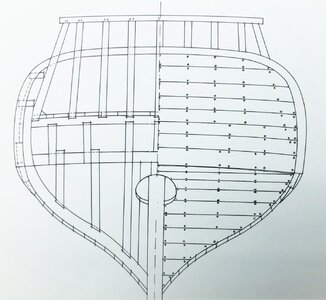
This is the drawing showing the stern structure and the planking (with nailing) by Boudriot -> you can see only a very slight curve of the planking
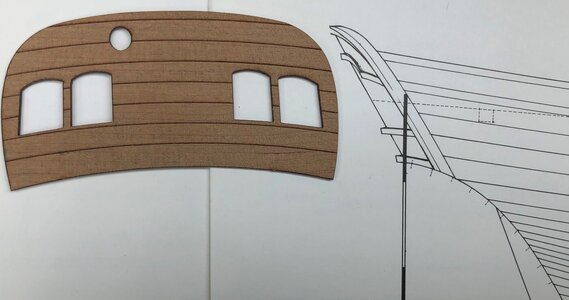
Now let us have a look at the part 1V-1 laying flat on the Boudriot drawing
and the same in appr. the angle of the stern inclination => because of the different and changed persepctive the curved planking is getting more straight - even more when you imagine, that the center is more aft (the stern is curved in the topview)
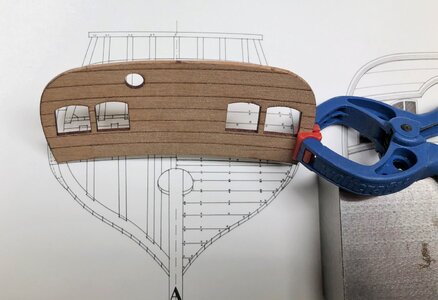
I also checked the sterns of several scratch build Coureurs - better I tried to find photos - I realized very fastly, that not many modelers are shoing the stern of their models - seems, that there are not so much realy good sterns made. But we can find either curved and also straight plankings of the transoms
As an example I found f.e. the stern of the Frölich model shown in his book
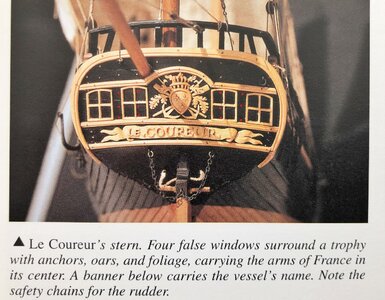
Book review - The Art of Shipmodeling / L'ART DU MODELISME / Die Kunst des Modellbaus" by Bernard FRÖLICH / Frolich
Today I want to bring close to you and highly recommend one book, which has a very special place and importance in my library. L'ART DU MODELISME The Art of Shipmodeling Die Kunst des Modellbaus by Bernard FRÖLICH Hardcover: 304 pages Publisher: www.ancre.fr (2002) Package...
shipsofscale.com
We can see, that Frölich used also straight planking for his stern.
Based on these information I decided for my model to use straight planking, I guess easier to handle with maybe better final result (modeling quality) and also based on the knowledge, that every solution you choose, based on the different perspective you will look on the model, the planking will look straight or curved.
Very interesting discussion and observation, Mon Amie. Here on your last image of the Frolich model, we can clearly see the planks are straight, while all moldings and windows have to conform to the curve. But JB shows slightly curved planks.
When I bought the plans and then compared them, I also thought about it and decided to stick with the original, as Uwe did in advance with the anchor winch. Personally, I like the stern with straight planks better. I'm just not sure if I am making real windows or the variant with the fake windows.
Hi guys, dear friends, I following your discussion with great interest. A decision which way I will go I would like to make only when I have come so far.
Today I want to show you my further works on the stern planking........
This photo is showing the stern structure with already partly shortened adjusted hull planking
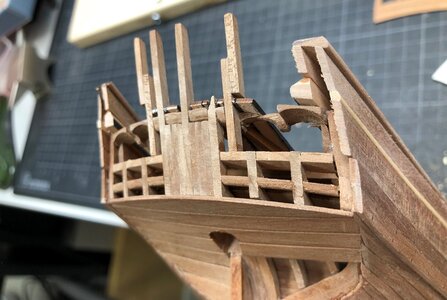
Because of easier bending I copied the size of the kit part on a piece of cardboard - we can see, that there are some smaller discrepencies between my stern structure and the form of the stern "planking". So I did not work perfectly with my hull - otherwise it would fit
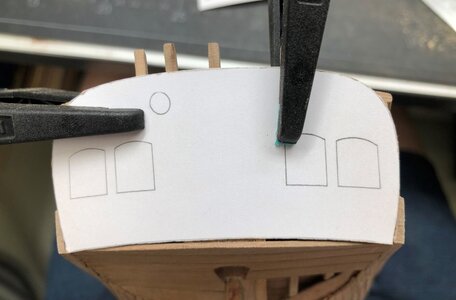
Transfering the approximate size on a new cardboard
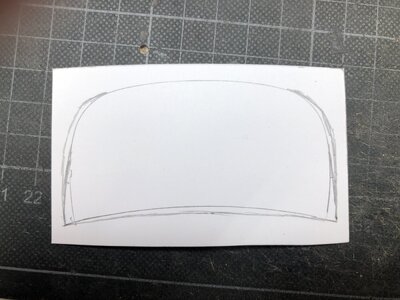
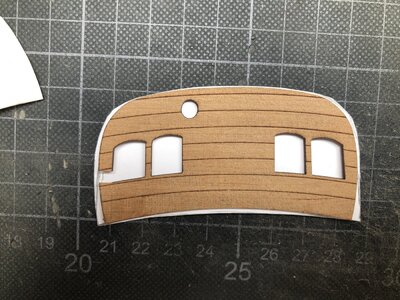
The new cardboard compared with the original
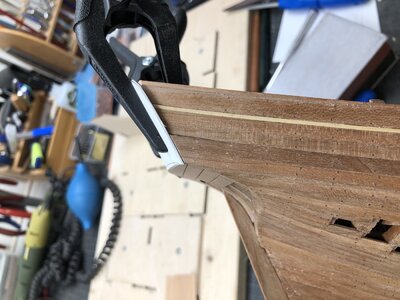
and adjusting the cardboard to the needs on my stern
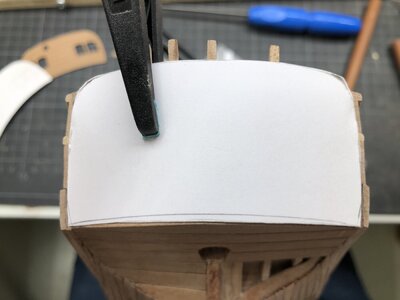
Now I am close to the needs and I can take over the form on my prepared planking
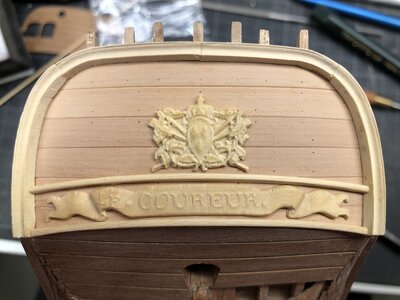
done - planking installed and sanded - btw from this perspective the planking is straight
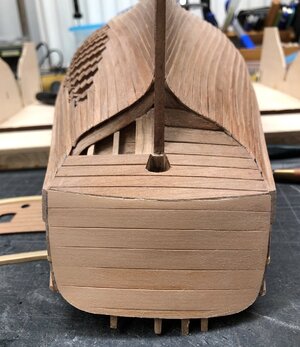
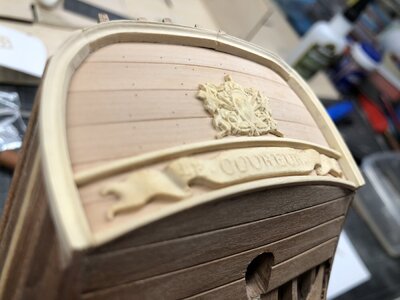
from this perspective I have curved planking at the stern
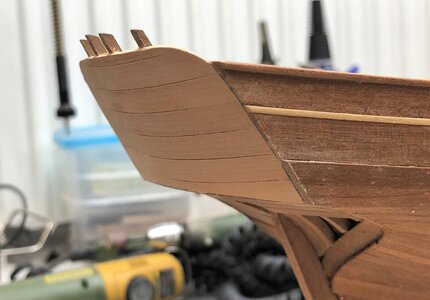
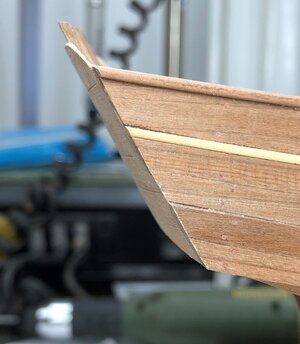
The planking of the stern and the planking of the hull are sanded, so that the decoration elements will fit (I hope so)
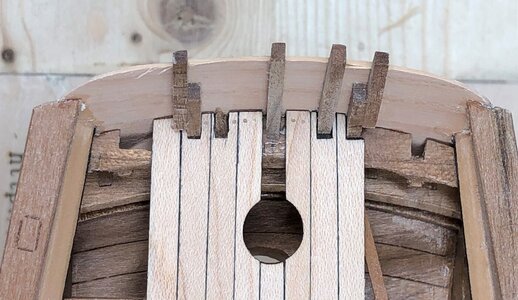
and the view form "inside"
Many Thanks for your interest .... to be continued ....
This photo is showing the stern structure with already partly shortened adjusted hull planking

Because of easier bending I copied the size of the kit part on a piece of cardboard - we can see, that there are some smaller discrepencies between my stern structure and the form of the stern "planking". So I did not work perfectly with my hull - otherwise it would fit

Transfering the approximate size on a new cardboard

The new cardboard compared with the original

and adjusting the cardboard to the needs on my stern

Now I am close to the needs and I can take over the form on my prepared planking

done - planking installed and sanded - btw from this perspective the planking is straight

from this perspective I have curved planking at the stern

The planking of the stern and the planking of the hull are sanded, so that the decoration elements will fit (I hope so)

and the view form "inside"

Many Thanks for your interest .... to be continued ....
Coming to the stern decorations
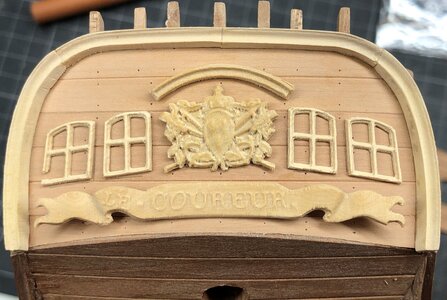
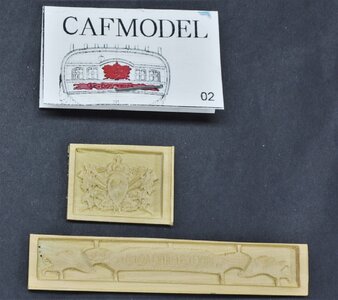
These are the boxwood carved decoration elements of the stern
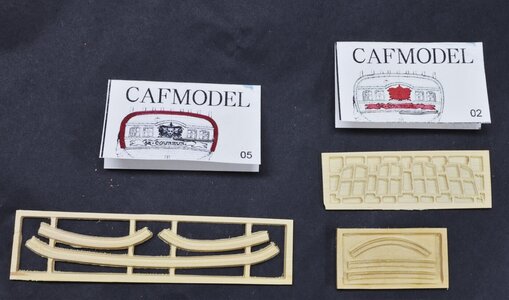
First of all the four windows of the stern
Due to the fact, that they are very filligran made, I did not use a sharp knife, but sanded them down from the backside, up to the level of the openings
here you can see, that already some areas are "free"
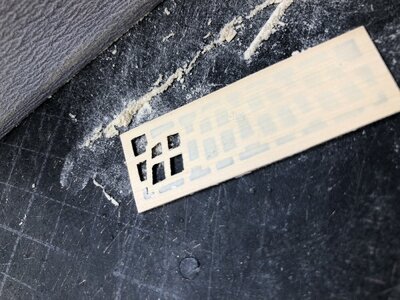
and more sanding from the backside
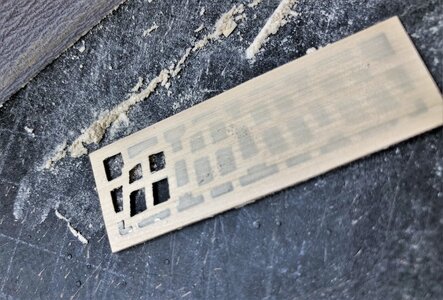
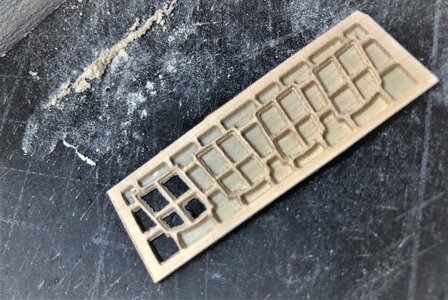
further sanding - carefully
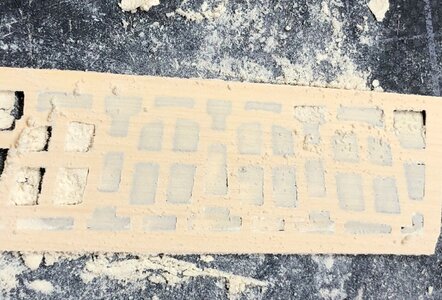
still not finished, but one step done
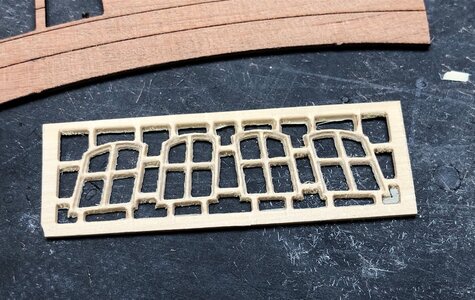
These are the boxwood carved decoration elements of the stern


First of all the four windows of the stern
Due to the fact, that they are very filligran made, I did not use a sharp knife, but sanded them down from the backside, up to the level of the openings
here you can see, that already some areas are "free"

and more sanding from the backside


further sanding - carefully

still not finished, but one step done

Coming to the stern decorations
These are the boxwood carved decoration elements of the stern
View attachment 250864
View attachment 250865
First of all the four windows of the stern
Due to the fact, that they are very filligran made, I did not use a sharp knife, but sanded them down from the backside, up to the level of the openings
here you can see, that already some areas are "free"
View attachment 250859
and more sanding from the backside
View attachment 250860
View attachment 250861
further sanding - carefully
View attachment 250862
still not finished, but one step done
View attachment 250863
Your tail turned out really good, very nice. We are very familiar with grinding. I will continue today after a 5 day break.
Looks very good, absolutely coherent.
Hi Uwe,
very careful construction!
Just keep it up!
Cheers Alexander
very careful construction!
Just keep it up!
Cheers Alexander
Very nice work, I like the straight planking, but "personally" I find the windows no longer harmonize as they are very curved.
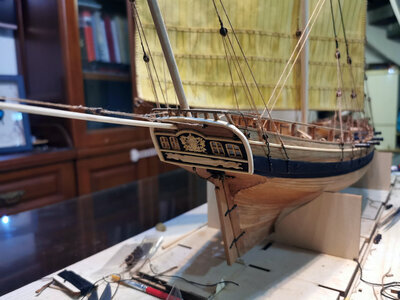
In this example the windows are straighter. The question now arises to me whether it looks different when color comes into play and the lines of the planking are no longer so clearly visible.
In spite of everything, very clean and beautiful work.

In this example the windows are straighter. The question now arises to me whether it looks different when color comes into play and the lines of the planking are no longer so clearly visible.
In spite of everything, very clean and beautiful work.
The "curved" or "straight" windows are also like the planking a question of the perspective..... I find the windows no longer harmonize as they are very curved.
....
In this example the windows are straighter. The question now arises to me whether it looks different when color comes into play and the lines of the planking are no longer so clearly visible.
When the eye is somehow close to the waterline the windows are straighter. Like your example of the model built by CAF
My photo showing the windows in post 913 is with the view somehow under the water appr. rectangle to the transom -> here the windows are looking curved.
The "curved" or "straight" windows are also like the planking a question of the perspective.
When the eye is somehow close to the waterline the windows are straighter. Like your example of the model built by CAF
My photo showing the windows in post 913 is with the view somehow under the water appr. rectangle to the transom -> here the windows are looking curved.
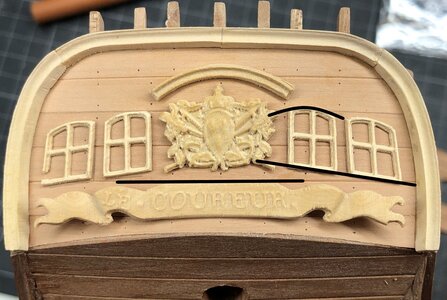
I think that I expressed myself wrong, I meant the harmony between window and planking, this slope that arises, but as you say, the angle of view and the taste of the viewer always play a big role. It shouldn't be a criticism either, because your work is great.
Understood - you are rightView attachment 251393
I think that I expressed myself wrong, I meant the harmony between window and planking, this slope that arises, but as you say, the angle of view and the taste of the viewer always play a big role. It shouldn't be a criticism either, because your work is great.

I did not include this difference of the angle into my thoughts before
-> Sometimes modeling is like playing chess - you have to think minimum 3 steps ahead, but unfortunately the fourth step would change everything ......
Nevertheless working on straight planks was much easier, like Bernhard Frölich
