
A fantastic development, looks very, very good. Also wish a nice weekend.

-

SUBSCRIBE TO SHIPS IN SCALE TODAY!
The beloved Ships in Scale Magazine is back and charting a new course for 2026!
Discover new skills, new techniques, and new inspirations in every issue.
NOTE THAT OUR NEXT ISSUE WILL BE July/August 2026 -

Win a Free Custom Engraved Brass Coin!!!
As a way to introduce our brass coins to the community, we will raffle off a free coin during the month of August. Follow link ABOVE for instructions for entering.
- Home
- Forums
- Ships of Scale Group Builds and Projects
- Le Coureur 1776 1:48 PoF Group Build
- Le Coureur 1776 1:48 Group Build Logs
You are using an out of date browser. It may not display this or other websites correctly.
You should upgrade or use an alternative browser.
You should upgrade or use an alternative browser.
LE COUREUR - french Lugger 1776 - POF kit from CAF in 1:48 by Uwe

Very nice progress, looks very nice and accurate. Have a nice weekend, too, and thank you for your wishes for our continued construction on the model. For me, the exterior planking is on.

Many Thanks for your comments, and all the likes received.....
Before I start with the rudder, I just finalized the stops of the windlass, which were still not finished.
These wooden bases for the stops are partly overlapping with the partners of the mast - in addition I made also some "bolts"


and also the two hinges were prepared - only blackening is still not done - fianl installation when everything on the deck will be assembled

these small bolts with round head are from Dry Dock Models - diameter 0,5mm - great to immitate such fixings

a normal toothpick to compare the size - the hinches are "working"

Before I start with the rudder, I just finalized the stops of the windlass, which were still not finished.
These wooden bases for the stops are partly overlapping with the partners of the mast - in addition I made also some "bolts"
and also the two hinges were prepared - only blackening is still not done - fianl installation when everything on the deck will be assembled
these small bolts with round head are from Dry Dock Models - diameter 0,5mm - great to immitate such fixings
a normal toothpick to compare the size - the hinches are "working"
Those tiny hinges with the bolts turned out pretty good. Eveything looks quite great.
Many Thanks for your comment - high appreciatedThis really good work, Uwe. You are setting an excellent example to the rest of the Group builders with your efforts. Maybe you can ask Tom for a replacement left window frame on the stern?
The small damage at the window is really hardly visible - and will remind me for the future to be much more careful with such fragile elements
Starting with the rudder of the ship - also a small project in the project, not with the timber elements, but the hinges have to be prepared well......
First of all the manual of the kit so you get an impression of the parts content in the CAF kit of the Le Coureur

I did not make any photo of the six timber parts of the kit, sorry..... but they fit very well.
It is sandwich built (2 times three parts) to get the overall thickness - after gluing them together the fun will start
included in the kit are also three hinges made out of brass

Before everything fits together the form of the wooden rudder has to be adjusted - the width at the bottom is smaller than at the top, second is the triangle front / fore (see later in the photo) and also the carefully cut out of some notches for the hinges
Here you can see the form of the rudder blade in the Boudriot excerpt


compared with teh excerpt of Jean Boudriot drawing


Here you can see the triangle form - necessary that the rudder can move to the side without touching the keel

and a first test at the hull - step by step it is getting nice - but still a lot to do at the rudder

First of all the manual of the kit so you get an impression of the parts content in the CAF kit of the Le Coureur
I did not make any photo of the six timber parts of the kit, sorry..... but they fit very well.
It is sandwich built (2 times three parts) to get the overall thickness - after gluing them together the fun will start
included in the kit are also three hinges made out of brass
Before everything fits together the form of the wooden rudder has to be adjusted - the width at the bottom is smaller than at the top, second is the triangle front / fore (see later in the photo) and also the carefully cut out of some notches for the hinges
Here you can see the form of the rudder blade in the Boudriot excerpt
compared with teh excerpt of Jean Boudriot drawing
Here you can see the triangle form - necessary that the rudder can move to the side without touching the keel
and a first test at the hull - step by step it is getting nice - but still a lot to do at the rudder
Einfach nur toll.
Ja - and I want to state, that with this extreme good basis of a well designed and high quality material in the kit you can make a really good model.Einfach nur toll.
and I think with some tools and some other small add-ons you can prepare a really special and great model......
Going further with the hinges of the rudder.
To imitate the bolts with which the wooden part of the rudder were fixed to the hinges I drilled some 0,5mm holes into the brass hinges with 1,2mm width

and insterted once more the fine "tiny nails" from @Dry-Dock Models & Parts
These nail heads are fitting well and looking like the bolt heads.....
 drydockmodelsandparts.com

overlength removed and ready for blackening

but before once more a dry fit on the rudder - also compared with the drawing of Jean Boudriot´s Le Coureur


But now they can be blackened


and here the rudder in place - approximately at this place it will be installed (the end of the rudder has to be slightly higher than the bottom of the keel)

It is looking nice - I am happy with the result
(a little bit higher than shown here)

Many Thanks for your interest - next post will show the second parts of the rudder-hinches
To imitate the bolts with which the wooden part of the rudder were fixed to the hinges I drilled some 0,5mm holes into the brass hinges with 1,2mm width
and insterted once more the fine "tiny nails" from @Dry-Dock Models & Parts
These nail heads are fitting well and looking like the bolt heads.....
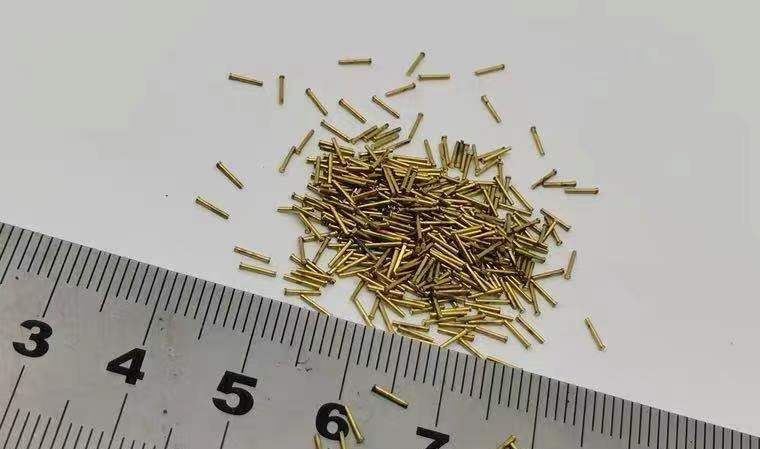
Tiny nails ( brass)
The brass nails has a flat end not spiky ,also the shape of the head is round and flat Diameter 0.3 mm ,Head 0.5mm, lenght 4mm Diameter 0.5mm , Head 0.7mm , lenght 4mm Diameter 0.6 mm , Head 1mm , lenght 6mm
drydockmodelsandparts.com
overlength removed and ready for blackening
but before once more a dry fit on the rudder - also compared with the drawing of Jean Boudriot´s Le Coureur
But now they can be blackened
and here the rudder in place - approximately at this place it will be installed (the end of the rudder has to be slightly higher than the bottom of the keel)
It is looking nice - I am happy with the result
(a little bit higher than shown here)
Many Thanks for your interest - next post will show the second parts of the rudder-hinches
Hello Uwe, you can really be more than satisfied, looks flawless.Going further with the hinges of the rudder.
To imitate the bolts with which the wooden part of the rudder were fixed to the hinges I drilled some 0,5mm holes into the brass hinges with 1,2mm width
View attachment 253625
and insterted once more the fine "tiny nails" from @Dry-Dock Models & Parts
These nail heads are fitting well and looking like the bolt heads.....
View attachment 253626Tiny nails ( brass)
The brass nails has a flat end not spiky ,also the shape of the head is round and flat Diameter 0.3 mm ,Head 0.5mm, lenght 4mm Diameter 0.5mm , Head 0.7mm , lenght 4mm Diameter 0.6 mm , Head 1mm , lenght 6mm
overlength removed and ready for blackening
View attachment 253627
but before once more a dry fit on the rudder - also compared with the drawing of Jean Boudriot´s Le Coureur
View attachment 253628
View attachment 253629
But now they can be blackened
View attachment 253630
View attachment 253631
and here the rudder in place - approximately at this place it will be installed (the end of the rudder has to be slightly higher than the bottom of the keel)
View attachment 253632
It is looking nice - I am happy with the result
(a little bit higher than shown here)
View attachment 253633
Many Thanks for your interest - next post will show the second parts of the rudder-hinches
- Joined
- Sep 28, 2020
- Messages
- 287
- Points
- 168

Very good job Uwe 
Wonderful Uwe. The hinges look alive.
Many Thanks for the comments and all the likes received.
Finishing the rudder hinges on the hull side - the same procedure like at the rudder
Once more I show more photos especially for the modelers coming later to this stage of the construction - for all other I say sorry for the boring somehow repeating photos. But I think, that a modeler working on this kit likes to see the same from different angles etc.......
The notches are prepared and the hinges are fitting

Now the first time the "marriage" of the rudder with the hull - the rudder fits well, is able to rotate and vlose enough to the hull, so that the gap is as small as possible


and the same status from the other side


now finished with bolts and blackened


One element more prepared - what is coming next?
Let us see tomorrow, so stay tuned ......
Finishing the rudder hinges on the hull side - the same procedure like at the rudder
Once more I show more photos especially for the modelers coming later to this stage of the construction - for all other I say sorry for the boring somehow repeating photos. But I think, that a modeler working on this kit likes to see the same from different angles etc.......
The notches are prepared and the hinges are fitting
Now the first time the "marriage" of the rudder with the hull - the rudder fits well, is able to rotate and vlose enough to the hull, so that the gap is as small as possible
and the same status from the other side
now finished with bolts and blackened
One element more prepared - what is coming next?
Let us see tomorrow, so stay tuned ......
The Le Coureur was too small and had no steering wheel, she was piloted / steered by a hand operated tiller


now also with the iron bands and the axis (the nail is only temporary inserted and will be changed later on)

For fun and to see, how it is looking I put the chain with some double sided adhesive tape

The chain is included in the kit - very good quality and absolutely in scale !!!! Great detail by @CAFmodel

now also with the iron bands and the axis (the nail is only temporary inserted and will be changed later on)
For fun and to see, how it is looking I put the chain with some double sided adhesive tape
The chain is included in the kit - very good quality and absolutely in scale !!!! Great detail by @CAFmodel

Very good job, Uwe.
The rudder looks very authentic.
Are the stern decorations ready or do you plan to paint or gilden them?
Grüße, Alexander
The rudder looks very authentic.
Are the stern decorations ready or do you plan to paint or gilden them?
Grüße, Alexander
Hallo Alexander,Very good job, Uwe.
The rudder looks very authentic.
Are the stern decorations ready or do you plan to paint or gilden them?
Grüße, Alexander
many thanks to your kind words.
I am really not a good painter, so I plan to leave them in the wooden appearance - f.e. I also want to leave the wales without any painting
I know the painting informations by Boudriot, but I like models often without the painting.

Some smaller things were done - now I am coming to the stage, that a lot of small works have to be done, which were still missing
First of all the inserts of the 12 scuppers are now blackened and finaly installed

also the two small stairs on the deck
first the manual

and in "real" life


First of all the inserts of the 12 scuppers are now blackened and finaly installed
also the two small stairs on the deck
first the manual
and in "real" life
Looking great Uwe
On the Le Coureur the ships-boat was stored on the deck. Because of missing space it was not in the middle axis, but more starboard.
Interesting is the discription by Jean Boudriot:
Ships boat:
The ship´s boat, the only boat on board, is secured atop two raised supports (comment Uwe: in drawings are three supports shown) as to not hinder passage of the cables.
and
We must note, that its location is incompatible with the operation of the two starboard side guns: unless the ship´s boat is moved or set in-tow behind the vessel.
Means, that the crew of the Le Coureur had to lift the boat from the deck into the water for towing before they are "ready for action". Also it has to be removed, when the main hatch over the main cargo hold has to be opened. BTW: Also the spare anchors were stored near or under the boat, also the oars (eighteen according Boudriot), if not alongside the hull........
It was really a small ship and the free deck space was very limited.
Here the manual of the supports:

The parts of the supports comparing with the drawing.
You can recognize, that the supports should have also a negative form of the clinker planking of the boat (steps) - this can be only prepared, when the hull of the boats model is finished

The "raw" parts on the deck

and finally glued and also with some bolts


Interesting is the discription by Jean Boudriot:
Ships boat:
The ship´s boat, the only boat on board, is secured atop two raised supports (comment Uwe: in drawings are three supports shown) as to not hinder passage of the cables.
and
We must note, that its location is incompatible with the operation of the two starboard side guns: unless the ship´s boat is moved or set in-tow behind the vessel.
Means, that the crew of the Le Coureur had to lift the boat from the deck into the water for towing before they are "ready for action". Also it has to be removed, when the main hatch over the main cargo hold has to be opened. BTW: Also the spare anchors were stored near or under the boat, also the oars (eighteen according Boudriot), if not alongside the hull........
It was really a small ship and the free deck space was very limited.
Here the manual of the supports:
The parts of the supports comparing with the drawing.
You can recognize, that the supports should have also a negative form of the clinker planking of the boat (steps) - this can be only prepared, when the hull of the boats model is finished
The "raw" parts on the deck
and finally glued and also with some bolts