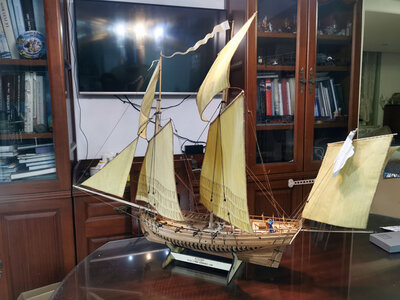
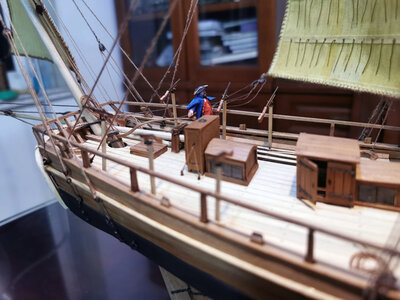
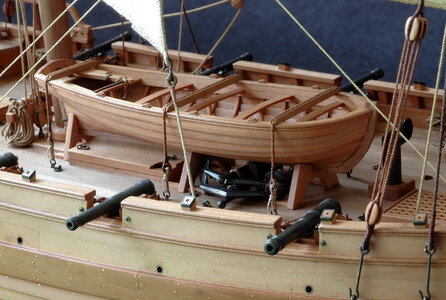
LE COUREUR - french Lugger 1776 - POF kit from CAF in 1:48 by Uwe

Let us take first a look at the Jean Boudriot drawing of this detail available in the Le REQUIN monograph


There shown three of these iron supports
IMG-7396.jpg

IMG-7397.jpg

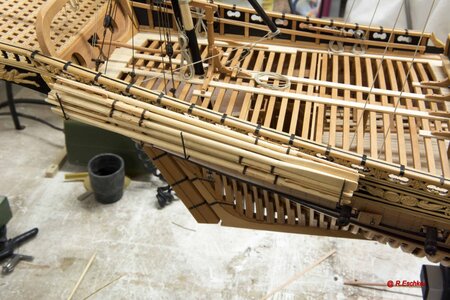
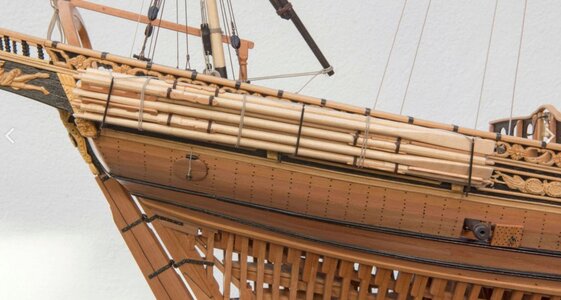
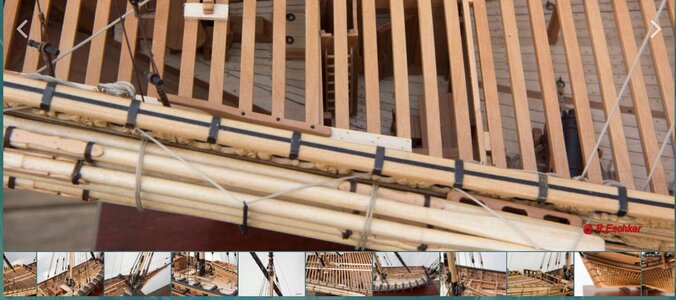
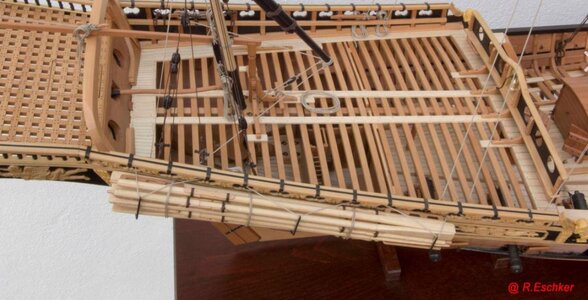
and now as agreed with Rüdiger his execution on his model

f1006t4617p132173n5_MsLPlHpI.jpg

The oars are tied together as a bundle and laying inside these three supports - in addition the supports are connected with a removable rope which shall fix the bundle inside the supports - simple way (not execution in the model!) and very clever detail

during construction with the oars, but without the ropes
f1006t4617p132173n6_fTJrYwQa.jpg

f1006t4617p132173n7_PvbVqxcw.jpg

and the final stage
Unbenannt11.JPG

Unbenannt12.JPG

Unbenannt13.JPG

Unbenannt10.JPG

Now I have a new additional small challenge to make - I will do something similar on my Le Coureur

Once more many thanks to @Lucius for the assiatance and help and @Tobias for the hint to take a look at the La Requin
 
Ich freue mich, Bilder von meinem eigenen Le Requien zu sehen. Im Anhang seht ihr die Montage der Ruder an meinem Modell.

Entschuldigung, Lucius, dass ich nicht gefragt habe. Die Bilder habe ich bei Modelships.de gefunden.

Es gab keinen Hinweis auf einen Autor, sorry.

25541AEF-AE3E-43F0-B969-BB0D7DFF306E.png
 
Last edited by a moderator:
Let us take first a look at the Jean Boudriot drawing of this detail available in the Le REQUIN monograph


There shown three of these iron supports
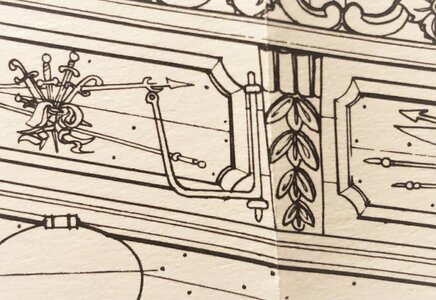
View attachment 257826

View attachment 257827

and now as agreed with Rüdiger his execution on his model
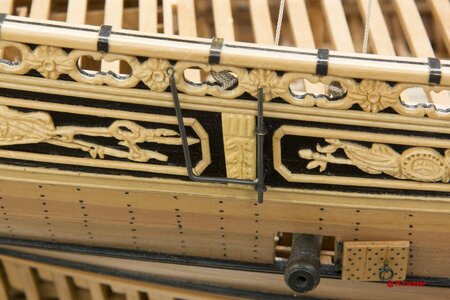
View attachment 257829

The oars are tied together as a bundle and laying inside these three supports - in addition the supports are connected with a removable rope which shall fix the bundle inside the supports - simple way (not execution in the model!) and very clever detail

during construction with the oars, but without the ropes
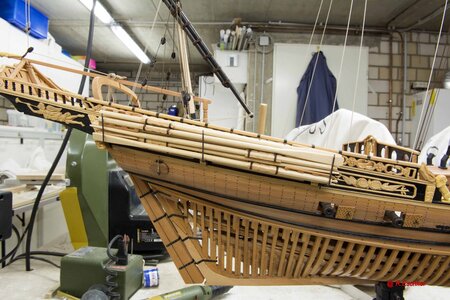
View attachment 257830

View attachment 257831

and the final stage
View attachment 257833

View attachment 257834

View attachment 257835

View attachment 257832

Now I have a new additional small challenge to make - I will do something similar on my Le Coureur

Once more many thanks to @Lucius for the assiatance and help and @Tobias for the hint to take a look at the La Requin
Very nice model with excellent wood color tones working together. RIch (PT-2)
 
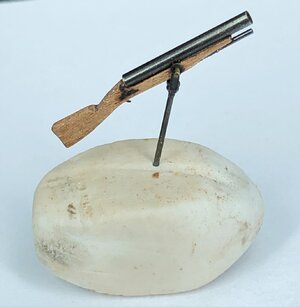
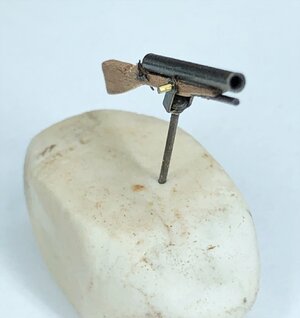
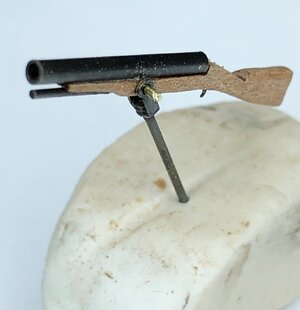
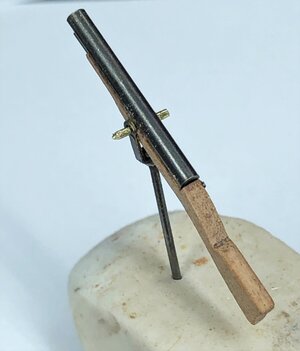
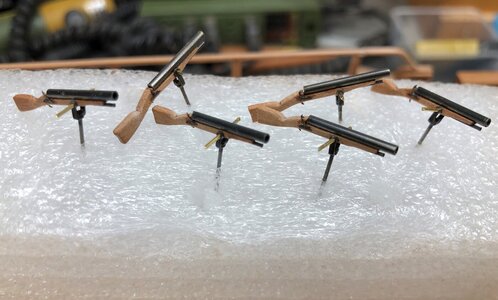
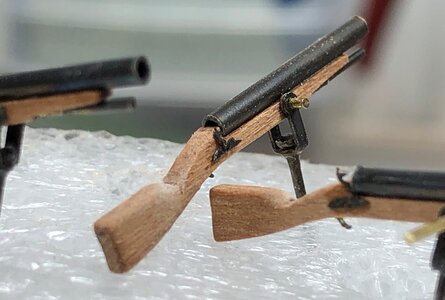
In the meantime I started also a small project inside the project and started to make the six muzzles which are mounted aft of the Le Coureur.
Off course they have to wait for the final installation until the masts and rigging works are finished.

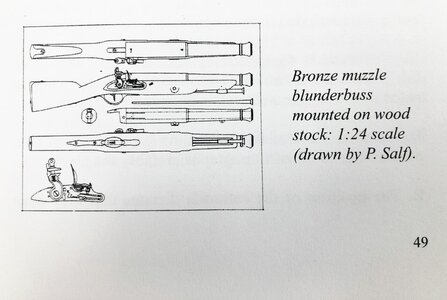
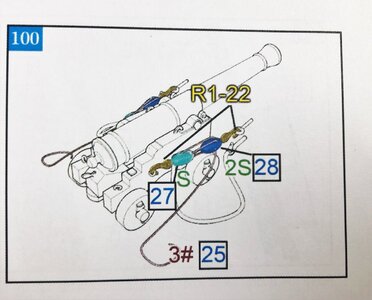
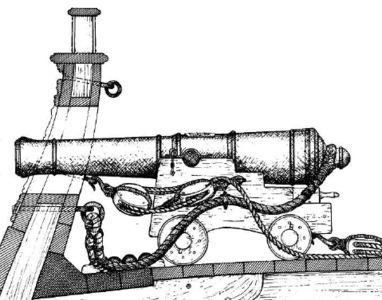
This is a sketch from Boudriot, how in detail such a gun was looking like, too much details, which can be hardly made in 1:48, but @CAFmodel made here really a good job.

IMG-7218.jpg

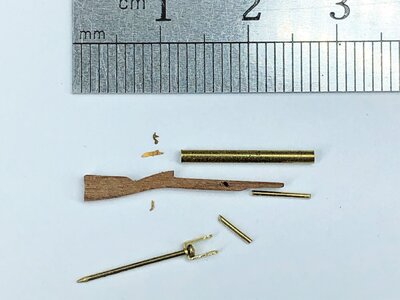
Here the parts which are necessary to make one of the muzzles - you can see, that the photoetched parts are really really small

IMG-7217.jpg

after blackening all metal parts I put the first gun together - with a good result I think

did I mention already that the parts are reall small ? ...... ;)

IMG-7222.jpg

IMG-7223.jpg

IMG-7224.jpg

IMG-7225.jpg

somehow it will look later on like this (off course without the rubber / eraser

IMG-7229.jpg

after I knew how these small parts have to be handled (they are really small) I managed to make the missing five muzzle guns

IMG-7246.jpg

IMG-7247.jpg

The guns are now stored safely for the final installation at the end of the complete construction
 
Man, these guns are soooo cool! Great work, Uwe.
A speculation from the sideline is that the tube barrel looks like a thick wall tube which if protected by a paper wrap could gently be secured in the jaws of a lathe or drill and then worked down by filing to shape the muzzle and possibly the two reinforcing bands on the barrel. With a small round file or some careful grinding with a correctly sized drill bit the stock could be grounded/filed deeper to set the breech end into the stock a the drawings show and not protruding above. The option to that last deepening would be to add a shim/filler piece on the top of the stock to also close out the breech of the tube/barrel. Maybe not for these which are finished without backing up but possibly for others to consider in their own work on these blunderbuss guns. Just some thoughts as I have been the mode of removing previous work when I think it was not right or what I wanted so I am in a reworking rut now. I am sure that your work will sit well in your ship. Rich (PT-2)
 
A speculation from the sideline is that the tube barrel looks like a thick wall tube which if protected by a paper wrap could gently be secured in the jaws of a lathe or drill and then worked down by filing to shape the muzzle and possibly the two reinforcing bands on the barrel. With a small round file or some careful grinding with a correctly sized drill bit the stock could be grounded/filed deeper to set the breech end into the stock a the drawings show and not protruding above. The option to that last deepening would be to add a shim/filler piece on the top of the stock to also close out the breech of the tube/barrel. Maybe not for these which are finished without backing up but possibly for others to consider in their own work on these blunderbuss guns. Just some thoughts as I have been the mode of removing previous work when I think it was not right or what I wanted so I am in a reworking rut now. I am sure that your work will sit well in your ship. Rich (PT-2)
In principle you are right with your ideas of optimizing the small guns. and many thanks for describing some possible solutions, which could be a good hint for the next modelers coming to this step. Thumbsup

Nevertheless I wanted also to show, how good such a small gun can look like, when the manufacturer is already preparing the kit in a very good way.
But you are right - there is every time some more space for improvement. If was, speaking for me, already happy about this result
BTW: Usually these guns are usually not shown by any scratch modeler of this ship - until now I did not know of one showing these guns. The first and the only le Coureur until now, where such muzzles were installed is the model CAF built by himself
QQ图片20201006015644.jpg QQ图片20201006015649.jpg

Usually the poles for the guns are empty - too complicated to make - but maybe in future based on the kit material and your ideas .......
 
Now we come to the real "big" guns
but when we talk about "big" everything is and was relatively.

The Le Coureur was equiped with only 8 small guns
..... originally the french had six 2-pdrs and two 3 pdrs guns on board. The british, after the capture, changed the gunnery to eight 4 pdr. guns

The french Broadside Weight was only 12.5 French Livre, which means appr. 13.49 lbs or only 6.2 kg. For comparison the HMS Alert had during the action with the Le Coureur 12 guns with 6 pdrs and 12 swivel guns, a total Broadside Weight of 39 Imperial Pound (appr. 17.7 kg) - 3 times more than the Coureur.

So the guns of the Le Coureur were really lightweights

from threedecks:
The British cutter Alert, Lieut. William George Fairfax, attacked the French lugger Coureur. The Alert carried eighty men, twelve 6's, and as many swivels: the Coureur had fifty men, two 3's, eight 2's, and six swivels; she was commanded by Enseigne de Rosily. She was ordered to go to the British Admiral; refused; and was at once fired upon. The two fought at pistol-shot range for nearly an hour and a half, until the Coureur struck. She hit the Alert several times on the water-line and cut up her rigging.

 
In principle you are right with your ideas of optimizing the small guns. and many thanks for describing some possible solutions, which could be a good hint for the next modelers coming to this step. Thumbsup

Nevertheless I wanted also to show, how good such a small gun can look like, when the manufacturer is already preparing the kit in a very good way.
But you are right - there is every time some more space for improvement. If was, speaking for me, already happy about this result
BTW: Usually these guns are usually not shown by any scratch modeler of this ship - until now I did not know of one showing these guns. The first and the only le Coureur until now, where such muzzles were installed is the model CAF built by himself
View attachment 258539 View attachment 258540

Usually the poles for the guns are empty - too complicated to make - but maybe in future based on the kit material and your ideas .......
You have a very fine looking ship and details. RIch (PT-2)
 
My friends,
many thanks for all your comments, hints and remarks - and off course also for the received likes

Before I started with the guns, I made the preparations on the hull, means the installation of the bolts for the gun tackles visible outside of the hull.

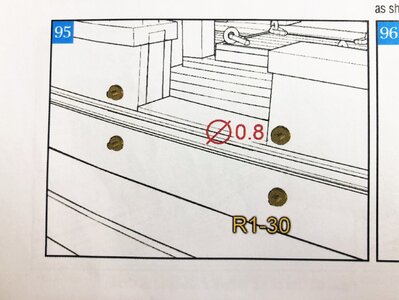
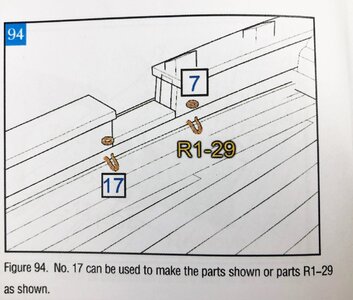
Here the manual descriptions for your information

IMG-7157.jpg

shown are two bolt ends located at each side of the gunports - the upper one for the ringbolt for the tackle and the lower ones for the hooks of the breeching rope

IMG-7158.jpg

IMG-7159.jpg

The inner ringbolt and hook I decided to install later on together finally with the guns - it is much easier to prepare the complete tackle incl. the ringsbolts and hooks at the gun, compared to the necessary work to fix the tackle, when they are already installed at the railing.

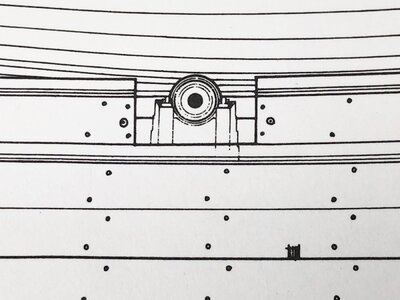
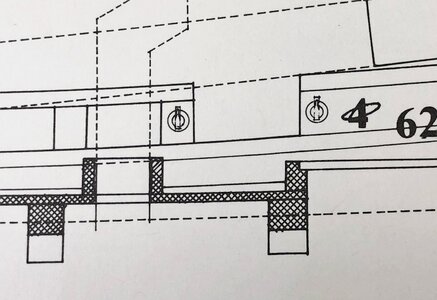
As usual I compared the bolt solution with the Boudriot monograph

IMG-7160.jpg

and photos showing scratch build models

a_6411.jpg

and realized, that there are outside only two bolts at each gunport visible

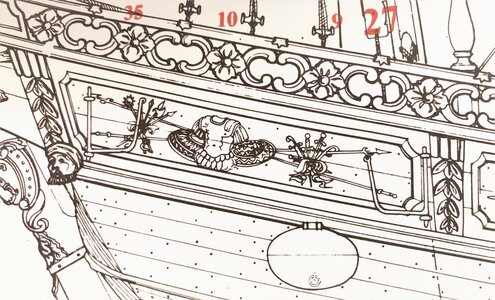
closer look at the Boudriots drawing of the Le Coureur is showing us a different type of fixing the gun tackles and breeching rope - unfortunately no sideview

IMG-7161.jpg

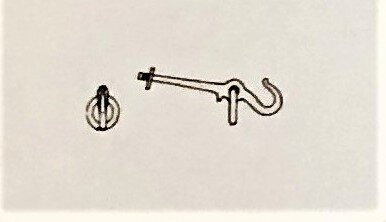
Only with this drawing I did not understand, how this bolt could look like (nowhere else in the monograph is shown something), but I found the final missing info in the monograph of the Le Cerf also by jean Boudriot.

cerf8.jpg

so it is a combined hook with implemented ring

Once more it is getting clear, that the recoil forces of such 2 and 3pdr guns was not very high.

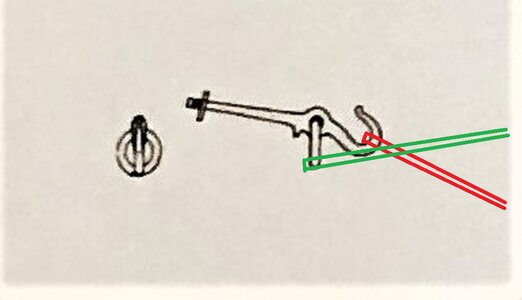
From technical point of view I have my doupts (this is now brainstorming), if such a combined ring-hook was really working well ?!?!

Usually on bigger or other guns the fixing points were organized like this:
The hook or bolt for the breeching rope is lower installed than the ringbolt for the gun tackle! So the tackle of the gun was everytime free to remove from the hook or not covered by the breeching rope

1584526095213.png

I am sure it was partly problematic with such a ring hook

cerf8a.jpg

beacuse here the ring for the tackle (green) is installed under the hook of the breeching rope (red)

cerf8a.jpg

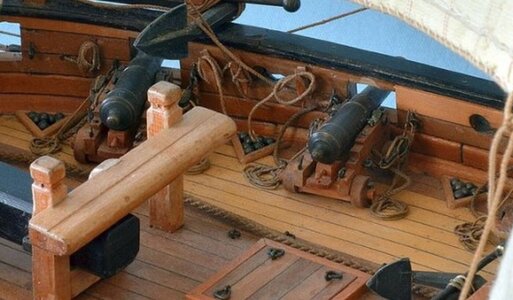
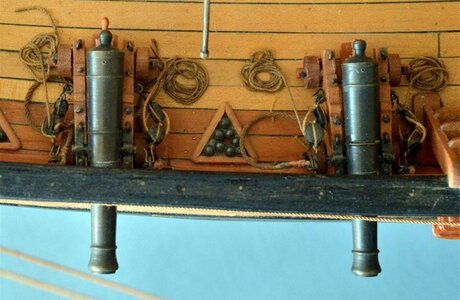
see also the photos of a Le Cerf model

gun le Cerf.JPG gun le Cerf 2.JPG

I guess it was sometimes no easy to handle and the ropes were sometimes, after the gun recoiled, not easy to get free or to handle......

Sorry for the longer and maybe for a lot members uninteresting subject, but I am still thinking about to make one combined or two seperate fixing points........
 
Personal point of view (since you invite to brain storming): When (if) I come this far I'll make it as intended by CAF. Partly because I think the complex ring/hook combination will be very difficult to make so it looks really good, not at least in such a small scale. And partly because I personally prioritize the aesthetically pleasing and what is functionel in practise higher than what may or may not be historically correct.
 
Hello Uwe,
I had some moments free from office work and life as usual to review your build and it is always a pleasure to see perfect workmanship and details. It is truly a lovely ship.
 
My friends,
many thanks for all your comments, hints and remarks - and off course also for the received likes

Before I started with the guns, I made the preparations on the hull, means the installation of the bolts for the gun tackles visible outside of the hull.

Here the manual descriptions for your information

View attachment 258730

shown are two bolt ends located at each side of the gunports - the upper one for the ringbolt for the tackle and the lower ones for the hooks of the breeching rope

View attachment 258731

View attachment 258732

The inner ringbolt and hook I decided to install later on together finally with the guns - it is much easier to prepare the complete tackle incl. the ringsbolts and hooks at the gun, compared to the necessary work to fix the tackle, when they are already installed at the railing.

As usual I compared the bolt solution with the Boudriot monograph

View attachment 258733

and photos showing scratch build models

View attachment 258740

and realized, that there are outside only two bolts at each gunport visible

closer look at the Boudriots drawing of the Le Coureur is showing us a different type of fixing the gun tackles and breeching rope - unfortunately no sideview

View attachment 258734

Only with this drawing I did not understand, how this bolt could look like (nowhere else in the monograph is shown something), but I found the final missing info in the monograph of the Le Cerf also by jean Boudriot.

View attachment 258741

so it is a combined hook with implemented ring

Once more it is getting clear, that the recoil forces of such 2 and 3pdr guns was not very high.

From technical point of view I have my doupts (this is now brainstorming), if such a combined ring-hook was really working well ?!?!

Usually on bigger or other guns the fixing points were organized like this:
The hook or bolt for the breeching rope is lower installed than the ringbolt for the gun tackle! So the tackle of the gun was everytime free to remove from the hook or not covered by the breeching rope

View attachment 258744

I am sure it was partly problematic with such a ring hook

View attachment 258745

beacuse here the ring for the tackle (green) is installed under the hook of the breeching rope (red)

View attachment 258746

see also the photos of a Le Cerf model

View attachment 258743 View attachment 258742

I guess it was sometimes no easy to handle and the ropes were sometimes, after the gun recoiled, not easy to get free or to handle......

Sorry for the longer and maybe for a lot members uninteresting subject, but I am still thinking about to make one combined or two seperate fixing points........
Actually, I find discussion quite interesting. Single hook/ring would be very difficult to manufacture uniformly without casting/photo etching. La Belle had a very similar arrangement. Johann (@archjofo ) would definitely be a person to provide some insight on how to make them.
 
Last edited by a moderator:
Back
Top