-

Win a Free Custom Engraved Brass Coin!!!
As a way to introduce our brass coins to the community, we will raffle off a free coin during the month of August. Follow link ABOVE for instructions for entering.
-

PRE-ORDER SHIPS IN SCALE TODAY!
The beloved Ships in Scale Magazine is back and charting a new course for 2026!
Discover new skills, new techniques, and new inspirations in every issue.
NOTE THAT OUR FIRST ISSUE WILL BE JAN/FEB 2026
You are using an out of date browser. It may not display this or other websites correctly.
You should upgrade or use an alternative browser.
You should upgrade or use an alternative browser.
Le Fleuron 1729 - 64 Gun Ship PoB Scratch Build in 1:48 - (Ancre Monograph-J. Boudriot/G. Delacroix)
- Thread starter Hoss6262
- Start date
- Watchers 54
-
- Tags
- ancre le fleuron pob
- Joined
- Oct 15, 2017
- Messages
- 1,191
- Points
- 443

Hello All,
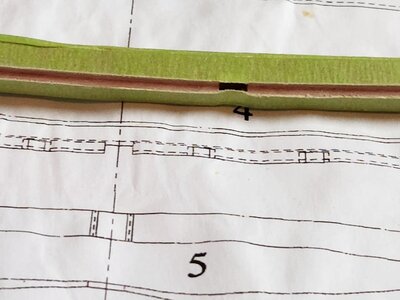
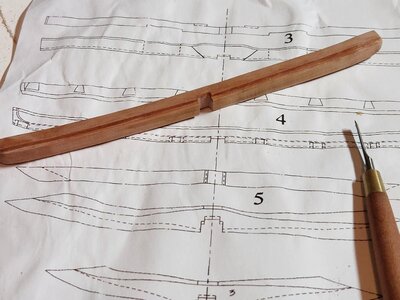
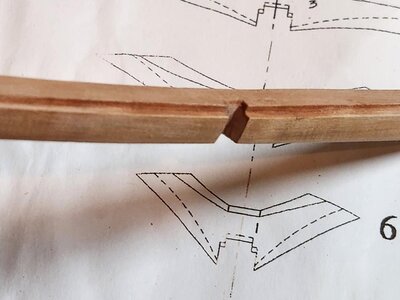
While I wait for some modeling clay to be delivered, I decided to work on the next logical element after the stern post. The wing transom. this piece is pretty straight forward. There is some curvature in it, with a centered notch to accept the stern post. Additionally, the bottom edge has a rabbit cut to accept the ends of the hull planking.
Cutting the rabbit.
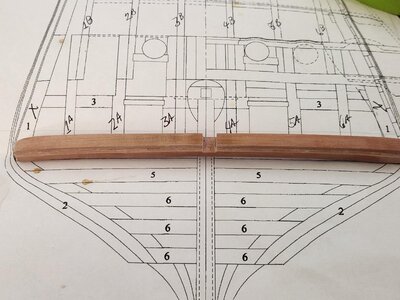
This may be the first element I successfully made on the first attempt. Next up will be the upper transom, which is slightly less straight forward than the wing transom. After that, I think the counter timbers perhaps.
Thanks for following along. Till next time...
While I wait for some modeling clay to be delivered, I decided to work on the next logical element after the stern post. The wing transom. this piece is pretty straight forward. There is some curvature in it, with a centered notch to accept the stern post. Additionally, the bottom edge has a rabbit cut to accept the ends of the hull planking.
Cutting the rabbit.


This may be the first element I successfully made on the first attempt. Next up will be the upper transom, which is slightly less straight forward than the wing transom. After that, I think the counter timbers perhaps.
Thanks for following along. Till next time...
- Joined
- Oct 15, 2017
- Messages
- 1,191
- Points
- 443

Hello All,
I am again in "spurt" mode. Small update, 9 hours to create one little piece of pear wood, the upper helm port transom. No re-dos though. A small victory.
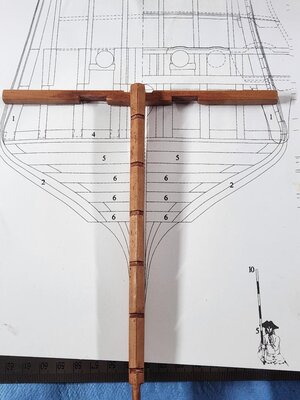
The upper transom, which will be fixed to the upper stern post has been completed, to a point. I have routinely been finishing element a little wider than shown in the plan to give myself the ability to adjust when dry fitting. This is because the ship's shell is the X factor and there may be small variable I will need to account for.
--------------------------------------------------------------------------------------------------------------------------------------------
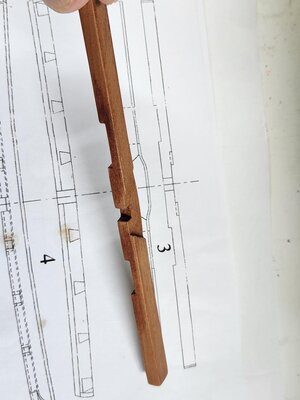
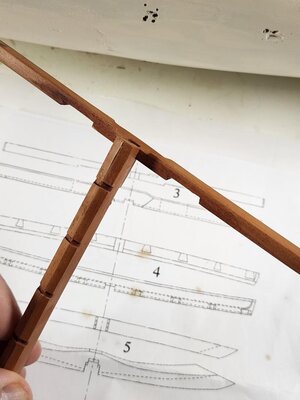
Centered on the aft face of the piece is the notch to accept the stern post. The top of the transom also has an area recessed to provide the the tiller free movement.
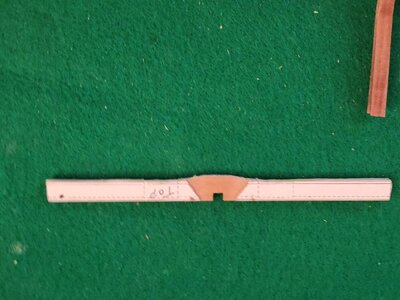
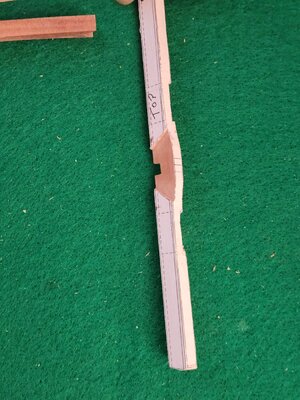
The underside of the transom has two rebates that serve as the upper sill of the aft gun ports. The depth of these are the initial mappings and are further deepened in the final version in the last photos.
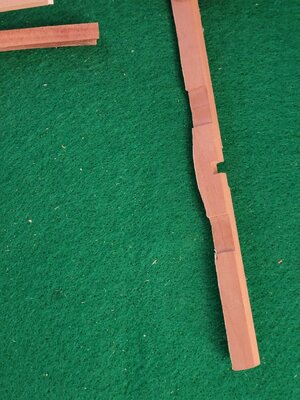
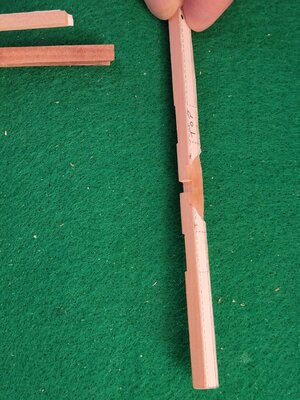
Just a couple of photos of both the stern post and upper transom. I meant to include the wing transom as well, but at this very moment it is lost. I know it didn't grow legs and walk somewhere. As I have not found any little splinters or chewed remnants, I don't think my 4 legged friend found it.
She doesn't look guilty, does she? Shiawase (Shia)???
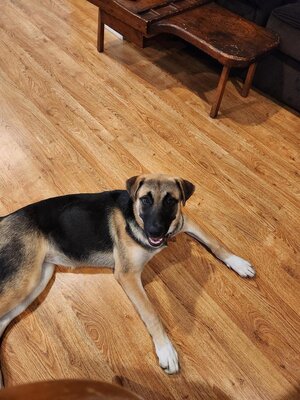
I'm sure it will show up. Hopefully not in a poop pile.
Some photos of stern post and upper transom. I finish the piece like I do all, to seal them from humidity with sanding sealer only.
Ok that's it for now. I think progress will slow a little bit now. Next up are the counter timbers and I've not yet decided how to best process them to create identical pieces. My greatest concern is that there are so many contact points in the stern structure. All the elements need to be fixed to each other correctly in order for the structure to be square. So more measure 4 times and hopefully cut once.
Modeling clay arrives today so I hope to at least start the task to measure the gap in the underside of my hull as suggested by Maarten and Paul.
Thanks for following along!
Till next time...
I am again in "spurt" mode. Small update, 9 hours to create one little piece of pear wood, the upper helm port transom.
 No re-dos though. A small victory.
The upper transom, which will be fixed to the upper stern post has been completed, to a point. I have routinely been finishing element a little wider than shown in the plan to give myself the ability to adjust when dry fitting. This is because the ship's shell is the X factor and there may be small variable I will need to account for.
--------------------------------------------------------------------------------------------------------------------------------------------
Centered on the aft face of the piece is the notch to accept the stern post. The top of the transom also has an area recessed to provide the the tiller free movement.


The underside of the transom has two rebates that serve as the upper sill of the aft gun ports. The depth of these are the initial mappings and are further deepened in the final version in the last photos.


Just a couple of photos of both the stern post and upper transom. I meant to include the wing transom as well, but at this very moment it is lost. I know it didn't grow legs and walk somewhere. As I have not found any little splinters or chewed remnants, I don't think my 4 legged friend found it.
She doesn't look guilty, does she? Shiawase (Shia)???

I'm sure it will show up. Hopefully not in a poop pile.
Some photos of stern post and upper transom. I finish the piece like I do all, to seal them from humidity with sanding sealer only.


Ok that's it for now. I think progress will slow a little bit now. Next up are the counter timbers and I've not yet decided how to best process them to create identical pieces. My greatest concern is that there are so many contact points in the stern structure. All the elements need to be fixed to each other correctly in order for the structure to be square. So more measure 4 times and hopefully cut once.
Modeling clay arrives today so I hope to at least start the task to measure the gap in the underside of my hull as suggested by Maarten and Paul.
Thanks for following along!
Till next time...
Last edited:
Hi Ken,
Nice work here. I resonate with your concern about 3D fit of parts in complex 3D structures. For some reason I have a hard time trusting the drawings - though I have been pleasantly surprised on several occasions when the outcome has been better than I feared it was going to be.
Oh, I found the wing transom - it's in post #322...
- Joined
- Oct 15, 2017
- Messages
- 1,191
- Points
- 443

Hi Ken,
Nice work here. I resonate with your concern about 3D fit of parts in complex 3D structures. For some reason I have a hard time trusting the drawings - though I have been pleasantly surprised on several occasions when the outcome has been better than I feared it was going to be.
Oh, I found the wing transom - it's in post #322...
 , cute Paul!
Yes, when I first read real plans from a monograph, I did not initially "see" the issue with 3D structures being rendered in 2D illustrations. It didn't take long for me to learn that it took multiple 2D illustrations in plans to clearly show a 3D object.
Now get over here and help me look for my wing transom!
- Joined
- Oct 15, 2017
- Messages
- 1,191
- Points
- 443

Hello All,
First, thank you for following along, your likes and assistance in what I'm discovering is a project that stretches my abilities right up to, and perhaps a step beyond my skillset. With that said, I am a stubborn mule and will succeed.
My default mode when I'm facing a setback is to switch gears and deliver a success. It offsets things and strikes a balance needed, for me. It also gives me some time to further ponder the potential solutions.
First setback I faced was already shared in the previous post where I had a gap between my keel and the shell of the ship. Paul and Maarten provided a possible solution, modelers' clay. I did order and receive some water based plasticine modelers' clay a few days ago. But in my eagerness to fix and move on I bought the wrong product. I needed something that was pliable and once formed either air cured or cured in a low temp oven to harden so I could trace onto a piece of pear stock, cut and then tailor fit to the hull and close the gap.
The issue, it NEVER HARDENS!!!
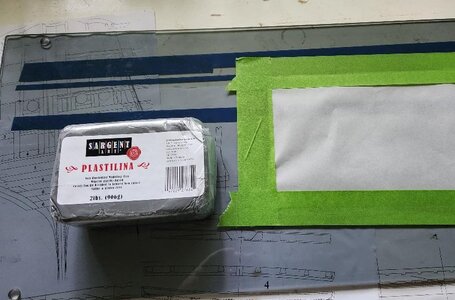
I formed it and waited 2 days and it was exactly as soft as when it was unwrapped. I put it in an oven at low temp, 170F degrees and it became a gray puddle of goo, which after it cooled regained its initial pliability!!! I froze it for 2 days and it was just slightly harder but much too soft to work with.
So off to Amazon and ordered some ceramic/potter's clay. It's on the way.
===========================================================================
So I needed some work that provided a small success to offset this small setback. I decided to work on some of the stern structure elements.
First up, the counter timbers. There are a total of 8 counter timbers, but in my case I will only make 6 as the outer 2 are replaced by the shell of the hull itself.
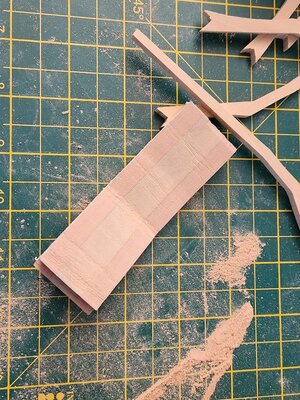
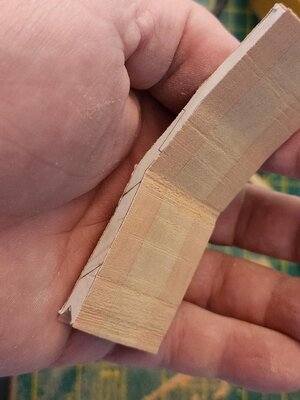
In order to create 6 identical pieces I fixed 6 pieces of boxwood stock with very thin, but high tack double sided tape. Then cut to just outside the plan's line and hand finished.
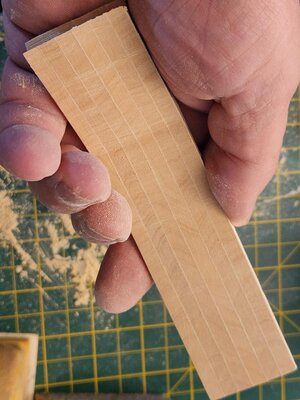
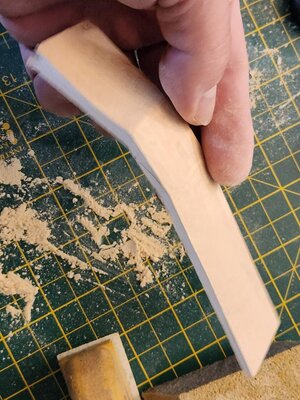
I'm happy with the output.
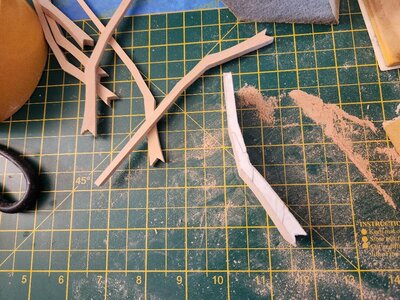
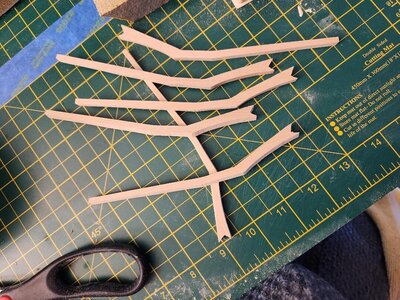
Ok, so originally I wanted/needed a small win so I decided to create one piece counter timber, representing both upper and lower. I thought it would be safer than creating both upper and lower and then orient the geometry correctly. After these came out nicely, I have my bravado back. So I will cut these as "uppers" only and use the same method to create the lower counter timbers.
Sorry for being long winded in sharing.
Thanks for stopping by. Till next time...
First, thank you for following along, your likes and assistance in what I'm discovering is a project that stretches my abilities right up to, and perhaps a step beyond my skillset. With that said, I am a stubborn mule and will succeed.
My default mode when I'm facing a setback is to switch gears and deliver a success. It offsets things and strikes a balance needed, for me. It also gives me some time to further ponder the potential solutions.
First setback I faced was already shared in the previous post where I had a gap between my keel and the shell of the ship. Paul and Maarten provided a possible solution, modelers' clay. I did order and receive some water based plasticine modelers' clay a few days ago. But in my eagerness to fix and move on I bought the wrong product. I needed something that was pliable and once formed either air cured or cured in a low temp oven to harden so I could trace onto a piece of pear stock, cut and then tailor fit to the hull and close the gap.
The issue, it NEVER HARDENS!!!

I formed it and waited 2 days and it was exactly as soft as when it was unwrapped. I put it in an oven at low temp, 170F degrees and it became a gray puddle of goo, which after it cooled regained its initial pliability!!! I froze it for 2 days and it was just slightly harder but much too soft to work with.
So off to Amazon and ordered some ceramic/potter's clay. It's on the way.
===========================================================================
So I needed some work that provided a small success to offset this small setback. I decided to work on some of the stern structure elements.
First up, the counter timbers. There are a total of 8 counter timbers, but in my case I will only make 6 as the outer 2 are replaced by the shell of the hull itself.
In order to create 6 identical pieces I fixed 6 pieces of boxwood stock with very thin, but high tack double sided tape. Then cut to just outside the plan's line and hand finished.


I'm happy with the output.


Ok, so originally I wanted/needed a small win so I decided to create one piece counter timber, representing both upper and lower. I thought it would be safer than creating both upper and lower and then orient the geometry correctly. After these came out nicely, I have my bravado back.
 So I will cut these as "uppers" only and use the same method to create the lower counter timbers.
Sorry for being long winded in sharing.
Thanks for stopping by. Till next time...
Last edited:
Hi Ken, yep you need air drying clay 
It dries in just a few hours without an oven.

It dries in just a few hours without an oven.
Nope… this is brilliant.and perhaps a step beyond my skillset.
- Joined
- Oct 15, 2017
- Messages
- 1,191
- Points
- 443

Yep, Maarten, I wish I could have seen the look on my own face when I opened the oven door and found that puddle of gray goo. I never thought that building a model ship would lead to me learning more about clay!!Hi Ken, yep you need air drying clay
It dries in just a few hours without an oven.
Cheers.
- Joined
- Oct 15, 2017
- Messages
- 1,191
- Points
- 443

Thanks Grant. You are very generous. No journey is without its stumbles. I will persevere.Nope… this is brilliant.
- Joined
- Aug 8, 2019
- Messages
- 5,568
- Points
- 738

How would I solve this problem? Not with clay. I would turn the model upside down. Take a ruler, hold that to the keel, measuring the gap with a piece of wood and shape it by hand till it fit between ruler and keel. But that's me, I approch things always in a different and maybe more difficult way.
Clay will do the job too, but you have still to transfer the shape of the clay to a piece of wood. Adjust it to fit it in.
Clay will do the job too, but you have still to transfer the shape of the clay to a piece of wood. Adjust it to fit it in.
- Joined
- Oct 15, 2017
- Messages
- 1,191
- Points
- 443

Thanks Stephan. I did give this approach some thought. The issue is the gap is over approximately 10 cm and changes. So measurements would need to be made incrementally at mm. As I wait for the clay to come, I'm not sitting still. I am actually shaping pieces by hand, just to do something.
Oh, by the way, Amazon sent me an email, "Your shipment is running late." Just wonderful....
I'm sure I will look back at this moment and chuckle.
Oh, by the way, Amazon sent me an email, "Your shipment is running late." Just wonderful....
I'm sure I will look back at this moment and chuckle.
- Joined
- Oct 15, 2017
- Messages
- 1,191
- Points
- 443

Hello All,
So while I wait for a clay delivery, work continues on the stern structure.
We've all had times when challenges slow us down and frustrate us and make us wonder, "why am I doing this?". And then times when everything goes right, we have success and we get excited, find inspiration in our own work.
 I've found that good feeling in recent work on the stern. The method of cutting multiple pieces at the same time to create identical units has yielded very good results for me.
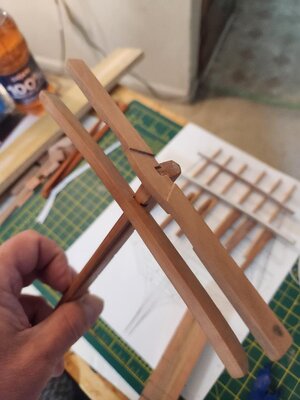
Winged and helms port transom dry fitted on the stern post.
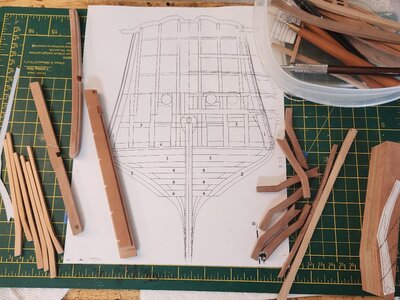
Below: 90% of the stern structures elements.
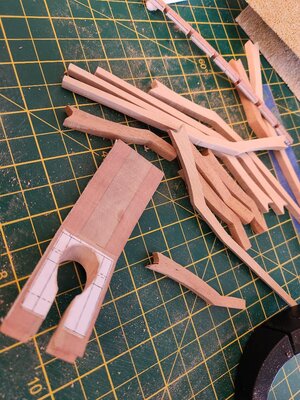
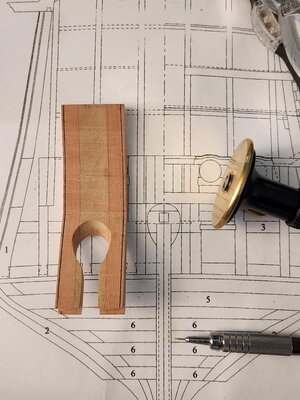
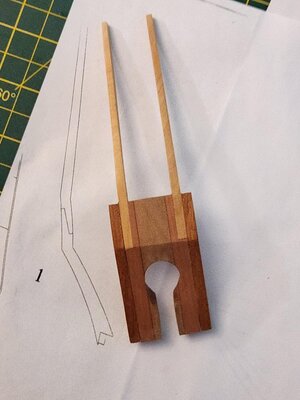
From left to right, upper counter timbers(Boxwood), upper transom, winged transom and stern post(Swiss Pear). To the right, lower counter timbers(Walnut) and cross beam timbers(Pear). Far right is the "tricky" helms port structure where the rudder head passes into the ship.
The tops of the upper counters were left at length, to be trimmed to plan once lower alignments with lower counters have been finalized.
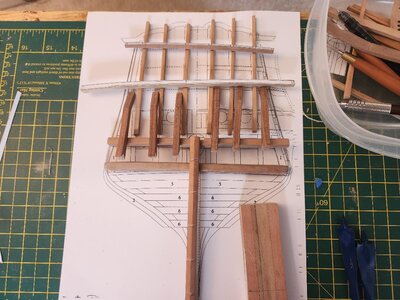
I am experimenting with different woods, for aesthetics. The helms port structure has pear wood in the center, flanked by swiss pear.
Progress stopped about 4AM EDT.
With some success comes excitement and endless energy, until you look at the clock realize it's 4AM.... My Admiral returns Sunday after 12 days away and my time will no longer be my own. So the push is on as things will slow down again.
Next up I will finish the helms port structure. Then create the portals and finish the cross timbers.
I think I will most likely finish(sand, seal, steel wool), each piece prior to dry fitting assembly. This is because after assembly things will be very tight.
On the horizon; I need to make a decision on how I want to marry the stern structure to the hull. I'm leaning towards making the stern a modular piece I can plug in and remove from the hull. I will need to do small detailed work creating the windows and I imagine it would be easier to do if the structure was not on the ship itself.
Any way, my recliner is calling me for a nap after 4 hours of sleep.
Thanks for following along. Till next time.
So while I wait for a clay delivery, work continues on the stern structure.
We've all had times when challenges slow us down and frustrate us and make us wonder, "why am I doing this?".
Winged and helms port transom dry fitted on the stern post.

Below: 90% of the stern structures elements.
From left to right, upper counter timbers(Boxwood), upper transom, winged transom and stern post(Swiss Pear). To the right, lower counter timbers(Walnut) and cross beam timbers(Pear). Far right is the "tricky" helms port structure where the rudder head passes into the ship.

The tops of the upper counters were left at length, to be trimmed to plan once lower alignments with lower counters have been finalized.

I am experimenting with different woods, for aesthetics. The helms port structure has pear wood in the center, flanked by swiss pear.


Progress stopped about 4AM EDT.


With some success comes excitement and endless energy, until you look at the clock realize it's 4AM....
Next up I will finish the helms port structure. Then create the portals and finish the cross timbers.
I think I will most likely finish(sand, seal, steel wool), each piece prior to dry fitting assembly. This is because after assembly things will be very tight.
On the horizon; I need to make a decision on how I want to marry the stern structure to the hull. I'm leaning towards making the stern a modular piece I can plug in and remove from the hull. I will need to do small detailed work creating the windows and I imagine it would be easier to do if the structure was not on the ship itself.
Any way, my recliner is calling me for a nap after 4 hours of sleep.
Thanks for following along. Till next time.

Last edited:
- Joined
- Aug 8, 2019
- Messages
- 5,568
- Points
- 738

Great update and a high level of woodwork.

A green cutting mat is always a guarantee for success.And then times when everything goes right, we have success and we get excited, find inspiration in our own work.
This is impressive fabrication work Ken!
...darn, I have to get the green matt, there is no way I can succeed without it.A green cutting mat is always a guarantee for success.
Very good work, Ken! You are the true craftsman.
- Joined
- Oct 15, 2017
- Messages
- 1,191
- Points
- 443

Well now, that explains why your workbench is covered in like 9 green healing matts Stephan! Your secret is out!Great update and a high level of woodwork.
A green cutting mat is always a guarantee for success.
 Hope you have a great trip!
- Joined
- Oct 15, 2017
- Messages
- 1,191
- Points
- 443

Thanks Paul. I'm really enjoying this stern workstream.This is impressive fabrication work Ken!
- Joined
- Oct 15, 2017
- Messages
- 1,191
- Points
- 443

Thanks Jim. I'm fairly certain I'm a journeyman modeler. A craftsman, I strive for it every time sit at the workbench. One foot in front of the other. Maybe I'll get there. Thanks mate!...darn, I have to get the green matt, there is no way I can succeed without it.
Very good work, Ken! You are the true craftsman.
- Joined
- Oct 15, 2017
- Messages
- 1,191
- Points
- 443

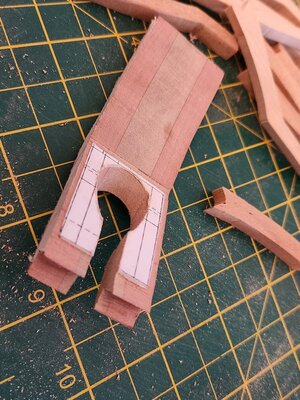
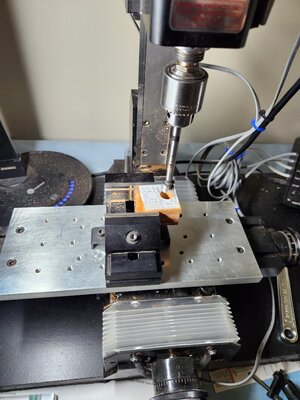
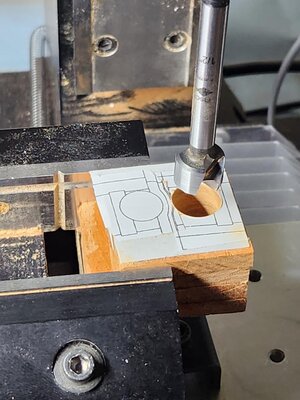
Small update. Fabricated the last pieces of the stern. Using forstner bit to cut portals. These bits cut very clean holes with no tear out on the back side. Since I need 4 of them, I used the same method of stacking blanks to cut multiple units, cutting a few extra as the edges are very close to the border of the wood.
Finishing of the helms port and inner counter timbers with sanding, sanding sealer and steel wool, while watching the Ryder Cup. I'm pretty pleased with the results, although the bases of the counter timbers are a little off. Not sure how I missed that. Oh well, all of it will be covered up planking. The differences in the woods' color is now more pronounced.
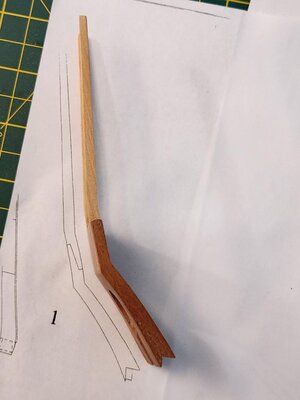
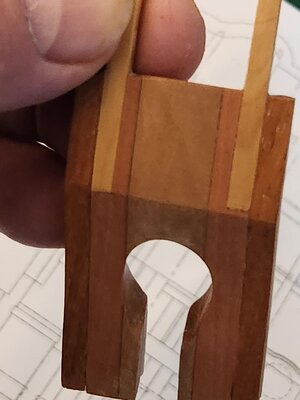
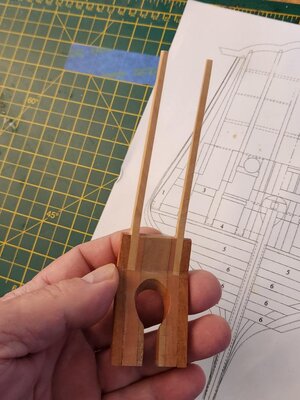
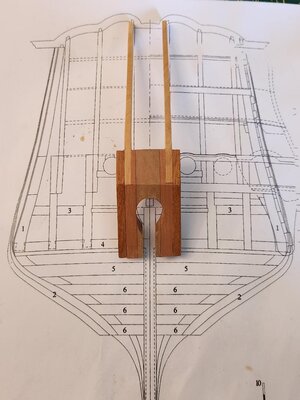
Admiral gets home later today. My 10 days as a bachelor are over and my time will no longer be my own. Hugs and "honey do" lists are welcome.
Hopefully, the next update will be one with an assembled stern (dry fitted to allow minor adjustments). After that, the part that makes me pucker a little bit. Fitting it to the shell of the ship.
Thanks for following along. Till next time...


Finishing of the helms port and inner counter timbers with sanding, sanding sealer and steel wool, while watching the Ryder Cup.


Admiral gets home later today. My 10 days as a bachelor are over and my time will no longer be my own. Hugs and "honey do" lists are welcome.
Hopefully, the next update will be one with an assembled stern (dry fitted to allow minor adjustments). After that, the part that makes me pucker a little bit. Fitting it to the shell of the ship.
Thanks for following along. Till next time...


