Le Fleuron 1729 - 64 Gun Ship PoB Scratch Build in 1:48 - (Ancre Monograph-J. Boudriot/G. Delacroix)

Dear Heinrich, Tobias, Stephan, First thank you all for your input. I have followed each of your builds and truly respect you talents and abilities, maybe more than you know.
I surely can tell from your posts, all of you have given thought to how you present them, in the most respectful way, with the sole intention of providing me with assistance. :) The same help that I've learned to respect from the SoS community. THANK YOU>

With that said, I expected this response and it's perfectly OK. This is why I've used the reference to Hans Cristian Anderson's story "The Ugly Duckling". It is ugly now, but trust me, a beautiful bird will be born from it.

@Heinrich, I do understand your point of practicing planking skills. I believe we are all striving to improve our skills in every aspect of ship modeling, especially planking, which, depending on the hull structure can be very difficult. I have confidence in my planking skills. I trust you will see later. Tapering, spilling planks at this stage would provide a good opportunity to practice those skill indeed. In this case I have weighed the ROI (return on investment) in time vs. return on that time and it just doesn't make sense. Keep in mind, I am not going into this blindly. If you knew how much I've obsessed over it before I made my decision, I think you would understand. But let me thank you again. If you didn't already know, I am already a student of yours through your WB build! Thumbsup

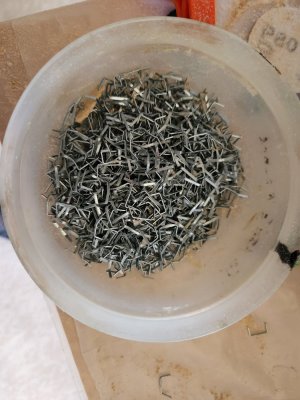
@Tobias, thanks for your input. The only difference I see in using hammered nails vs. staples is it would take more time to hammer. Staples are much faster and achieve even a better purchase of planks to the skeleton. Actually, each staple, having 2 prongs is the equivalent of using 2 small nails. In addition to that I will be using approximately 2,000 staples per layer, the equivalent of 4,000 nails per layer. The only function of the staples is to ensure the planks stay firmly attached, until the PVA dries. Now, on the down side of my approach, it will take me longer to extract that many staples. So this is an unknown.

@stephan, Please, there is NO need to apologize. I would never question your intent. I just happen to be a little sensitive in this area as it is something I've dealt with for 66 years. Some people are not nice. You are NOT one of them. And, of course Stephan I do know your true intent and that is to help. Thank you Sir. :)

When I was young my Dad would take every relevant opportunity to remind me, "If you fail to plan, you plan to fail." I don't think he understood the level to which I would embrace this dictum. It allowed me to organize the complicated, manage risk and provide me with a skill that help me through a rewarding career. While I spend a lot of time planning, no plan is ever perfect. In reality, there has never been a project plan, in my career, I've worked on, mine or others that didn't change. I have come to learn, once that plan has been finalized and it has addressed the "critically important" issues, then you've also addressed the "critically important" risks and the work must begin.

Thank you all again for your input and advice. I am not ignoring you. I hear you. I am confident in my approach in that my method meets the objective. I hope you respect my decision as I respect your knowledge and advice.;)

Now, I must get back to work. That will not be able to sleep tonight until I get that bolster issue resolved. :)Thumbsup

Till next time...
Cheers.
 
Dear Heinrich, Tobias, Stephan, First thank you all for your input. I have followed each of your builds and truly respect you talents and abilities, maybe more than you know.
I surely can tell from your posts, all of you have given thought to how you present them, in the most respectful way, with the sole intention of providing me with assistance. :) The same help that I've learned to respect from the SoS community. THANK YOU>

With that said, I expected this response and it's perfectly OK. This is why I've used the reference to Hans Cristian Anderson's story "The Ugly Duckling". It is ugly now, but trust me, a beautiful bird will be born from it.

@Heinrich, I do understand your point of practicing planking skills. I believe we are all striving to improve our skills in every aspect of ship modeling, especially planking, which, depending on the hull structure can be very difficult. I have confidence in my planking skills. I trust you will see later. Tapering, spilling planks at this stage would provide a good opportunity to practice those skill indeed. In this case I have weighed the ROI (return on investment) in time vs. return on that time and it just doesn't make sense. Keep in mind, I am not going into this blindly. If you knew how much I've obsessed over it before I made my decision, I think you would understand. But let me thank you again. If you didn't already know, I am already a student of yours through your WB build! Thumbsup

@Tobias, thanks for your input. The only difference I see in using hammered nails vs. staples is it would take more time to hammer. Staples are much faster and achieve even a better purchase of planks to the skeleton. Actually, each staple, having 2 prongs is the equivalent of using 2 small nails. In addition to that I will be using approximately 2,000 staples per layer, the equivalent of 4,000 nails per layer. The only function of the staples is to ensure the planks stay firmly attached, until the PVA dries. Now, on the down side of my approach, it will take me longer to extract that many staples. So this is an unknown.

@stephan, Please, there is NO need to apologize. I would never question your intent. I just happen to be a little sensitive in this area as it is something I've dealt with for 66 years. Some people are not nice. You are NOT one of them. And, of course Stephan I do know your true intent and that is to help. Thank you Sir. :)

When I was young my Dad would take every relevant opportunity to remind me, "If you fail to plan, you plan to fail." I don't think he understood the level to which I would embrace this dictum. It allowed me to organize the complicated, manage risk and provide me with a skill that help me through a rewarding career. While I spend a lot of time planning, no plan is ever perfect. In reality, there has never been a project plan, in my career, I've worked on, mine or others that didn't change. I have come to learn, once that plan has been finalized and it has addressed the "critically important" issues, then you've also addressed the "critically important" risks and the work must begin.

Thank you all again for your input and advice. I am not ignoring you. I hear you. I am confident in my approach in that my method meets the objective. I hope you respect my decision as I respect your knowledge and advice.;)

Now, I must get back to work. That will not be able to sleep tonight until I get that bolster issue resolved. :)Thumbsup

Till next time...
Cheers.
I am very happy that you see my message in the way that it was intended, Ken. I will keep following your build and wish you only success!
 
Dear Heinrich, Tobias, Stephan, First thank you all for your input. I have followed each of your builds and truly respect you talents and abilities, maybe more than you know.
I surely can tell from your posts, all of you have given thought to how you present them, in the most respectful way, with the sole intention of providing me with assistance. :) The same help that I've learned to respect from the SoS community. THANK YOU>

With that said, I expected this response and it's perfectly OK. This is why I've used the reference to Hans Cristian Anderson's story "The Ugly Duckling". It is ugly now, but trust me, a beautiful bird will be born from it.

@Heinrich, I do understand your point of practicing planking skills. I believe we are all striving to improve our skills in every aspect of ship modeling, especially planking, which, depending on the hull structure can be very difficult. I have confidence in my planking skills. I trust you will see later. Tapering, spilling planks at this stage would provide a good opportunity to practice those skill indeed. In this case I have weighed the ROI (return on investment) in time vs. return on that time and it just doesn't make sense. Keep in mind, I am not going into this blindly. If you knew how much I've obsessed over it before I made my decision, I think you would understand. But let me thank you again. If you didn't already know, I am already a student of yours through your WB build! Thumbsup

@Tobias, thanks for your input. The only difference I see in using hammered nails vs. staples is it would take more time to hammer. Staples are much faster and achieve even a better purchase of planks to the skeleton. Actually, each staple, having 2 prongs is the equivalent of using 2 small nails. In addition to that I will be using approximately 2,000 staples per layer, the equivalent of 4,000 nails per layer. The only function of the staples is to ensure the planks stay firmly attached, until the PVA dries. Now, on the down side of my approach, it will take me longer to extract that many staples. So this is an unknown.

@stephan, Please, there is NO need to apologize. I would never question your intent. I just happen to be a little sensitive in this area as it is something I've dealt with for 66 years. Some people are not nice. You are NOT one of them. And, of course Stephan I do know your true intent and that is to help. Thank you Sir. :)

When I was young my Dad would take every relevant opportunity to remind me, "If you fail to plan, you plan to fail." I don't think he understood the level to which I would embrace this dictum. It allowed me to organize the complicated, manage risk and provide me with a skill that help me through a rewarding career. While I spend a lot of time planning, no plan is ever perfect. In reality, there has never been a project plan, in my career, I've worked on, mine or others that didn't change. I have come to learn, once that plan has been finalized and it has addressed the "critically important" issues, then you've also addressed the "critically important" risks and the work must begin.

Thank you all again for your input and advice. I am not ignoring you. I hear you. I am confident in my approach in that my method meets the objective. I hope you respect my decision as I respect your knowledge and advice.;)

Now, I must get back to work. That will not be able to sleep tonight until I get that bolster issue resolved. :)Thumbsup

Till next time...
Cheers.
Hi Ken I'm glad you took this as good advice and as for the nailing oh yeah I know what you mean my frames are half done and I can't see it anymore ROTF but we all have to go through this. After you explained to me what your procedure is, I can understand it. Thank you for your explanation and I will definitely continue to follow your blog.Thumbsup
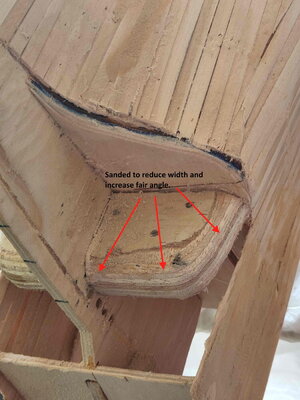
 
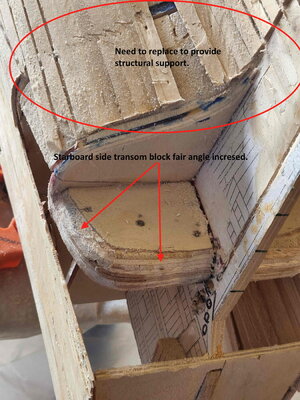
Hell All, After some demolition, which was easy once I had a plan, I've sanded down the bolsters and reinstalled replacement planks.

Please keep in mind this is ugly. Do not be alarmed. It is perfectly OK with me as I know it is the correct thing, structurally. The reason I'm doing this is the angles were not correct. They are now. And they are strong, which are the two objectives I needed to meet before I could start sanding and laying the 2nd layer.

Removing planks in order to sand the bolsters. When I took these photos I had removed the planks only back to the first bulkhead. After inspecting, I realized I needed to remove them further back to the 2nd aft bulkhead in order to provide a good purchase and be stable.
Transom Fix Port Side2.jpgTransom Fix Starboard Side2.jpg

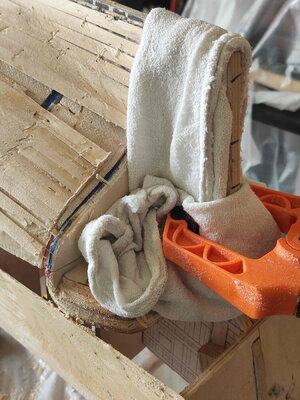
Also, In order to be seamless I needed to remove the planks that were laid over the deadwood areas towards the sternpost. So I soaked a work towel with vinegar and let it rese for 10 minutes and they peeled off easily.
Transom Fix Vinegar.jpgTransom Fix Vinegar Cloth.jpg

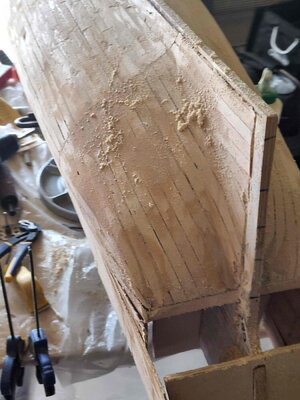
Once the new planks were installed, I filled gaps with wood filler and did a primary rough sanding.
Transom Fix Starboard Mud1.jpgTransom Fix Port Side5.jpg

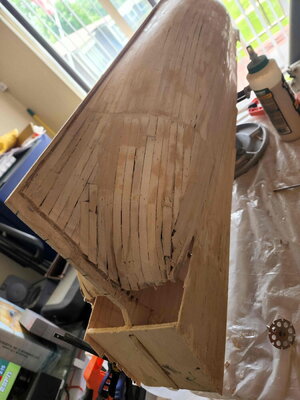
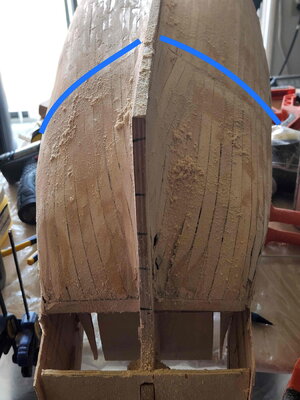
If you look below the blue lines you can see the seam where the new planks were butted up against the existing planks.

Transom Fix Stern Shot.jpg
I will finish filling in the remaining small gaps and then do a final sanding of the entire hull.

As the Admiral is off visiting her mother, the Rear Admiral, I will have some time to focus. I expect/hope 2nd layer will start later today.

Thanks for visiting my journey.
Till next time...

Cheers!
 
Hi Roger, Thanks for following along. Yes the approach is certainly different. What I find very interesting at this point is many of our SoS modelers (very experienced ones) are asking the very questions I asked during my feasibility stage of planning.

That is the main reason I decided to create this build log. Since my knowledge of this method is conceptual, I wanted to have it in front of all those experienced modelers and perhaps have them ask that one critical question I had not thought of. I'm sure there are things I've not considered, but I'm cautiously confident it isn't a huge item.
Thanks for your comments Roger.

Cheers,
Ken
 
Hello Everyone,

Four hours of sanding outside and a coat of diluted PVA yesterday and the 2nd layer of planking began and completed. I'll use this step to show a bit more on the stapling process and the pros and cons of using it.

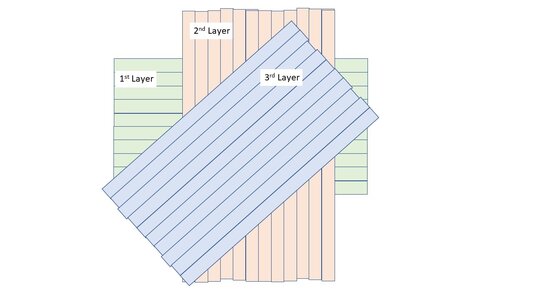
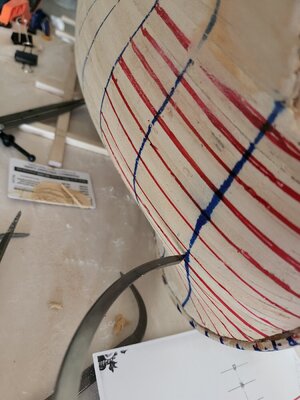
In order to create strength in the structure I am laying the layers in opposing directions, like the layers of plywood.
Plank Layer Example.jpg

For maximum strength, I wanted to lay the each layer in an opposing direction to create the strongest structure possible. I ran into an issue immediately and discovered the reason for Igor using "thick frames" bulkheads. The thick bulkheads provide a wide surface for the staples to find and attach to. Igor used 12mm, I believe, where I, trying to reduce weight used 6mm. When the PVA started to dry the planks contracted and started to pull away from the bulkheads.

Easy fix. I set a few clamps to hold them firm to the bulkheads until they dried completely. I did hold my breath a few hours later when I released the clamps and to my excitement they held their shape to the bulkheads. As in the illustration above, I started to lay the 2nd layer in a 90 degree orientation, but after the issue, decided to lay the remaining planks in the 2nd layer at approximately 30-45 degrees. This worked and eliminated the planks pulling away from the bulkheads.

I wanted to share a little more information on the use of the stapling method.
Pros
Very efficient. Very fast (using a powered stapler). Very accurate (placing the staple in the small target location), once you get a little practice. I would never attempt this using a manual stapler as your hands would tire quickly and you may be visiting your doctor with carpel tunnel syndrome!

Cons
As fast and effective the stapling insertion process is, the removal process is another story. It is slow, tedious and ripe with danger. ROTF

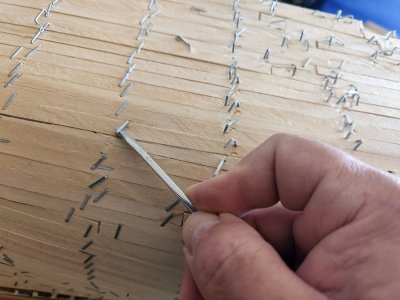
Removal starts with a small sharp flat screwdriver. You insert under a staple and pry up one of the edges. In the photo below the staples on the right have been loosened, the left yet to be. After some practice I was able to build a rhythm and move along, with a few hiccups.
20220626_133625.jpg20220626_133610.jpg

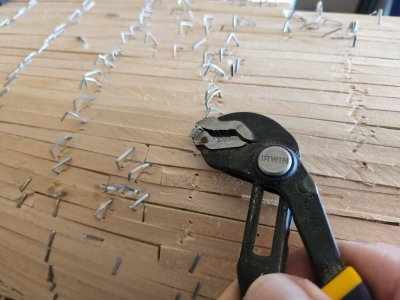
Once the staples are raised they are easy to grab with a small pair of channel lock pliers. They were fit for this function. I did this in small sections. This is because every raised staple is a hazard!
Maarten mentioned in an earlier post, "I hope you have a lot of Band-Aids." I should not quote. I'm actually paraphrasing. Somehow he KNEW!
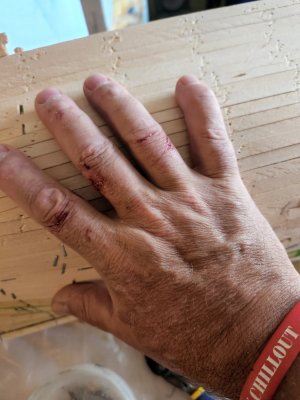
When you are grabbing and prying the edge of a new staple, if you are not careful and in too much of a hurry, you can slip and the force guides your hand into a minefield of raised staples. ROTF I think I replied to Maarten, "yes, this project may cost me blood, sweat and tears."
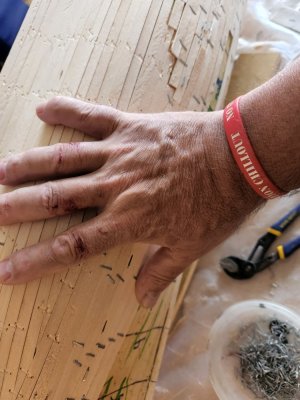
So here is a pic of my hand half way through removing the 2nd layer's staples. Fun, Fun!!

20220627_130329.jpg20220627_130333.jpg
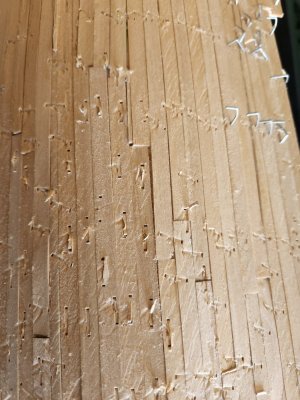
Every once in a while, when extracting a staple the 2nd leg will break off in the plank. No big deal. It is removed surgically. The image below show that the surface is rough and staple marks are present. No big deal. Sanding solves all.

20220626_133556.jpg20220610_111109.jpg

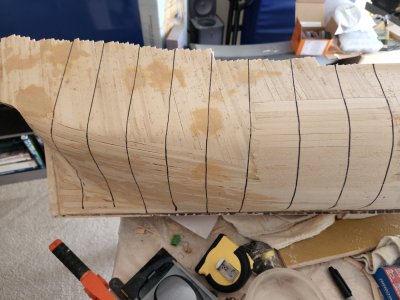
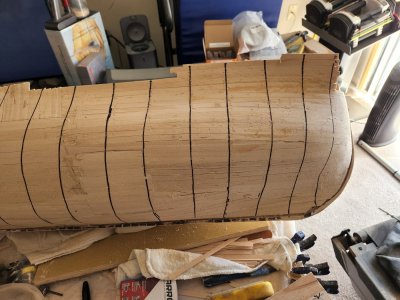
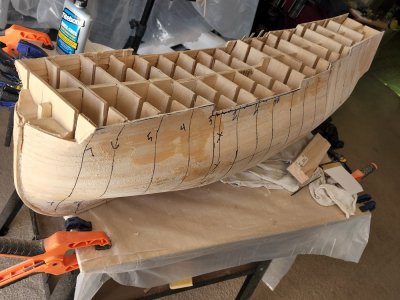
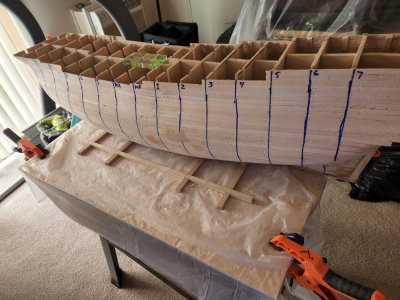
Some photos after 2nd planking and hours of sanding. I forgot how much I dislike sanding, sanding, sanding....

Below, I've marked the bulkhead positions so that I can take the negatives from the plan to see how close I am to plan. This is the real critical time as I still, but only have one more layer to make adjustments. I will be very deliberate here and decide on the next steps.
20220613_150153.jpg20220613_150156.jpg
20220614_152614.jpg20220705_134526.jpg

From this point forward closer inspection of the hull dimensions will take place, followed by filling of voids and sanding high spots. After the 2nd layer the outer dimensions should still be shy of the final dimensions stated in the plan, accounting for the thickness of the 3rd layer.

This is a great segue to take a break and do some planning on how I measure and record and map my next steps.

Thanks for following.

Till next time...
Cheers!
 
Very good progress Ken. The speed with which you do the planking is astounding. I wish you the best of luck with the third layer.
 
Looks good. Sanding solves many woes. As long as your curves are on the money all is good. Yes Igor’s entire process is to use thick frames. Weight issues shouldn’t be a concern at all and the thicker frames make the entire model stronger. It’s going great so far though.
 
Looks good Ken,it looks different to traditional methods but does look how I would expect from this type of construction.

Be careful how much emphasis you place on checking with templates, I would rather have a fair hull and be a little out to the drawings.

Kind Regards

Nigel
 
Good morning Ken,
we had the topic of the spur and the milling of the grooves in my blog, I think the link might be of interest to you. Admin is also Mr. G. Delacroix.


I'm really positively surprised what your first shape brings about through the tangled planking. Secretly I didn't doubt you but I just couldn't imagine it with all the brackets etc. but it looks really great at first sight.
 
Last edited:
Thank you all for your likes, input and feedback. It is all very much appreciated.

@Tobias, thank you for the link. As much as search for many months for information sources, I never did find this site. It will be very helpful to me....thank you!
 
The hull shape looks already great.
Hopefully the majority of the iron content in the hull is from staples and not from blood :).
Looking at your hull this can become a very interesting building methode.

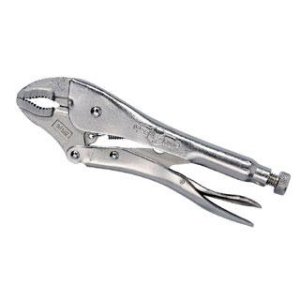
Have you considered to use vise grip pliers to remove the staples? These you can lock when pulling out the staple.
the-original™-curved-jaw-locking-pliers-with-wire-cutter-276.jpg
 
Last edited:
Maarten, I wish you told me sooner, I could have borrowed your Vice Grips! :p Actually, I think I tested something like 2 specialized tools for removing staples I bought on Amazon, along with 6 or 7 types of pliers. The ones I am using now came out the winner.

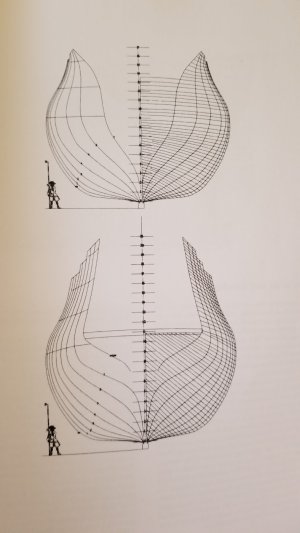
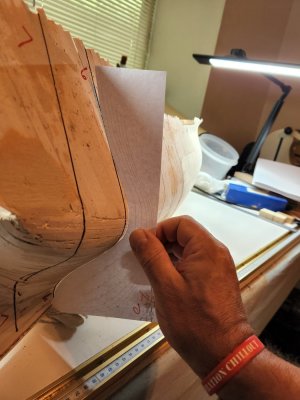
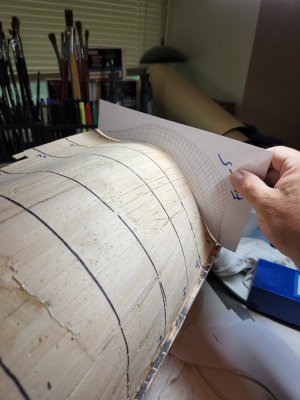
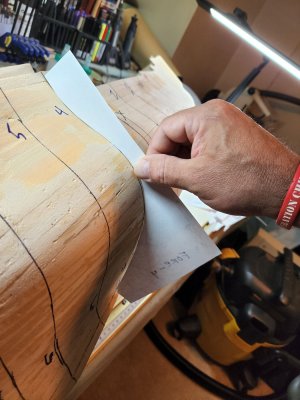
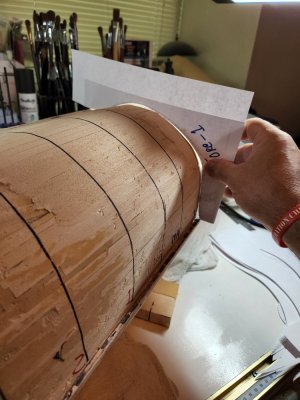
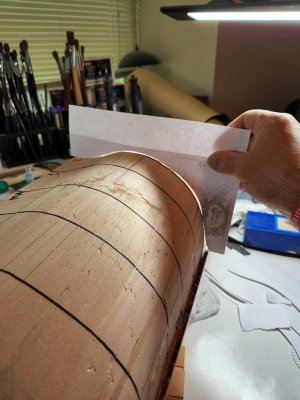
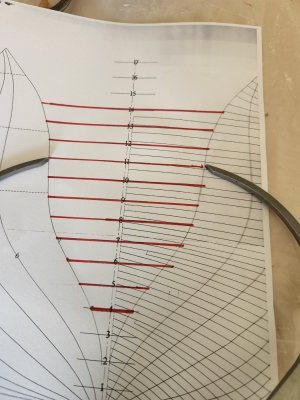
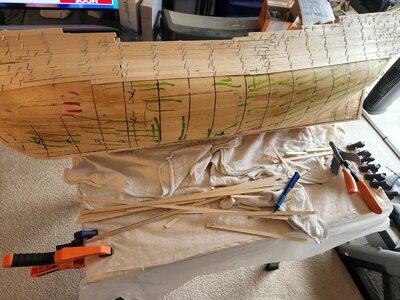
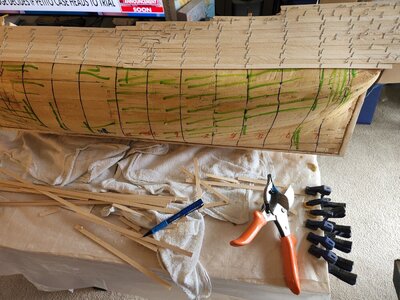
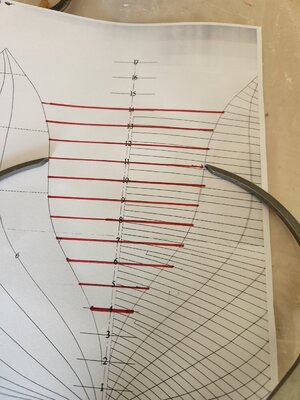
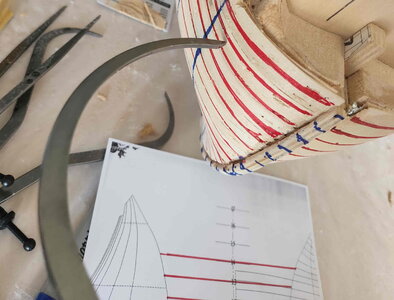
So I'm at the point in the planking where I need to see how close my hull is, compare to the plan. I have one last layer to make final adjustments, but I need to address any large issues now. To give myself confidence to move forward, I've cut out the negative bulkhead profiles from the Body/Elevation plan and cross my fingers that my work so far it not really far off.
20220308_122559.jpg

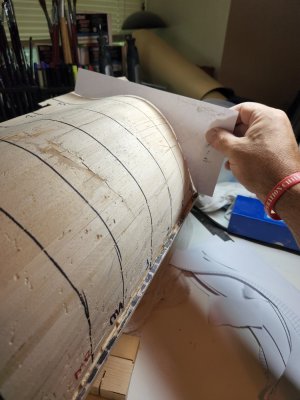
I won't bore you with every bulkhead photo. I did measure every one, Port and Starboard. Some were fine compared to plan, some were off just a little bit and a couple had some issues. Most of the issues were at the bow, with the very first bulkhead, #7. The good news is that the measurement was wider compared to the plan and there for the fix was to sand the high spots.

Most of the cases the measurements are close enough to proceed to 3rd layer and adjusted after it is completed.
20220614_110414.jpg20220614_111056.jpg20220614_111105.jpg20220614_111403.jpg

Some require a bit of work.
20220614_110928.jpg20220614_111024.jpg20220614_111434.jpg

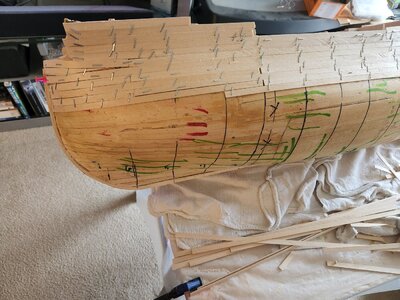
And then the high spot on the bow. You can see the deviation starts on bulkhead #5, a little worse on #6 Then fairly large on #7.

20220614_111105.jpg20220614_111158.jpg20220614_111206.jpg

Here is the question I need to answer myself. On #7, is the middle "high" or are the areas near the rails and keel "low"? At the moment I do not know. I have a method I think will help me figure that out clearly.

I will need to build a small cradle to ensure the hull/keel is resting at the correct height so I can take are mark vertical measurements and use calipers to compare the hull to the plan @ bulkheads #6 and #7 @ each vertical point.
20220707_093251.jpg

I'll go off and build the cradle that will hold my "baby".

Thanks for following along.

Till next time...
Cheers.
 
Everything is looking good, Ken. Enjoy the cradle-building process! Thumbsup
 
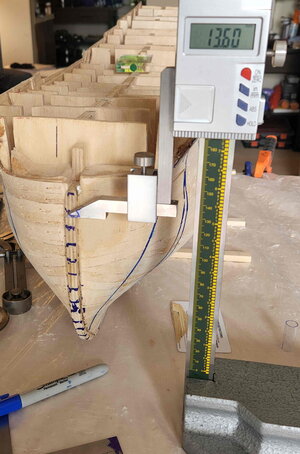
Small update. In my previous post there is a photo of the ship's elevation plan and set of calipers. To determine where the profile of the bow is off from plan, I need to set the calipers to the width of the hull at the intersection of bulkhead, horizontally and elevation mark vertically.

To do this I need the hull to sit absolutely flat, horizontally and vertically, AND that the correct height in order for the hull to be marked correctly.

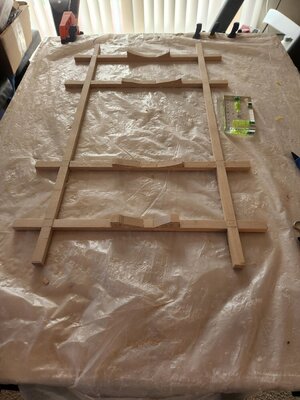
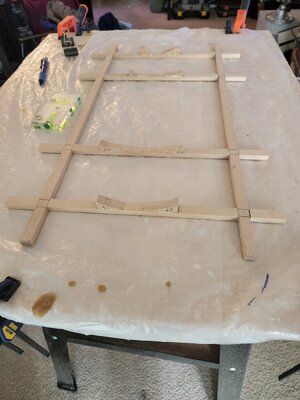
Below is a simple cradle that I made and adjusted many times to get hull rested in the correct position. The cradle is also critical in some of the next steps. Marking the hull with key location information such as deck lines, wales, gun ports, etc.
20220705_141542.jpg20220705_141556.jpg20220705_134538.jpg
The hull was marked to intersect bulkhead and elevation mark. Calipers set to the plan for each, then compared to intersection lines on the hull. It became very obvious where the deviation was and the solution to correcting it. Mid elevation, the bow's planking is high (too wide) and must need sanding.

20220706_113027.jpg

20220707_093251.jpg20220707_093409.jpg

Correct dimensions should be very close to the following.
20220707_093451.jpg

I have already corrected this on both sides of the ship and planking of the 3rd layer has started.

20220622_133812.jpg20220622_133817.jpg20220622_133825.jpg

Thanks for checking in. Till next time.

Cheers!
 
Last edited:
Welcome aboard sir. Always room for another mate from S.A.!! Thanks for following along. :)
 
WOW - you are making very good progress - lucky you, you have some spare time to work in the workshop
and btw very good work
 
Thanks all for the likes, positive comments and suggestions.

Uwe, yes, I constantly refer to my Spurts and Sputters way of working. I make great progress when the right conditions exist, then sometimes almost slow to a stop when they don't.
I've been able to make very good progress lately for 2 main reasons. I've had time to work with my head down and probably most importantly, I have a clear understanding of what I need to do in this particular phase.

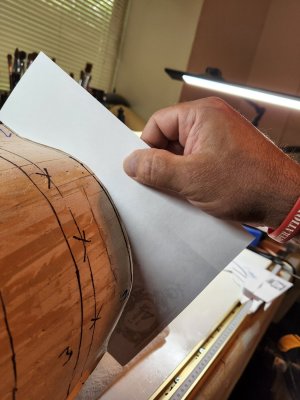
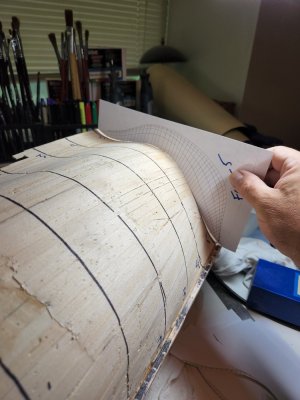
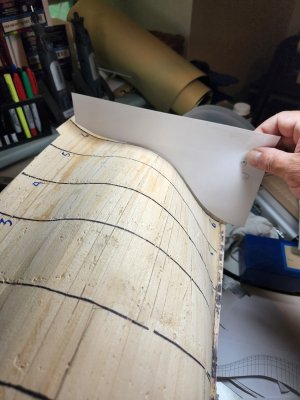
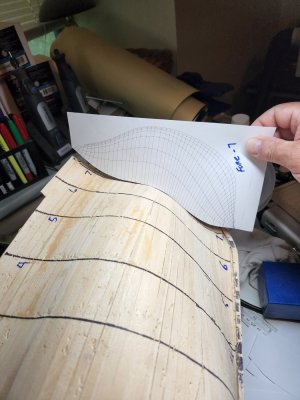
Once I've completed this phase things will slow waaaaaaaayyyyyyy down. This is because I will start to measure and plot important points on the hull, such as gun ports, deck lines, etc. This will be in preparation of cutting into the very hull I just created!!! o_OROTF I'm sure this is the moment where modelers get very nervous on their first scratch build. It is new territory for me and I will most likely ask the advice of people soon. I'm curious if I need to plot every point from the plan at each bulkhead and connect the points using French curves or use actual copies of the plans as stencils taped to the hull and plot the points that way.

Anyway, I don't have to worry about that just yet. I have a lot of sanding and finishing to go yet.

Thanks for following along.
Till next time...

Cheers.
 
Back
Top