Le Fleuron 1729 - 64 Gun Ship PoB Scratch Build in 1:48 - (Ancre Monograph-J. Boudriot/G. Delacroix)

I work in Spurts and Sputters. This is official terminology for me. I make great progress, then it's, "Where is Ken?" ROTF

Today's spurt offered some small progress. However, I will do what I always do, and I imagine others do as well. I'll sleep on it and revisit tomorrow to see if I feel the same way as I do now.

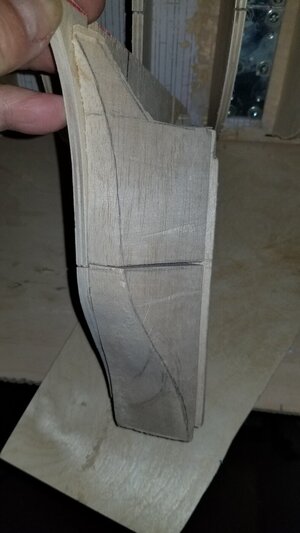
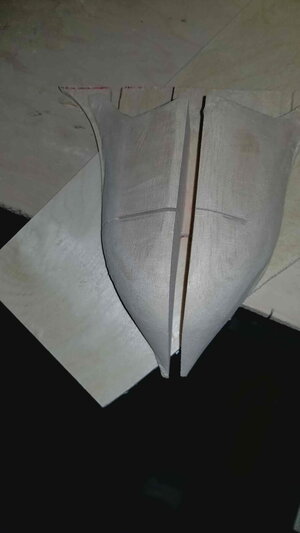
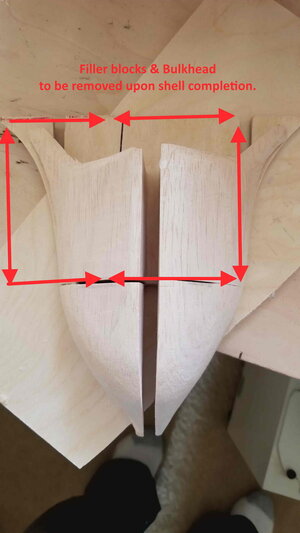
Bow filler progress.
20220314_150133.jpgBowProgression1.jpgBowProgression3.jpg..


20220324_182408.jpg

I need to add some filler to bring the Starboard side of the block flush to the edge of the fore most bulkhead. No worries there.

Next step: the rest of the filler blocks, between all bulkheads. I'm pushing off the stern/lower counter bolsters for now as I need to give it more thought on exactly how I do that. Nope, I'm not stalling. ROTF Just want to get it right and do it once.

Till next time...
 
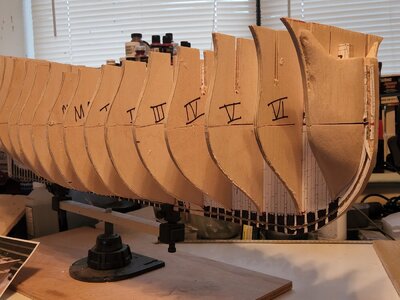
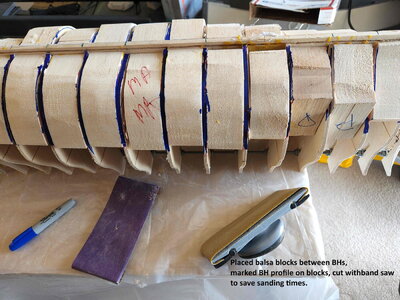
Hello Everyone, A small update. Shoring up the structure below the 1st deck is being done with balsa blocks. I'm not concerned with cosmetics here.

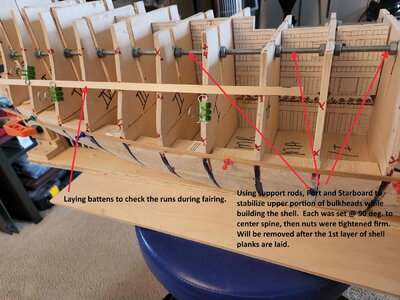
The primary focus is measuring, cutting and securing the blocks, while ensuring the bulkheads remaining square/perpendicular to the backbone. Securing the upper portion of the bulkheads square/perpendicular to the backbone is achieved with the threaded rods. Typically in a PoB build you'd only have to square up each bulkhead, put your filler blocks in and glue in place while keeping them square. Since the bulkheads have been CUT almost all the way through @ the 1st deck, it is necessary to ensure the top have of each is also secured square.

Each balsa block was fitted in between its respective set of bulkheads, marked of with marker and cut roughly on the scroll saw to get a general fit and reduce the amount of sanding needed.

BH Fillers.jpg

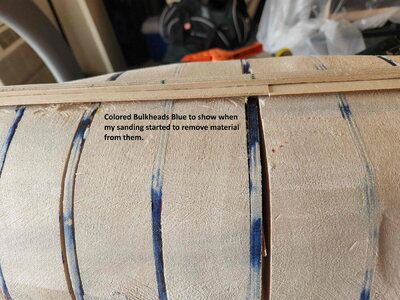
I will sand the blocks down to the level of the bulkheads, which have been marked with blue ink. I did this so I could see when I started to remove bulkhead material. Once I've sanded the blocks down to the bulkheads' level for the entire hull, I can start the fairing process.

BH Fillers4.jpg20220504_150355.jpg.
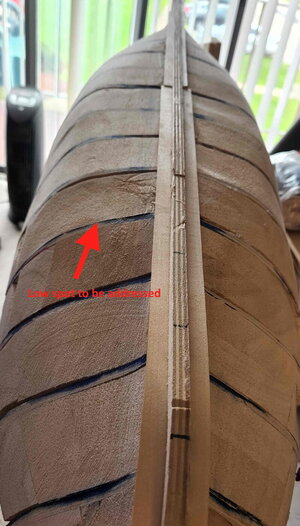
As I start the fairing process, inconsistent areas are noted and need to be addressed. Highs will be sanded down, low spots filled and sanded.
This process is not just one step and move on. Sand, inspect, mark, sand, inspect, mark, fill, sand, inspect, mark.....rinse and repeat.
Understanding that it will never be perfect, at some point I will deem it sufficient to move on, understanding I can make adjustments after each layer of shell planking. There is some latitude throughout the process.

Thanks for following.

Till next time...
 
Last edited:
Oh boy! Do I not only know this step too well! I like your way of sleeping over something - it gives great perspective. Like you said, take your time with this step and with the sanding. You are right, it will never be perfect, but you can at least get it symmetrically imperfect! :)
 
Heinrich, yes, we could be brothers from a different Mother! ROTF All of us have to deal with this at some point, I think. It is one of those steps that is not exciting, but important. I have no idea how you have the time to read any other posts with as busy as your WB keeps you. I just read your recent challenge with the wing transom alignment with the wales. KUDOS on your efforts to stay true to history!!
 
I would think fairing of the proper shape/lines of the ship would have to be pretty perfect here. Maybe I wouldn’t kill myself filling in dimples though. There are three more layers going on top of this template.

I say that knowing full well that I would not follow my own ‘advice’ and neither would you :rolleyes:.
 
Nothing gets by you Paul. I listen to everyone's advice, but I may not follow everyone's. Ultimately, I have to own my decisions, right or wrong, good or bad! ;) To me, that is actually the core of this entire exercise.

With that said, I value the experience and knowledge of all those who have gone before me.

"Dimples" don't worry me too much. Voids, however do. Considering it doesn't take much to rectify them, I will be as thorough as I can in addressing them.

Typically, fairing is to bevel the bulkheads or frames to allow the next planking layer (1st and 2nd or final) to lay flush, thereby creating a smooth external hull, with no waves or bumps. One of the things to remember in this method is, I'm building out in 3 layers before I even lay my final Pear planking layer. The bulkheads as they exist right now are not the correct perimeter dimension. I have to build them out, one layer of shell planking at a time. Each time I complete a layer of shell planking presents an opportunity for me to check the hull at each bulkhead.
After the 2nd layer I plan to do a very thorough check, using a negative profile at each bulkhead vs. the body elevation plan to see where I am. I anticipate that will tell me if I'm close to correct external dimension at that bulkhead. Once each individual bulkhead is very close to plan, the subsequently, the hull should be very close to plan. Normally the fairing is solely critical in achieving the correct hull profile and volume, and the last chance to get this correct prior to external planking. In this case the final hull planking will not be laid onto bulkheads or even a first/primary layer of planking but on a finished shell. The shell itself will conform to the dimensions of the plan, albeit, 2mm shy of the final external dimension.

Theoretically, the method I'm using is more forgiving as I have more than one point in the build process to measure and make adjustments. Theoretically being the operative word. Since is this is my first attempt at this, I'll let you know. Actually, you'll be a witness. ROTF

I hope I've shared my approach clearly. I can get "wordy" and I'm working on that. ROTF

Thanks Paul for sharing your perspective. I greatly appreciate it.

Cheers.
 
Last edited:
Nothing gets by you Paul. I listen to everyone's advice, but I may not follow everyone's. Ultimately, I have to own my decisions, right or wrong, good or bad! ;) To me, that is actually the core of this entire exercise.

With that said, I value the experience and knowledge of all those who have gone before me.

"Dimples" don't worry me too much. Voids, however do. Considering it doesn't take much to rectify them, I will be as thorough as I can in addressing them.

Typically, fairing is to bevel the bulkheads or frames to allow the next planking layer (1st and 2nd or final) to lay flush, thereby creating a smooth external hull, with no waves or bumps. One of the things to remember in this method is, I'm building out in 3 layers before I even lay my final Pear planking layer. The bulkheads as they exist right now are not the correct perimeter dimension. I have to build them out, one layer of shell planking at a time. Each time I complete a layer of shell planking presents an opportunity for me to check the hull at each bulkhead.
After the 2nd layer I plan to do a very thorough check, using a negative profile at each bulkhead vs. the body elevation plan to see where I am. I anticipate that will tell me if I'm close to correct external dimension at that bulkhead. Once each individual bulkhead is very close to plan, the subsequently, the hull should be very close to plan. Normally the fairing is solely critical in achieving the correct hull profile and volume, and the last chance to get this correct prior to external planking. In this case the final hull planking will not be laid onto bulkheads or even a first/primary layer of planking but on a finished shell. The shell itself will conform to the dimensions of the plan, albeit, 2mm shy of the final external dimension.

Theoretically, the method I'm using is more forgiving as I have more than one point in the build process to measure and make adjustments. Theoretically being the operative word. Since is this is my first attempt at this, I'll let you know. Actually, you'll be a witness. ROTF

I hope I've shared my approach clearly. I can get "wordy" and I'm working on that. ROTF

Thanks Paul for sharing your perspective. I greatly appreciate it.

Cheers.
I really like the idea of using negative profiles to check your work (adjusted as you sneak up on the full size of the hull). My point was more about killing yourself getting this first bit perfect, perfect, perfect. Dimpled areas (maybe even minor depressions) won't force the first layer of 'planks' to follow the indentation unless you make them do that (which would be foolish). That said, if I understand the process, a very critical check after the first layer would be important. And increasingly so as you pack out the shell.

I know I spent two days working on (shaping/sanding/filling) the first layer of my hull - and you will actually have three 'first' layers to make adjustments.

Again, with all that said, I know if I was attempting this build I would give each step my utmost. I certainly wasn't trying to talk you into something - mostly just making conversation. I caught back up to where I was in my build from two weeks ago, and now I'm going to take another break, but I'm addicted to the forum and I'm oddly interested in your approach.
 
Sorry Paul. I guess I misunderstood the point you were making. All good. The area I pointed out with the red arrow was approximately 8mm deep, so I felt I needed to address it. And it was an easy fix.

In the meantime, I'll work on my reading comprehension. :)

Hope you enjoy your break and you're doing something exciting!
 
I think I mentioned in my OP that my default mode of working is in "Spurts and Sputters". My current Spurt has me motivated and eager to start planking. So much so that I'm waking 2 hours earlier than normal. While the Admiral is happy to see me excited about working on the ship, I'm sensing that rising at 4:30 AM may find me relegated to one of the guest bedrooms.

Last preparations before first layer of shell planking. Running battens on each side at different elevations revealed a few small issues.

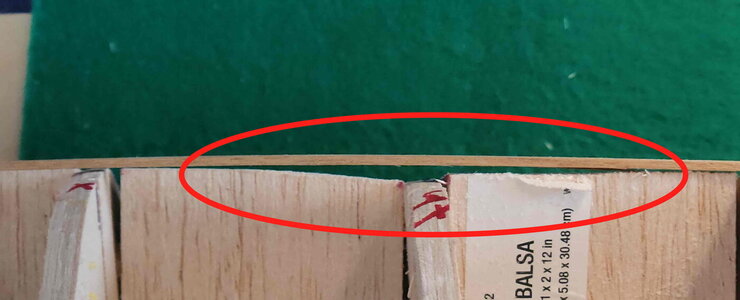
First was a void where the 3rd aft bulkhead seemed to be much narrower than it should be. As much as I would like to understand the cause, I will focus my energy on fixing it and moving on. This was fixed with a shim to bring the outer edge of the bulkhead to the correct faired point.
20220502_153634.jpg

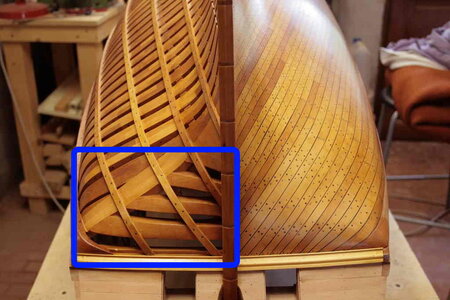
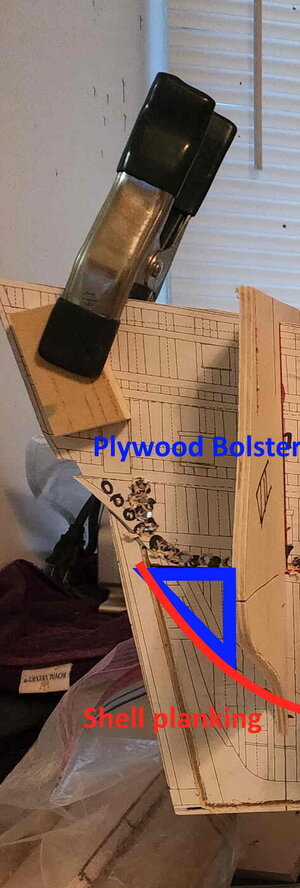
The last step is to build what I'm calling the Bolster. It is a support piece to guide the shell planks up to the wing transom and lower counter area. This is a challenge. Normally in a PoF build the transom timbers would define the shape/contour of the tuck of planks in this area.

Courtesy of "Rekon" and his 1:24 Le Fleuron build.
fleuron1688.jpg.dc8dc1f3bf71a98a36682beddc7aee2k9.jpg

As these timbers don't exist when using this method, I need to create the bolster piece to mimic the vertical and horizontal angles to get the correct tuck. I am extrapolating from different angles of the plans. This an area that I am vulnerable. As Paul pointed out in a previous post, some things don't need to be perfect. But my OCD/ADD makes that the challenge; potential "Paralysis through Analysis". ROTF But for some reason I like the feeling of being uncomfortable in these situations. :oops: Hmm does this make me a sadist or a masochist? Can you be both?

I digress!

20220323_185319.jpg

Note in the image above, once the shell is built, I will be removing the plywood along the vertical rabbit and replacing that piece with a pear wood stern post, which will be mortise/tenon fixed into the pear wood keel.

Final tweaks prior to shell planking to square up the upper bulkheads and tighten down the nuts on the reinforcing rods. To ensure they stay put while planking and stapling.

BH Fillers5.jpg

So, I'm charging my new electric stapler.

Till next time guys....
 
Hallo,
was ist der Unterschied bzw. was bedeutet POB und POF.

Danke
Karl
Karl, The POF stands for Plank On Fame model (you will show the frames assembly, like Georgian style), POB is Plank On Bullhead (instead of frames, you will use bulkheads and no internal structure, cover the hull with planks)

Karl, The POF steht für Plank On Fame model (du zeigst die Spantmontage, wie im georgianischen Stil), POB ist Plank On Bullhead (anstelle von Spanten verwendest du Schotts und keine interne Struktur, bedecke den Rumpf mit Planken)
 
Thanks Jim. But to clarify for Karl. It is plank on bulkhead, but the bulkheads above the first gun deck will be removed after the external shell is built.

I will be building all internal structures from the first deck and all decks above it.

Cheers
 
yea... You have a variant type of POB because even if you will provide internal structure, you will not have frames, unless you will ;)
 
Yep, but I saw you said, "no internal structures", so I wanted to be sure that part was clear, unless I misunderstood something. ;)
 
Yep, but I saw you said, "no internal structures", so I wanted to be sure that part was clear, unless I misunderstood something. ;)
Usually, when you build a POB model, you will not show anything below the main deck because it will be covered with hull planks. However, it is the sole modeler's decision to show the gun deck, for example. In this way, you will build the main desk by showing upper deck beams, lodging knees, hanging knees, ledges, and carlings. You may expose the structure for the viewers or partially plank on one side, for example. But this will still be a POB method because you are using bulkheads and not frames as the hull structure.
 
Yes, Jim, I know this. But this will be an "unusual build". Just like its builder!:p What confused me is when you told Karl, "(instead of frames, you will use bulkheads and no internal structure, ". Bulkheads was correct, the "no internal structure" was not. If the statement said, "no internal structures below the first deck." then it would be correct. That was the only part I wanted to make clear.

Yes, I will build and show the internal structures, but then will not be exposed in the traditional "cut away" method. I will use cameras down the longitudinal line.

But I'm getting way ahead of myself here, I don't even have a shell, let alone a ship, or a deck to put internal structures on.ROTF I may get there one day, before I'm an old man....ahem.

As always, thanks for the help Jim!

Cheers!
 
Back
Top