-

Win a Free Custom Engraved Brass Coin!!!
As a way to introduce our brass coins to the community, we will raffle off a free coin during the month of August. Follow link ABOVE for instructions for entering.
-

PRE-ORDER SHIPS IN SCALE TODAY!
The beloved Ships in Scale Magazine is back and charting a new course for 2026!
Discover new skills, new techniques, and new inspirations in every issue.
NOTE THAT OUR FIRST ISSUE WILL BE JAN/FEB 2026
You are using an out of date browser. It may not display this or other websites correctly.
You should upgrade or use an alternative browser.
You should upgrade or use an alternative browser.
Le Mercure ANCRE Plans
- Thread starter LeMercure
- Start date
- Watchers 38
-
- Tags
- ancre le mercure
@JosephH: I use paint for the caulking. I have experimented with paper (specifically newspaper) and I personally feel it gives a line that is still too thick.
ok so how do you keep the paint from wicking through the wood and not staying on the seams. I am assuming you painting the sides of wood before you glue.
I tried black powder its called "Colorant" kind of high power dry tempura I mix with my glue to color it. you can get it at hobby shops but you must be very careful with it and not use much otherwise it thickens the glue then it wont hold. really touchy stuff. you normally put 1 tsp colorant to 8 oz water. I havent tried premixing as I think the water would thin the glue too much to get it dark so i use a few grains to an oz of glue and it does ok.
https://www.amazon.com/Colorants-3-...ld=1&keywords=Colorant&qid=1593276144&sr=8-38
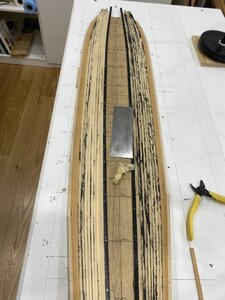
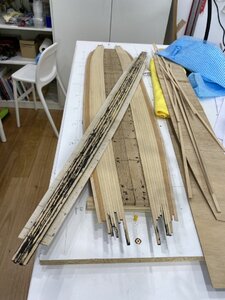
I paint the edge of the plank using a water based black paint but paint spills over on to the top of the plank as well which is not a problem. I let this glue dry and then attach the plank to its neighbour plank. Please note I only attach 1 plank/day as it is a slow process: sanding the edge of the plank, shaping it to the correct profile with a plane in a jig, and then painting it plus allowing drying time of that paint. I attach a photo of the deck planked but not yet scraped and one showing the detachable nature of the centre deck. It looks like a complete mess as you can see the paint on the top of the planks.
I am cautious about using dyes or the like as they can penetrate the wood resulting in a caulking line that is not "clean". Ideally I like to use a medium that sits independently between the planks. Paint dries and can mostly achieve this as can paper, but paper (in my opinion only) is too thick and is also more difficult to work with. That being said, I have found that even paint can penetrate some woods so I would suggest experimenting first. It works perfectly with Castello (provided the edge of the Castelllo is sanded very smooth) but does penetrate very, very slightly in to the Daru which is why I did not caulk the joint between the two Castello planks.
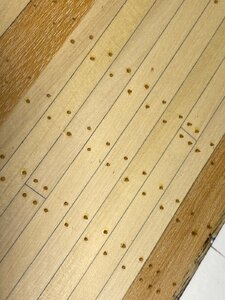
The previous photos of my caulking and nails are zoomed in 3x so in reality when you look at the deck the caulking lines and nails are only very subtly visible which is the finish I was going for. I didn't want a speckled deck or overly noticeable caulking. I am currently working on drilling holes in to the rest of the main deck so I'll post another photo of the completed main deck from "eye height" so you can gauge this as well.


Cool ok TY Normally I Use Aspen to build with as it is a nice hard wood with almost no grain then stain it to the desired wood. I like Yellow oak and a stain called Gunstock which is similar to a light walnut
It is really Common in the US. it can be from almost a white wood to yellowish and even have some grey in the heartwood on rare occasions. its really good at taking glue and stains. it is really close to poplar which is another wood I use. some say it is a soft wood but its more of a medium and doesnt mark very easily like softwoods do
Aspen American Hardwood Info Center
Ocooch Hardwoods

Aspen American Hardwood Info Center
Ocooch Hardwoods

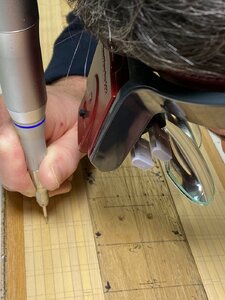
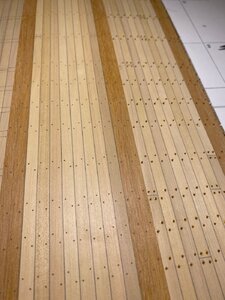
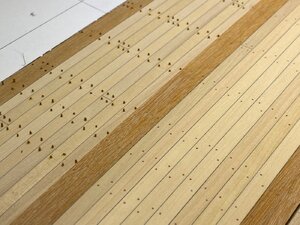
I have now drilled holes and inserted nails on the right hand side of the main deck.
Unfortunately my 0.7mL drill piece broke and I couldn't finish all the holes! Tomorrow I'll visit the jeweller's suppliers and buy another one and continue work.
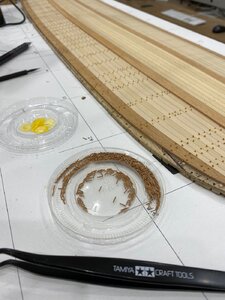
You'll notice my jeweller's drill has a pedal which makes drilling holes a pleasure.
I always work under a lot of LED lighting and with loupes.
Under the tabnle in the one photo are a few of my jigs I use to taper the planks before gluing them ti the deck.
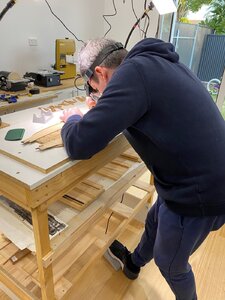


Great looking workshop you have Anton.
Thank you Brian077.
We put an extension on our house a bit of a year ago and I included a model building room on the plans. It is detached from the main house so when I work on my model I genuinely don't have any distractions.
By the way, I like your avatar of Salvador Dali!
We put an extension on our house a bit of a year ago and I included a model building room on the plans. It is detached from the main house so when I work on my model I genuinely don't have any distractions.
By the way, I like your avatar of Salvador Dali!
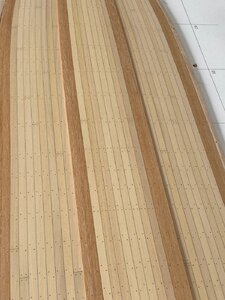
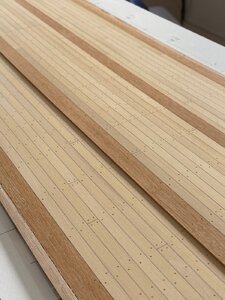
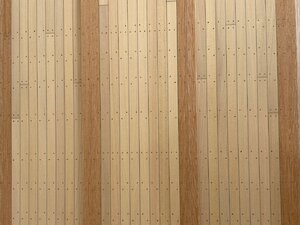
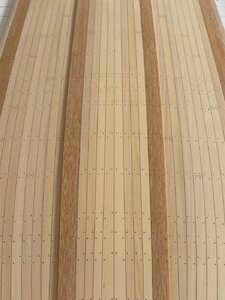
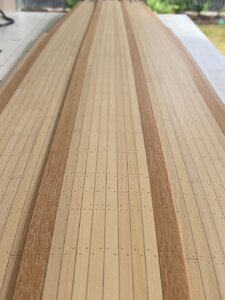
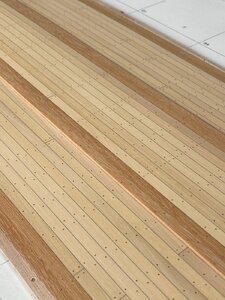
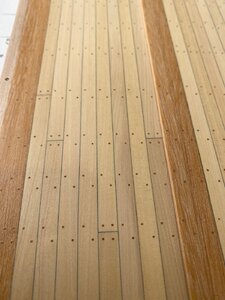
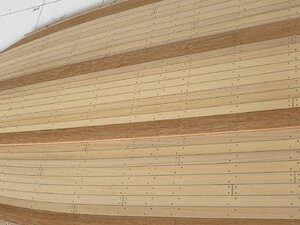
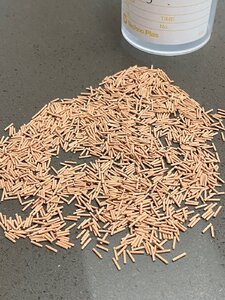
All the nails have been inserted in the main deck which is now more or less finished (aside from a sand with very fine paper and a waxing prior to insertion in to the model).
The waterway is missing. This will be inserted only after the main deck goes in to the model which is unlikely to happen very soon.
The photos I attach are zoomed in 2x and make the nails a little more noticeable than they actually are.
Standing back from the model, at eye height the nails are only very subtly visible which was the effect I was trying to achieve. After a waxing they will get slightly darker.
You will notice double nails on some planks. Hatches will be cut at these locations shortly.
The irony is, the majority of this deck will be covered up. Only about 1/3 of it will be visible on the final model.


Last edited:
utterly loverly
Very accurate nailing pattern - you achieved a very good appearance - Very Good
Thank you gents for your comments.
To be honest, I am not sure if it was historically accurate to reverse the nails at mid-ships on these type of French merchant vessels. It was shown this way on the plans and I liked the idea of implementing this so I proceeded with it.
I also post on the French forum (where there are some naval historians) and I have asked the question there.
If you take a look at still existing vessels like the Victory, you realize, that the pattern is often not regular - I think, that the shipwrights of these old times made them how they thought it would fit best - but I am also looking for the historical correct answer..... interesting question
Thanks Uwe.
The French deck planking was significantly different from the English to the extent of not using systems such as the 4 butt shift.
I understand that the French just used the "best" piece they had available ensuring there were at least 4 or 5 full planks between two joins on the same beam (and that planks were not too short) for strength. There was often no symmetry between the joins of planks on the port and starboard side of the deck. On my model I have replicated the lack of "system" but kept symmetry between the port and starboards sides, which one could say, is historically inaccurate.
I am also very interested in the Spanish system - particularly on vessels such as Santisima Trinidad.
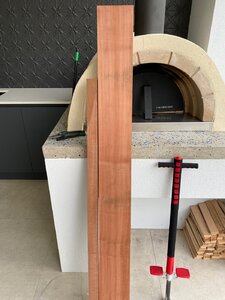
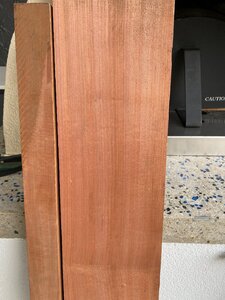
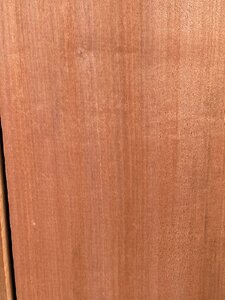
I have stalled trying to find the perfect wood to use for planking under the waterline. Unfortunately this perfect wood doesn't exist so I had to settle this piece of Myrtle which very fortunately has very little fiddleback or blemishes of any kind. The grain is very straight and it reminds me a lot of some of the red European pear I have in very limited supply. I prefer to stay away from stains or liquid varnishes as they change the colour too much (in my opinion).
My initial observation is that it is a little pink for my liking but I'll cut this down to a few planks and experiment first with a few waxes.
I'll also now start the process of mapping out the planking under the waterline by dividing the section in to 4 or 5 bands and using a few "dummy/temporary" planks to cap off the planking at the top point.


Looks good Antonio, I'm sure you will make a great job of it,
Best regards John,
Best regards John,
Antonio its just fantastic you're using the methods Dr Mike taught you ! Its extremely labor intensive but it certainly provides for a strong strong hull. great work with the nails. do you have any more photos of the hull building and shaping process ?
Thanks Tony
Thanks Tony
Thanks Tony,
After a few weeks away (thinking about the next steps...) I have been able to start the next phase which is the hull planking.
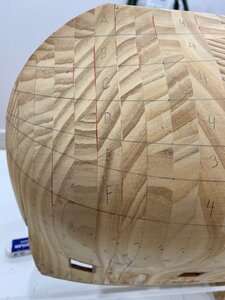
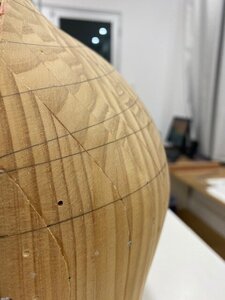
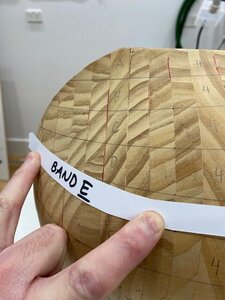
I spent most of yesterday and today dividing the planking into bands which I have drawn on the hull and labelled as: A, B, C , D , E and F. Each of these bands will have 4 planks (except for band E which will have 3 planks for reasons that will become obvious later).
Le Mercure has a relatively blunt bow and therefore quite a bit of spiling will be required on each and every plank at the bow.
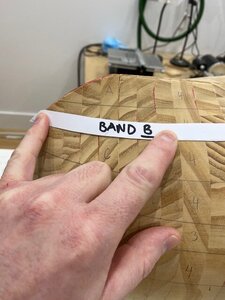
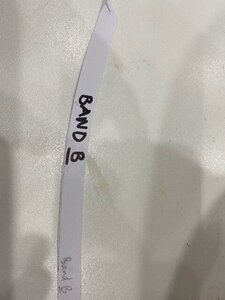
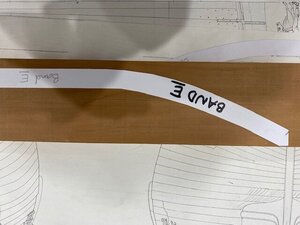
I use paper templates and cut them with scissors so that when they are laid flat on the bow (exactly where the plank would sit) they follow the pencil line exactly. Then when the paper is laid flat on a table it shows the amount of "curve" that needs to be cut in to the plank. Band E has the most significant amount.


